


By David Harrington
This article was originally published in RC Driver’s November 2015 issue.
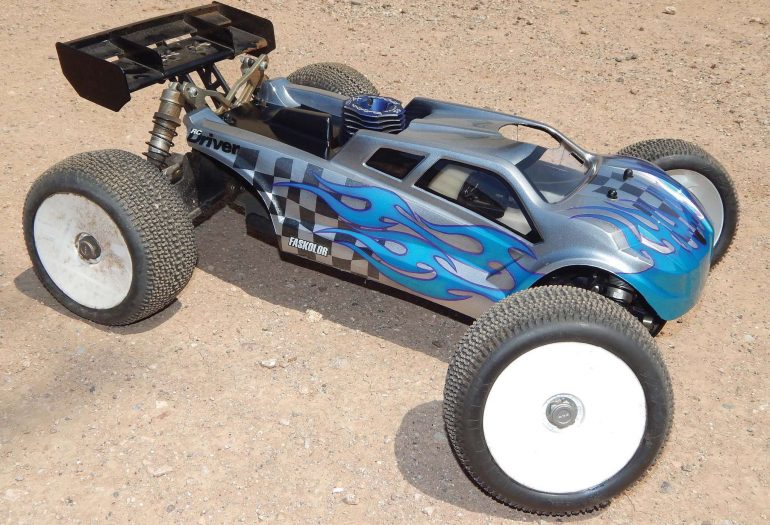
Last month I went all the way back to the beginning and demonstrated a basic spray can paint job. This month I’m going to mix things up and bring the airbrush back out to do something for the more advanced painters out there. I know many of you probably feel Parma’s precut paint masks are for beginners and you’d rather create your own graphics. Consider this; Parma has numerous patterns, many of which are standard patterns that people request over and over. Take, for example, a basic checkerboard. This is a basic element that you could easily work into your scheme. Parma has basic square checkers, but I chose this one called “Vertigo.” The checkers have a bit of wave to them that I liked. Lightning bolts, skulls, these are things that don’t necessarily have to be your theme; they can be in the background of your theme. Let’s go ahead and try this out so you can see how some background graphics can enhance your paint job, with a minimal amount of eff ort.
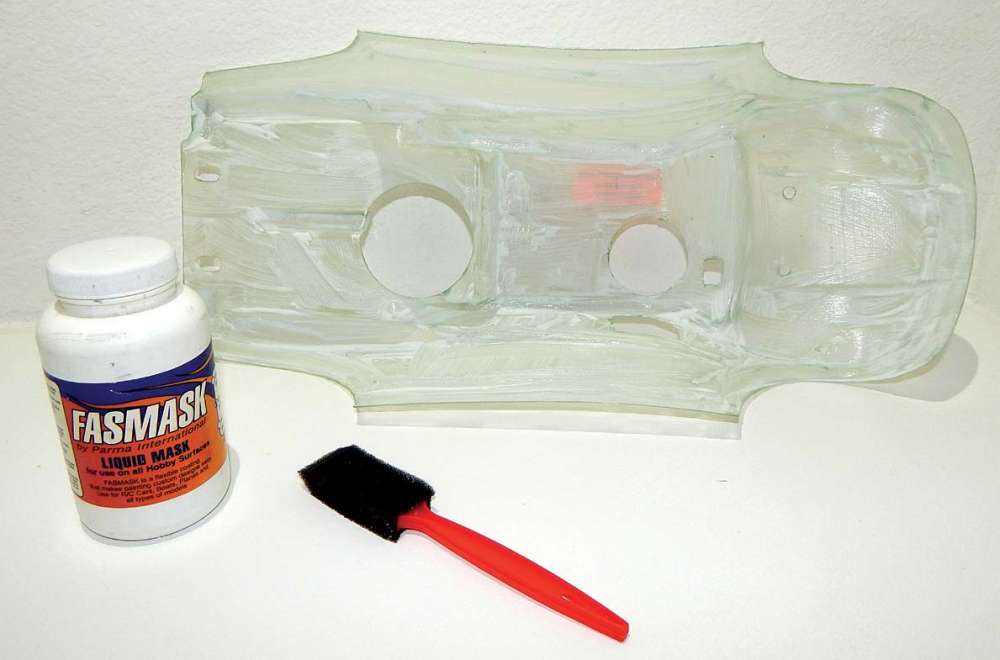
1 To demonstrate the graphics I will be using this truggy body from an 8lightT 3.0 kit. The body comes precut and ready to mount so we can get straight to the masking. To create my own graphic I’m going to use my preferred method with liquid mask. To apply the FasMask you just need to brush it on with a paint brush. I prefer a one-inch foam brush. After shaking the bottle really well I pour a little bit in the body and start spreading it out. You should lay fairly thick coats and allow plenty of time to dry in- between. Better too thick than too thin. When it is thin it is a nightmare to remove and this is where most people have their problem. After three good coats I like to allow it to dry overnight.
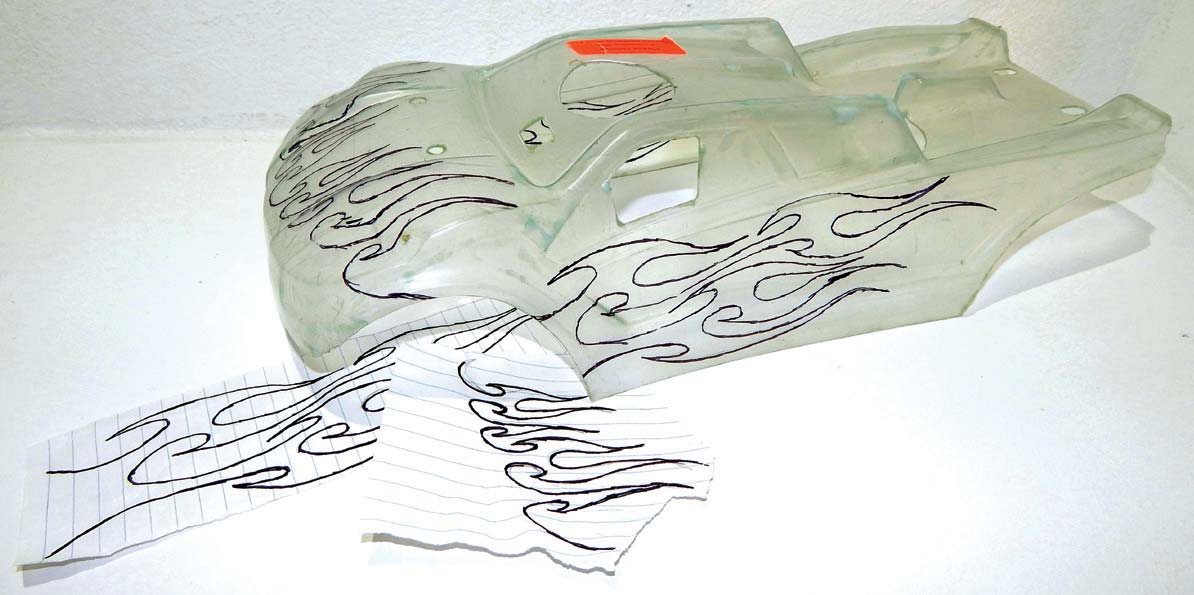
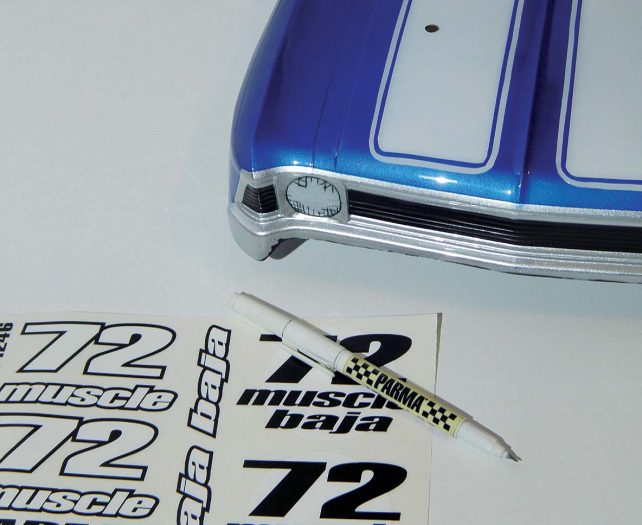
2 To create my graphic I sketch it out on a piece of paper in pencil. Then when I have it just the way I want it, I trace it over with my permanent marker. This creates a reverse image on the other side. Then I tape my graphics inside the body with a few tabs of masking tape, and trace them on the outside with my permanent marker.
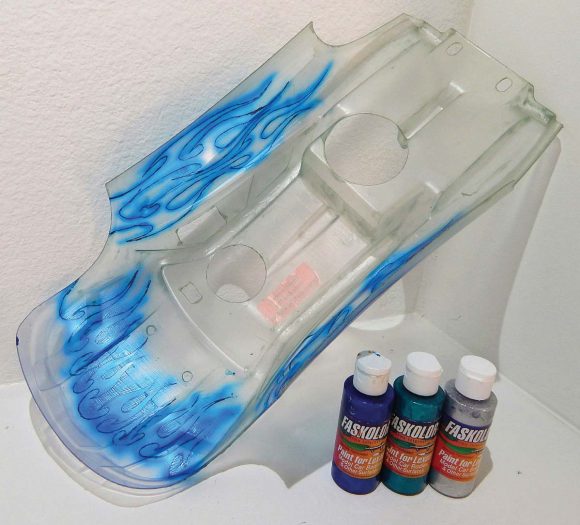
3 Then I carefully cut the graphic out of the liquid mask on the inside of the body using my hobby knife. Be careful not to apply to much pressure as scoring can cause the body to crack, but be sure to apply enough pressure that it cuts all the way through, so you don’t have problems later when removing the mask. When I’m cutting flames I find it is easier to start at the middle of the bottom curve, and then pull my line out the tips, being sure that my tips intersect. After the graphic is cut out I remove the mask from the flame area, leaving the background masked. I then shade around the edges using the Faspearl Blue. I fill the remaining area with Fasescent Turquoise and then back with FasKrome to make the other colors opaque.
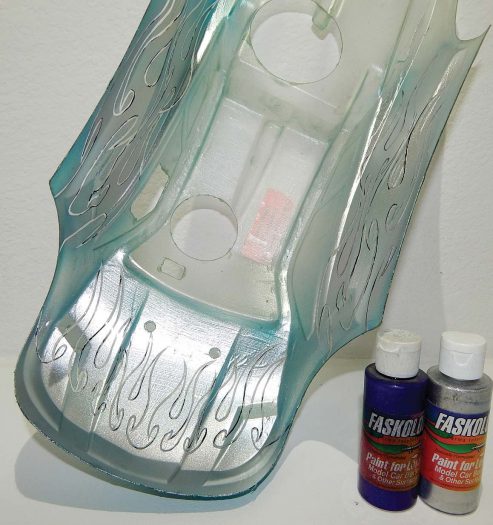
4 To make the flames really pop I’m going to add an outline. You want the outline to contrast the flames, so I went to the other side of the color wheel and went with Fasescent Purple because that would be the opposite of Turquoise. When cutting the outline, you just follow your previous line. I feel the FasKrome really helps to see where the line is. To remove the mask you may have to start it with the tip of your hobby knife. Thumbnails don’t hurt either. Once the mask is removed from the outline area, I fill it with the purple and back with FasKrome.
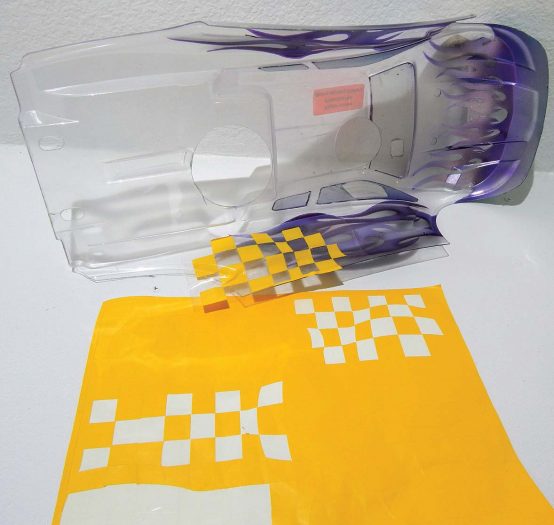
5 Now that I am done painting my own graphic with the liquid mask it is time to add the precut graphics. First I cut out the windows before removing all remaining mask from the background area. Then I prep the masking sheet by removing every other square from the areas I will use. I found opposite corners gave me similar squares for the sides and then I used a strip from down the middle for the hood. Once I had the excess mask removed, I cut the strip of lift-off tape in half since I would only need half and this makes it easier to handle. Then I press it down over my strip of checkers and rub it down on the mask. When you’re peeling the mask and lift-off tape off together, you may have trouble getting the mask to separate from the backing paper. I just keep my hobby knife handy, so I can start the edge up and then press the lift-off tape back down, and it should peel right off. Once I’ve lifted the mask from the backing paper, I line it up on the body by looking at it from the outside. I press the mask down really hard and then I carefully lift the lift-off tape. Afterwards I rub the mask down with the back of my fingernails, being sure to press it into contours.
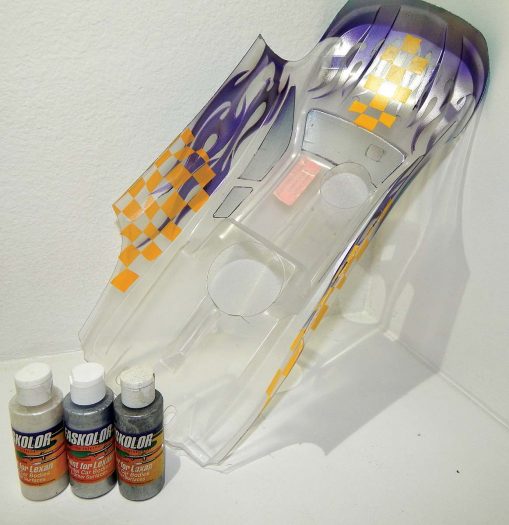
6 I start painting the background by shading some Faspearl White into the corner behind the checkers and on the hood coming from the nose. Then I fill the rest of the body with Faspearl Silver, trying to avoid the parts I just hit with the white, so as not to get the paint too thick and make the mask difficult to remove. Then, as usual, I back the sparkly colors with FastKrome to opaque it up.
7 After giving the thicker coats a good 20 minutes or so to dry, I start removing the checkerboard mask. After the mask is completely removed, I fade Faspearl charcoal into the checkers. I just faded it in and didn’t make the edges solid because I wanted it to be indistinct where the checkers begin. Once again I back it with FasKrome.
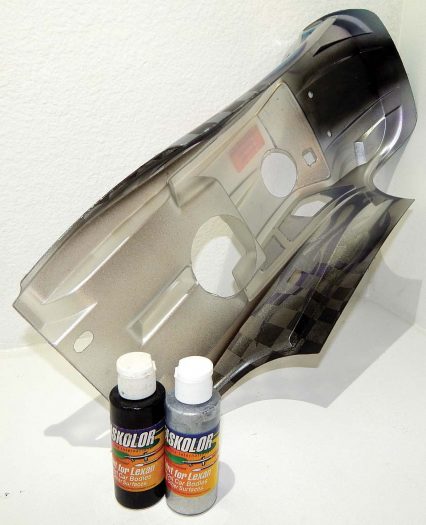
8 Even though truggies have little resemblance to a real truck, I like to fi ll the bed with black. This makes it at least look like it is based on some sort of pickup. To do this, I cut the overspray film on the outside to expose the bed area. I also cut the window trim at this point. When I fill the window trim with FasBlack, I go ahead and fill the entire body with black for a uniform look. Then I spray the bed area last to avoid fingerprints. All that is left is to remove the overspray film, and window mask. Bam! It’s done.
WRAP UP
So, you see, there are many common elements that you may want to incorporate into your paint job. Something as simple as some checkers can really make a huge diff erence. Rather than cut the same old graphic for the umpteenth time, why not let Parma do the work for you? Next time you’re online you really should browse their website, parmapse.com, and see the vast selection of graphics they off er. Never mind next time, do right now!
Links
Parma parmapse.com , (440) 237-8650


