fbpx
Thursday, April 18, 2024
Ax
rally

How To: Easily Change Drift Tires Without Damaging Your Rims

This article was originally published in RC Driver’s April 2015 issue.

Tips & tricks to change drift tires with TrackStar’s Remover

How-To--Easily-Change-Drift-Tires-Without-Damaging-Your-Rims-1
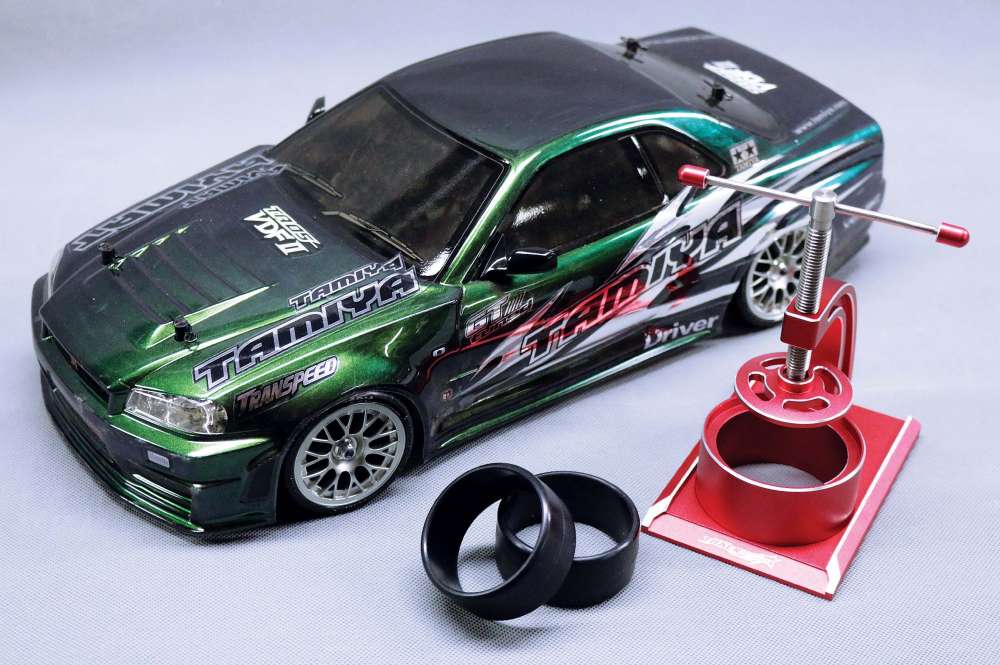
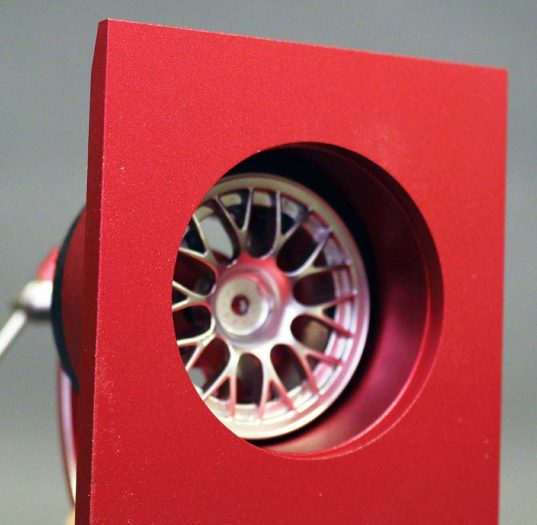
Drifting is an awesome part of RC, from customizing your ride to your taste or mastering some awesome driving maneuvers with these gliding and sliding machines. The hard plastic tires mounted to standard sedan style wheels is a big factor in why these cars are so easy to drift, but on the down side, the hard plastic spinning on top of the abrasive pavement takes a toll on the tire and wears it down. The good news is, the rim is often in great condition even after the tires wear away so there is the potential to swap out the old tires on your trick rims for new ones. There are a number of ways to swap drift tires, some including language we can’t repeat here, but we’re going to show you our way to swap drift tires.

DETAILS

TASK: Remove worn drift tires and install new tires on original rims
EASE OF TASK: (1-Easy to 10-Hard) – 3
TIME TO COMPLETE: 20 minutes (5 minutes per wheel)
PARTS NEEDED: New drift tires
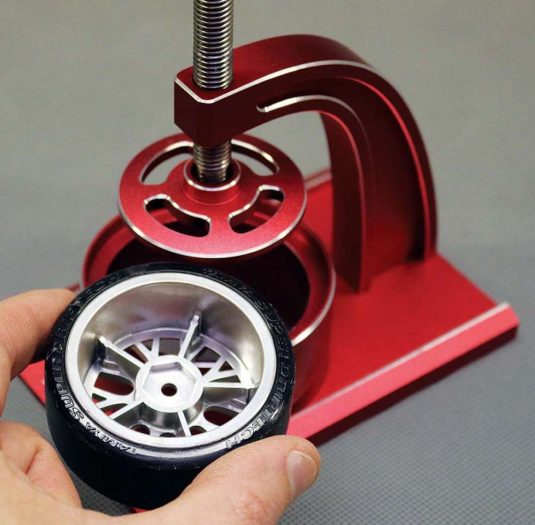
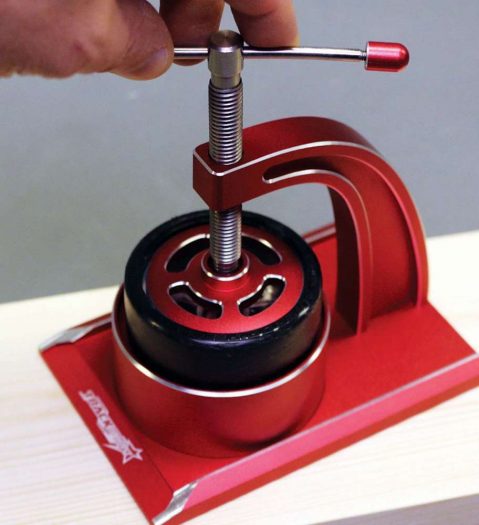
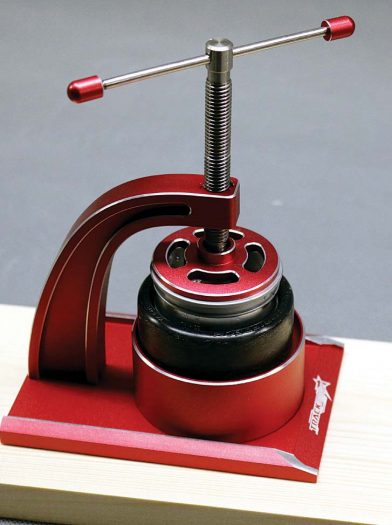
TOOLS NEEDED: TrackStar Drift Tire Remover
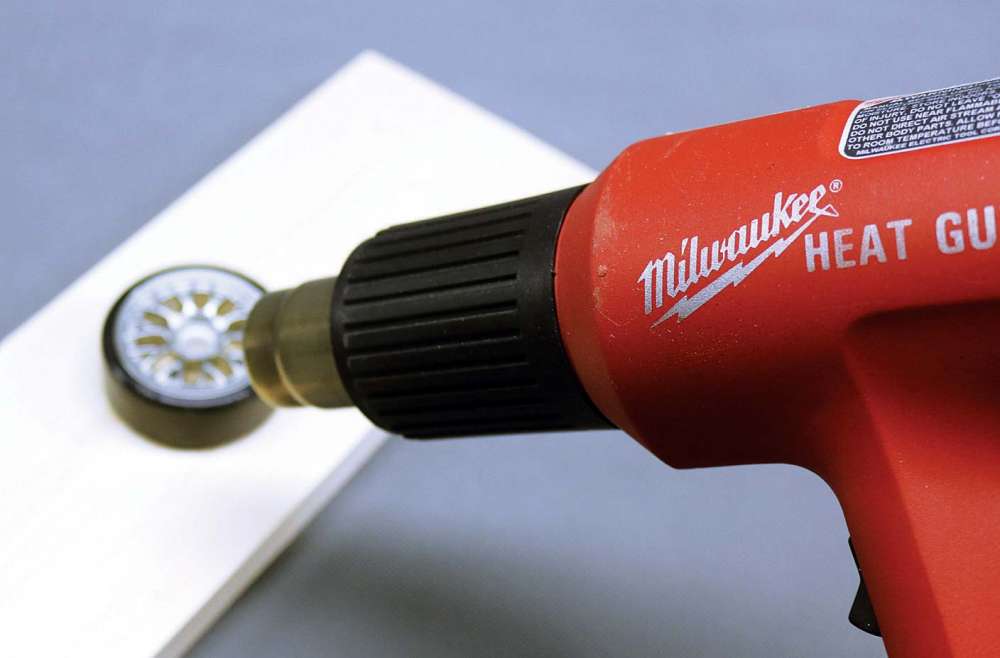
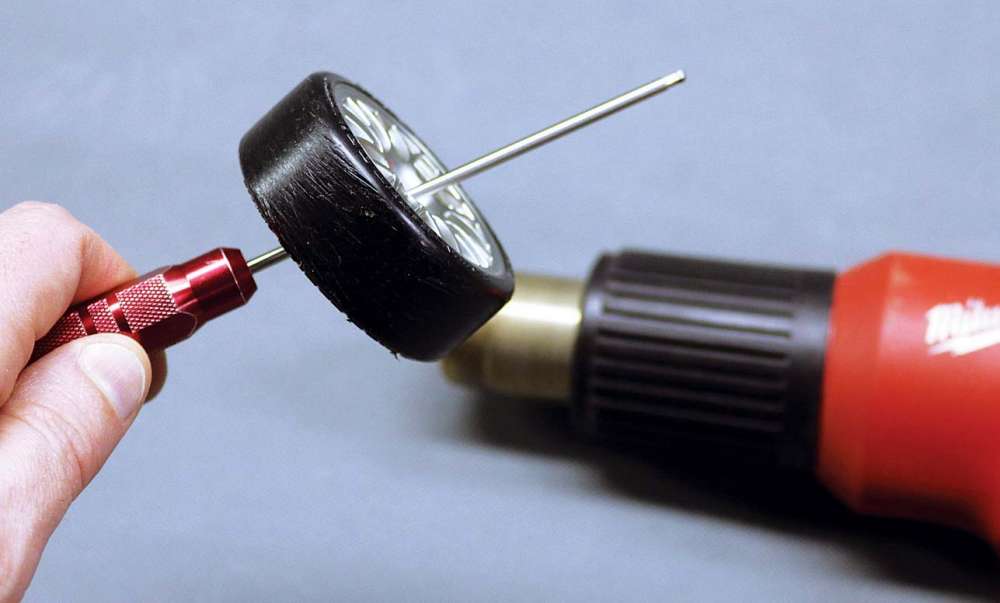
ADDITIONAL ITEMS NEEDED: Heat gun or bowl of hot water

PREP: There are a variety of drift tires on the market and some may have their own quirks when it comes to installing them like a small groove for the rim lip that you may have to contend with. So before you just try to pop some tires off, take your time and be careful, you don’t want to wreck the rims you are trying to reuse.

STEP 1: This, of course, is where you pull the wheel off the car. Duh. Use the kit box wrench, fancy 7mm nut driver, a pair of vice grips to hack the wheel nut off. Whatever—remove it. Then inspect the rim, make sure there are no cracks. No sense in tearing tires off and installing them only to have your wheel break later.

STEP 2: With the wheels off, you’ll want to work on them one at a time. We’re going to use Trackstar’s Drift Tire Remover to rip the tires off the rim, but before we do that, here are a few tips that may help speed up the process with less damage.

A: Heat up the rim and tire in a bowl of hot water. The hot water will soften the plastics and allow the tire to expand and slide off the rim easer.
B: Use a heat gun to heat up the rim and tire to remove it. Be careful not to melt your wheels with a high temperature heat gun.
C: If using a forced air heat source to heat your wheels, consider spinning the wheel on a long shank driver so you can spin and distribute the heat evenly over the wheels. Watch those fingers and don’t melt the parts.

STEP 3:

STEP 3: Carefully place the hot wheel into the Trackstart Drift Tire Remover, backside of the rim up. You’ll want to make certain the rim is centered over the ring so the press doesn’t pinch the wheel between the ring and push plate.
Carefully place the hot wheel into the Trackstart Drift Tire Remover, backside of the rim up. You’ll want to make certain the rim is centered over the ring so the press doesn’t pinch the wheel between the ring and push plate.

STEP 4:

STEP 4: Once the wheel is in position, simply screw the push plate down with the T-handle screw. Take time to check that the wheel is not pinched in the ring. Also make sure it moves rather freely. If it’s hard to turn or you see the tire start to mushroom there is a problem. Take the tire back out and try to get more heat into the tires.
Once the wheel is in position, simply screw the push plate down with the T-handle screw. Take time to check that the wheel is not pinched in the ring. Also make sure it moves rather freely. If it’s hard to turn or you see the tire start to mushroom there is a problem. Take the tire back out and try to get more heat into the tires.

STEP 5:

STEP 5: Keep screwing the T-handle screw down until the rim pops out of the bottom. Repeat for the other three wheels.
Keep screwing the T-handle screw down until the rim pops out of the bottom. Repeat for the other three wheels.

STEP 6:

STEP 6: Trackstar’s Drift Tire Remover can actually be used to reinstall the new tires on the rim. This time you just heat up the tire in water or with a heat gun. Place the rim on top of the tire and insert the two into the Trackstar tool with the back of the rim up. Screw the push plate down until the rim pops into the tire. Then repeat for the other rims and tires.
Trackstar’s Drift Tire Remover can actually be used to reinstall the new tires on the rim. This time you just heat up the tire in water or with a heat gun. Place the rim on top of the tire and insert the two into the Trackstar tool with the back of the rim up. Screw the push plate down until the rim pops into the tire. Then repeat for the other rims and tires.
Get more How-To’s and tool tips every month
with a subscription to RC Driver

WRAP-UP

Drifting is a fun and skill challenging segment in RC. Don’t let worn tires kill your drift experience. Swapping tires while keeping your old rims is simple. Take your time, follow our steps and you’ll find it easy to swap tires. Just be aware there are several types of tires available, so make sure the rims you have will work with whatever replacement tires you buy.

LINK

Trackstar, dist. by Hobbyking, hobbyking.com

Leave a Reply