


Getting new gear, be it a new servo or an upgraded aluminum suspension part, can be one of the most exciting parts of the RC journey, quickly removing the old parts, preparing for the install of the new part, and finally getting to try out your new parts. What’s the worst thing in RC? When that new part doesn’t work or causes some new problems! So, we’re going to take a look at a few popular topics regarding How To Install New Electronics.
SERVO INSPECTION
A few basic areas are commonly overlooked in servo installs. Servos are damaged from time to time and need to be replaced, so this process is one of the more common things in the wide world of RC wrenching. Some would say the servo is the hardest working part in your RC vehicle, so they take a lot of beating and often offer the possibility of improvement for the average hobbyist. When installing a new servo, the first thing you should do is connect the servo to your receiver, power everything on, and center up the trims and sub trims. Why? So that when you install the servo, the output is in the center of its travel and ready to be installed. You can also take this time to make sure the new servo goes the same direction as your old servo. Most are the same, but not all, so double-checking this before you install it can save a bit of time later.
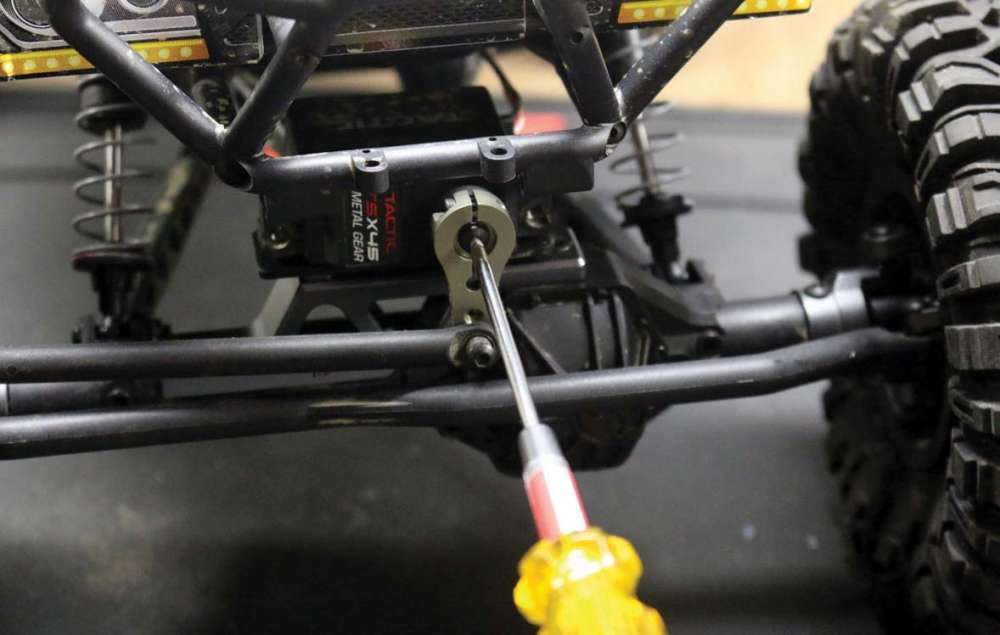 Once the servo is installed, make sure it has the same travel as your old servo. Slowly turn the steering all the way left and all the way right. Watch the servo arm and listen carefully. If the servo stops before you have turned the steering wheel, or stick, completely, you’ll need to make some adjustments. If the servo hums or buzzes at full steering, you’ve got a bit of a problem. The same is true if the servo does not get the full range of the steering. Higher end radios will have EPA, or travel adjustments that allow independent adjustment of the left and right steering output. This allows you to fine-tune the exact output of each side of the steering. Travel can be decreased or increased to meet the specific needs of the vehicle’s steering design and the servo installed. Some radios do not have independent travel adjustments, and only have “dual rate” that limits left and right at the same time. It is better to have limited steering rather than having the servo over- driving the steering. The overdrive will cause damage to the servo and can cause operational problems for the vehicle’s speed control as well. If you do not have a radio system with these adjustments, it should be the next item on your upgrade wish list. Do some basic test runs before you really hit the bricks. Make sure the new servo is not drawling too much power and causing issues. It is common for upgraded servos to brown-out the speed control’s internal BEC and make the radio system act up or cause basic servo operation problems. Be prepared to add a receiver capacitor (Glitch Buster), or possibly an external BEC in some cases. Also, it is bad to rapidly work your steering back and forth repeatedly with the vehicle in the air or on the ground. This is an un-natural speed of input and operation on your servo, and is hard on everything.
Find New Servos Here: https://bit.ly/41rs8Pg
 SPEEDO SWAP OUT
Electronic speed control replacements are also commonplace. Race trends have many of us wanting the newest gear and often we are on our way up from ready-to-run electronics, into more tune-able and powerful aftermarket items. Virtually every speed control manufacturer uses a slightly different calibration, or setup process for their product. The items are not plug-in-and-go, there is a one- time basic calibration or setup that must be done before you drive the vehicle. Even if you plug everything in and it seems to function correctly, stop and do the setup. Just because it seems OK does not mean the speed control has all the correct information from the radio system. Throttle points, brake points and neutral points are all important factors in your throttle and brakes working as expected. Instruction manuals are your friend. Read them, and check the manufacturer’s website for any service updates or more recent versions of the manuals. Several manufacturers have so much information on their product that none is included with the speed control. It’s all on the manufacturer’s website. So be sure that before you go the track, or head out for your test day that you have pre-loaded your advanced manuals or have internet where you are headed. If you need to seek the advice of experts, bring your manual, they will need it.
Speed Control Options: https://bit.ly/3nDIgzy
 MOTOR UP
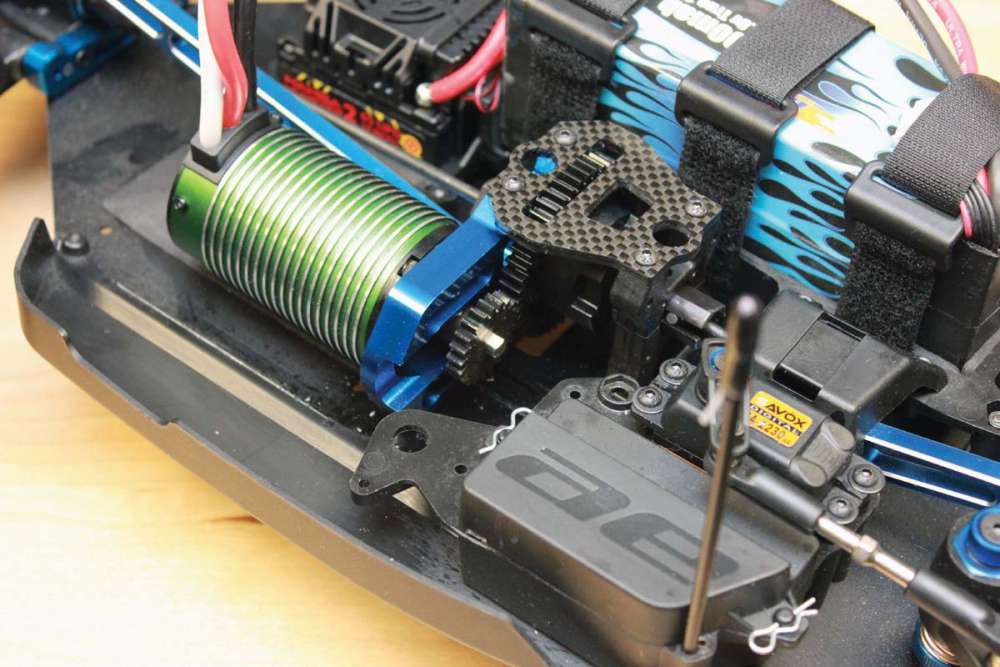
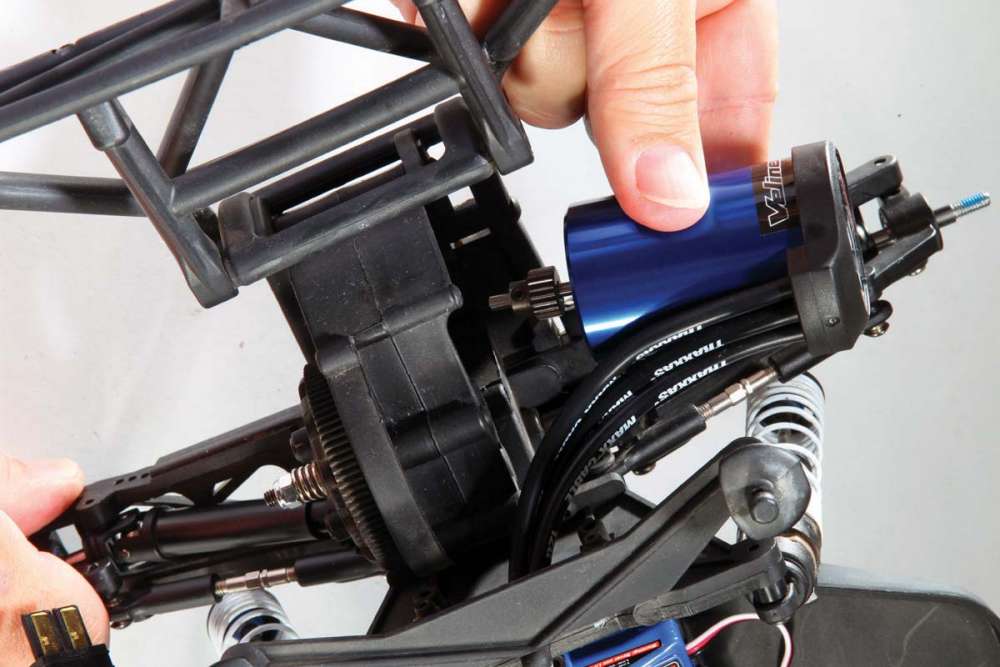
Perhaps the most commonly replaced electronic part in the modern RC car is the motor. Motors have gotten significantly more reliable but folks are always looking for more power, or changing motors to suit specific class rules. So, what are we looking for? Basically everything. The motor’s power wires are as important as any other part, so when switching to a more powerful motor, make sure the ESC can handle it and that your wiring or motor connectors are up to the task. Gearing is next. Different speed motors require different gearing. That gearing difference can be drastic when going from spec motors to mod motors. If you have never replaced a motor before, be aware of the ins and outs of proper gear mesh and how to set it. Improper gear mesh is one of the number one newbie mistakes seen at hobby shops across the nation. Don’t be that guy. Read up on proper gear mesh and take your time setting it. Also, motor mounting screws are 3mm in almost all 1/10-scale vehicle platforms. Even if every other screw in your vehicle is an SAE standard screw, the motor screws are going to be a 3mm metric thread and have a metric hex size to accompany them. Make sure you have the right screws and wrenches to install your new motor.
Brushless Motors: https://bit.ly/3Ba5S1G
WRAP-UP
Those are three common upgrades that each have several easy places to overlook. Now you know what to look for and how to avoid the basic problems that many of us have encountered. Take your time, do a bit of research, and you should have a positive upgrading experience.
By Charlie Suangka
*Notice: Some of our articles, videos and descriptions may contain affiliate links or coupon codes, which means that if you click on or use one of the product links/ codes, we may receive a small commission. This helps support the website and social media channels and allows us to continue to produce content.


