


This article was originally published in RC Driver’s September 2015 issue.
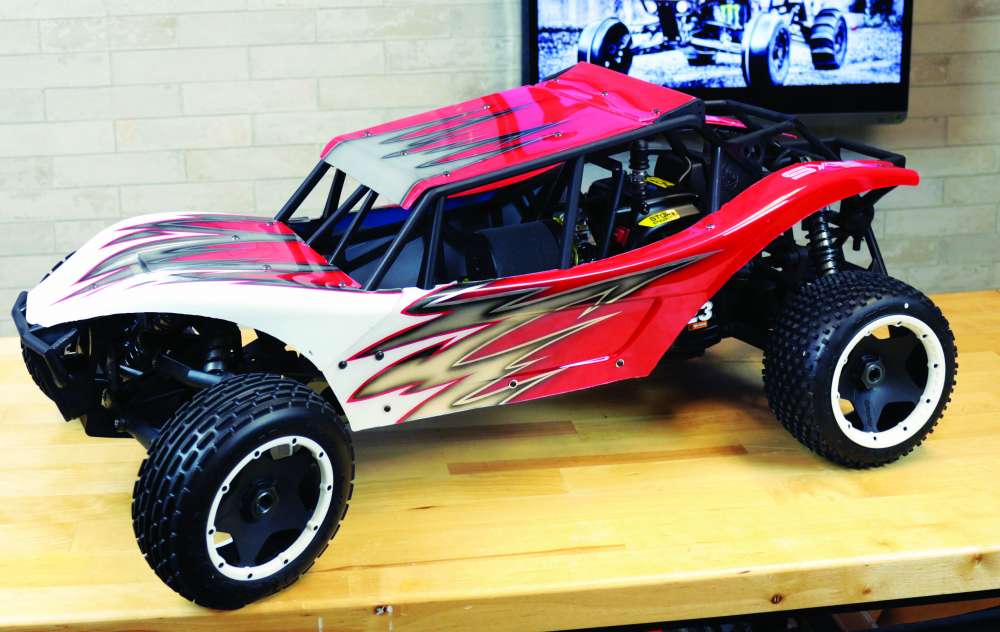
Kraken RC’s Sidewinder X5 (SX5) Sand Rail Conversion for the HPI Baja is by far one of the best conversion kits for this buggy we’ve seen, transforming your big ol’ 1/5-scale to a pretty serious-looking desert buggy. We’ve had an HPI Baja 5B sitting in our office for a while just waiting for some special project idea to come around … and here it is. In this How-To, we’re going to show how to install the SX5 conversion on your Baja 5B.
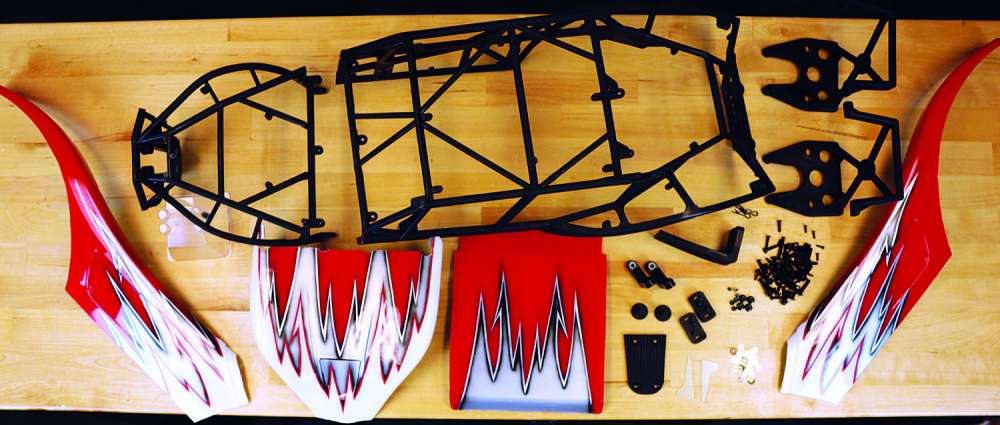
STEP 1: Here’s a look at all the parts included in the kit. You get an extremely buff 3-piece cage, body panels, some plastic parts and a slew of mounting hardware. The panels come clear so you’ll have to have those painted prior to assembly.

STEP 2: Follow the directions to attach the front part to the main cage … five screws, pretty easy.

STEP 3: Attach the rear piece to the main cage. Again, pretty simple.
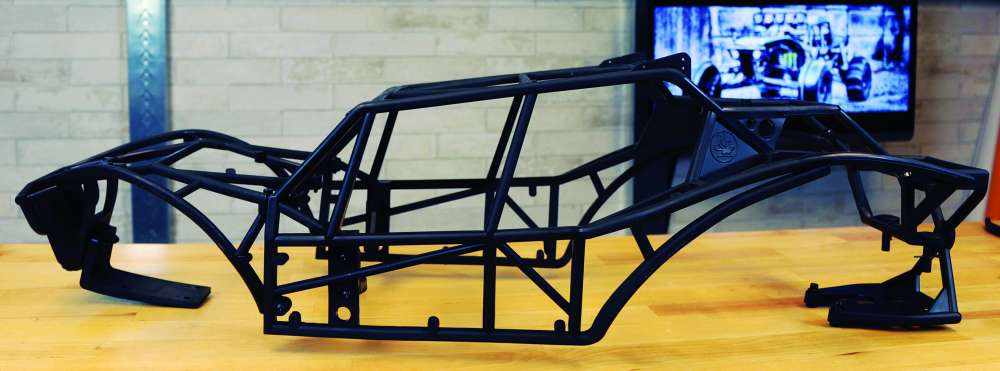
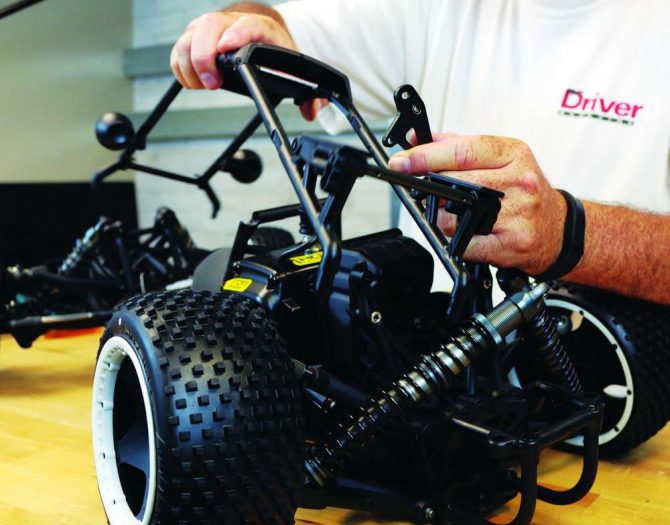
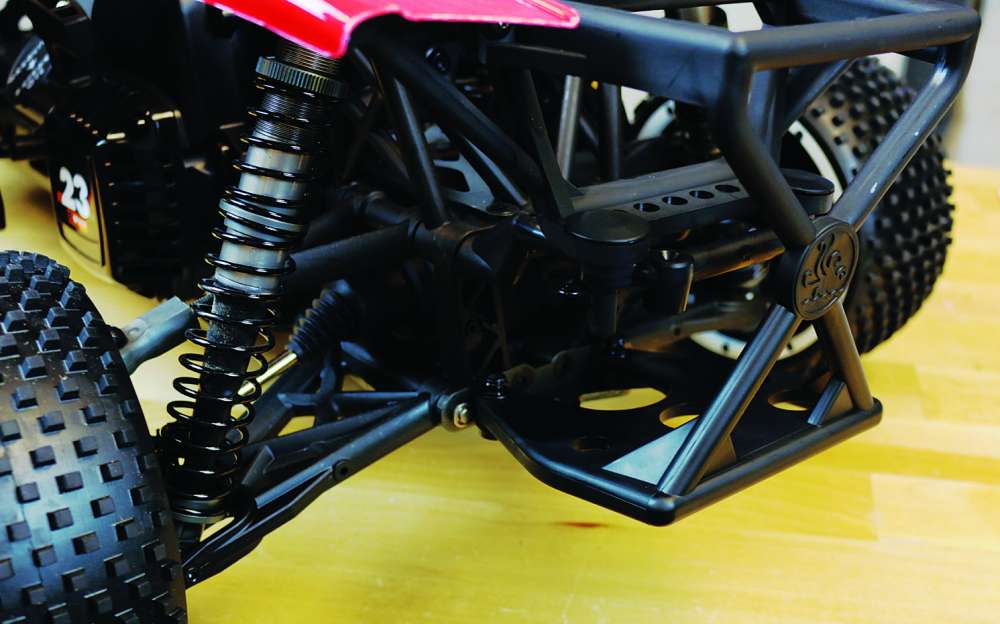
STEP 4: The next step is to attach the front bumper, front chassis mount and side chassis mounts. Don’t overtighten the side chassis mounts; nice and snug is fine. You may need to adjust them slightly when attaching the cage to the chassis. You can already see how awesome this conversion is starting to look! At this point you can also attach the body panels; I left them off for this picture to show you the assembled cage.
STEP 5: Now it’s time to strip down your Baja 5B and prep it for the conversion install. Start by removing the upper body panel and chassis tray.
STEP 6: We need to remove the original Baja cage. This requires disassembling the rear shock tower and one shock, rotating the tower out of the way and just pulling the cage off. Once removed, you can re-attach the shock and tower.
STEP 7: We also need to remove the front bumper and brace. There are four screws holding the front bulkhead in place, two of them UNDER the front bumper. Don’t remove these just yet.
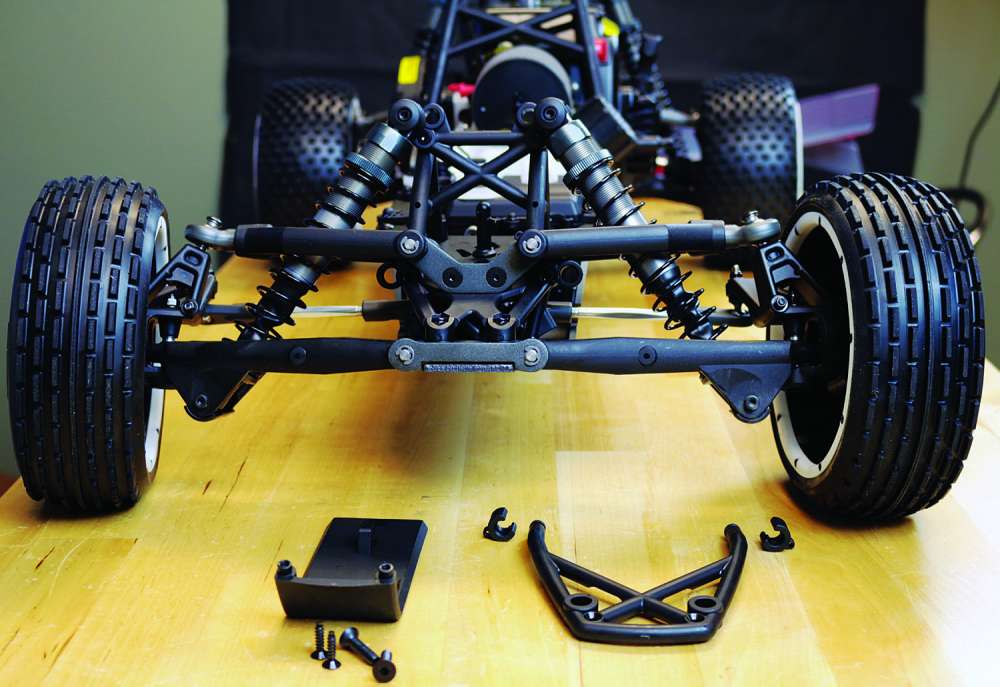
STEP 8: The conversion requires us to remove part of the rear bumper as well. Pull the entire bumper off, disassemble and re-attach the part shown. The Kraken cage uses this as part of the mounting point.
STEP 9: Fit the assembled cage to the 5B starting and the front and then wiggling the rear into place. Flip it over and remove the two screws holding the front bulkhead in place. Using the Kraken-sup- plied replacement screws, line up the holes and attach the front bumper to the chassis. It sounds complicated but it’s actually a pretty simple process.
STEP 10: Attach the rear of the cage to the chassis (using the stock chassis holes). Drop the molded body posts through the rear bumper you re-attached in Step 8 and secure with the body clips.
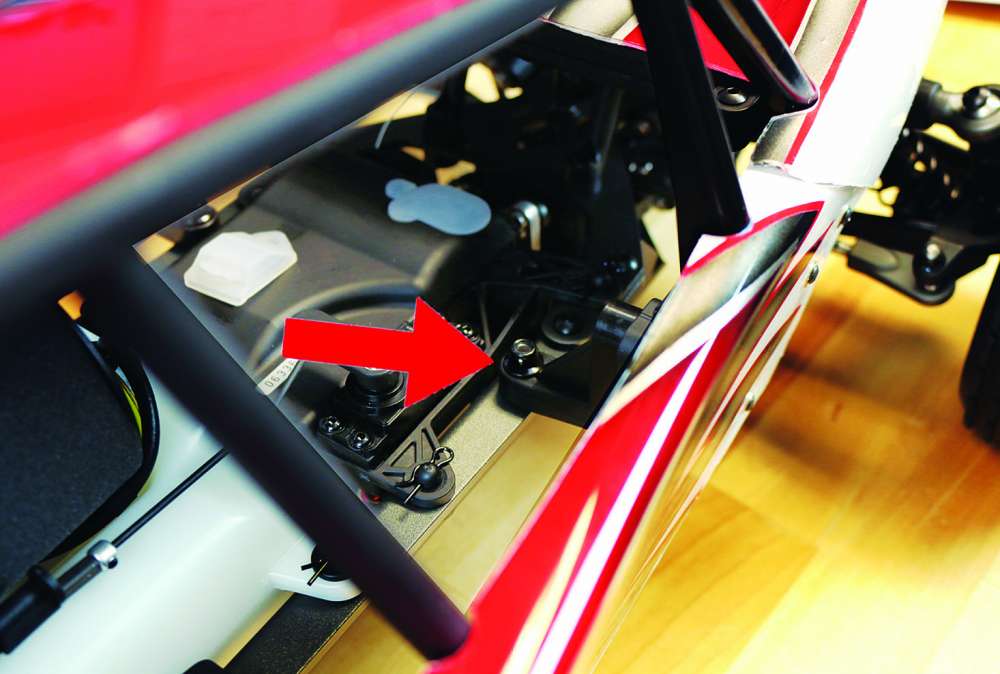
STEP 11: The final step is to attach the sides of the cage to the chassis. These side chassis mounts may need a bit of adjustment; if they do, remove the body panel, loosen the screws and align.
Kraken RC did a great job with this Sand Rail Conversion. It was a breeze to assemble and looks absolutely awesome on the 5B! The body panels are thick and durable, but this also means they’re very hard to cut out. There were a few additional panels to attach, but I left them off to make some adjustments since the rest of this rail is about to get a complete overhaul. Keep an eye out for the complete project and, of course, some video of this beast tearing it up in the sand!
Link
Kraken RC www.krakenrc.com
HPI Racing www.hpiracing.com


