


Since the beginning of my hobby career, I’ve always spent way too much time trying to simplify mounting bodies. Over the years, I’ve come up with a number of tips and techniques that have made the job easier, but it never fails that when a body is all mounted up, I wished I had moved it a few millimeters in one direction or another before drilling the body post holes. Apparently the crew at Dynamite RC had gone through experiences and set out to develop a foolproof method to body mounting. We think they nailed it with the new EZ Body Post Marker Set. This innovative yet simple “why didn’t I think of that” tool is made up of rubber caps of varying sizes, aluminum caps with magnets fixed to their tops and additional magnets to secure the body. When all the components are positioned properly, it allows you to move, set and mark the perfect position to drill holes for your body posts. I bet I have your attention. Here’s how simple it is to use the set.
AT A GLANCE 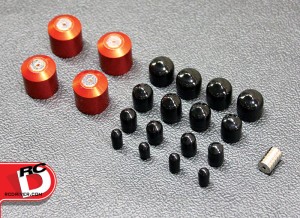
WHO MAKES IT: Dynamite RC
WHAT IS IT: Body Post Marker Set
HOW MUCH: $16.99
PART NUMBER: DYN5145
WHAT YOU GET: Assortment of spacing caps to fit anything from a mini to a monster truck, four red anodized aluminum caps fitted with magnets and six external magnets to secure the body.
Get Ready
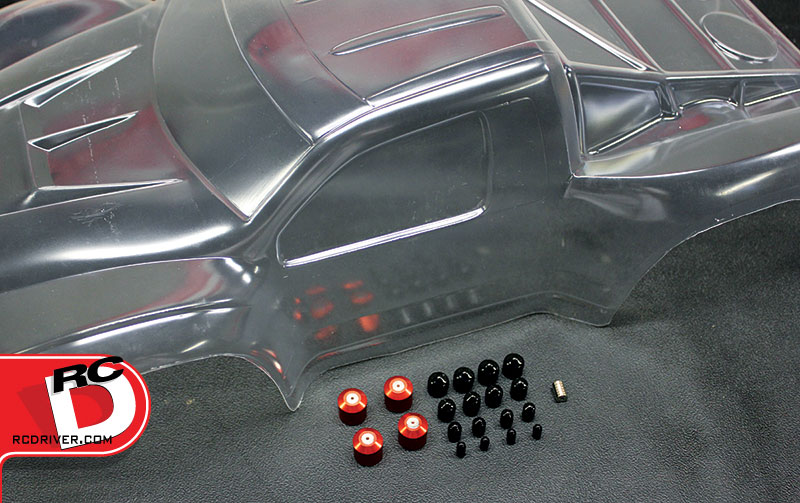
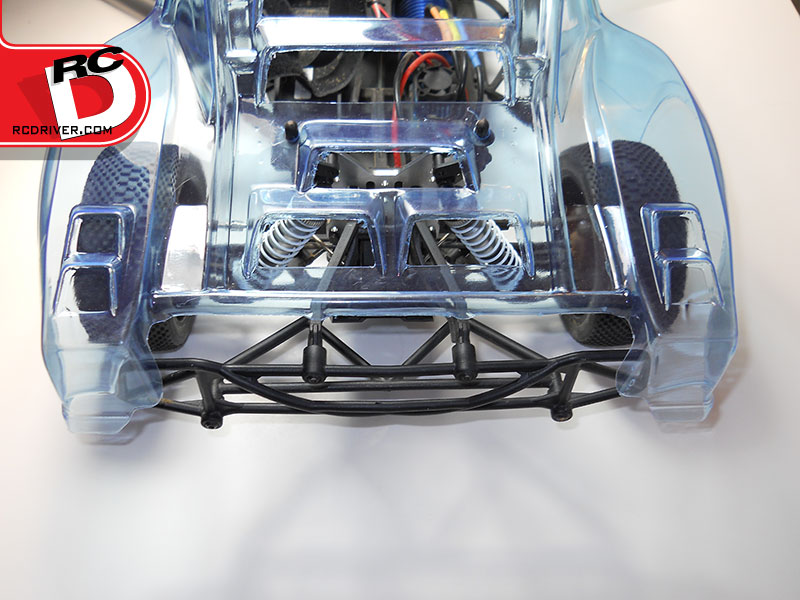
Here is the new Dynamite short course body we’ll be mounting up to a Losi XXX-SCT truck along with the Post Market Set, the only other items you’ll need is a fine tip marker and a body reamer.
Step 1
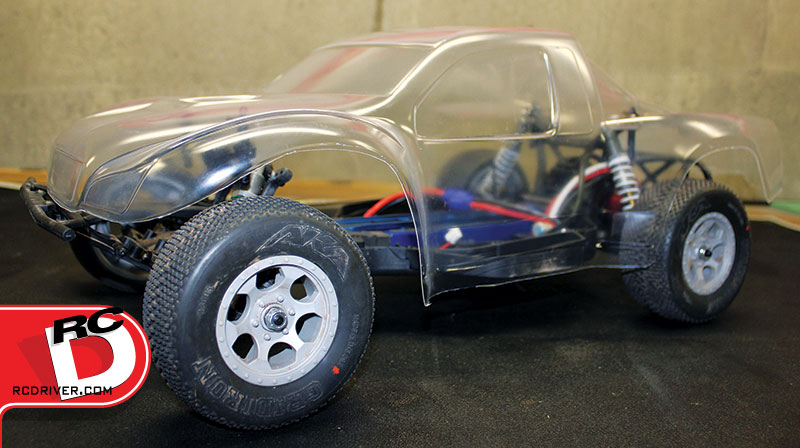
The system will work with either a painted or clear body; it’s best to start out by cutting out and then placing the body on the vehicle. You’ll want to get the body posts situated so the body is near its final mounting position and level. Having the front or rear end to high may cause the body to shift awkwardly if you reposition the posts later.
Step 2
Remove any body support plates or clips, this will allow you to properly seat the rubber caps on the posts.
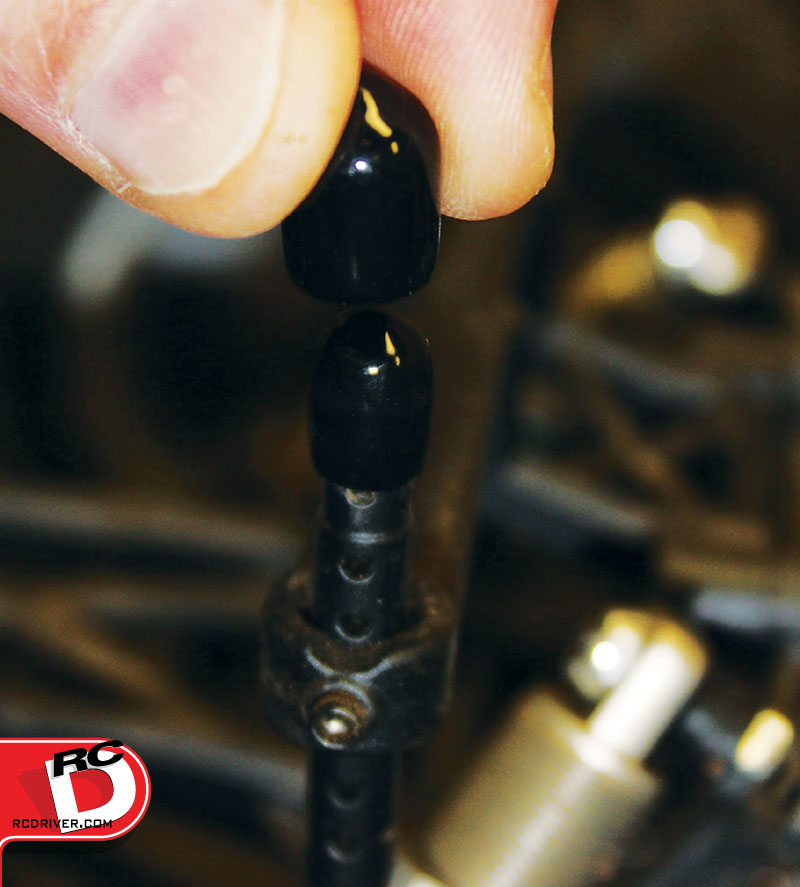
Step 3
There are a number of friction fit rubber caps included with the kit; you simply build up caps on the posts in order to securely place the magnetic cap on top. These caps allow you to use the body mount system on most cars on the market. Here we placed the first cap on the post; it was the second to smallest cap in the kit.
Step 4
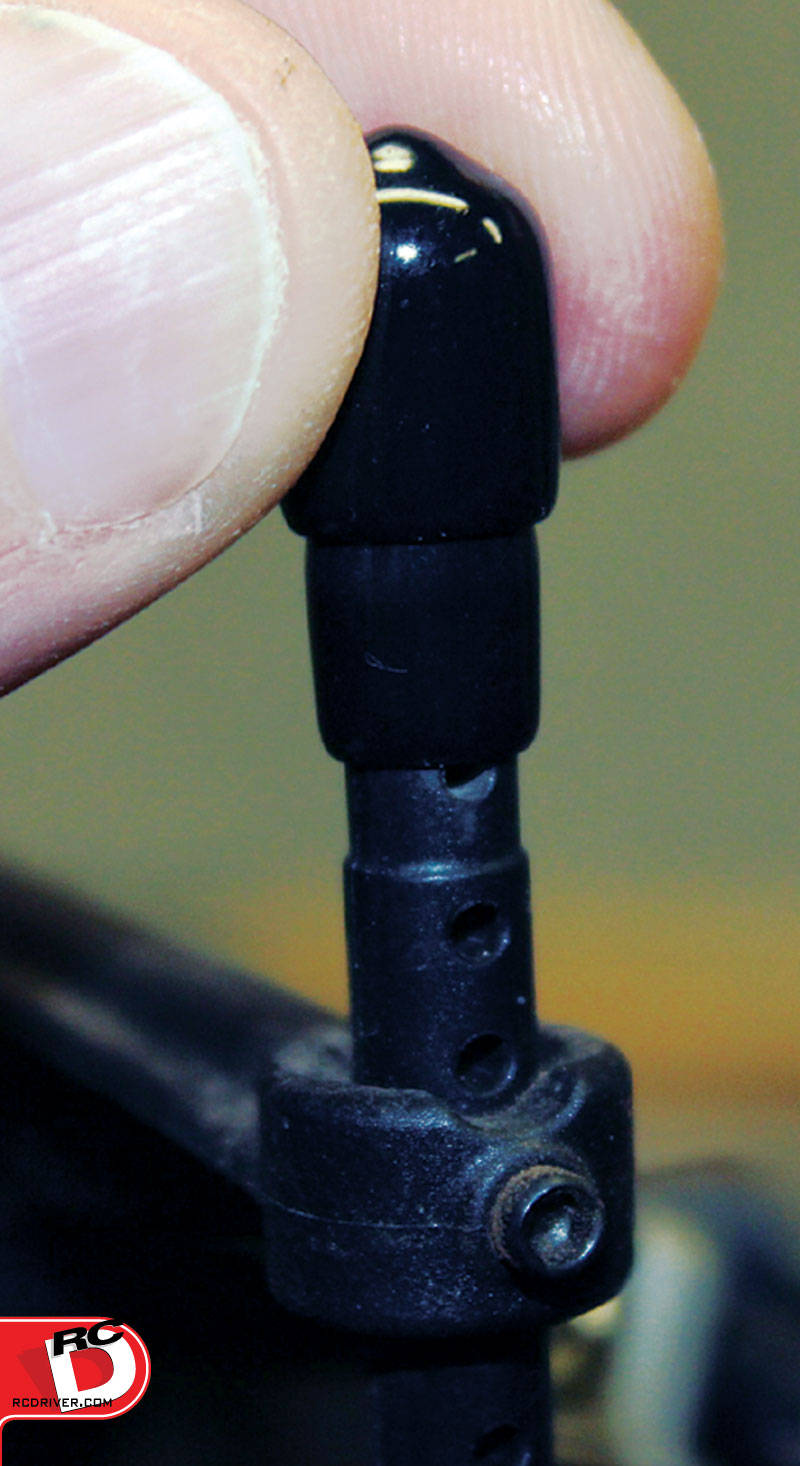
Here’s the next size cap going over cap one. Push it down as far as you can, you’ll want all the caps to be positioned the same so the body doesn’t tilt when you are positioning it for mounting later.
Step 4
Now the largest rubber cap goes on before the magnet cap. This cap kept popping off due to air being trapped under it. To release the air, I later drilled small holes in each rubber cap so everything seat perfectly.
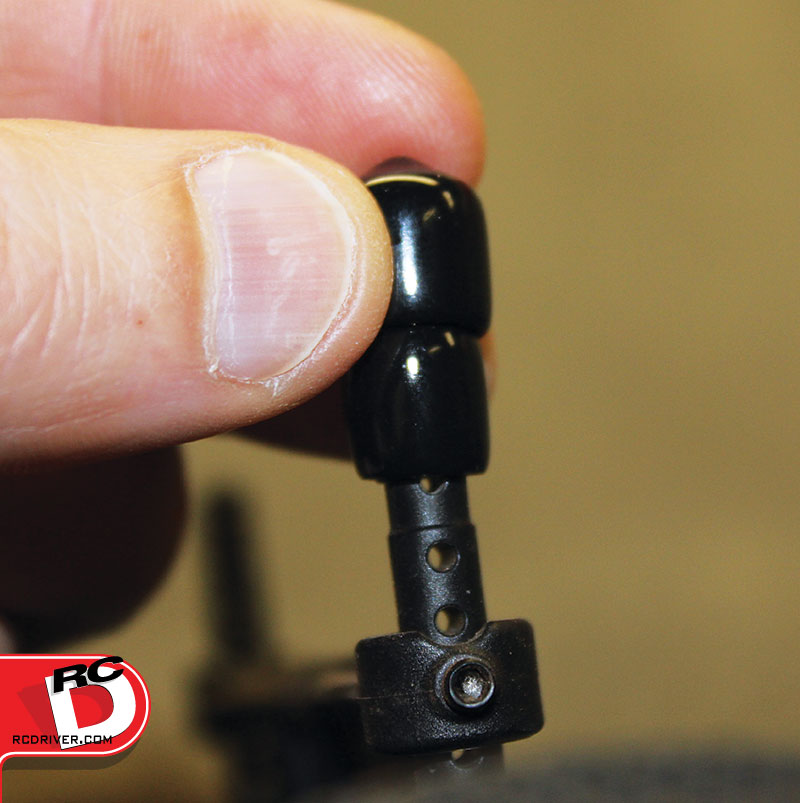
Step 5
Now the aluminum cap with magnet affixed to it goes over the stacked rubber caps. This means the magnet is perfect centered above your body post.
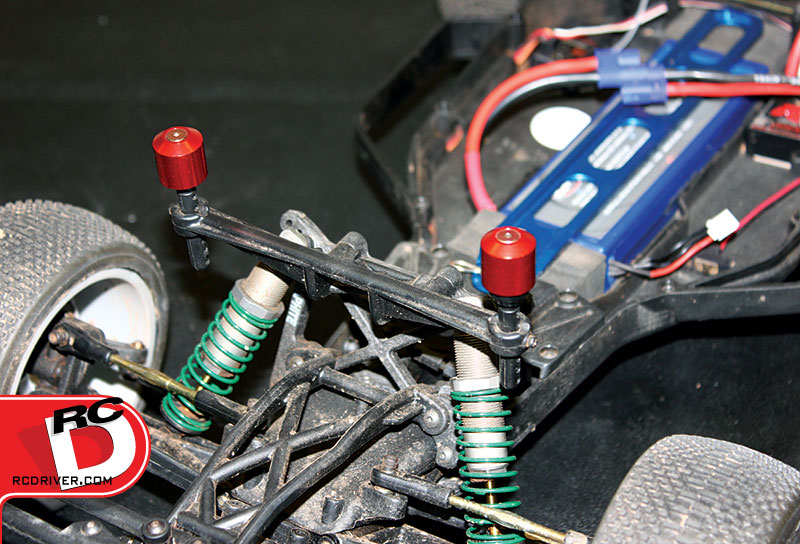
Step 6
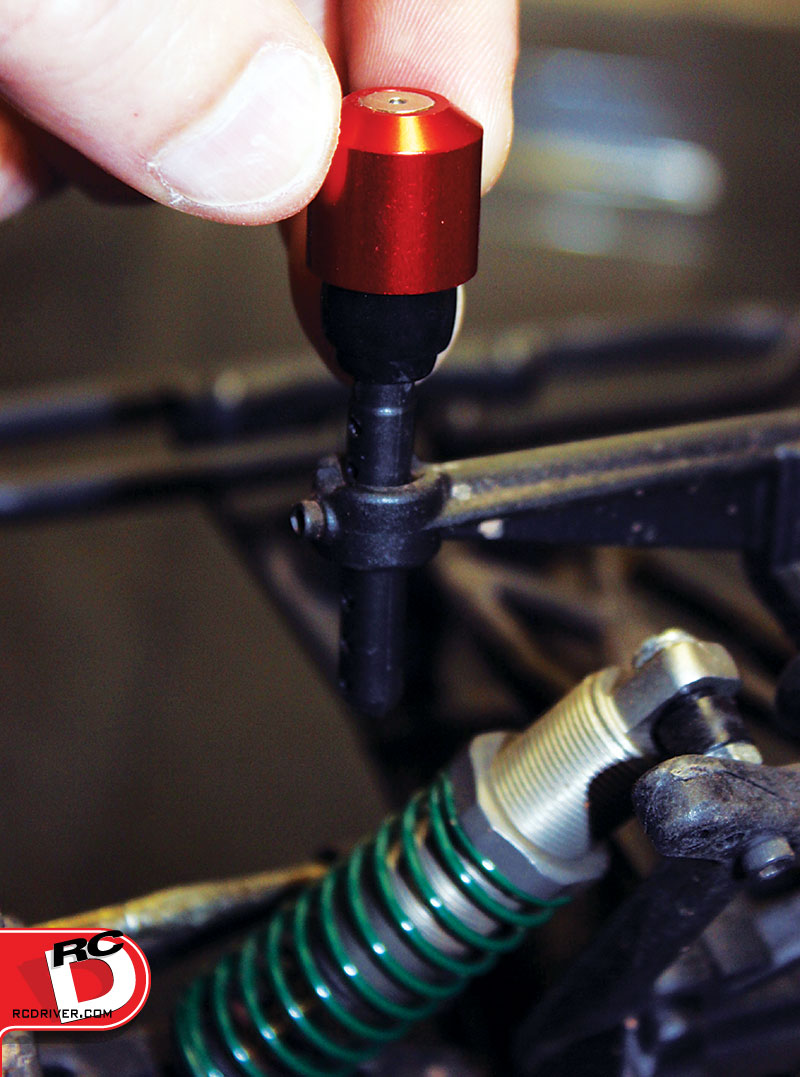
The front of the truck is prepped with the magnet caps; repeat the process for the rear.
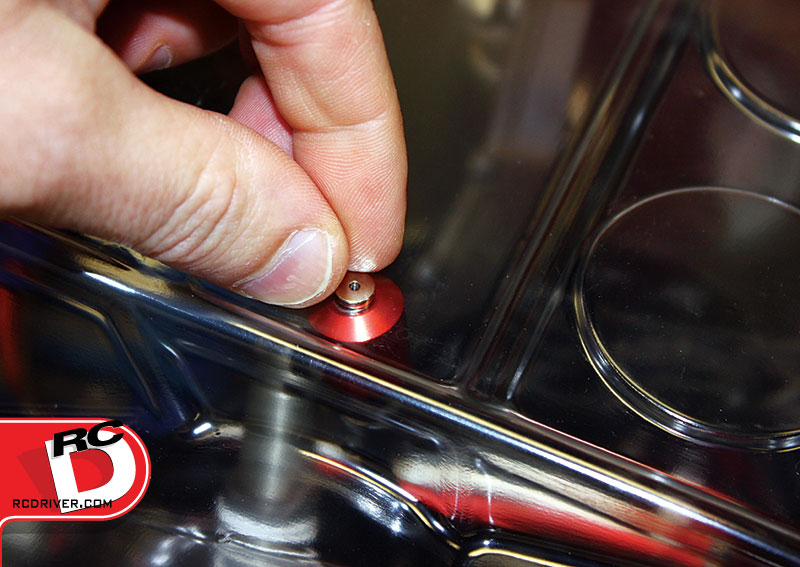
Step 7
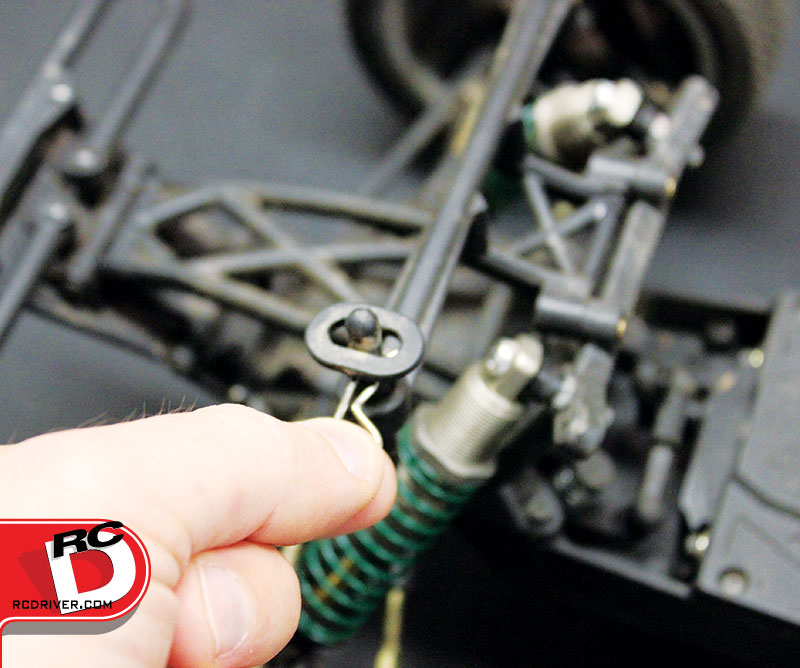
Place the body on the vehicle and then place one of the strong magnets over each aluminum cap on each body post. The magnets will fly out of your hand and latch onto the cap when you go to place them; they are that strong.
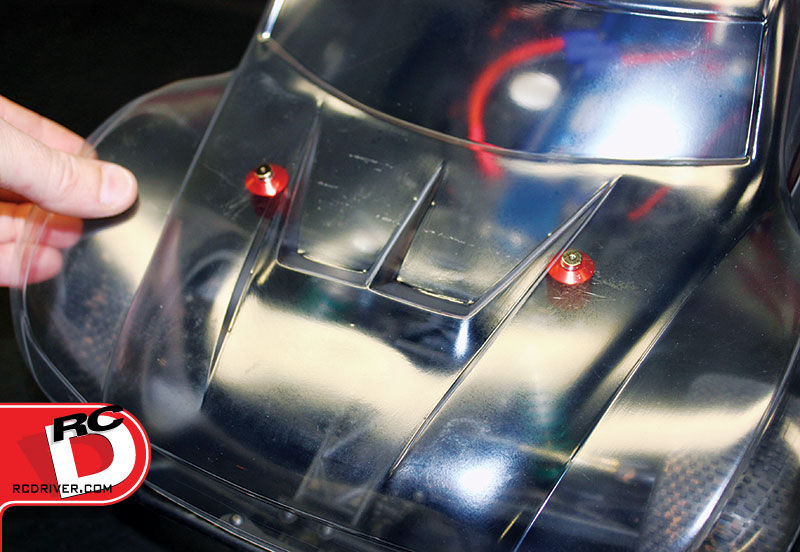
Step 8
Now that the body is held in place by magnets on the truck, I can position the body exactly where I want it to be. I also grabbed the front and rear bumpers to compress the suspension to see where the wheels would move to under compression inside the fender wells. The body did not move during this process unless I physically forced it.
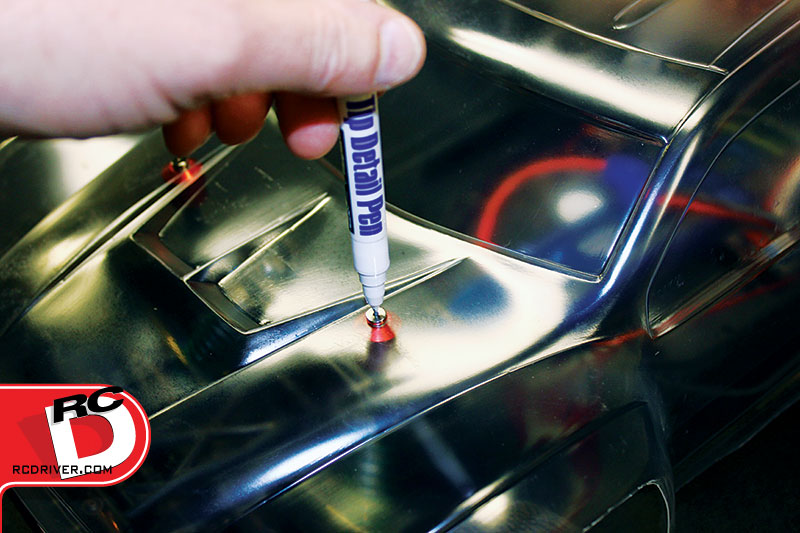
Step 9
With the body positioned where I wanted it, I took a fine tip Parma body-marking pen and put the marking point through the hole in the top of the magnet to mark the body. Repeat the marking process for all four body posts.

Step 10
Remove the magnets and the body and use a reamer to ream out the body posthole where the marker left the ink dot. Repeat for all four posts.
Wrap Up
Once you’ve reamed all four holes, remove all the caps from the body posts and reinstall any body support plates or clips. This body mounting process was ultra easy and will be a hobby saver for anyone who needs to mount up a painted body. Dynamite is well-known for their line of hobby tools and the EZ Body Post Marker Set goes onto the list of must-have tools for any RCer’s pit box.
LINKS
Dynamite RC dynamiterc.com, (877) 504-0233


