


Words: David Harrington
Photos: David Harrington
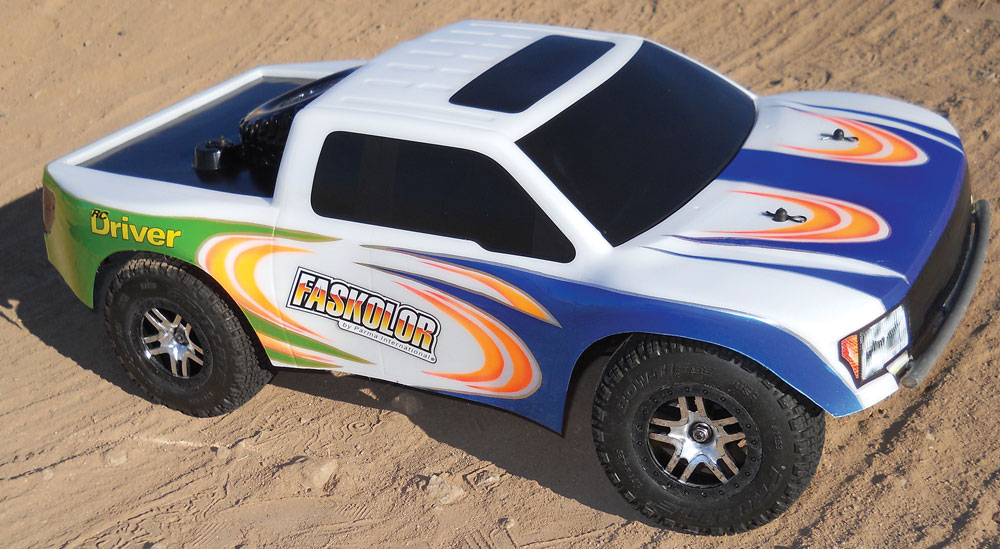
One of the more challenging parts of doing this column is continuing to come up with original ideas, while also addressing all different skill levels. When I originally painted Parma’s Ford Raptor SVT body for the special RC Short Course Driver issue #1, I felt that with all the decals, including the factory graphics that this body comes with, it was best to do a basic one-color paint job to show beginners how easy it is to create a nice body, but I would have liked to have done something more. So I’m back again with this body to see what it would look like with more of a race oriented scheme.
ITEMS USED
Parma
• FasBlack #40001
• FasWhite #40000
• Faspearl Blue #40055
• Faspearl Key Lime #40301
• Faspearl Gold #40053
• FasKrome #40300
• Fasflourescent Red #40105
• Fasflourescent Flaming Orange #40304
• Faskolor F-1 airbrush #40260
• Detail Pen #10400S
Miscellaneous
• Hobby knife
• Blow Dryer
• Masking tape
Step 1
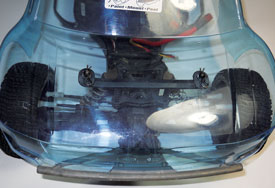
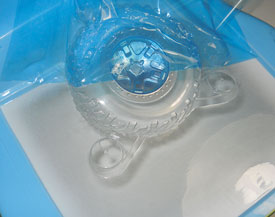
This body is designed as a direct drop-on fit for the Traxxas Slash, but with a little tweaking I was able to adapt it to my HPI Blitz. I took about a ¼-inch extra off the bottom of the front end. Then I sat it on the chassis and marked where the bumper hits and notched it out to let it drop down more. Since the rear body mounts sit in pockets on the body and I have it sitting slightly forward of the stock mounting hole position, I had to remove the rear body supports and the body rests on the rear shock tower.
Step 2

To mask this body I used Fasmask liquid mask. To apply it I just brushed it in with a foam brush. Always looking for an easier way, I just dumped a bunch in the roof, and spread it out from there in even overlapping strokes. Afterwards I hit it with the blow dryer to speed drying time, then gave it a couple of hours to dry before repeating the process two more times.
Step 3
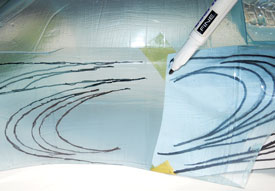
I wanted a short course style race theme that would be easy to see. I was picturing something with scallops that swooshed around to create an oval shape around the main logo. So I drew my graphic out on a piece of paper, and traced it over with a marker to create an image on the backside of the paper. I tacked it in the body with a couple of pieces of masking tape, and traced in the graphic in front, then I flipped it over and drew it over the rear wheel well. I also used the same graphic on the hood.
Step 4
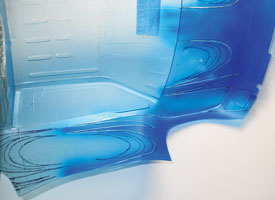
I started by cutting my front graphics with my hobby knife. It doesn’t take much pressure to cut through the liquid mask so be careful not to press too hard and score the body. I’ve found a quick smooth motion is best for cutting straight lines. If you hesitate you’ll get crooks. After I laid a couple of coats of the Faspearl Blue and allowed it to dry, I cut a thin outline and then backed the whole area with FasKrome, which will help make the blue opaque and give extra sparkle while simultaneously filling in the outline.
Step 5
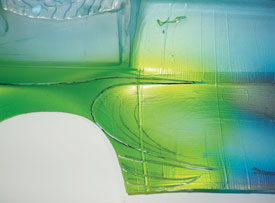
The front end has more graphic, more rear fills and more area, so I used my dominant color in the front and in the rear I used Faspeal Key Lime, which is a brighter, lighter complimentary color that really pops. I repeated the process the same as the front, but this time I used some Faspearl Gold in the outline before backing it with the FasKrome. While I was at it, I also cut the mask around the wheel in the bed, and filled it with the FasKrome.
Step 6
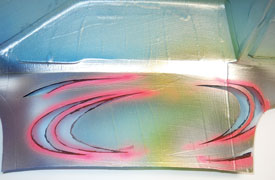
The next thing I did was cut the accent graphics. By this point it might be hard to see your drawing on the outside through the over sprayed paint. I like to hold a flashlight between my knees to light the body from below while I cut. I shaded from the tips and along one edge with Fasflourescent Red before filling the whole area in with the Fasflourescent Flaming Orange.
Step 7
With my graphics all painted in, I then removed the rest of the liquid mask that is left. I finished by laying several heavy coats of Faswhite, allowing time to dry between coats. The fluorescent colors dry semi-transparent, so they need to be backed with the white, and since white is fairly opaque, it is a good finishing color.
Step 8
I always like to paint my bed area from the outside so that area will be less glossy than the rest of the body and to give the feel of a bed liner. This body also has a tire in the bed which will also benefit from the look. I cut the overspray film and removed it from the bed area. I cut the wheel out and left that covered so the FasKrome underneath would be exposed. I also cut out the triangle areas between the wheels spokes.
Step 9
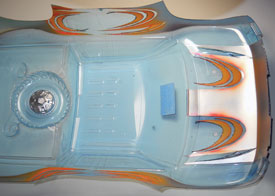
Now all that is left to do is remove the overspray film, and put on decals. The smaller ones such as the headlights and taillights go on fairly easily, but with large decals such as the windows, it is always best to use the window cleaner technique. I just spray the area with window cleaner and spread it evenly. This allows the decal to easily slip around until you get it in position. Push the extra window cleaner out with a dry cloth, and then squeegee the bubbles and any remaining cleaner out with a credit card.
WRAP UP
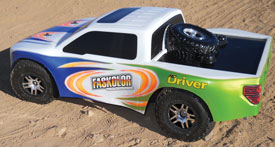
This body is more scale looking than other short course bodies, but considering the Raptor is supposed to be a factory built pre-runner, I could see this truck out in the middle of the desert testing out the course before the big race. The spare tire in the bed really clinches it!
LINKS
Parma parmapse.com, (440) 237-8650


