


8 Things You Need To Start Airbrushing Your RC Car Bodies
Words and Photos: David Harrington
This article was originally published in RC Driver’s December 2015 issue.
Recently I’ve been getting requests for an article on starting out in airbrushing. A while back, I forget how long, the first article I wrote for this magazine was “How To Get Started in Airbrushing”. I often felt this was a subject that needed revisiting, because I had written that article as a buyer’s guide.
I know I have made some mistakes in my purchases and wished someone would have just told me what to buy. It also occurs to me that if people want the results I’m getting, then they should be using the same stuff . So here it is, you asked for it, my tell-all guide to getting started in airbrushing!
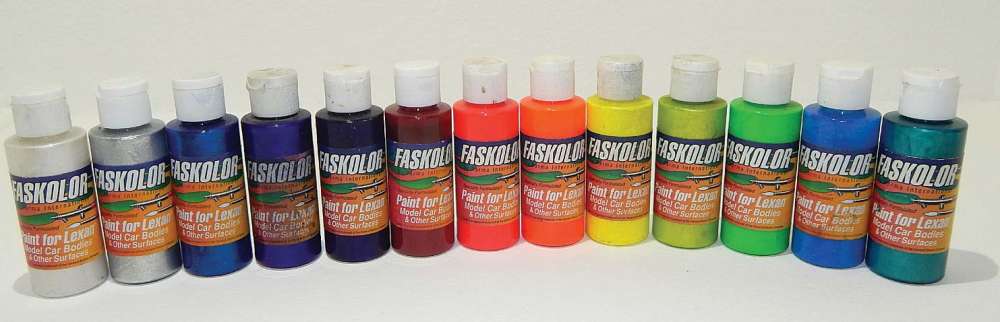
1. It all starts with the paint
I am starting with the paints because that could potentially determine what airbrush you buy. Different paints spray differently and could require an additional needle and nozzle purchase if you want thicker or finer spray.
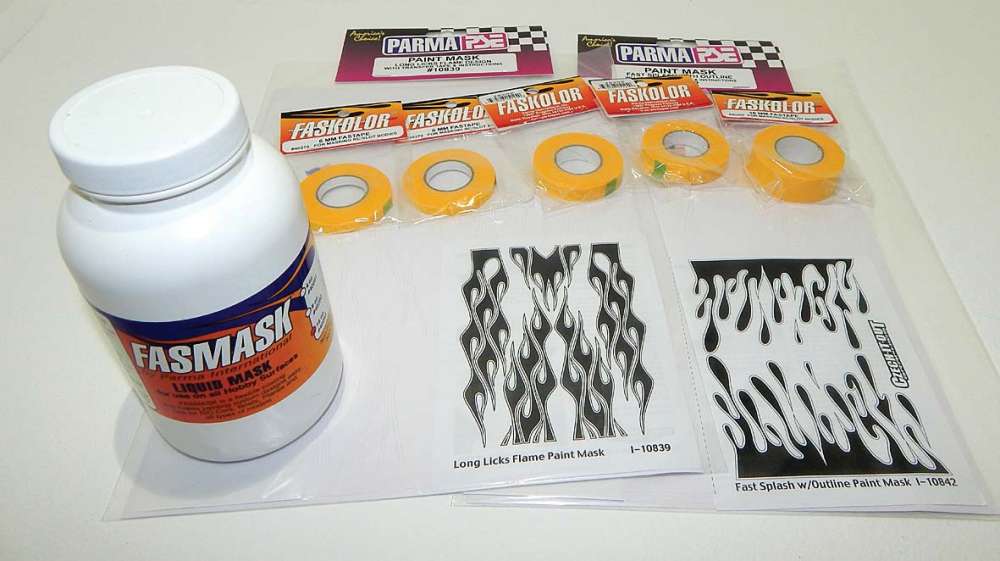
I prefer to spray with Parma’s FasKolor paints for one main reason, they are water based so there are no noxious fumes and I can spray indoors. They also are easier to clean up and come in a vast array of flourescents, pearls, translucents, opaques and specialty colors.
Duratrax, Spaz Stix and Tamiya are all great paints and you’ll see me try other brands in this column, but those paints are either lacquer or enamel based, which emit toxic fumes and should ideally be sprayed outdoors. However, many prefer those paints for their permanence, especially on nitro cars.
Since this is a getting started article, to start off, I recommend sticking with water based for airbrushing. There are ways of protecting your paint and my paint jobs always outlast my bodies anyway.
2. Choose Your Airbrush
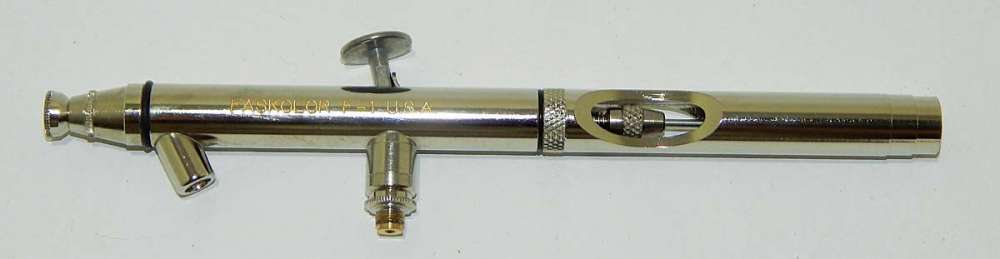
Alright, so we’re using Parma’s FasKolor paints, now what’s the best airbrush for them?
Obviously it’s going to be Parma’s F-1 airbrush. I am not just saying that either, it is a really good airbrush.
I’ll break it down for you. I have owned many airbrushes over the years and here’s what it comes down to with cost over performance.
This airbrush sells for $110 on Parma’s website. I have seen it go for $80 all over the internet. I paid $80 for a Badger and the F-1 does a better job of atomizing the paints to create a finer spray and it has a greater workable range.
On the other end I’ve paid double for an Iwata and it is a great airbrush, for fine detail. It’s more of an illustrator’s brush so if I had to do heavy coverage over an entire short course body, I’d be throwing it at the wall.
To me the Parma brush feels just as nice and is already set up for what I do. You can also order replacement needles and nozzles through your local hobby shop, instead of some arts and craft store.
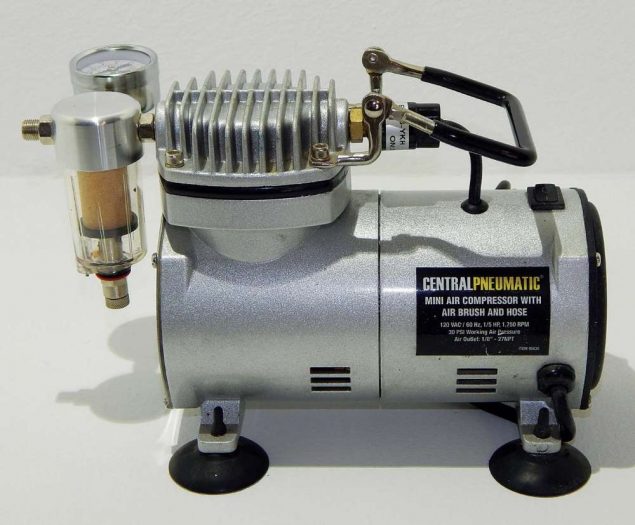
3. Air Compressor Options
An airbrush compressor should be an oilless, diaphragm type, with a water trap and an air pressure regulator.
To spray FasKolor paints from a bottle you should be at about 50psi air pressure. If you use the side cup you can get away with 25psi, but more is better.
Here is where it gets tricky.
While a lot of these sub- $150 range compressors might be rated at 40-45psi, that is their max and you want to look at their constant pressure.
Many cheaper compressors will drop to 15-20psi when you hold the airbrush open for extended periods. 1/10-1/8 horse power usually doesn’t cut it. 1/6 is getting there, but 1/4 is best. Some note a slight pulsing, that is where dual-diaphragms come in, then you’re getting in the $250-300 range.
In my case I picked up a Harbor Freight one in a pinch and paid an extra $12 for the two-year extended warranty, figuring the way I burn through compressors, I should get two free compressors out of it, but it has worked perfectly for over two years now.
You can also use your shop compressor, but make sure you are using a filter to prevent any oil or debris from getting in your paint job. It is very important that you don’t go much past 50psi at the risk of damaging your airbrush.
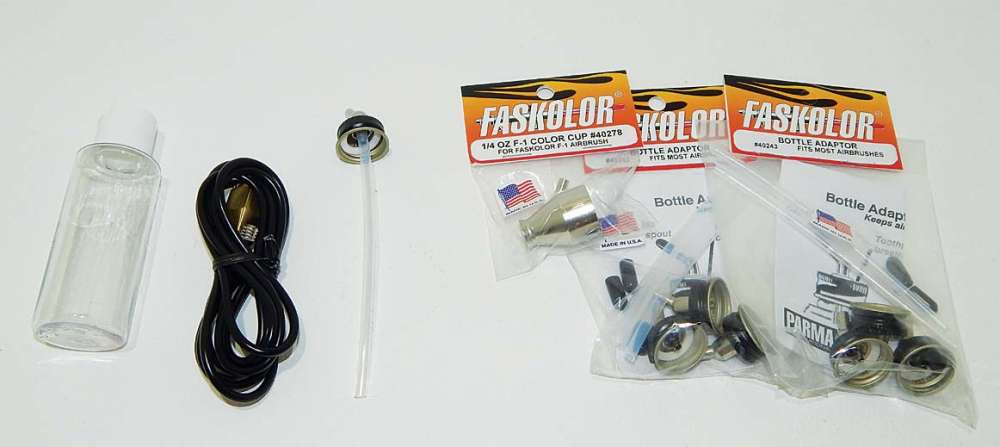
4. The Essential Accessories
The F-1 airbrush actually comes with a hose, a bottle adaptor and extra bottle to mix colors or spray cleaner.
I kind of like the basic vinyl hose it comes with, as I have cats and it is hard to see when they make holes chewing on the cloth ones. If you don’t have cats, then by all means get the better hose, but this one is fine for now.
The bottle adapters are convenient to get spraying quickly, but they require more air pressure. They are really convenient. When you get several, then you can have all your colors lined up and ready to paint.
The side cup, however, will let you work at a lower pressure, for better detail and so your air compressor choice won’t be so critical. I use the side cup, 99% of the time. Other brands of cups work fine in the F-1, but this one has a curve in it so it is at a better angle and I don’t get paint all over my jeans when I get too excited making streaks.
5. Mask is a Must
If you are painting an RC body, you will need a way to mask it off.
An airbrush is not going to do an intricate scheme for you, you still need to create a design to paint and that’s where I say a lot of what I do can be replicated with a rattle can. An airbrush just gives you finer shading, better control and color blending that you don’t get with spray cans.
Whether you use FasMask liquid mask, Precut vinyl mask or tape will depend on your skill level and what you plan to do. Which should you use? Well, that’s pretty much what I cover every month.
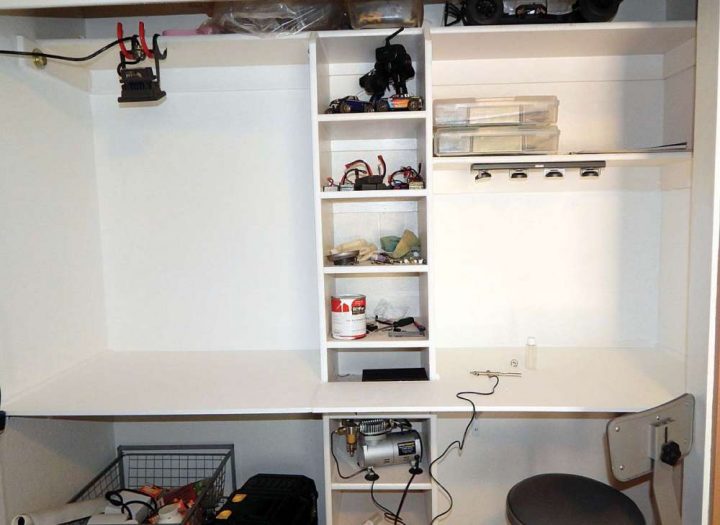
6. Your Painting Space
Ideally you want a little spray booth with filtered exhaust fans, but we’re just starting out.
In my old place I sprayed near the back door for ventilation, but I got overspray all over my RC stuff.
I just started my current spray area so it is a work in progress. I took the sliding closet doors off my closet and made a work bench. Since I’m spraying into a corner this keeps the overspray contained, but I still need to install fans to get the paint away from me.
If this is something you only do occasionally, then you might want to just set up a table in your garage or porch to avoid messes.
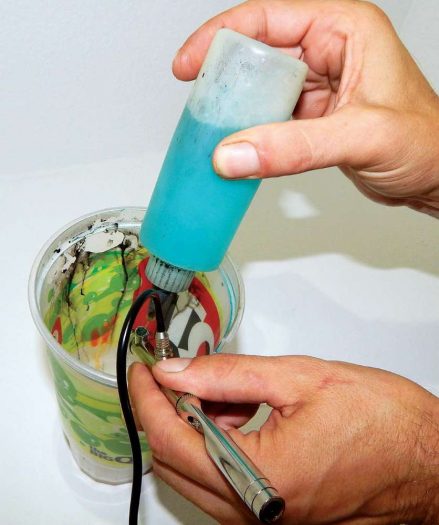
7. Clean-up Techniques
This is actually my least favorite part, but one of the most critical if you want your airbrush to function properly next time you use it. I’ve heard of several techniques, but here is what works best for me:
- Take a large fountain drink cup and cut a slot down the side large enough for your fingers to fit in.
- Hold the airbrush upside down and spray out the excess paint into the side of the cup.
- Use a squirt bottle to squirt out more paint, using window cleaner with ammonia as a cleaner.
- After you’ve blasted out as much as you can, spray the cleaner through the brush, working the needle back and forth, until it sprays clean.
- Cover the tip while applying air pressure to back flush it and get out larger pieces that won’t pass through the small tip.
- Keep repeating as necessary.
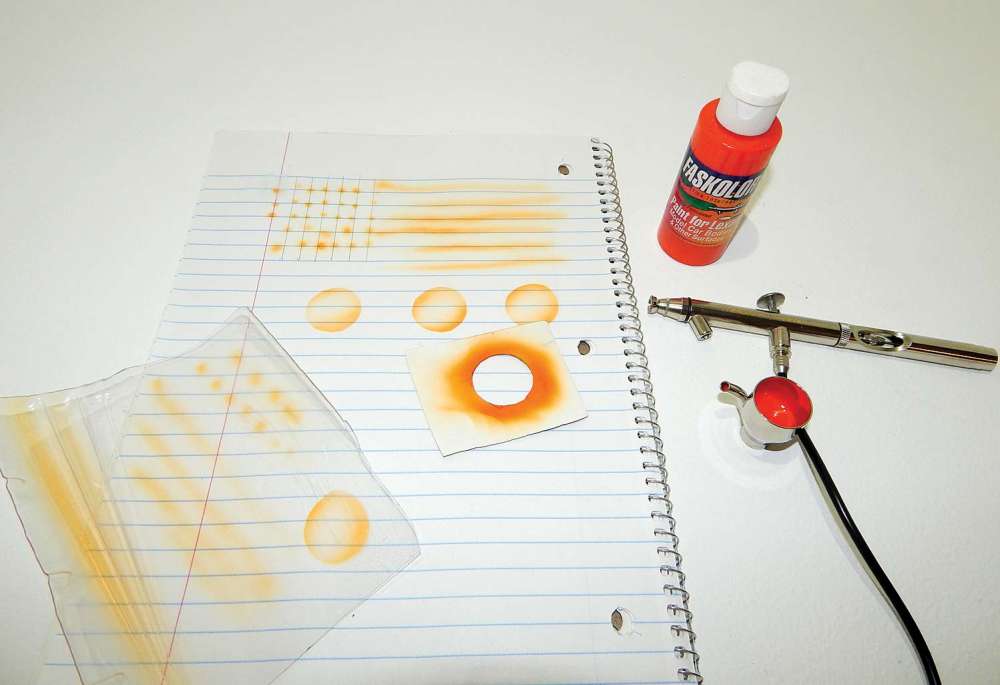
8. Practice Makes Perfect
Yay! I finally get to play with my new airbrush! This going to be fun! Hey, wait. Practice exercise? None of this sounds fun!
This is why I maintain airbrushing is a skill more than a talent. The more you practice, the better you get.
To start, draw a grid. Then aim your airbrush about a half inch from the paper. Push down to release the air and then slowly pull back until a dot comes out. Then release the paint before releasing the air.
Try to center the dot in the crosses. Practice making them as small as possible at first. Then pull back, use more paint flow and try to make larger dots.
Next, make lines. Try to be as straight as possible, using the same air, paint, paint off, air off technique.
Now take a piece of thin cardboard, I used this notebook cover. Trace a quarter and cut out the circle. Then shade inside the circle to create a 3D sphere.
This will help you practice shading inside mask.
Now forget all that, because the paint will react differently on a Lexan body and will be more difficult to spray properly.
Now that you’ve had some practice, cut up some plastic bottles and do the same practice steps on them to get a feel for spraying on plastic. It doesn’t matter what color, try different colors to get a feel for the types of paints.
Now you should be ready to paint your masterpiece… or wreck it. Did you practice like I told you? Honestly, it’s been a while since I’ve done these and when I went to demonstrate them, I realized I could really up my game if I did this more often! It takes time so don’t get frustrated if it doesn’t come to you at first.
So there you have it. You can skip all the confusion and cut to the chase. This is everything you need to know get started. You may notice I use Parma for just about everything and that is because their stuff works. Besides, isn’t it easier to get all your stuff in one place rather than have to shop around for everything? Now the next time you see a paint job you like, don’t say, “Oh, I wish I could.” Follow the instructions in this article, read one of my many past paint columns and now you’re airbrushing!
Links
Parma parmapse.com, (440) 237-8650


