Team Associated B44.3 Build – Turnbuckles / Driveline
The Build – Part 7 In Step 7 we move on to the turnbuckles and driveline components.
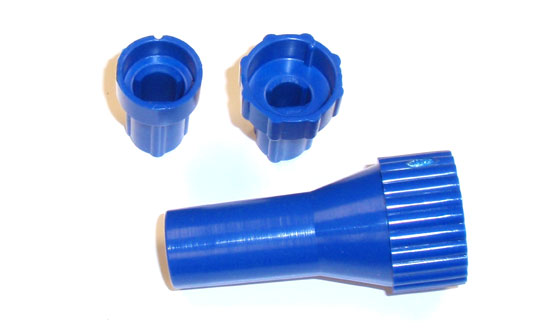
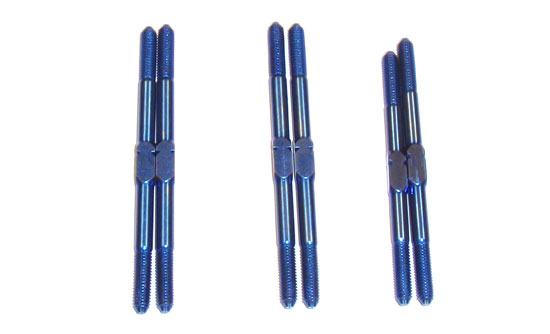
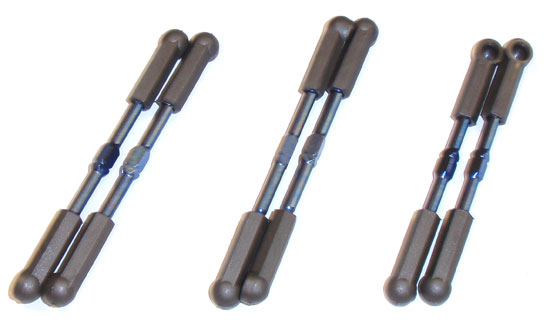
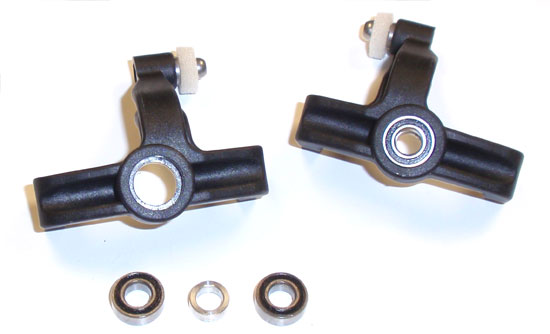
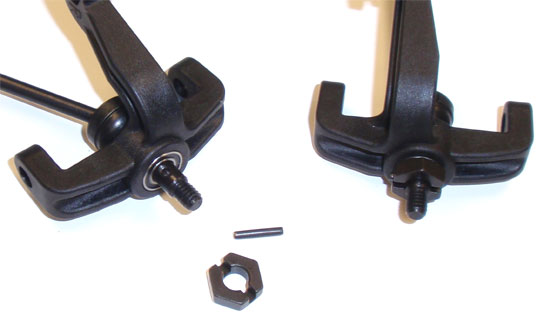
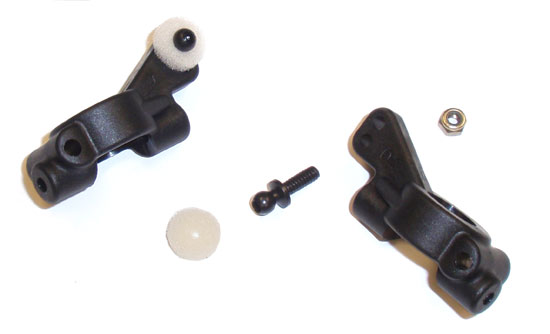
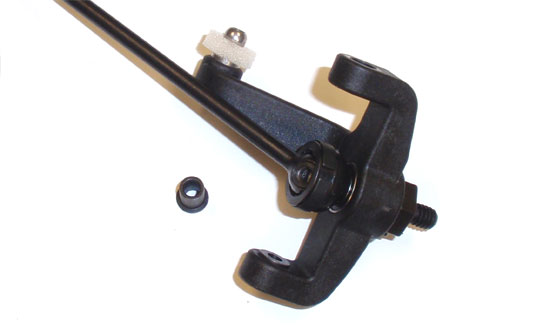
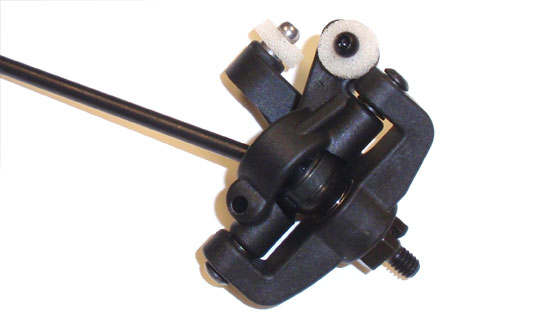
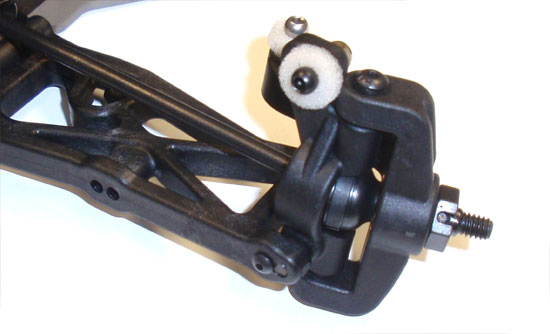
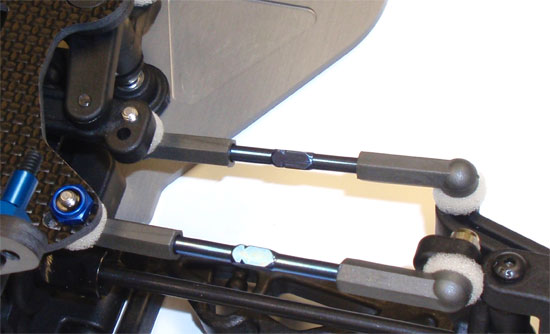
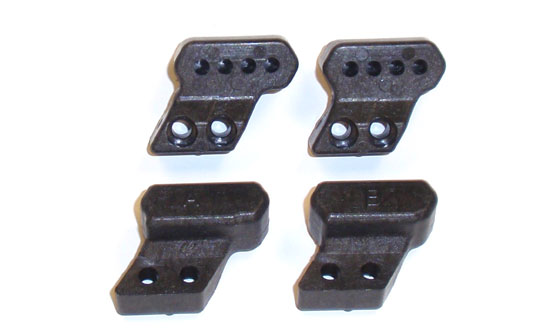
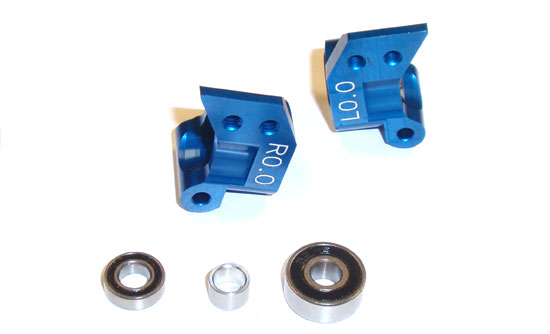
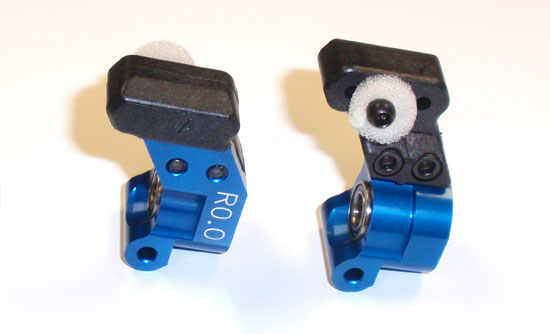
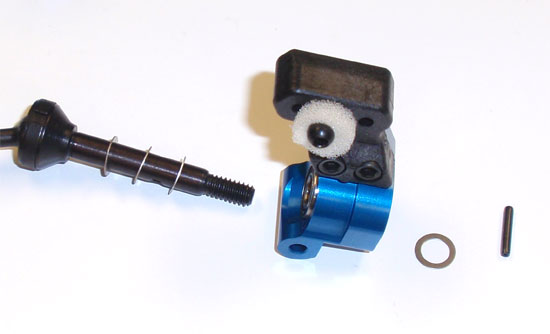
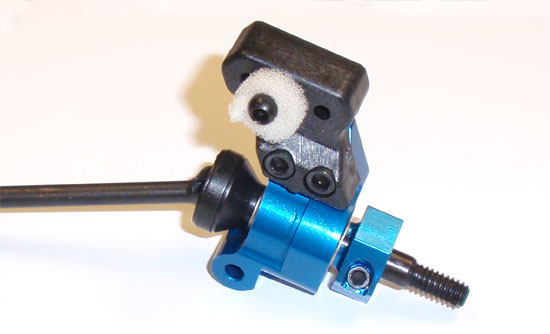
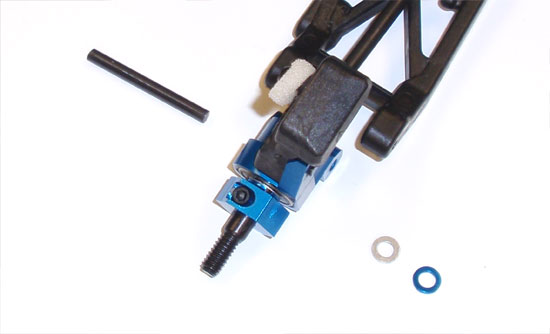
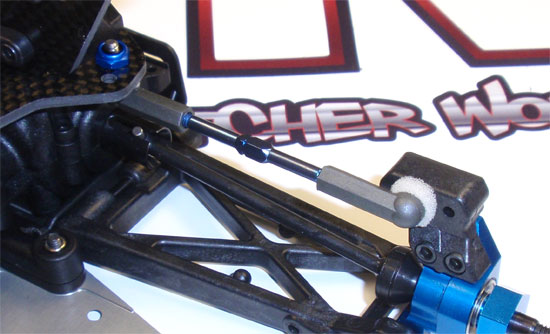
Team Associated B44.3 Buggy Build Step 79 I don’t like building turnbuckles. Ever. That is, unless I have a cool tool to help me to the job. Check out this neato turnbuckle helper tool from Duratrax. Simply find which insert holds your ball cup, slide it into place on your tool and turnbuckle away. Love the tool, but it still doesn’t make me like building them.Team Associated B44.3 Buggy Build Step 80 The B44.3 comes with 6 turnbuckles; 4 that are 2″ long (front and rear camber links) and 2 that are 1.77″ long (steering links). Don’t mix them up when building or something will be WAY off.Team Associated B44.3 Buggy Build Step 81 Assemble them per the manual but, again, keep them separated.Team Associated B44.3 Buggy Build Step 82 Find your two steering arms, press the locknut into the keyed hole and insert your ball end. Don’t forget your foam thingy.Team Associated B44.3 Buggy Build Step 83 Press the two bearings into the steering arm with the crush washer in between.Team Associated B44.3 Buggy Build Step 84 Find your front axles and insert them into the steering arms. Press the axle hex onto the axle making sure the notches face out. Key the notches to the holes in the axle and slide the roll pin in place.Team Associated B44.3 Buggy Build Step 85 Screw the ball ends into the caster blocks and secure with the locknut. Again, don’t forget your foam thingy.Team Associated B44.3 Buggy Build Step 86 Take 2 of the hat washers and set them in the holes in the steering arm (from the inside). They are not a press fit and will fall out so be careful how you handle them.Team Associated B44.3 Buggy Build Step 87 Slide your caster block over the axle and all the way to the steering arm, securing it in place with the upper and lower 4-40 screws. Make sure the hat washers stay in place.Team Associated B44.3 Buggy Build Step 88 Using the hinge pin, attach the steering arm to the front suspension arm. Note the orientation of the steering components. Use the 2-56 screw to keep the hinge pin in place.Team Associated B44.3 Buggy Build Step 89 Locate your front camber links and pop them into place. Note the direction of the ‘notch’ in the turnbuckle.Team Associated B44.3 Buggy Build Step 90 Locate your steering links and pop them into place, matching the direction of the ‘notch’ for the camber links.Team Associated B44.3 Buggy Build Step 91 The B44.3 comes with a molded A and B camber link tower. We’ll be using the A towers.Team Associated B44.3 Buggy Build Step 92 Insert the bearings and crush tubes into the rear hubs.Team Associated B44.3 Buggy Build Step 93 Assemble and attach the A towers to the rear hubs.Team Associated B44.3 Buggy Build Step 94 Slide 3 of the 3/16″ axle shims onto the rear axles, then slide the axle through the rear hub. Add one more 3/16″ shim followed by the roll pin.Team Associated B44.3 Buggy Build Step 95 Slide the clamping hex onto the axle, keying it to the roll pin. Insert the 2-56 screw and clamp the hex down.Team Associated B44.3 Buggy Build Step 96 Using the hinge pin, attach the rear hub to the suspension arm. Add a silver and blue washer to the back of the hub during assembly. Use a 2-56 screw to capture the hinge pin.Team Associated B44.3 Buggy Build Step 97 Locate your rear camber links and pop them into place, matching the direction of the ‘notches’ to the front links.