Earlier this year, I built an 1/5 scale HPI Baja based gasoline powered asphalt burner that was featured on the pages of RC Driver magazine’s September 2013 issue. Within a few weeks of the magazine spread I received a phone call from Jim White, a fine fellow interested in purchasing a nearly identical Beetle, with a few changes that he really wanted.
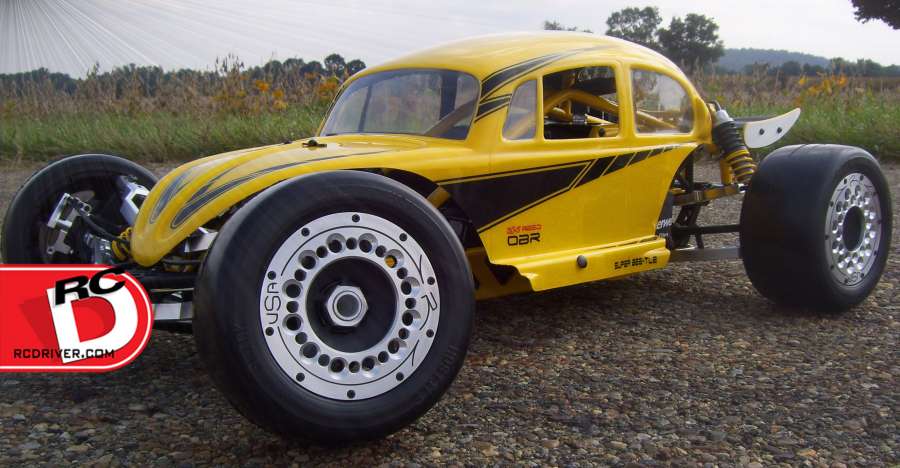
Like all RC enthusiasts, Jim wanted the most powerful gasoline scale car he could get his hands on without breaking the bank. Jim happens to be the proud owner of one of the new Mopar Hemi Challenger/Charger platform vehicles. His car’s color is the screaming Detonator Yellow with black accents. The only variation on the yellow and black color scheme is a slick red “HEMI” logo on the side of the car.
The original magazine article Beetle was a red and black carbon fiber car that had an arrogant look to match the power living under the roof. Jim liked it, but he wanted something closer to his “Detonator” tastes.
These two cars were a similar, but both were unique because I wanted a realistic Beetle body to give the car an old school hot rod look. The problem, however, was that no Baja sized Beetle bodies are available anymore with the correct dimensions to fit the long Baja chassis configuration. I was left with few choices. The only alternative seemed to be the German FG brand Beetle body.
This presented some real fitment issues because the body was designed for a completely different type of vehicle. I wanted the look to be as realistic as possible, and for sake of uniformity, that left me aiming for the same body mount locations.
Most of our cars get some variation our popular Red Arrow USA tubular roll cage. The Beetles were no exception. The cage really paved the way for the proper fitment of the bodies to achieve the sleek look.
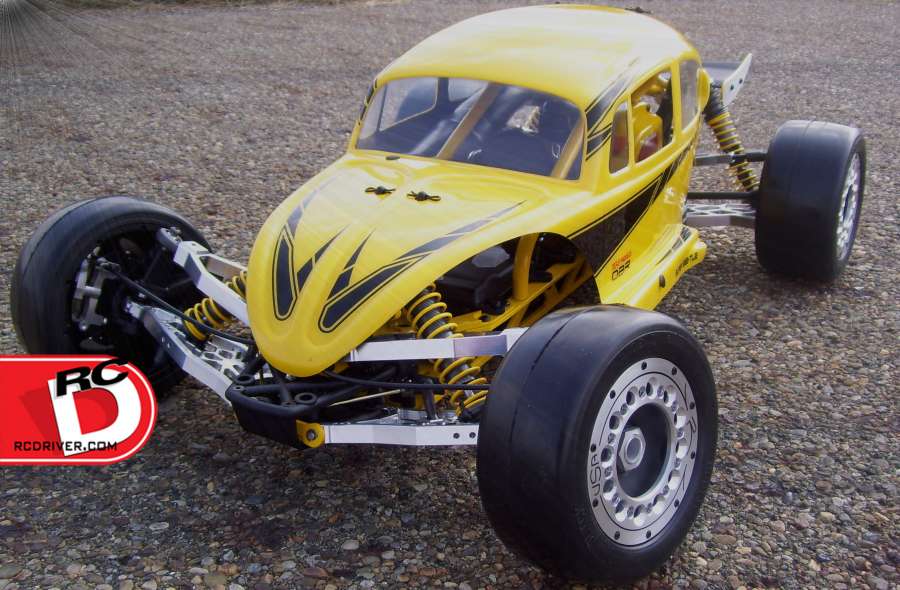
For Jim’s car, I set out with the goal of achieving the Hemi appearance, utilizing the yellow, flat black, and brushed alloy highlights. Typically, the first thing on the schedule for these builds is a complete “mock up” of the car. This gives me an exact list and plan of parts that will need to be fabricated to complete the “skeleton” of the car. I began by fabbing the cage and front shock tower to accommodate the body and the low stance I was looking for. This does require some re-engineering of some of the front suspension geometry.
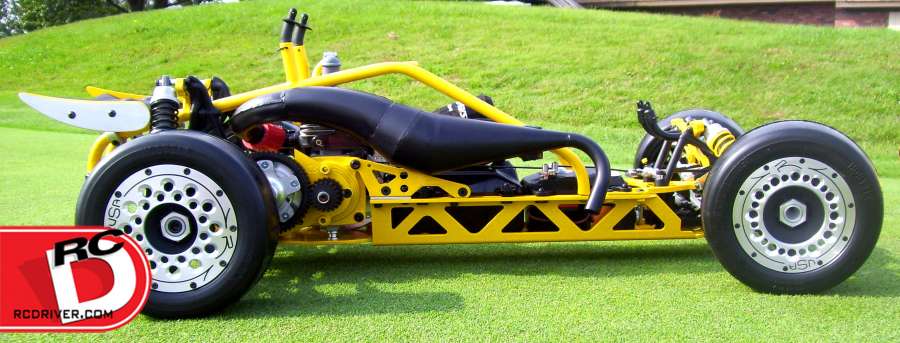
Next, I ordered the differential carrier and clutch assembly I use on most of my builds, Turtle Racing’s Quick Diff and the sleek V2 Clutch system. These are durable and classy pieces that handle the hi torque that will propel the Beetle. I ordered a list of other important parts I would need and, of course, an HPI Baja 5B buggy SS kit. Disc brakes were also on the list, the car would be fast, and the ability to set correct brake bias would be important to stop this car on a dime.
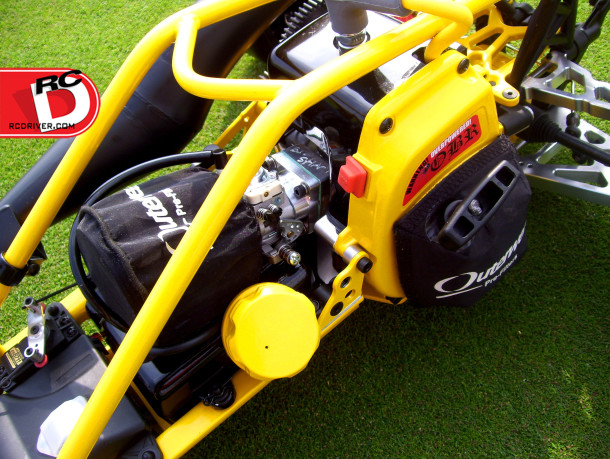
Engine choice is never a tough decision for me. O’Neill Brothers Racing is at the forefront in innovation of scale racing engines. I have had a long relationship with Sean at OBR, and after a quick phone call, I had a 8.2HP OBR 30.5 Reed Case engine on its way to my doorstep. While I was making arrangements for the engine, I had Sean include an OBR 2 speed transmission kit, one of the most durable 2 speeds on the market. I also picked up a Victory Sise Unsilenced header pipe and had it black ceramic coated.
When all my fabrication and gathering was complete I delivered a big box of parts to my powder coater, BJ Meyer of Meyer coatings. BJ is an artist who has done work for some very well-known clients. The time to work on the paint scheme was now staring me dead in the eyes, a task that is always a bit scary, a paint scheme can make or break the looks of even the best built vehicle.
Jims directive was “Detonator Yellow”, a difficult color to work with. This yellow changes hues in different lighting, even the paint chips at the body shop were little help. Add the complication of yellow’s tendency to change color under lexan. I had BJ order a Prismatic yellow powder that I was confident would be a match for the body and spent a good day nailing down a mix of paint color that would look correct under the lexan.
For the graphic scheme, I looked at both old and new Chrysler/Dodge Hemi car graphics, and I developed a graphics scheme that had a nasty “Bee” look similar to the famous Dodge “Super Bee” cars. I loved the red “HEMI” logo on the side of Jim’s car, so I added a red “30.5 Reed OBR” logo to the side of the Beetle. I topped it all off with a “Super Bee-tle” logo for the paint job.
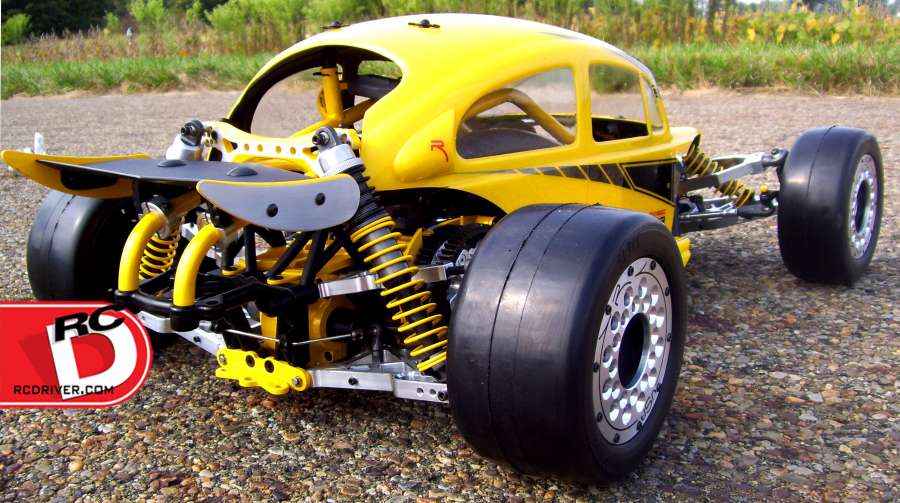
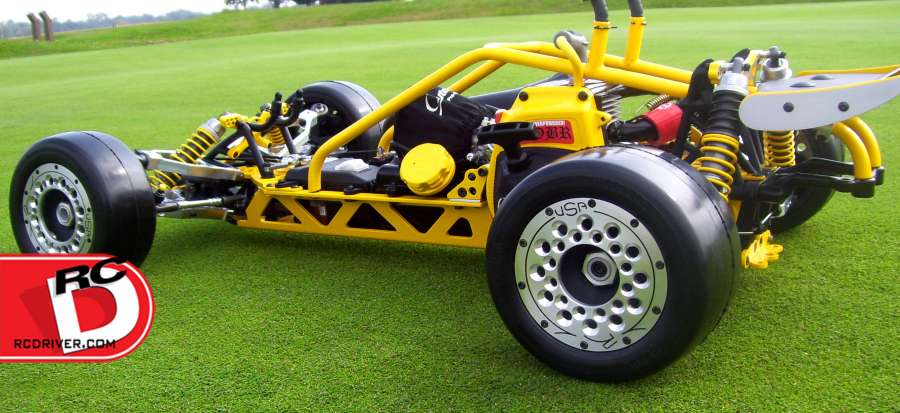
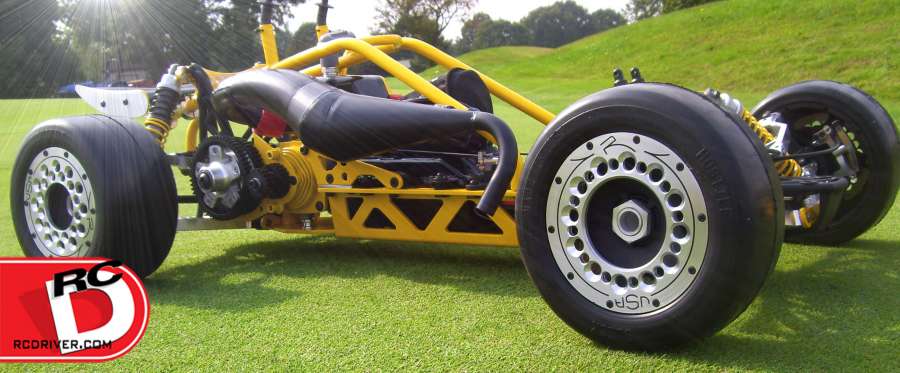
With all parts i hand I carefully fitted and assembled the car from the ground up. To add to the sleek look of the Beetle, I added our new Red Arrow “Ellipse” functional beadlockers. I also added one of Red Arrow’s special edition “F22” rear wings.
Once the build was complete, i set all the suspension geometries to make sure the car was stable and secure to handle the OBR Reed engine. I carefully boxed up the car, a little sad to see it leave. Jim was thrilled with his new “Bee”. A thrilled customed always makes the hard work and risk seem worth it. Jim happily announced that he will be ordering another build after Christmas. I can’t wait, another build for Jim will be a great Christmas present for me.
Super sick where did you get the beadlocks i seen some similar at detroit performance but the rear beadlocks in your pictires fill tge rear wheels better
 RC Driver The Best In RC Car & Truck News, Reviews & Video


Super sick where did you get the beadlocks i seen some similar at detroit performance but the rear beadlocks in your pictires fill tge rear wheels better