 RC Driver The Best In RC Car & Truck News, Reviews & Video


Recently I was hanging out with my friends, racing 1/10-scale 2WD buggies at the local indoor clay track. As you may know, buggies are an open wheel class where you avoid contact with the other cars. In between races we were watching the 4WD short course trucks run. These trucks were really too much for the tight indoor track, but these guys were really thrashing away, slamming into the walls, the pipes, and each other. They were coming out of the straightaway and slamming into the wall so hard we could feel the concrete vibrating under our feet. My friend Adam says, “It’s carnage out there. You don’t want no part of that.” Rob and I both looked at each other and said, “I think we do. That looks like fun!” So Rob went out and picked up a Slash 4×4 Platinum Edition, because we all know a Traxxas can take a beating. I, on the other hand, decided to stick with my Hyper10. It has never broken, ever. So I was sure it would take a beating. It also is light and nimble, so I fi gure it should do well on the tight track. However, I was a bit jealous of Rob’s ride, so now it’s time for a new lid to freshen up my look!
By David Harrington
Parma
• Parma
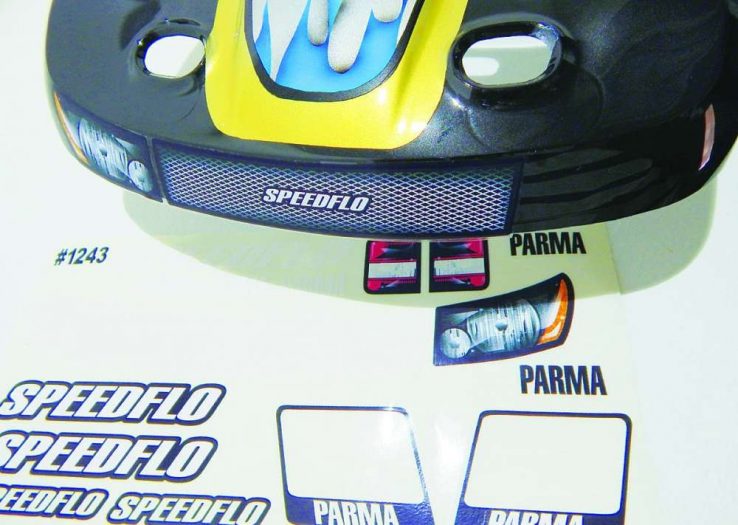
• Speedfl o 2.0 body lightweight 1243L
• Fast Splash precut vinyl mask 10842
• 6mm tape 40279
• 10mm tape 40280
• FasPearl Charcoal 40054
• FasBlack 40001
• FasPearl Silver 40050
• FasKrome 40300
• FasPearl Gold 40051
• FasBlue 40004
• FasFluorescent Blue 40106
• FasWhite 40000
SKILL LEVEL: INTERMEDIATE
On this one the masking is super basic, allowing you to focus on developing your airbrushing skills. You could rattle can this scheme, but you really need to have an airbrush to make the droplet effect really work. The airbrush techniques are more advanced, and admittedly my execution leaves a bit to be desired. Do as I say, not as I do, and with a bit of practice you should get some pro level results.
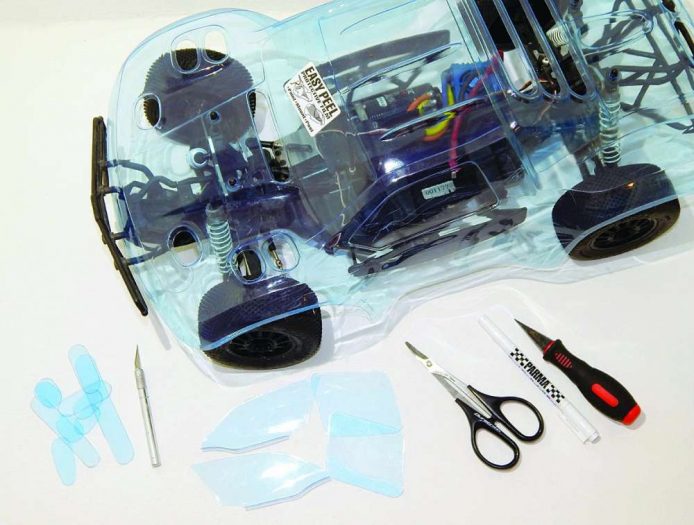 1 I wanted to take this to the track, so I needed a light weight race body. I went with Parma’s Speedflo 2.0 body, because it is a great handling body. I started by trimming it with my Lexan scissors. I love this thin race Lexan because it is super easy to cut. But be careful, sometimes sharp Lexan scissors will zip through it like wrapping paper. To cut out the vent holes, I scored the edges with my hobby knife and then pushed back and forth until it popped out. There is really no need to go too deep with the knife on this body, so be careful with the pressure. Don’t forget to cut out the number plates and fins. It’s easy to lose them in the scraps. Once it was all trimmed I sat it on my chassis. I had to trim about 1/8 inch off the nose, and open up the back area to clear the bumper. Once it was sitting the way I liked, I mark the tops of the body post with a permanent marker. Then I opened up the holes with a body reamer.
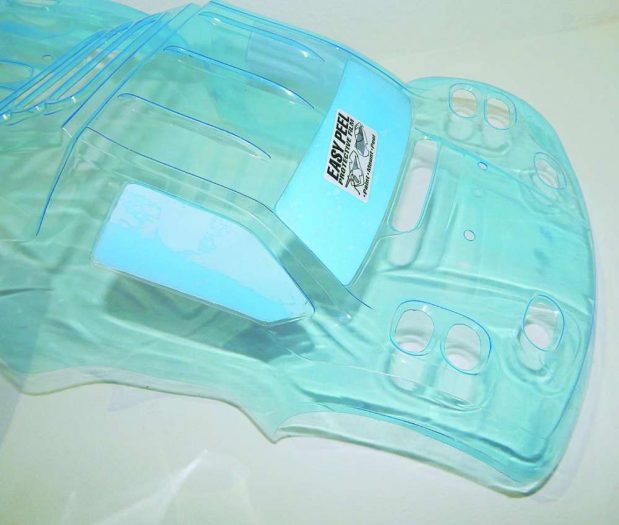 2 After trimming the body I wash it out with dish soap and warm water to remove any residual oils. Then I start masking by applying the included window mask. To apply these I like to tack one corner into place and hold it there with my thumbnail while I pull the mask along one of the long edges usually the bottom to line it up. Letting the mask hang free from the body, I start working my way back and forth to rub it down. Then I go over it with the back of my fingernail. Some small bubbles are fine, but make sure you push out all the ones along the edge.
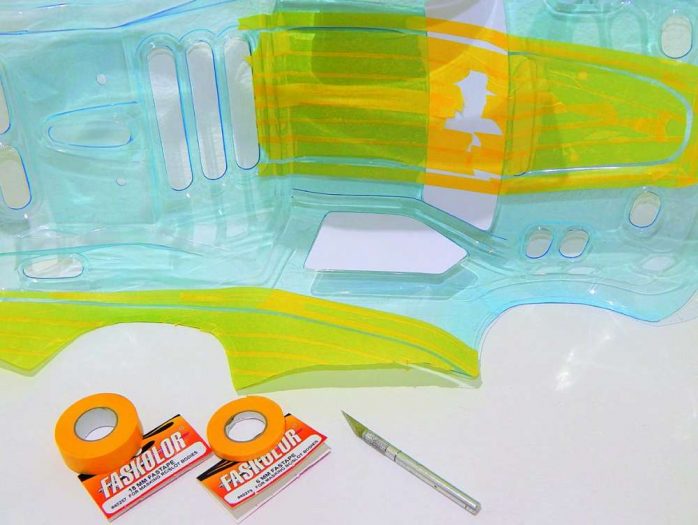 3 After studying some short course schemes looking for a common theme, I came to the conclusion that they all have very basic graphics and it’s more about the logos. So I decided the easiest way to mask a basic scheme is with masking tape. I started with some FasKolor 6mm tape. The tape is just flexible enough that you can pull some mild curves into it. I started at the at tip of the rear and pulled a gradual curve to the bottom of the front wheel well. Then, about and inch forward, I pulled another line just above that, to widen the line. I filled in the inside with more tape. Then I took 10 mm tape, and leaving a small line between the mask, I pulled it in a curve following the bottom line. I then finished by filling the remainder of the bottom with tape. I did the same for the hood, but I had to cut the corners with my hobby knife.
 4 I’m not quite done masking, but first I have to lay the background color. This is a little different than how I normally do things, but it makes sense when using tape rather than liquid mask. I just lay two nice even coats of the FasPearl Charcoal. Normally, I would back the pearl color with FasKrome, but that will not be necessary since my next color will be silver.
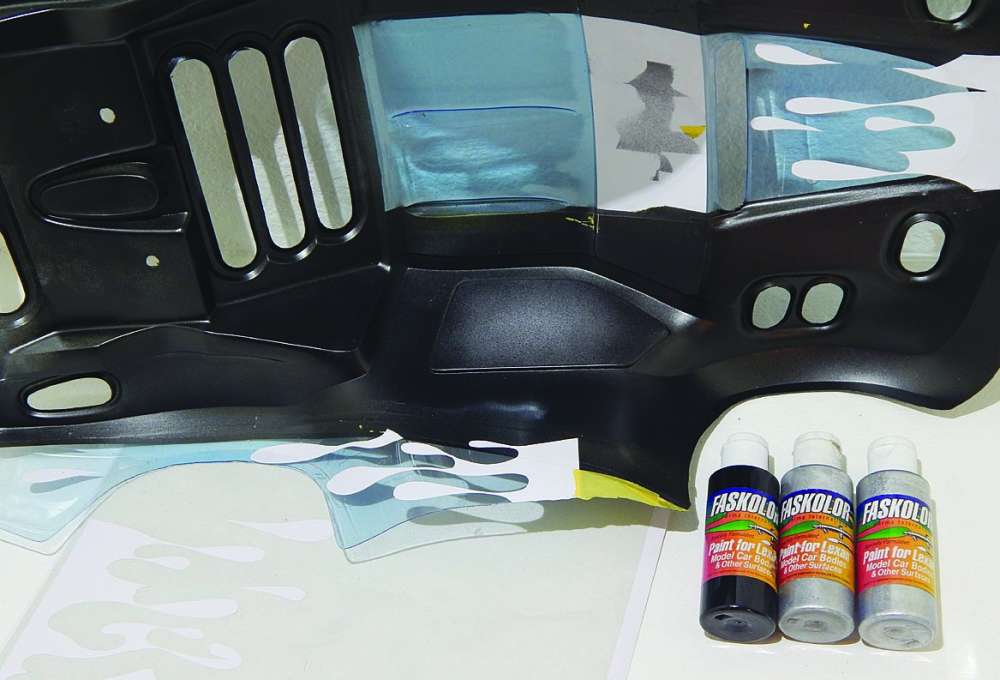 5 After allowing the paint to dry, I removed the tape from the lower areas and the center of the hood. I wanted to spice it up with a splash of color, so I used these precut drip graphics from Parma. First, you’ll need to weed out the excess material from the mask. I’m not a fan of an outline around a drip, but I realized you can leave the outline in place if you want it to look like a thicker substance like paint blobs or you can remove the outline if you want it to look thinner, like water. I wanted a water effect, so I removed the outline. Last month I experimented with using masking tape as lift off tape with mixed results. Since this is a more basic graphic than flames, I feel the included lift off tape works best for this body. Because of the curve I was following, I had to get a little creative with my placement. Once the blokes were in place I drop shadowed the under sides with some FasBlack. I just start at the tip, inside the graphic. I the pull it out toward the edge, and do a quick line toward the thin part. Then I fill it with FasPearl Silver, which will need to be backed with FasKrome, so I hit the Charcoal while I’m at it.
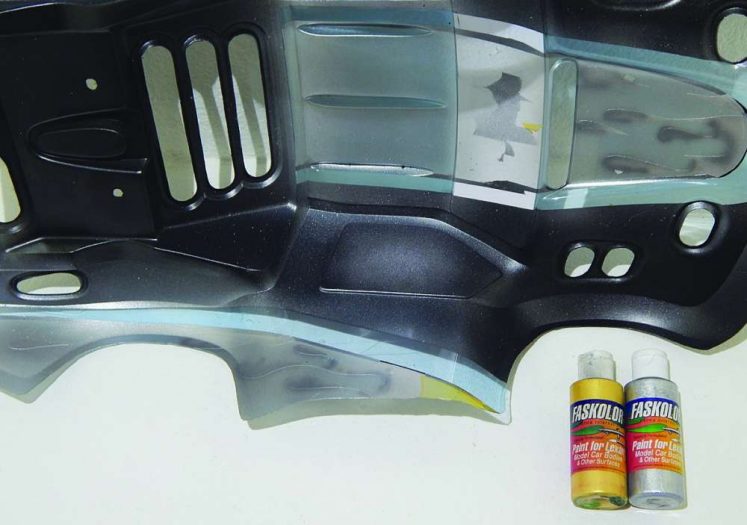 6 This will be a quick step. After allowing the previous coats at least 15 minutes to dry, I just remove the masking tape from the stripe and fill it with two even coats of FasPearl Gold. Of course that will need to be backed with the FasKrome as well.
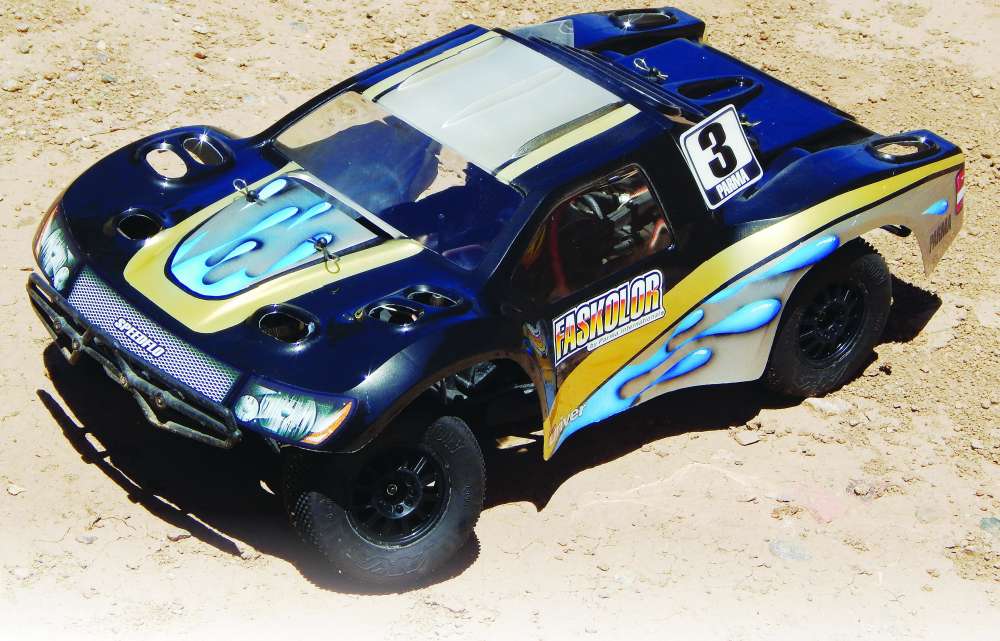
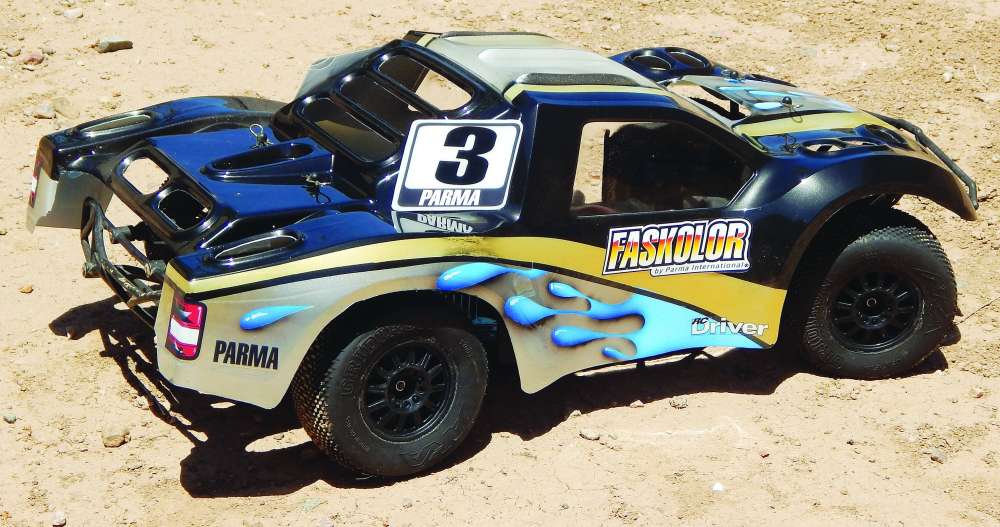
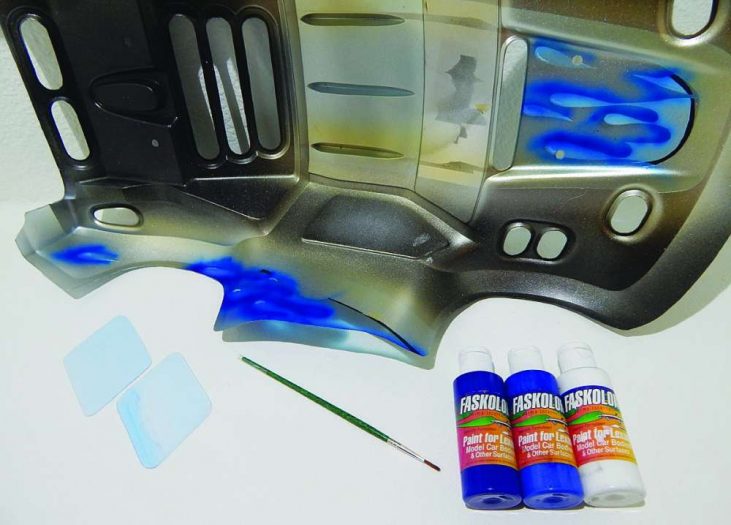 7 Now I can remove the mask from the splash. I wanted mine to look like water so I went with a blue theme. To help give the splash some dimension and the illusion of a light reflecting the glossy surface, I took a fine paint brush, dipped it in some FasWhite, and pulled some thin lines across the top of each blob. I push hard at first and then pull away to create a taper. Then to give the blobs some depth, I shade around the edges with FasBlue. Since the line of sparkle and drop shadow insinuates the light coming from above, I put heavy emphasis on the bottom with the darker shade of blue. I then fill it in with a couple of coats of FasFluorescent Blue. The fluorescent color will need to be backed with white, so I fill the entire inside of the body with FasWhite for a nice uniform look. I also spray the number plates in white.
 8 You can now breathe a sigh of relief because the painting is done! All that’s left is the fin- ishing details. After allowing the paint a good amount of time to dry, I remove the window mask. Then I remove the overspray film. Apply the included decals, which is made easy, since they are already cut out for you. There is a piece of double stick tape in the back I use to attach the number plates. I opted to leave the fins off. If you should decide to mount them, just make two small holes on the bottom. Then hold them in place before marking the holes. Then attach them with the included nylon. Now we’re done and ready to race!
WRAP UP
With this one I wanted to take a basic short course style scheme and spice it up a bit with some precut mask. I feel I pulled this off. I did, however, have some trouble with the drop shadows. I was using some old paint, and the passenger’s side came out good, but then it started to sputter on the driver’s side. I should have stopped to clean out my airbrush right then, but I was in a hurry and decided to push through to the hood, where I met with disaster when paint suddenly came spurting out. The lesson there is, don’t rush it! Also, fresh paints and a clean airbrush really help. Take your time and practice a little before you start on the body, and you should get results as good as or better than mine!
LINK
Parma parmapse.com, (440) 237-8650.


