


RC4WD is a favorite among scale RC enthusiast and I am no different. Their bodies and chassis offer the ultimate in scale realism and performance. With the right angles, it is nearly impossible to tell an RC from the real thing. The RC4WD Gelande II Cruiser is no different, and if anything, offers a higher level a realism to their offerings. It was truly only a matter of time before I would succumb to the urge to build my own.
PROJECT DETAILS
MODEL USED: RC4WD
PART NUMBER: Z-K0051
HOW MUCH: $429.99
BUILD TYPE: Kit
PROS & CONS
+ Awesome scale appearance
+ Excellent detail in the body
+ 4-link suspension
+ Beadlock wheels
+ Lots of metal parts
+ Proven drivetrain
– All lenses for the body come clear
– Length of steering tie rod was a little long
– Steering servo mount requires modification to the mount or servo.
Authors Thoughts:
The Gelande II chassis is tried-and-true as it has been on the market for many years and offers proven performance and reliability. Stock, the chassis comes with an assortment of cool items including the R3 single speed transmission, center mount transfer case, locked differentials, stamped steel beadlock wheels, and dual-rate oil-filled shocks. The instructions are easy to follow and the chassis is a piece of scale automotive art. Add to that a killer cruiser hardbody, a few accessories, and you are set to have an outdoor adventure. The rigs looks as good on the street as it does on the trail!
THE BUILD:
As the rig is unboxed, there are two separate assembly areas, the chassis and the body. With each step in the build, it is important to pay attention to the pictures and the directions that are given. Take care not to force parts where they do not fit and make sure not to cross thread the hardware. Using a nice set of tools will help to ensure the entire build goes as smooth as possible. The chassis is built first and then you will move to the body. Once you get to the point where you are going to start building the body, I recommend you lay out all the pieces and see how they fit together so you can determine how and when you are going to apply paint. If you assemble the entire body and then try to paint it, you will not be able to get to all the small details. Additionally, if you paint everything and then assemble, you make end up removing paint to ensure everything fits the way it should. Just take your time and you will get results you are trying to achieve.
There were a few minor issues that can be addressed during assembly that aids in the ability to drive the rig once complete. The first step that I found that needed minor adjustments were the steering tire rod assembly built in step 6. When installed in step 37, there was a considerable amount of toe-out on the axle. Removing a minimal amount of material from the Z-S0401 rod ends using a rotary tool corrected the issue.
Prior to installing Z-S0791 in step 20, I prefer to grove the servo mount prior to installation. If these parts are not grooved, then the gusset found on most servos will need to be trimmed, weakening the mounting brackets on the servo. The grove only needs to be about 1.5mm wide and a few millimeters deep. This can be done with a small file, rotary tool, or milling machine.
In step 26, prior to installing the lenses, I used a red Sharpie to color lens Z-B007-11&12 red from the inside. I then used an orange Sharpie to color lens Z-B0077-3, 4, 5, 6, 7, 8, 9, & 10, also from the inside.
As you are building the chassis, it is important to use a blue thread lock to ensure all the hardware stays tight even on the roughest trails. Additionally, it is a good idea to disassemble the transmission, transfer case, and axles to ensure an adequate amount of grease has been applied to moving parts and to also apply thread lock to these parts as well. While you have the axles apart, verify the mesh between the pinion and different gear is adequate. If the gears are too loose, then it is more likely that a pinion or differential gear can strip, and if too tight, then performance suffers. To shim the pinion gear, I recommend using RC4WD axle shims, PN Z-S1559. Doing these items now will prevent failures in the field later and a considerable amount of disassembly. If you are planning on adding other scale accessories to the kit, and can afford to purchase them prior to building the kit, consider installing them as you assemble the chassis. Items like the ARB differential covers are considerably easier to add prior to mounting the axles to the chassis.
For electronics in the Cruiser I started with a Futaba R2104GF receiver and a S3305 servo and controlled the truck using my trusty Futaba 4PL radio. For the motor, a Castle Creations 1406-2280Kv sensored motor and a Mamba X ESC. As always, the Futaba equipment offered known and trusted performance. The Castle system blew me away. While the ESC is larger than most making it challenging to fit under the body while trying to keep everything hidden, the performance was well work the pain. The only modification I made to the Castle system was to lengthen the sensor wire because I was trying to keep the ESC at the back of the rig to hide it. I would recommend purchasing a longer sensor wire, but if you are impatient like me, only cut and lengthen one wire at time so you do not cross any of your sensor wires. The brushless crawler setup on 2S offers insane low speed torque and precision with awesome full trigger power!
Once the chassis is assembled, then it is time to move to the body and it is HUGE in comparison to the D90 and other 1/10 scale rigs. The Cruiser body is much closer to 1/8 or 1/9 scale and consists of tons of parts. If you add one hop up to the entire kit, I highly recommend purchasing the light kit from RC4WD. For less than $18, the light kit adds tons of reality. Taking your time to ensure each part is cut flush helps to ensure the highest quality build. Additionally, using the right glue is critical to ensure a strong bond. I started using a plastic weld, but the joints were not strong enough, so after some trial and error I ended up using Zap-a-Gap medium CA glue.
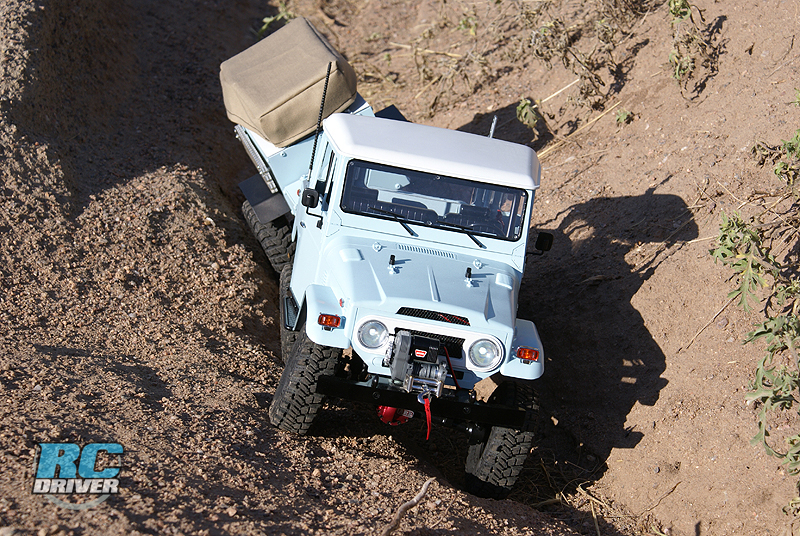
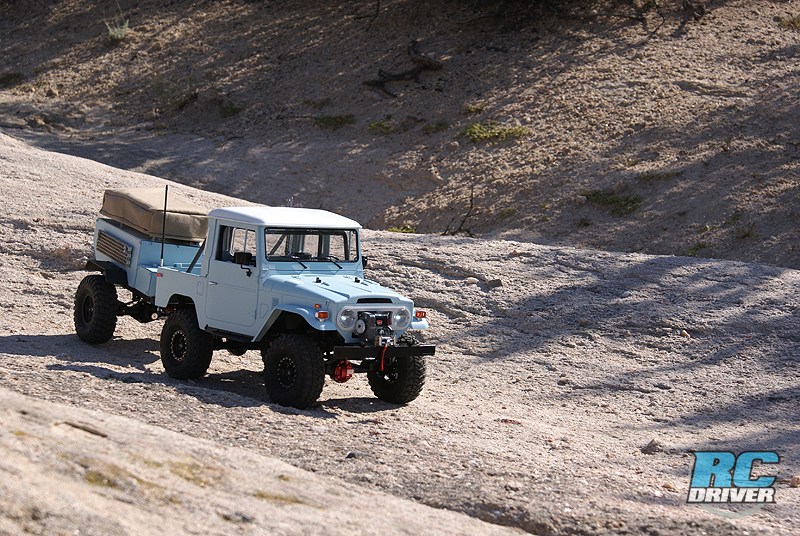
Early I decided while the stock body was awesome, I wanted to go with something a little different. I started with the RC4WD Tough Armor side sliders which required minimal trimming of the body. From there it was unclear exactly what I was going to do with the body. After much deliberation, I decided to go with a half cab FJ40 look. I carefully cut 4.25” out of the stock top and then started glued the front and rear sections back together. While the two pieces were close to perfect, it did require a bit of styrene, body putty, and an untold amount of filler primer to get a smooth roof. At this point it was obvious that the stock roll cage was not going to fit in the cab, so a custom steel roll cage was fabricated that started in the cab and protruded into the bed of the rig. I picked a Capri Blue from a list of Toyota FJ40 color codes to replicate a stock color. The rig could have been completed at this point, but it needed just a bit more.
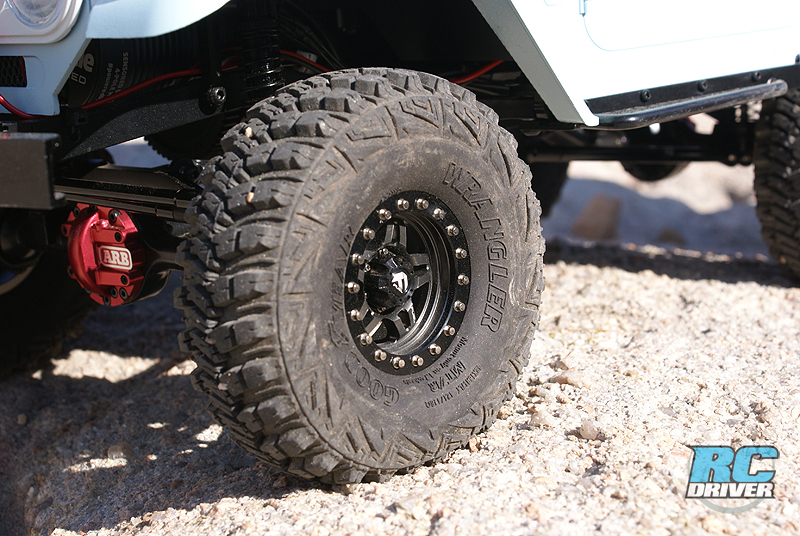
The stock looks were good, but it needed a little something to make it pop. I started with the RC4WD Fuel Offroad Anza 1.7” beadlock wheels wrapped with a set of 1.7” Goodyear Wrangler MT/R scale tires. The outside diameter and overall width was as close to perfect as one could get. The Fuel wheels are an absolute work of art. The scale hardware is amazing and when wrapped with such a great scale tire, it is nearly impossible to tell that they are not true 1:1 scale products. The Goodyear Wrangler MT/R offers more than just crazy good looks, but they also offer performance to match. The stock foams were able to handle the weight of the rig with only minimal sidewall bulging of the tire. The rubber compound is fairly soft resulting in the ability to climb the steepest slopes.
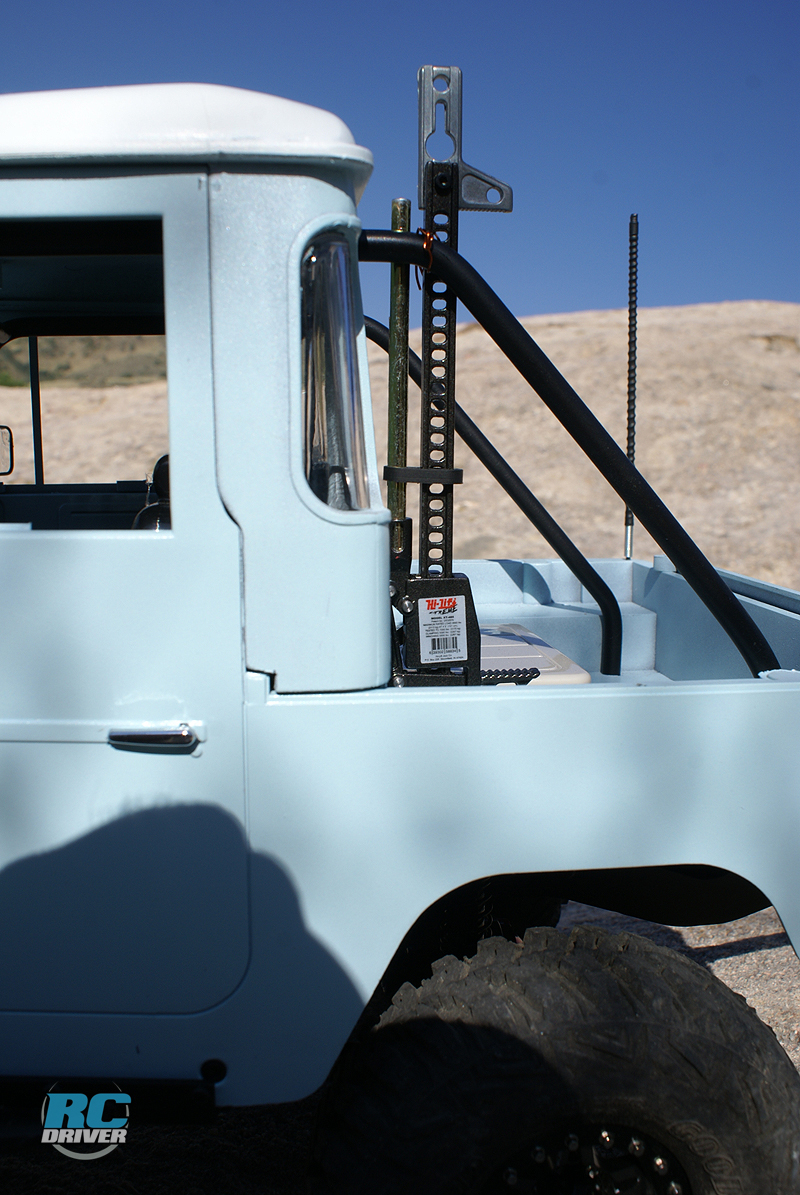
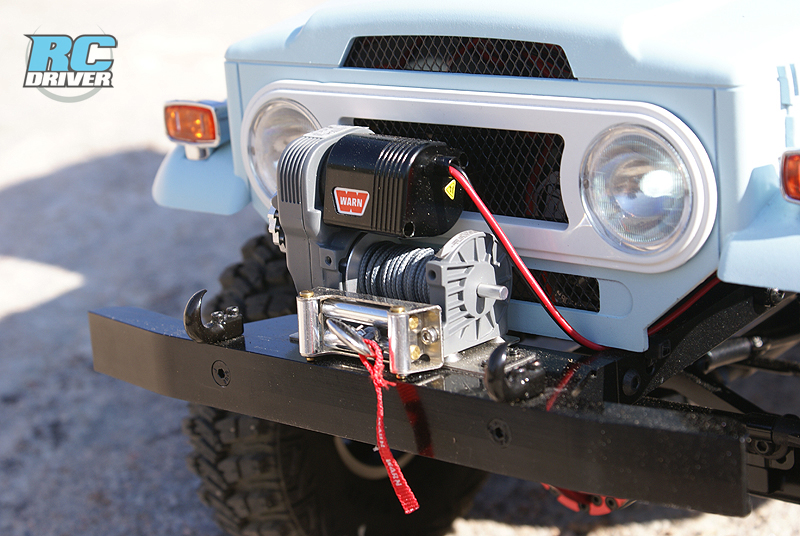
On the front bumper I mounted a period correct Warn 8274 winch with a wireless controller. I have had a lot of winches over the years, but this winch knocks it clean out of the park in both scale realism and performance. I think I wasted close to an hour just playing with the winch the first time I pulled it out of the box. After that I would have my boy drive his crawler into spots that would cause him to get stuck so I could winch him out. I added the Hi-Lift Extreme Jack to the bed of the truck to ensure I could jack it up incase I got a flat. It’s hard to imagine that for less than $30, I can buy a functioning Hi-Lift jack. To finalize the truck I added the ARB front and rear differential covers.
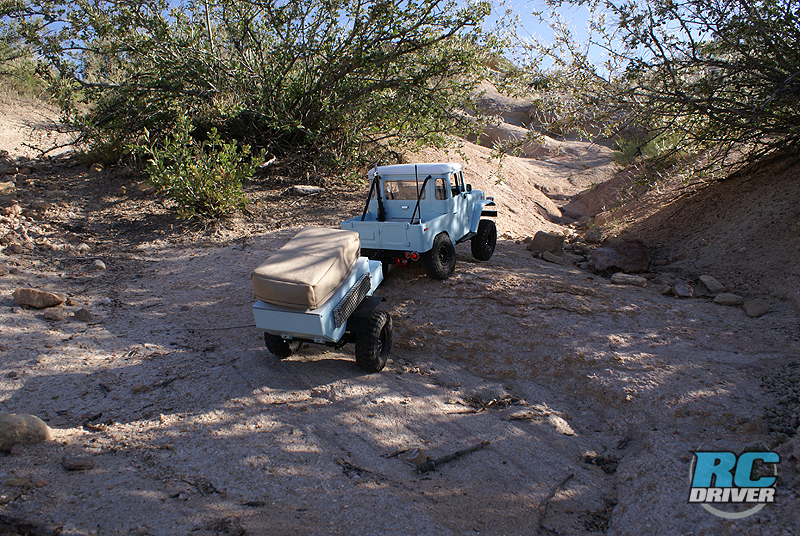
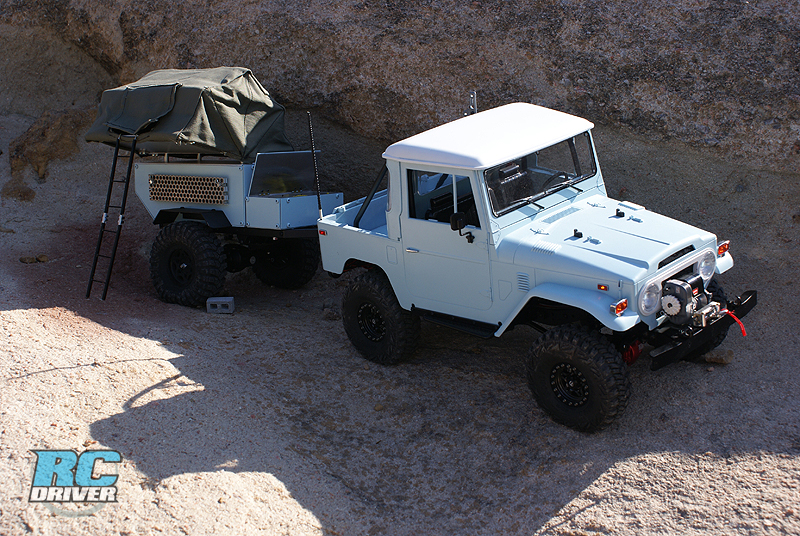
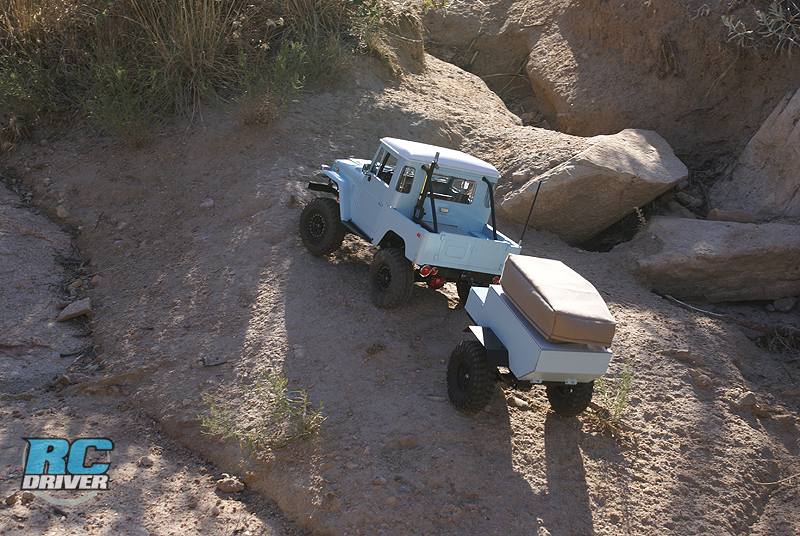
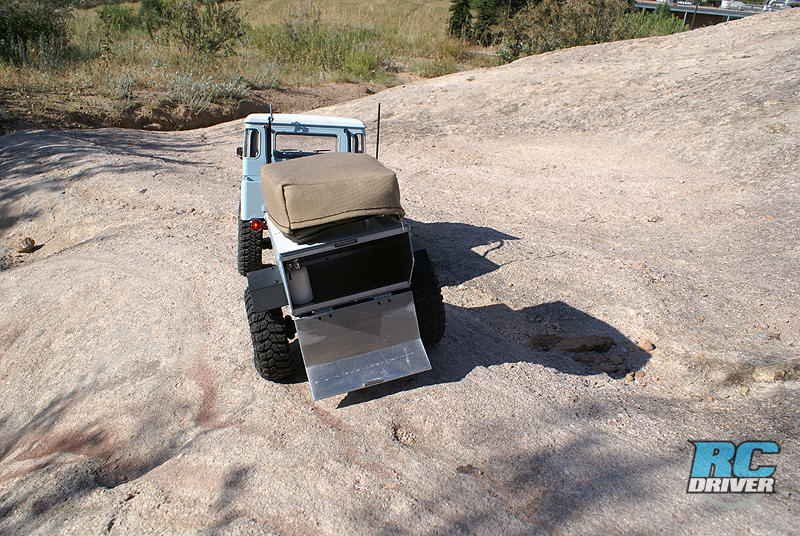
At this point the truck was done and ready to hit the trail, but one night an add came up on Craigslist for a full-size FJ40 expedition trailer and I knew I had to replicate the trailer for this build. The guy who built the trailer had a 60-page post on one of the big 4×4 forums and included all the important dimensions. At a swap meet a few months prior I had also picked up a set of RC4WD T-Rex 60 plastic axle housings and a set of leaf springs and mount for the same axles. The axles needed a home and I needed a trailer. Using 0.08” aluminum sheet I cut the necessary pieces to build the smaller front box and larger rear box. Some small hinges from my local hardware store were mounted to allow the tops to open. All the parts are drilled and tapped using 3mm hardware. The tent was fabricated using spare Traxxas ball ends, some 1/8” steel rod, and some material from the fabric store. It may be more dangerous using a sewing machine then a milling machine, but after a few nights the tent and cover where completed.
ITEMS NEEDED
– Motor: Castle Creations 1406-2280Kv Brushless Sensored Motor
– Speed Controller: Castle Creations Mamba X
– Radio and Receiver: Futaba 4PL with R2104GF Reciever
– Steering Servo: Futaba S3305
– Servo horn: Dubro Super-Strong Servo Horn
– Glue: Zap-A-Gap Medium CA
– Lots of blue thread lock
ADDITIONAL ITEMS USED: Hitec X1 MF Charger, ProTek RC 2s LiPo battery.
HOP-UPS:
– Z-E0071 LED Basic Lighting System for Cruiser Body Set <= Must Have!!
– Z-S0826 Scale Steel Punisher Shaft V3
– Z-S1295 RC4WD ARB Diff Cover for the Yota II Axle
– Z-W0218 RC4WD Fuel Offroad Anza 1.7” Beadlock Wheels
– Z-T0157 RC4WD Goodyear Wrangler MT/R 1.7” Scale Tires
– Z-E0075 RC4WD Warn 8274 Winch
– Z-S1092 RC4WD Warn Wireless Winch Controller
– Z-S1726 RC4WD Tough Armor Side Sliders for G2 Cruiser
– Z-S1774 RC4WD Hi-Lift Extreme Jack
– Z-S1559 RC4WD 5mmx9mmx0.3mm Axle shims
TOOLS & ACCESSORIES INCLUDED
+ 4-way wrench
+ Flush cuts
+ Modeling knife
+ Files
+ Hex drivers
+ Small Phillips screwdrivers
+ Pliers
+ 3mm x 0.5 Tap
ON THE TRAIL
The Gelande II chassis is well suited for class 0 and class 1 type crawling. The suspension is smooth and well designed. The first thing that I noticed is with the size of the body, the rig was a little top heavy. It did not help that I had added a steel roll cage to the beast. The threaded shocks allow me to make some quick adjustments and tune the suspension to my driving style. Once I got a feel for the rig, I able to push it to the limits and make it up any line I picked.
The stock tires are not overly aggressive, but the upgraded Goodyear tires provided ample traction on a wide variety of different surfaces from loose dirt to the red rocks of Colorado. I had a concern that the tire and foam combination might have been too soft to support the weight of the rig on the trial, but it handled beautifully. There was the perfect amount of sidewall deflection and traction.
The best aspects of the Goodyear tires were also their downfall. The amount of traction I had on the red rocks of Colorado was placing a lot of force on the S3305 servo. Typically for 1/10th scale rigs with 1.9” tires or smaller, the S3305 provides good power at a completive price. However, with the weight, size, and traction I have with the cruiser, I had to upgrade to a S9372SV which provided more than double the torque. I would recommend utilizing a servo with at least 20kg*cm of torque.

The Castle Creations sensored crawler setup is beautiful. Running a 35T brushed motor in a gelande II chassis would be similar to driving with a fresh stock motor. It provides combination of good torque and horsepower. Upgrading to the Castle Creations 2280Kv motor and Mamba X ESC is like driving with an angry, highly modified LS engine. There is more than plenty of low end grunt, to the point that you may be able to climb straight up a wall, while providing enough wheelspin to hop over just about anything. Additionally, I love using the third channel to adjust key features of the ESC. For crawlers, I use the third channel to adjust the amount of drag brake that I have on the trails. If you are on the rocks, I dial up the drag brake to allow me to stick on the rig on any slope. As I get onto the flats, I tune down the drag brake so I do not do front wheelies on high traction surfaces as I come to a stop. If you have not tried a Mamba X, I am not sure what you are waiting on, go get one!!
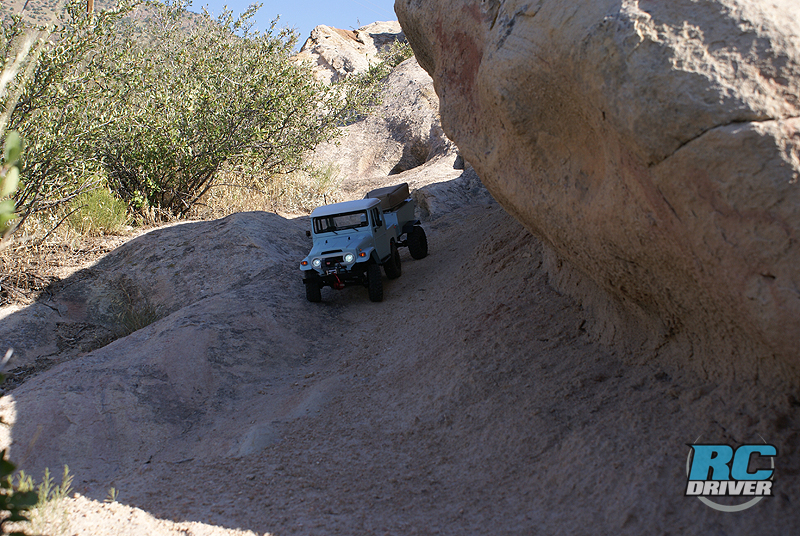
The rig was beautiful on the trails. From a few feet away, the cruiser looked and performed like a real rig. The period correct blue and white paint schemed screamed retro. I was fortunate to have quite a few mods on the rig, but if you do build a cruiser, the light kit is a must. The winch is insanely awesome, as well as the working jack, but if you get the rig out at dawn or dusk, the lights just complete the package.
PROJECT SPECS
DIMENSIONS
Length: 18.35” (466mm)
Width: 8.5” (215mm)
Height: 10.6” (270mm)
Ground Clearance: 2.3” (58mm)
Wheelbase: 10.83” (275mm)
Weight: 6.57lbs (2.98kg) [mine without battery 8.365lbs (3.79kg)]
Body, wheels and tires
Body: Hard plastic, requiring assembly and paint.
Wheels: Fuel Offroad Anza 1.7” Beadlock Wheels
Wheel adapter type: 12mm hex
Tires: Goodyear Wrangler MT/R 1.7” Scale Tires
Suspension
Type: 3-Linked front axle and 4-linked rear axle
Ride height: Threaded Aluminum dual rate shocks
Steering
Type: Direct connect to servo
Chassis
Type: Ladder Style
Material: Aluminum
Thickness: 0.25”
Drivetrain
Type: 4WD
Transmission: 1-Speed center-mounted
Transfer Case: 1-Speed Hardened-Gear
Differential: Lockers
Clutch Type: Adjustable slipper
Gear ratio: 31.9:1 with stock pinion gear
Bearings: Full ball bearings

THE LAST WORD
I could not wait for the opportunity to build a Gelande II chassis. RC4WD is great at manufacturing scale RC goodness and this kit does not disappoint. Stock the Gelande II comes with a ton of great parts and when you start to look at the aftermarket accessories, you will find an entire world of awesome accessories for this chassis. Out of the box, the rig is very capable and can tackle the hardest obstacles.
When you add the Cruiser body to the build you will soon find that it’s looks are second to none. The hard-plastic body is filled with details that are only found as you are painting and making the rig your own. Building this kit is similar to putting together a plastic model car. Taking your time with paint and other details will yield a rig, that when on the trail is hard to distinguisher from the real thing.
I am highly impressed with both the look and performance of the Gelande II Cruiser kit. It is at home on the trails. I am not sure where I go next, maybe a long wheelbase Gelande II D110 or something else, but I am sure my next scale rig will be coming from RC4WD.
WORDS: Nate Myers
PHOTOS: Nate Myers
LINKS
RC4WD, rc4wd.com
Futaba, futabarc.com
Castle Creations, castlecreations.com
DU-BRO Products, dubro.com


