 RC Driver The Best In RC Car & Truck News, Reviews & Video


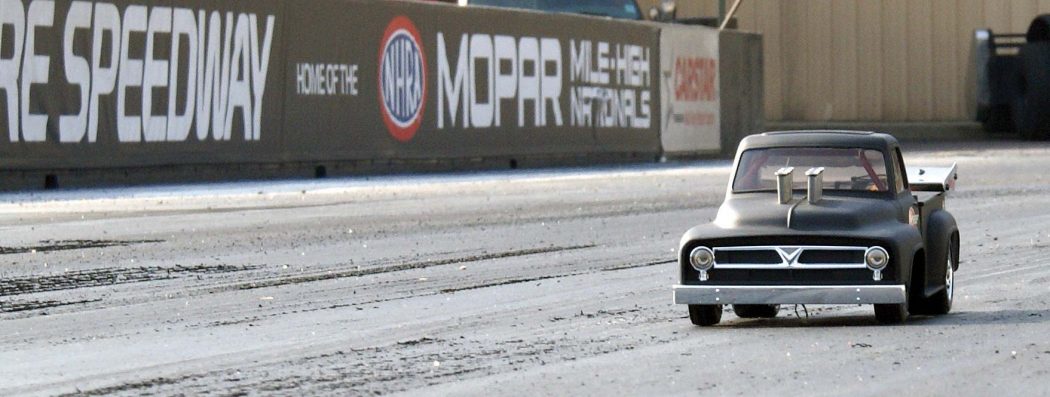
Drag racing and American muscle!
By Nate Myers
 There is a fine line between insanity and genius, and while I don’t claim to be either, once in a while I get a crazy idea that haunts me for years. I wanted to build a vehicle that could go zero to sixty fast enough to blow my mind while looking like it is flying when standing still. What really changed the direction was when I received a box from RCStacks.com. In the box was a set of their Hilborn style velocity stacks. Right then I knew that I was about to build something with classic styling and modern performance.
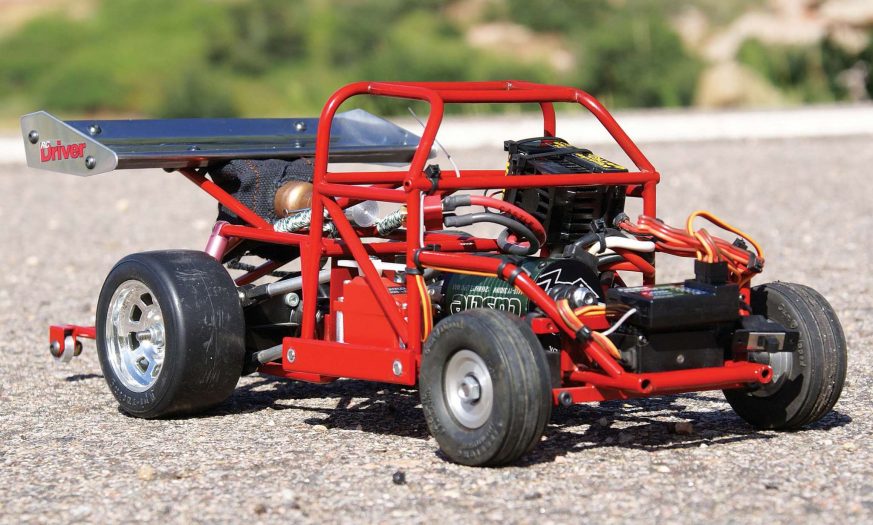
THE DRAGSTER CHASSIS
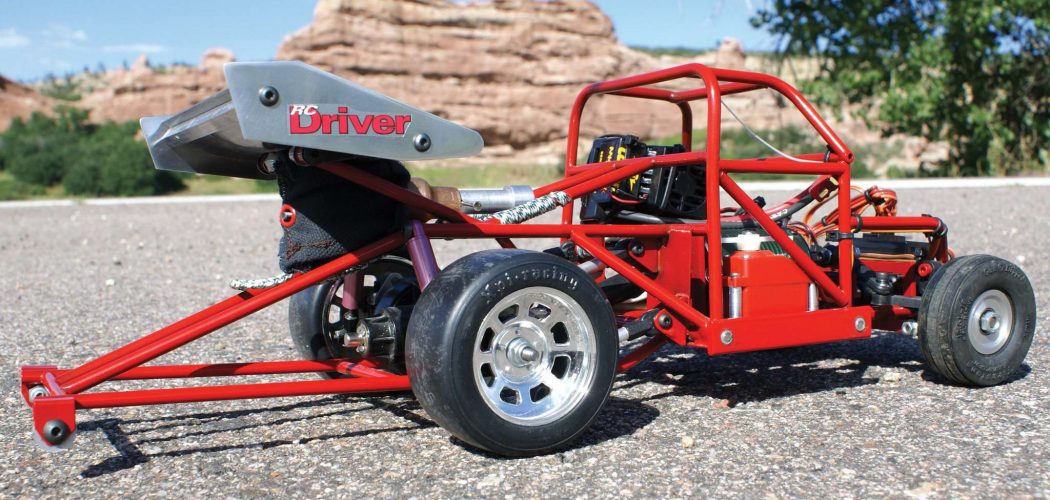
From the beginning I knew there would be two options for the chassis. Option one was to take an on-road chassis, such as the Tamiya M-06 chassis, and modify it to match the body. This would provide somewhat of a restomod look and feel with an old body on an updated chassis. Option two was a totally custom, one off race style tube frame. Needless to say that while option one appeared easier, Option two provided a much better look and stance for a truck hot rod. The chassis began life in AutoCAD as a two-dimensional drawing and then progressed into the garage where brake line met silver solder. I knew what the basic design of the chassis should look like, so I started making jigs to hold the different pieces of the chassis while I soldered the parts together. Once the main cab section was completed, I progressed forward to the nose of the truck. Finally I worked from the cab to the rear, adding the rear suspension, race wing, and wheelie bar.
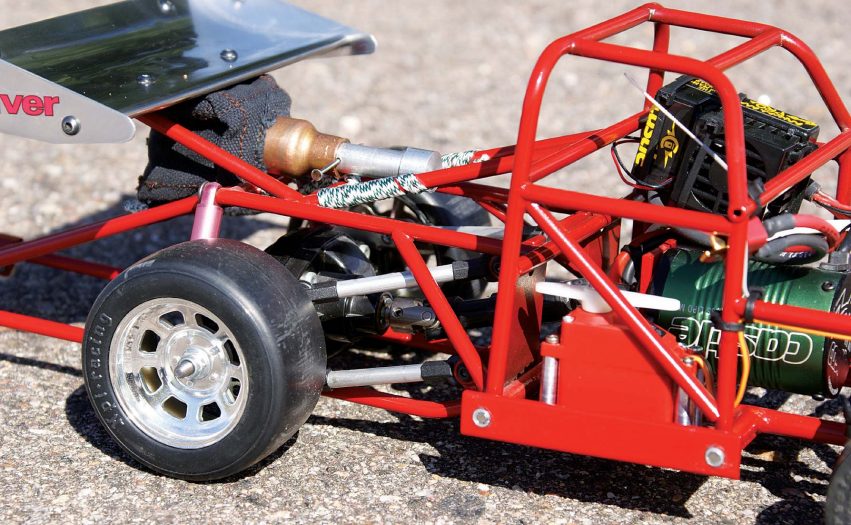
SUSPENSION
On huge challenge on this truck was the size of the body. The Tamiya Midnight Pumpkin is maybe 1/12-scale and quite small even when compared to a 1/10 body. This makes it challenging to fit all the suspension, steering, electronics, and driveline components into the chassis. In addition, since I was building a tube chassis, the suspension and steering were incorporated into one big package. The front suspension is a typical independent suspension using A-arms and Traxxas caster blocks to support the front axles. For the most part there is very limited front suspension travel as a result of the cramped front quarters. The rear utilizes a 4-link suspension setup connected to a Tamiya semi rear axle. When designing the rear geometry, I tried to take into account anti-squat calculations to assist where the rubber meets the road (literally)! After reading several technical articles and books pertaining to suspension geometry, I finally added the mounting locations to the chassis and axle. Finally I used Tamiya tractor trailer shocks to provide dampening.
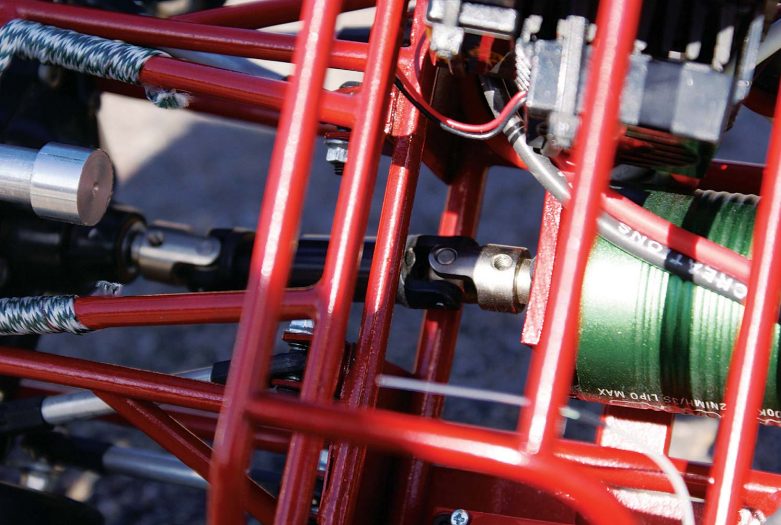
 DRIVELINE
The overall driveline could not be much simpler. The center mounted Castle 1410-3800Kv motor is tied directly to a Tamiya semi rear axle using a standard 5mm driveshaft. The rear axle has a gear ratio of 2.6:1. This did not leave a lot of room for adjustments, but my thoughts were if you have a good battery and a killer motor, it should not be an issue to motivate the truck down the track. indicated that under ideal situations, the truck should be able to approach a top speed of 90 miles per hour.
ELECTRONICS
A Mamba Max Pro by Castle Creations provided power to the 4-pole, 3800Kv motor. A Flightpower 2s 2,100 mAh 40C LiPo provided power for the system. A JR Z590M servo provided steering while a Multiplex micro MCV2 servo was mounted to deploy the parachute. Finally, a trusted Futaba R2104GS receiver completed the system. The electronics were picked based on simplicity and what was on hand.
FINISHING TOUCHES
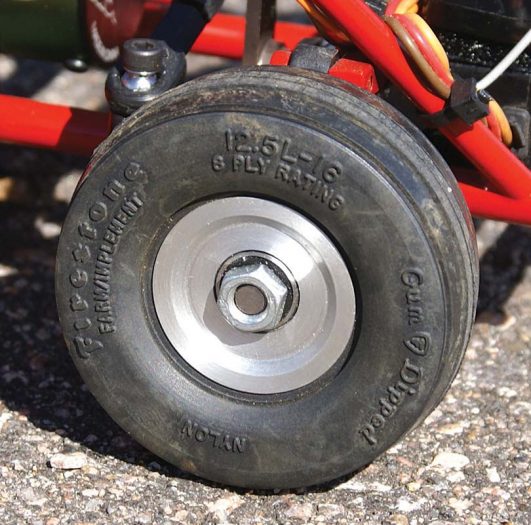
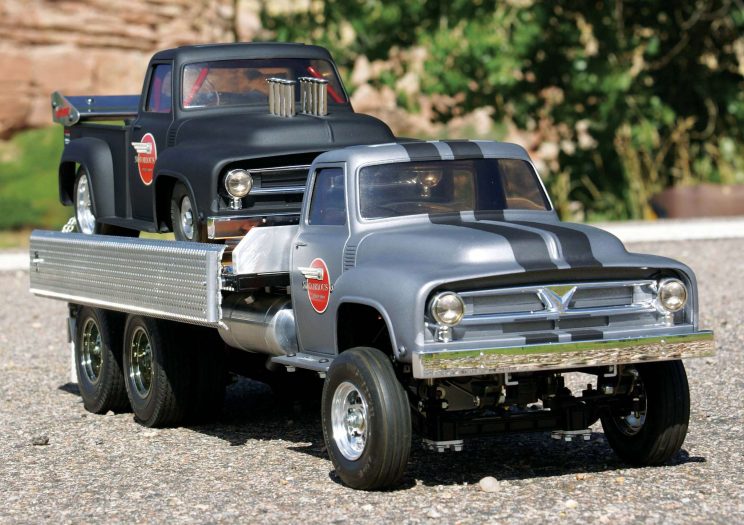
The chassis was powder coated red and the Tamiya midnight pumpkin body was painted a flat black and the velocity stacks were mounted on the hood. The bed of the truck was cut out to accept a large custom aluminum wing to increase down force at speed. The body is mounted to the frame using neodymium magnets in four locations. This method allows the body to be easily removed to get to the electronics. A spring loaded parachute mechanism was designed to allow for deployment of the custom parachute. The front tires are solid rubber 1/16 tractor tires that I found online. I machined the simple front aluminum wheels to allow me to mount the tires. In the rear, HPI vintage racing wheels and tires where used to give a big sidewall look, and exceptional performance.
PERFORMANCE
The dragster took over two years to complete mainly because of life, cost of parts, and other priorities. In hindsight there are hundreds of hours of work into the overall build. When it came time to drive the beast, I was nervous. One bump in the road, rock in the street, or a mechanical failure at speed could lead to complete destruction of the truck. In addition, when was the last time you saw a Tamiya midnight pumpkin body even approaching flying down the track?
I made arrangements to take the truck up to Bandimere Speedway in Morrison, Colorado to take pictures and I knew that if there was ever going to be a time to for a first drive, it was that day. After taking the basic pictures, I decided it was time to see what the truck could do. I glued up a set of tires specifically for the first run using tons of glue with hopes that the tires would just stay on the rims. The track was sticky from practice the night before to a point that my boots stuck to it, kind of like walking through syrup. I did a quick burnout and then decided it was time to go for it.
On the first launch, the truck lifted the driver’s side tire about 5/8-inch off the ground and the chassis pulled hard to the right. I let off for a second and then gave it full throttle. Surprisingly, after the initial launch the truck was very stable. As I approached mid track I let off the throttle and tried to apply brakes only to find they were somewhat nonresponsive. After a couple adjustments to the ESC, I was ready for the second shot. I hit it hard and the truck again veered right, but knowing what to expect I adjusted and kept it moving. For the short wheelbase vehicle, it was very controllable at speed and provided tons of fun runs. There is enough torque to burn the tires off the rims and more than enough speed.
Following several awesome runs, I was feeling pretty good and decided it was time to go all out. Following a good launch, the truck was at about 1⁄4 track when something happened and it turned violently to the left and then proceeded to barrel roll several times. I ran down the track expecting to find the worst, but once I got there I found that I had scratched the body in three spots (all very minor) and bent the wing mounts (maybe for the better because I like the position of the wing better now).
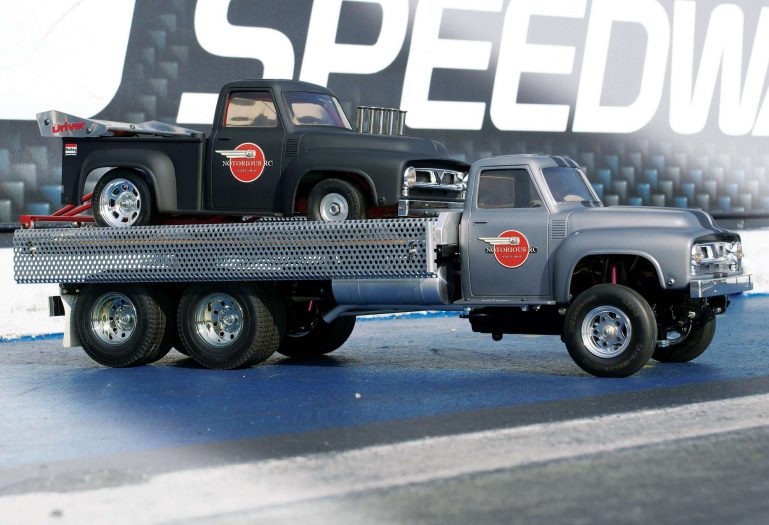
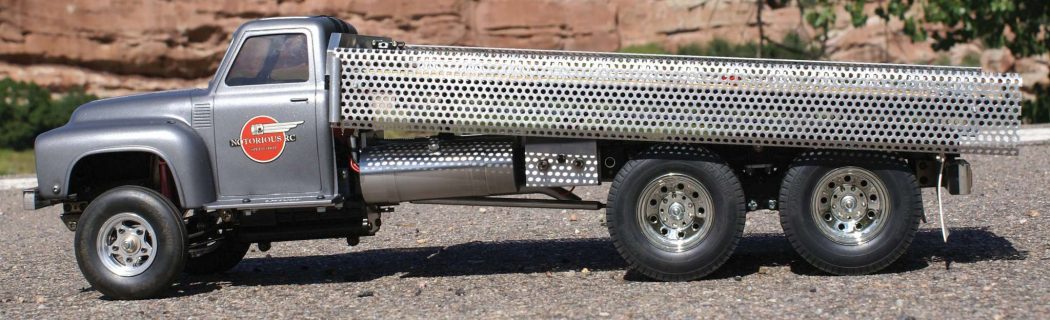
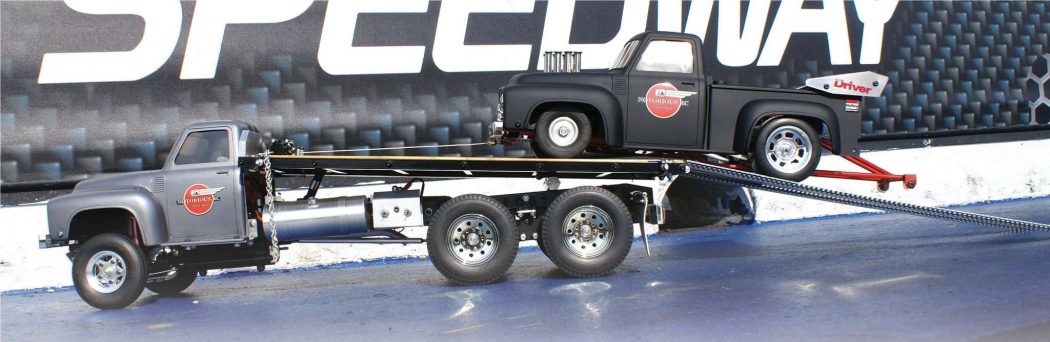 THE HAULER
CHASSIS The hauler chassis started life as a Tamiya Ford Aeromax that I had picked up off Craigslist for a song and a dance. The chassis remained stock, with exception of a few extra holes for mounting the bed tilt mechanism and having to notch a small section at the front of the chassis to clear the front bumper of the truck body.
SUSPENSION The Tamiya tractor trucks utilize leaf spring suspension, both front and rear with friction shocks to help smooth the ride. Truth be told, the tires play a huge part in the suspension of the truck, helping to smooth out a rough ride. As with any large rig, added weight on the rear of the chassis also goes a long way to smoothing out the ride.
DRIVELINE Both axles on the Tamiya tractor trucks are drive axles. I maintained the three-speed transmission and stock driveline. I did reduce the pinion size to help decrease the overall top speed of truck. The drag truck does enough burnouts for both vehicles and the last thing I wanted to do was to dump the dragster while trying to do burnouts with the hauler.
ELECTRONICS The fancy electronics went into the dragster. The tractor trailer utilizes a Hitec 645MG servo for steering, a Futaba S3004 shifting servo, Axial AE-1 ESC, Axial 55t motor, and a Spektrum AR6000 receiver. The electronics in the hauler were simple and reliable.
 FINISHING TOUCHES
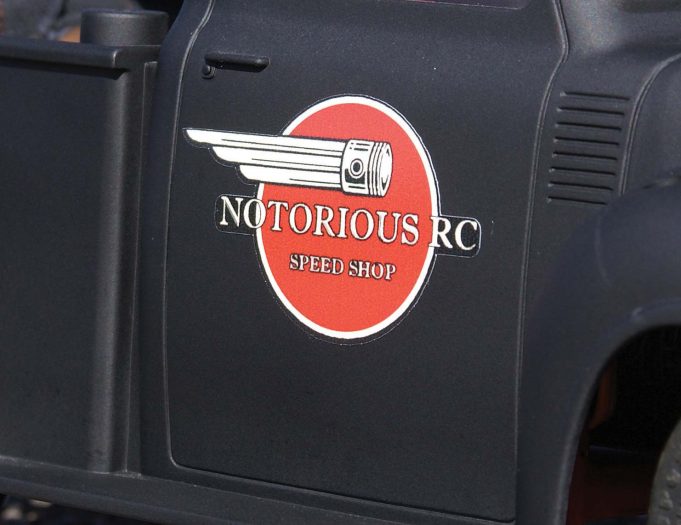
To make the hauler period correct, I decided against a rollback tow truck bed and instead went for a tilting bed with long ramps. This provided a more period correct hauler for a 1950’s to 1960’s truck. Using a gearhead reduction DC motor, I machined a screw-drive system that mounted between the three-speed transmission and the rear axles. Using a three-position momentary toggle, I can control the up up/down movement of the bed. Side mount ramps were constructed and mounted to the side of the bed. The front semi rims and tires where swapped with a set of aluminum Grasshopper style wheels and tires. Billet aluminum gas tanks were spun on the lathe and scale exhaust was added to the chassis. The bed was fabricated from 1/4” aluminum bar and c-channel drilled and tapped. Finally, a thin layer of aluminum sheet was mounted to the bed and was then covered with thinly cut wood. Custom decals were design and then printed to give me the overall look I was going for.
 PERFORMANCE
Initially I had a 27t motor in the hauler and within 30 seconds, it was obvious that a 27t motor was way too quick. Doing burnouts with the hauler was cool when the dragster was not on the bed, but the overall speed was too high. I purchased an Axial 55t motor and decreased the pinion size to provide a more controllable top speed. The hauler is smooth and loading/unloading was a dream.
WRAP-UP
Overall the build and then performance of both rigs was a ton of fun. I wanted a vintage look with exceptional performance; the final product exceeded my expectations. While the project took over two years to complete, every aspect was an adventure. As much as I love grabbing a new RTR rig off the shelf and going bashing, there is still something to be said about playing in the shop. The only problem is I think I caught the speed bug and now it’s time to build something faster.
Links
Axial racing, axialracing.com , (877) 642-9425
Callie Graphics, callie-graphics.com
Castle Creations, castlecreations.com , (913) 390-6939
Flightpower, flightpowerbatteries.com ,(888) 598-8037
Futaba, futaba-rc.com , (217) 398-3630
Hitec, hitecrcd.com , (858) 748-6948
HPI Racing, hpiracing.com , (217) 398-0007
JR Americas,jramericas.com , (217) 352-7959
RcStacks.com, rcstacks.com
Spektrum, spektrumrc.com , (217) 352-1913
Tamiya USA, tamiyausa.com (800) (826-4922
Traxxas, Traxxas.com , (972) 549-3000


