 RC Driver The Best In RC Car & Truck News, Reviews & Video


SPONSORED ARTICLE
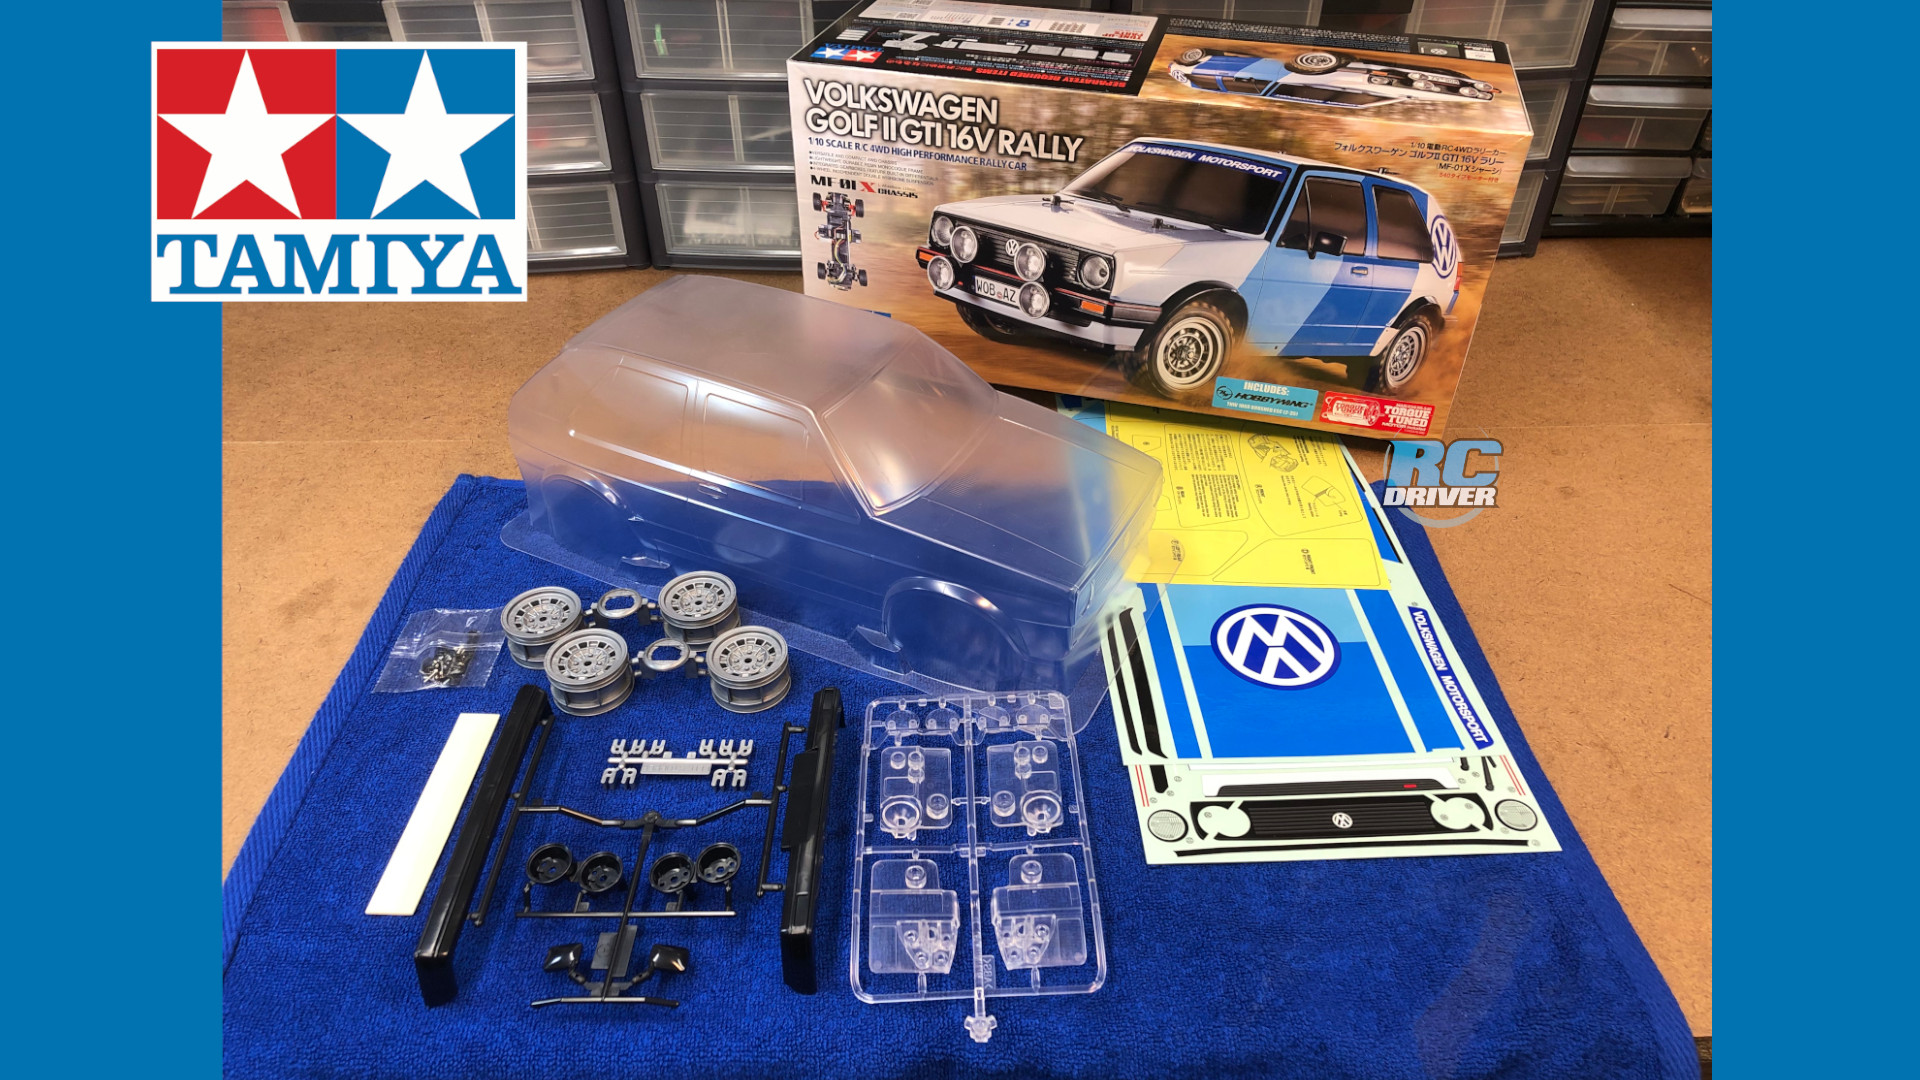
A big and very rewarding part of building a RC car or truck is completing the body. People typically find this step the most intimidating when building a kit and it does not need to be, especially when you are working with a Tamiya kit. Tamiya does a great job with suppling excellent instruction manuals along with precisely manufactured parts not to mention they offer a vast selection of high-quality paints and numerous tools to assist you in the process. To illustrate this, we put together a two part How-To article featuring one of Tamiya’s cool new releases. Time to dive in to painting and detailing the Tamiya VW Golf II Rally and show some tips and tricks along the way.
ABOUT THE MF-01X CHASSIS
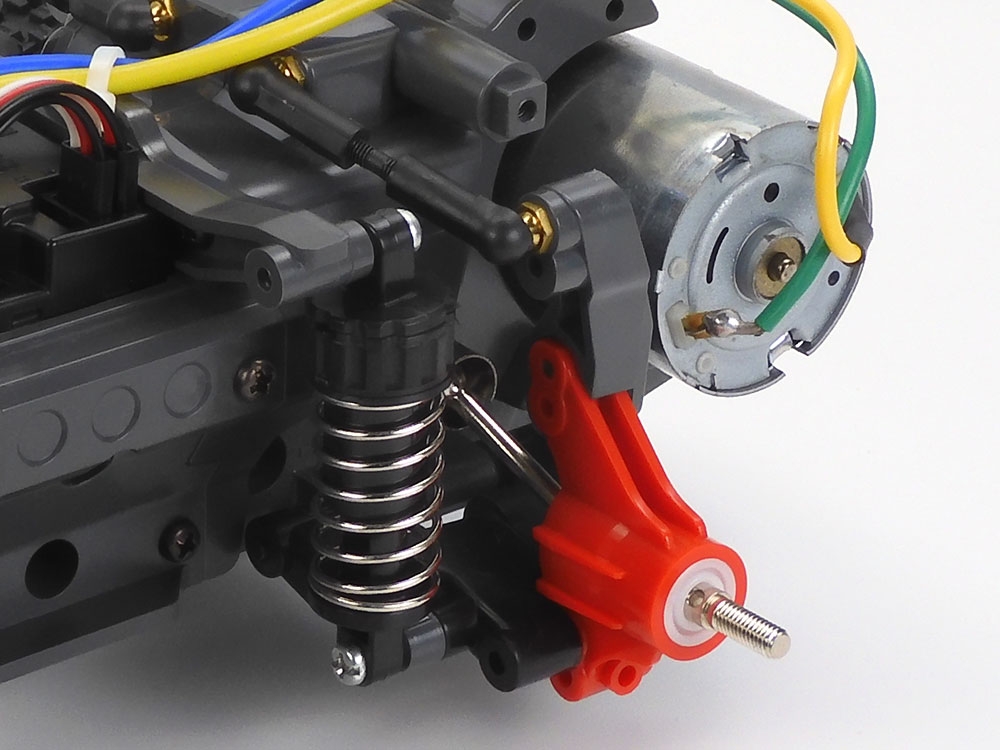
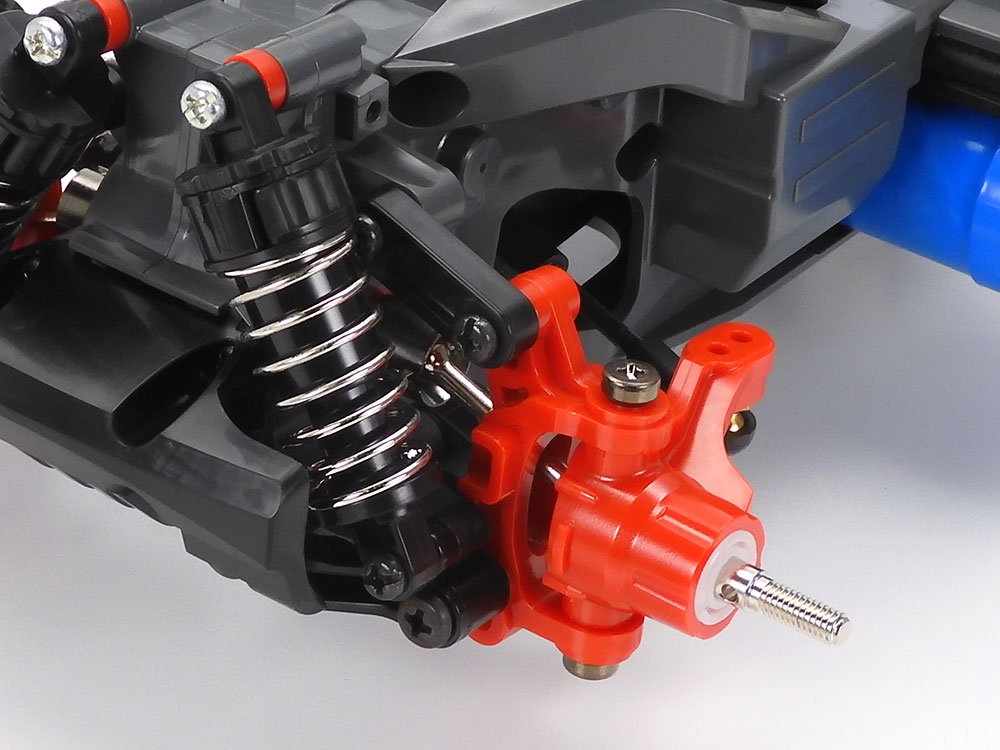
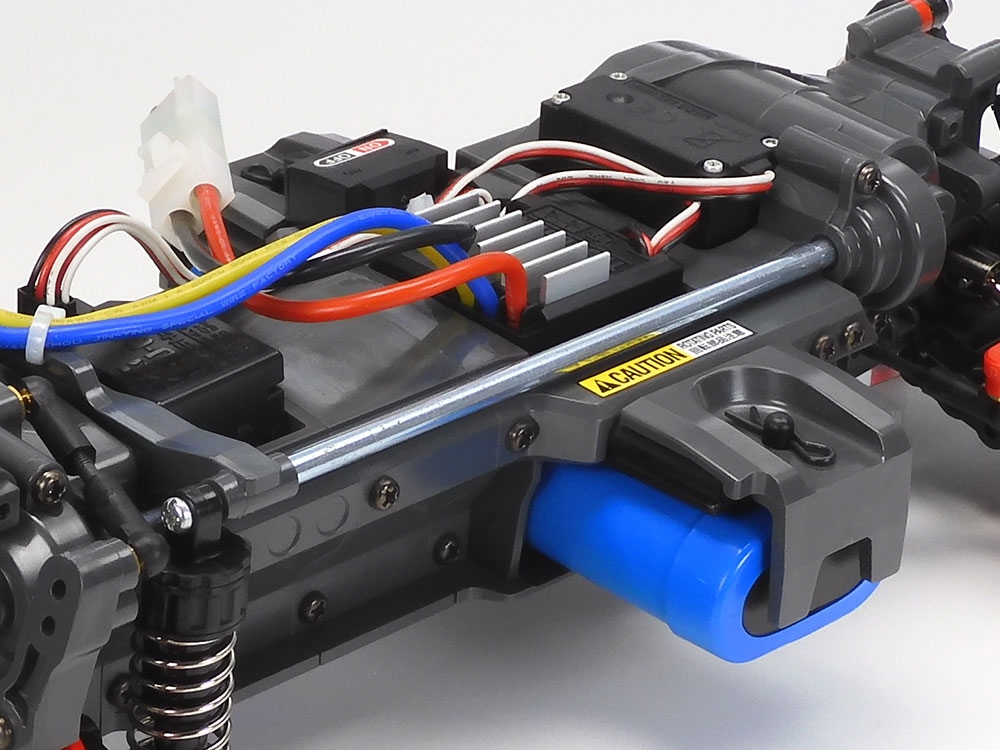
Underneath the Tamiya Volkswagen Golf II GTI 16V Rally body is the Tamiya MF-01X chassis that was built to handle rally style running on both asphalt and flat dirt surfaces. For a vehicle with this type of capability, you want a chassis that is tough and that is why Tamiya employed a monocoque frame that has the gearboxes integrated into it. Not only is the MF-01X chassis tough, but it is also compact. It comes stock with a 540 brushed Tamiya Torque Tuned motor which is positioned in the rear of the chassis with gear-driven rear wheels and a metal propeller shaft to transmit the power to the front gearbox. Both the front and rear gearboxes utilize tough and reliable gear differentials. Tamiya designed the MF-01X chassis to have adjustable wheelbase where you add or remove sections of the chassis to achieve either a short (210mm), middle (225mm) or long (239mm) wheelbases. This version of the MF-01X with Golf II body utilizes the long wheelbase. There is also the option of building the chassis with either high or low ground clearance and the Golf II is setup with high clearance. Your standard four wheel independent double wishbone suspension with friction shocks helps to keep this car in control while rallying. Positioned in the middle of the chassis is the battery pack to help maintain a balanced setup for the 4WD chassis.
TAMIYA VOLKSWAGEN GOLF II GTI 16V RALLY SPECS

Item #58714-A
Scale: 1/10
Chassis Type: MF-01X
Length: 15.63 in. (397mm)
Width: 6.69 in. (170mm)
Wheelbase: 9.41 in. (239mm)
Construction Type: Assembly Kit
Chassis: ABS plastic monocoque frame
Drivetrain: Shaft-driven 4WD
Differential: 3 gear, bevel gear diffs
Bearings: Metal and plastic bushings
Motor: 540 Torque-Tuned brushed
Speed control: Electronic speed control
Suspension: Lower H-links w/ front upper fixed links and rear upper adjustable links
Shocks: Molded plastic, friction type
Body material: Polycarbonate
Required to complete: 2-channel radio system, steering servo, battery pack, battery charger, paint
ITEMS USED
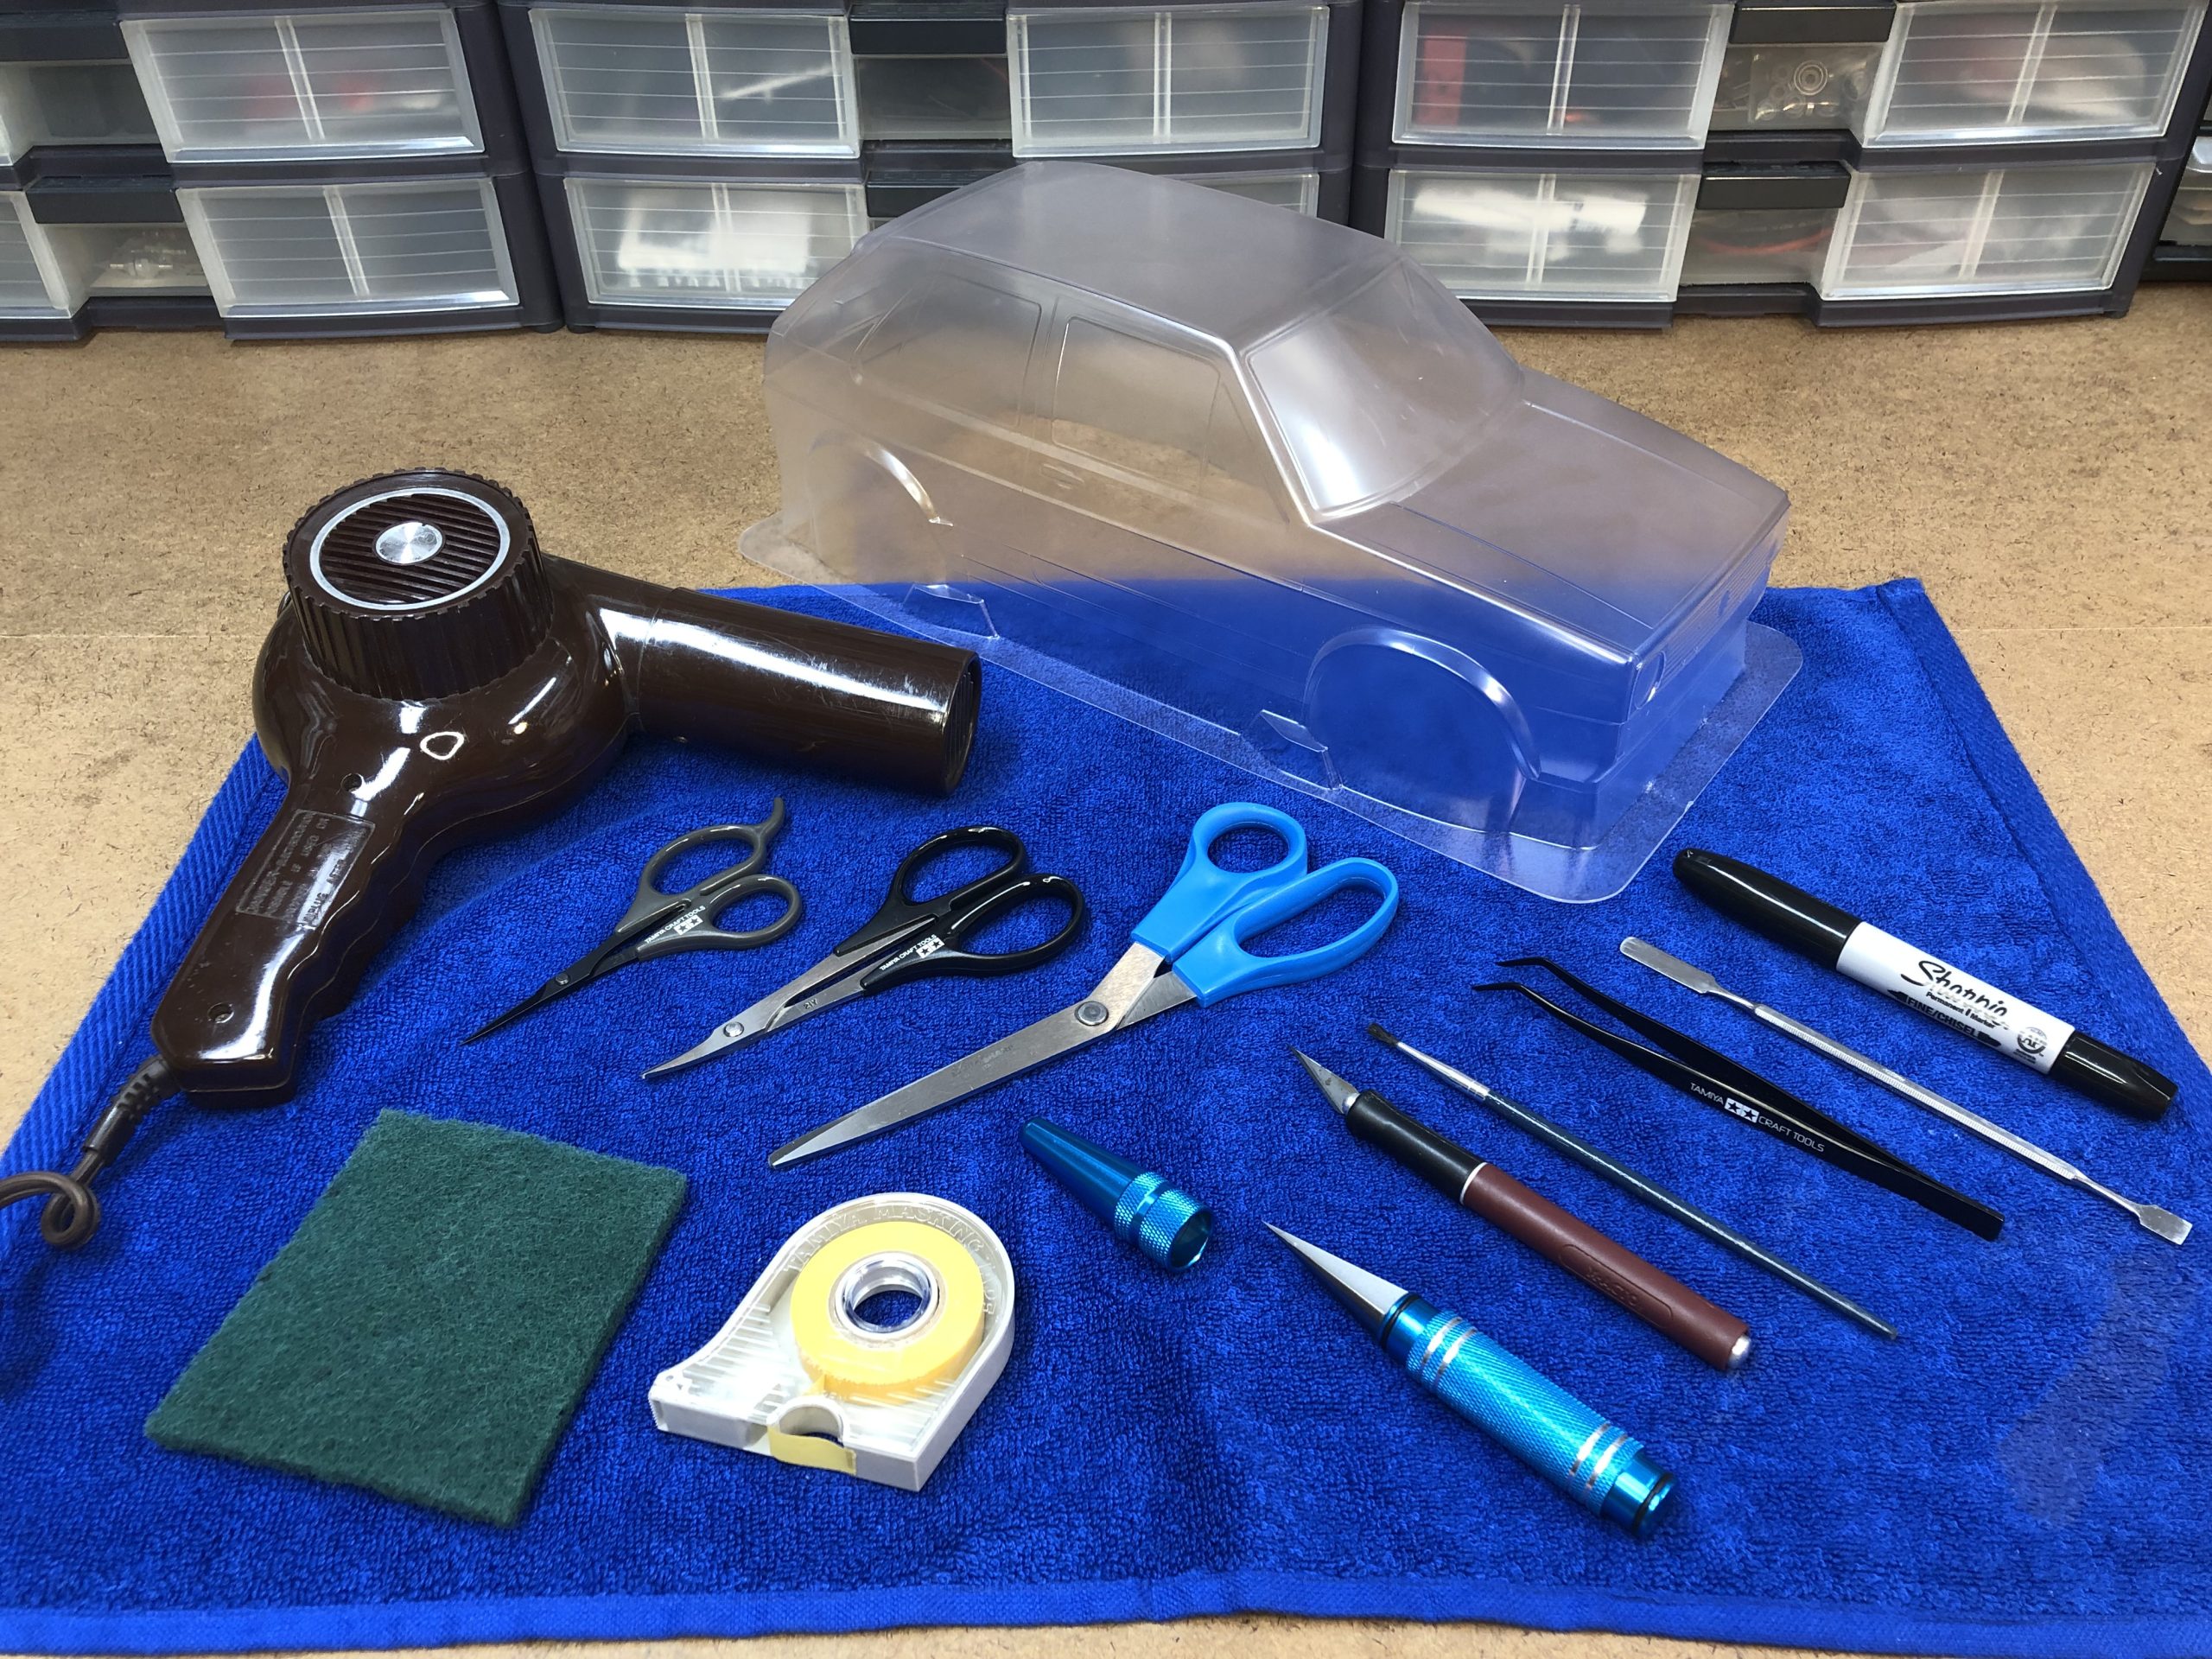
Here are all the items we used to complete our Tamiya Volkswagen Golf II GTI 16V Rally. These tools and materials help to make the painting and detailing process as smooth and trouble free as possible.
- Tamiya decal scissors—74031
- Tamiya curved scissors—74005
- Tamiya angled tweezers—74003
- Durasharp all-purpose scissors
- Tamiya masking tape 10mm—87031
- Body reamer
- X-Acto X2000 hobby knife—X3722
- Sharpie marker
- Dental spatula
- Hairdryer
- Scotch-Brite pad
- Paint brush
QUALITY PAINT IS KEY

Don’t take the chance and go cheap with selecting paint for the body you are painting. It is well worth the money to help ensure you get a great result that will look incredible and last. For the Tamiya VW Golf II Rally body and wheels, we selected all Tamiya paint. Make sure that you pick the correct paint that works with the material that you are painting. For polycarbonate, use Tamiya’s PS spray paints and for ABS plastic parts like the wheels, bumpers and rally light buckets, use Tamiya’s TS spray paints and/or Tamiya’s bottled acrylic paint.
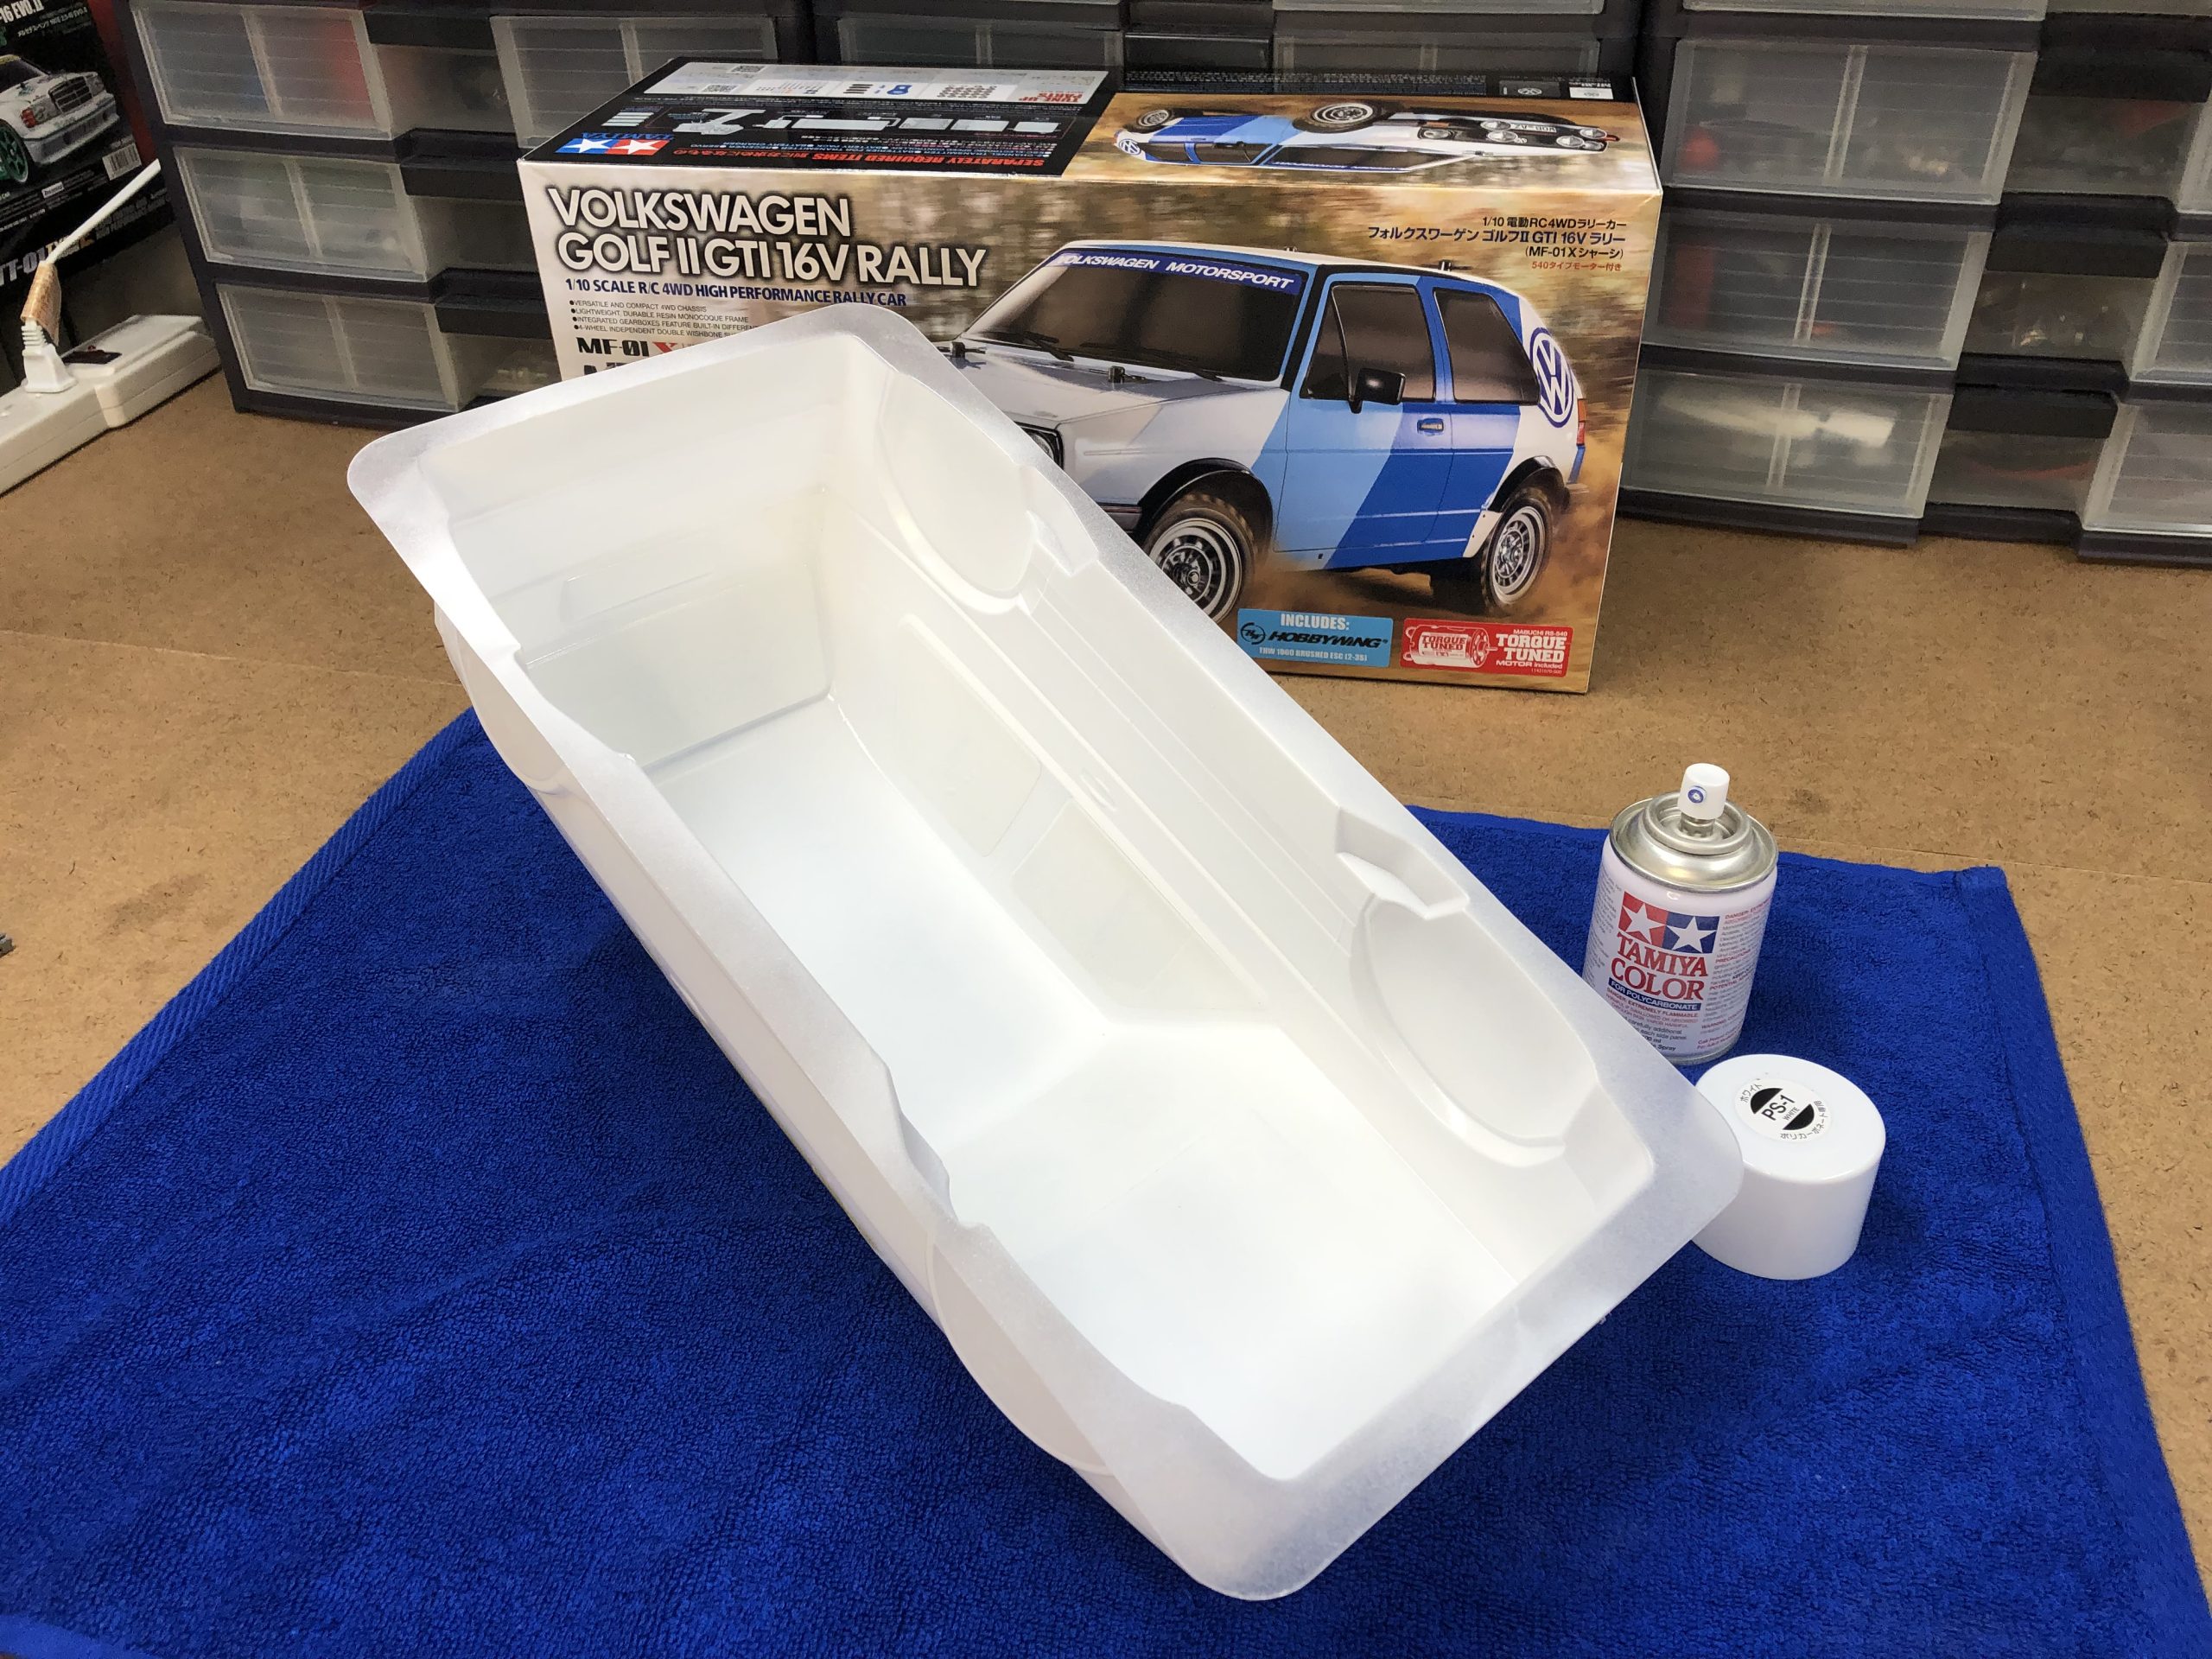
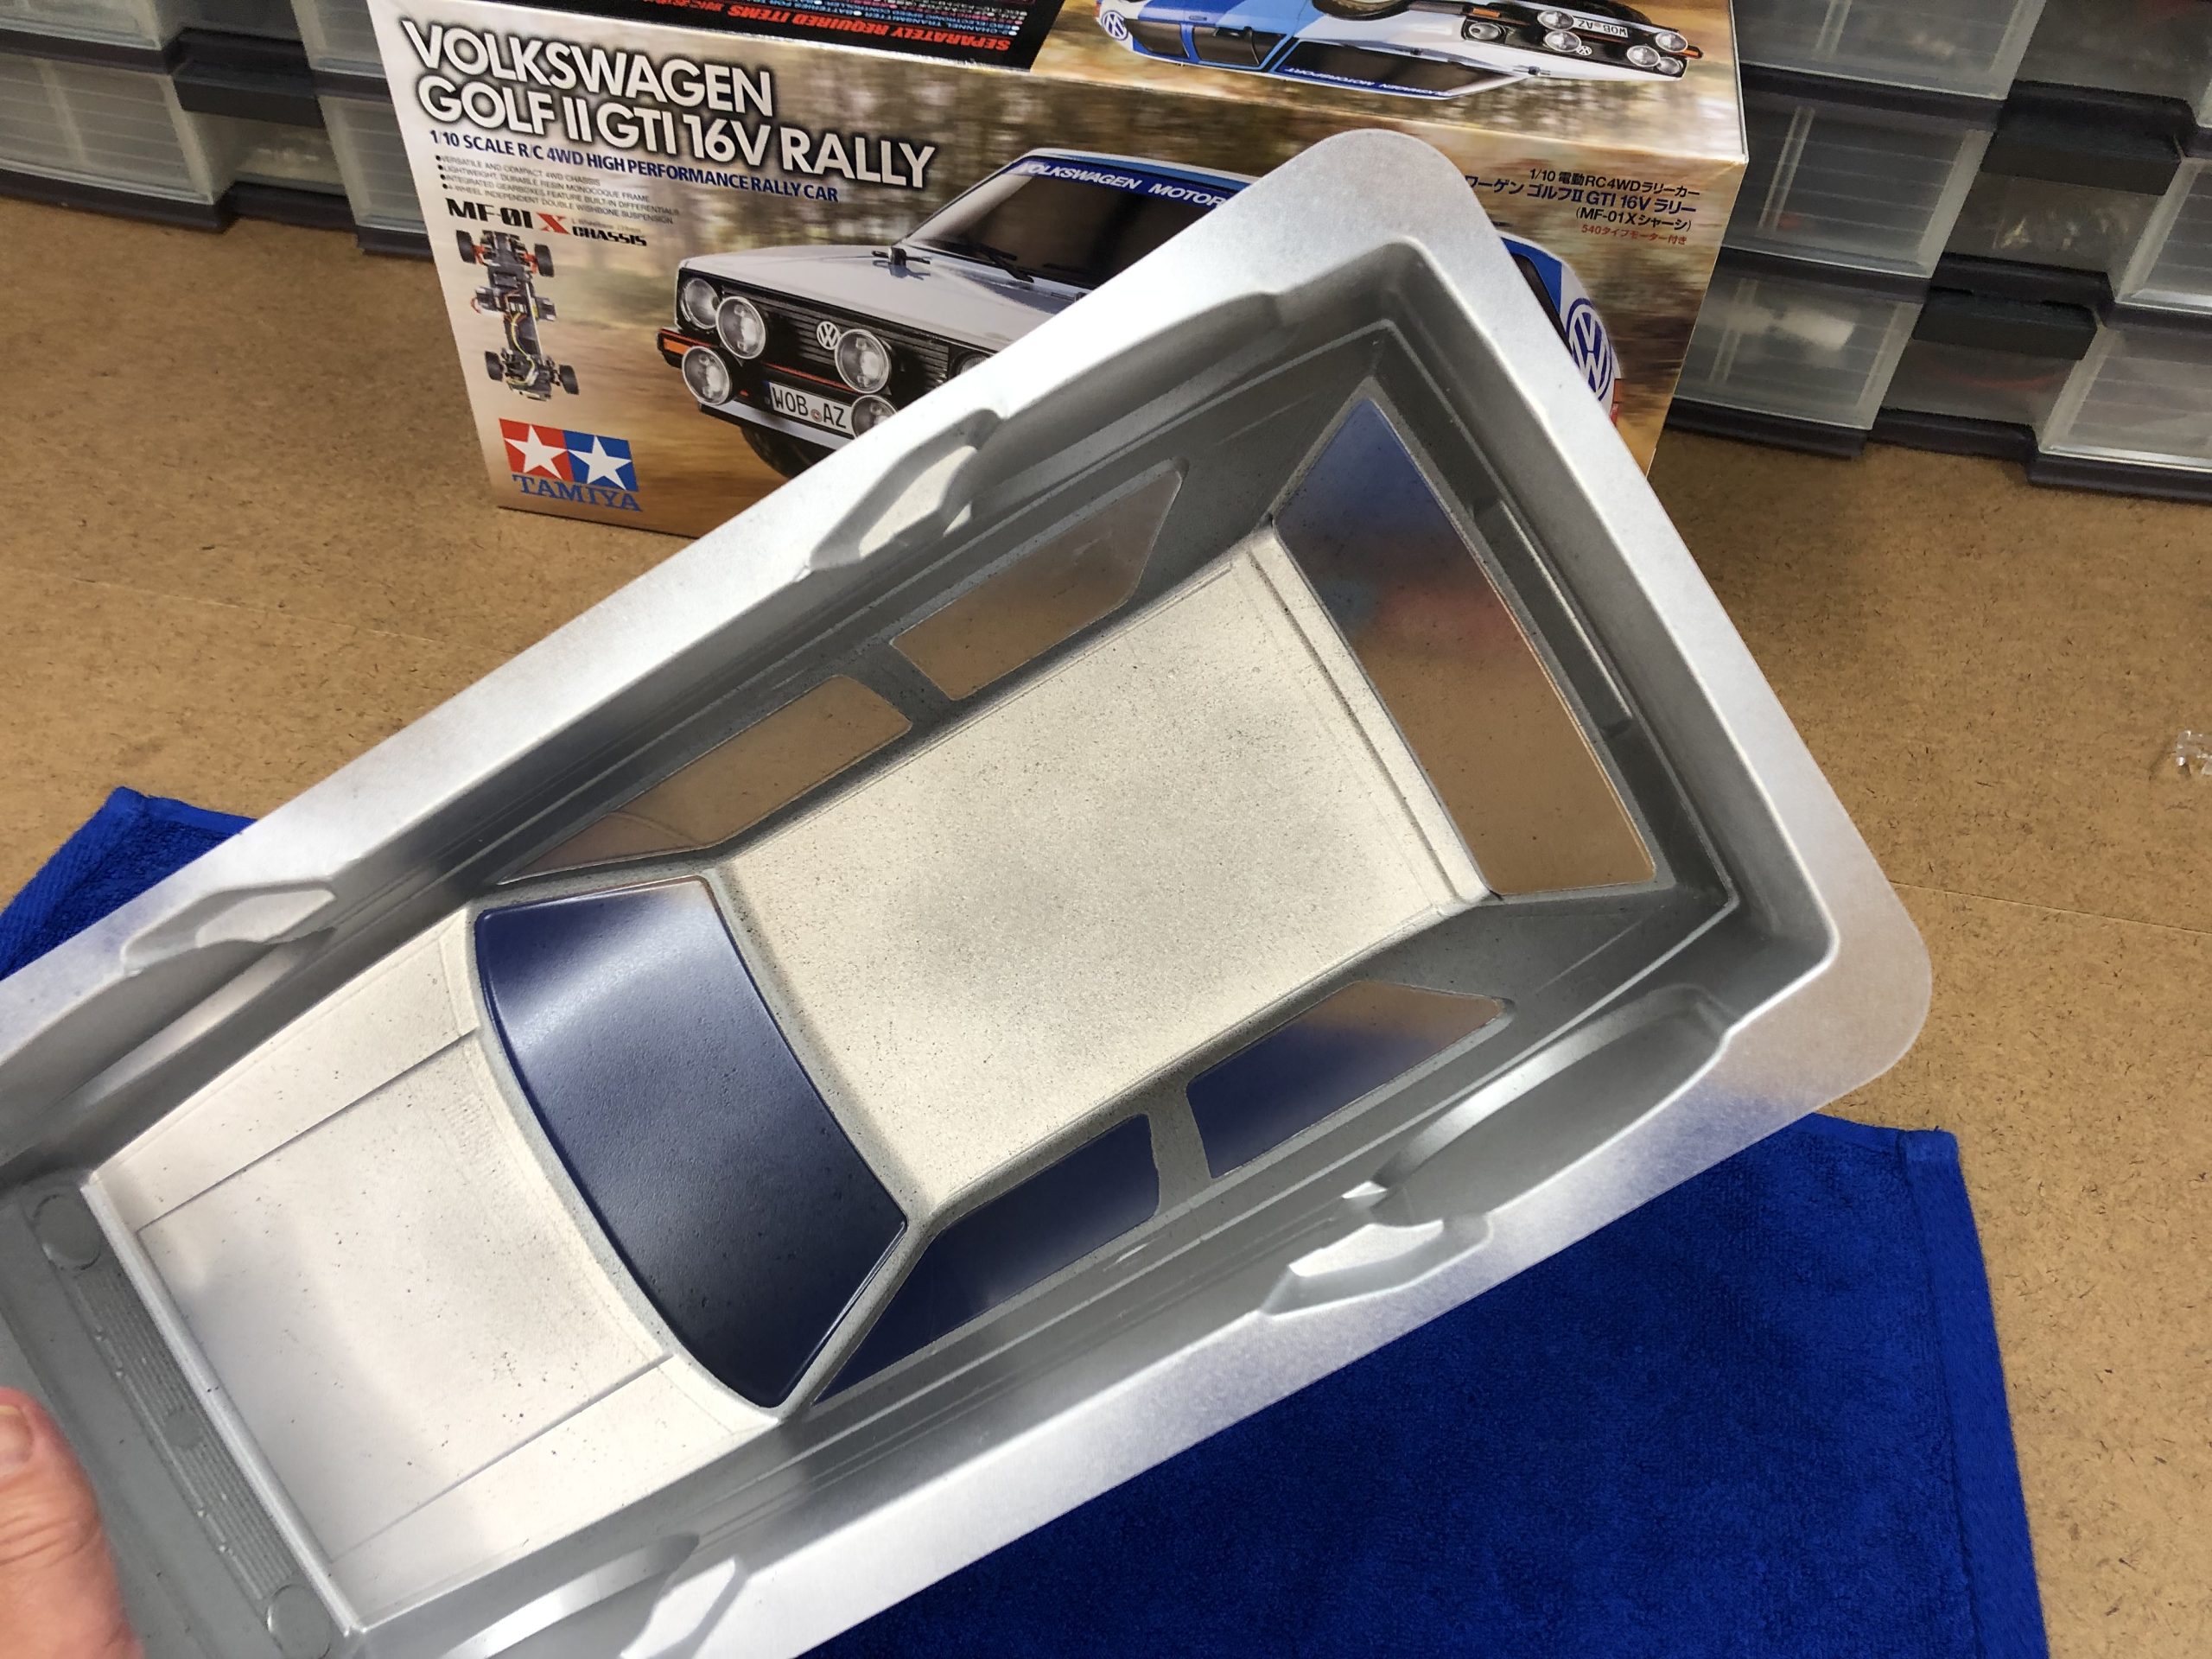
SCUFF THE BODY
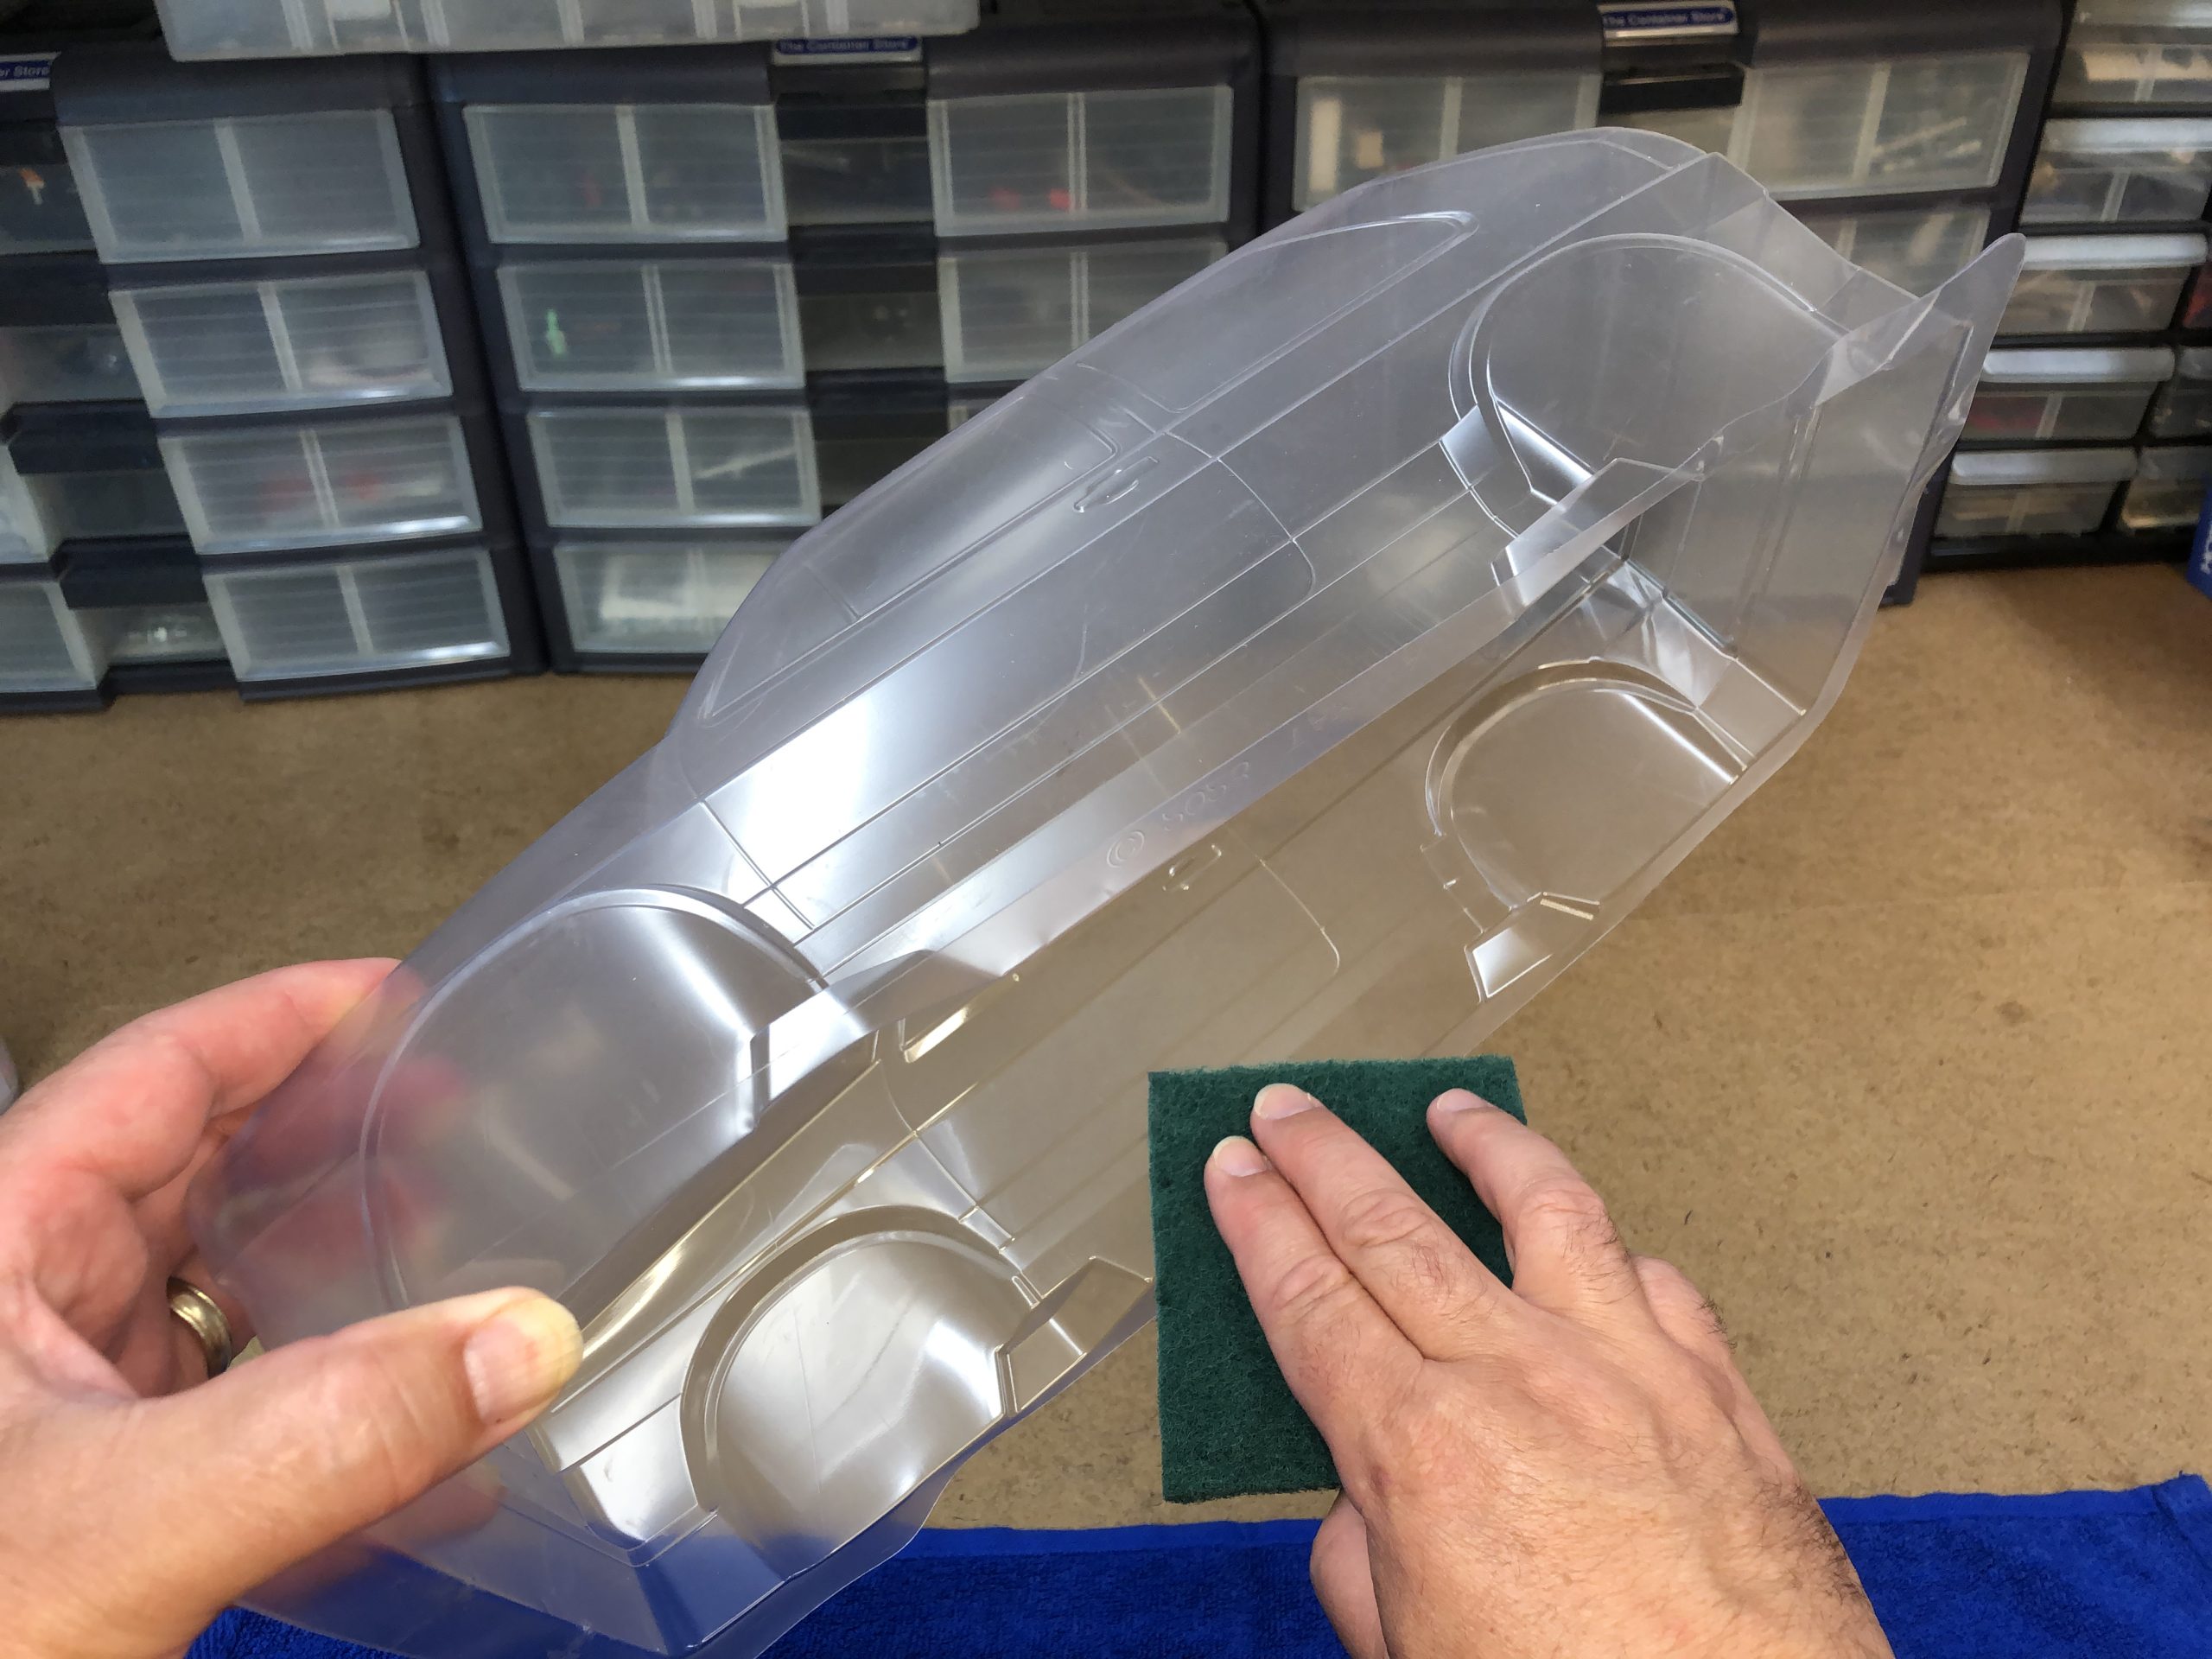
The idea here is to scuff the inside of the body with a Scotch-Brite pad which gives the paint something additional to “grab” and adhere to. Make sure you do not scuff the windows, headlights or taillights so that they stay crystal clear on the finished body. If they get scuffed, they will have a hazy, scratched look to them. With our experience, we have found this step to be completely optional when using Tamiya’s quality spray paint. The Tamiya PS spray paint does not easily chip or flake off the body as long as you properly prep the body and paint following the instructions.
WASH THE BODY
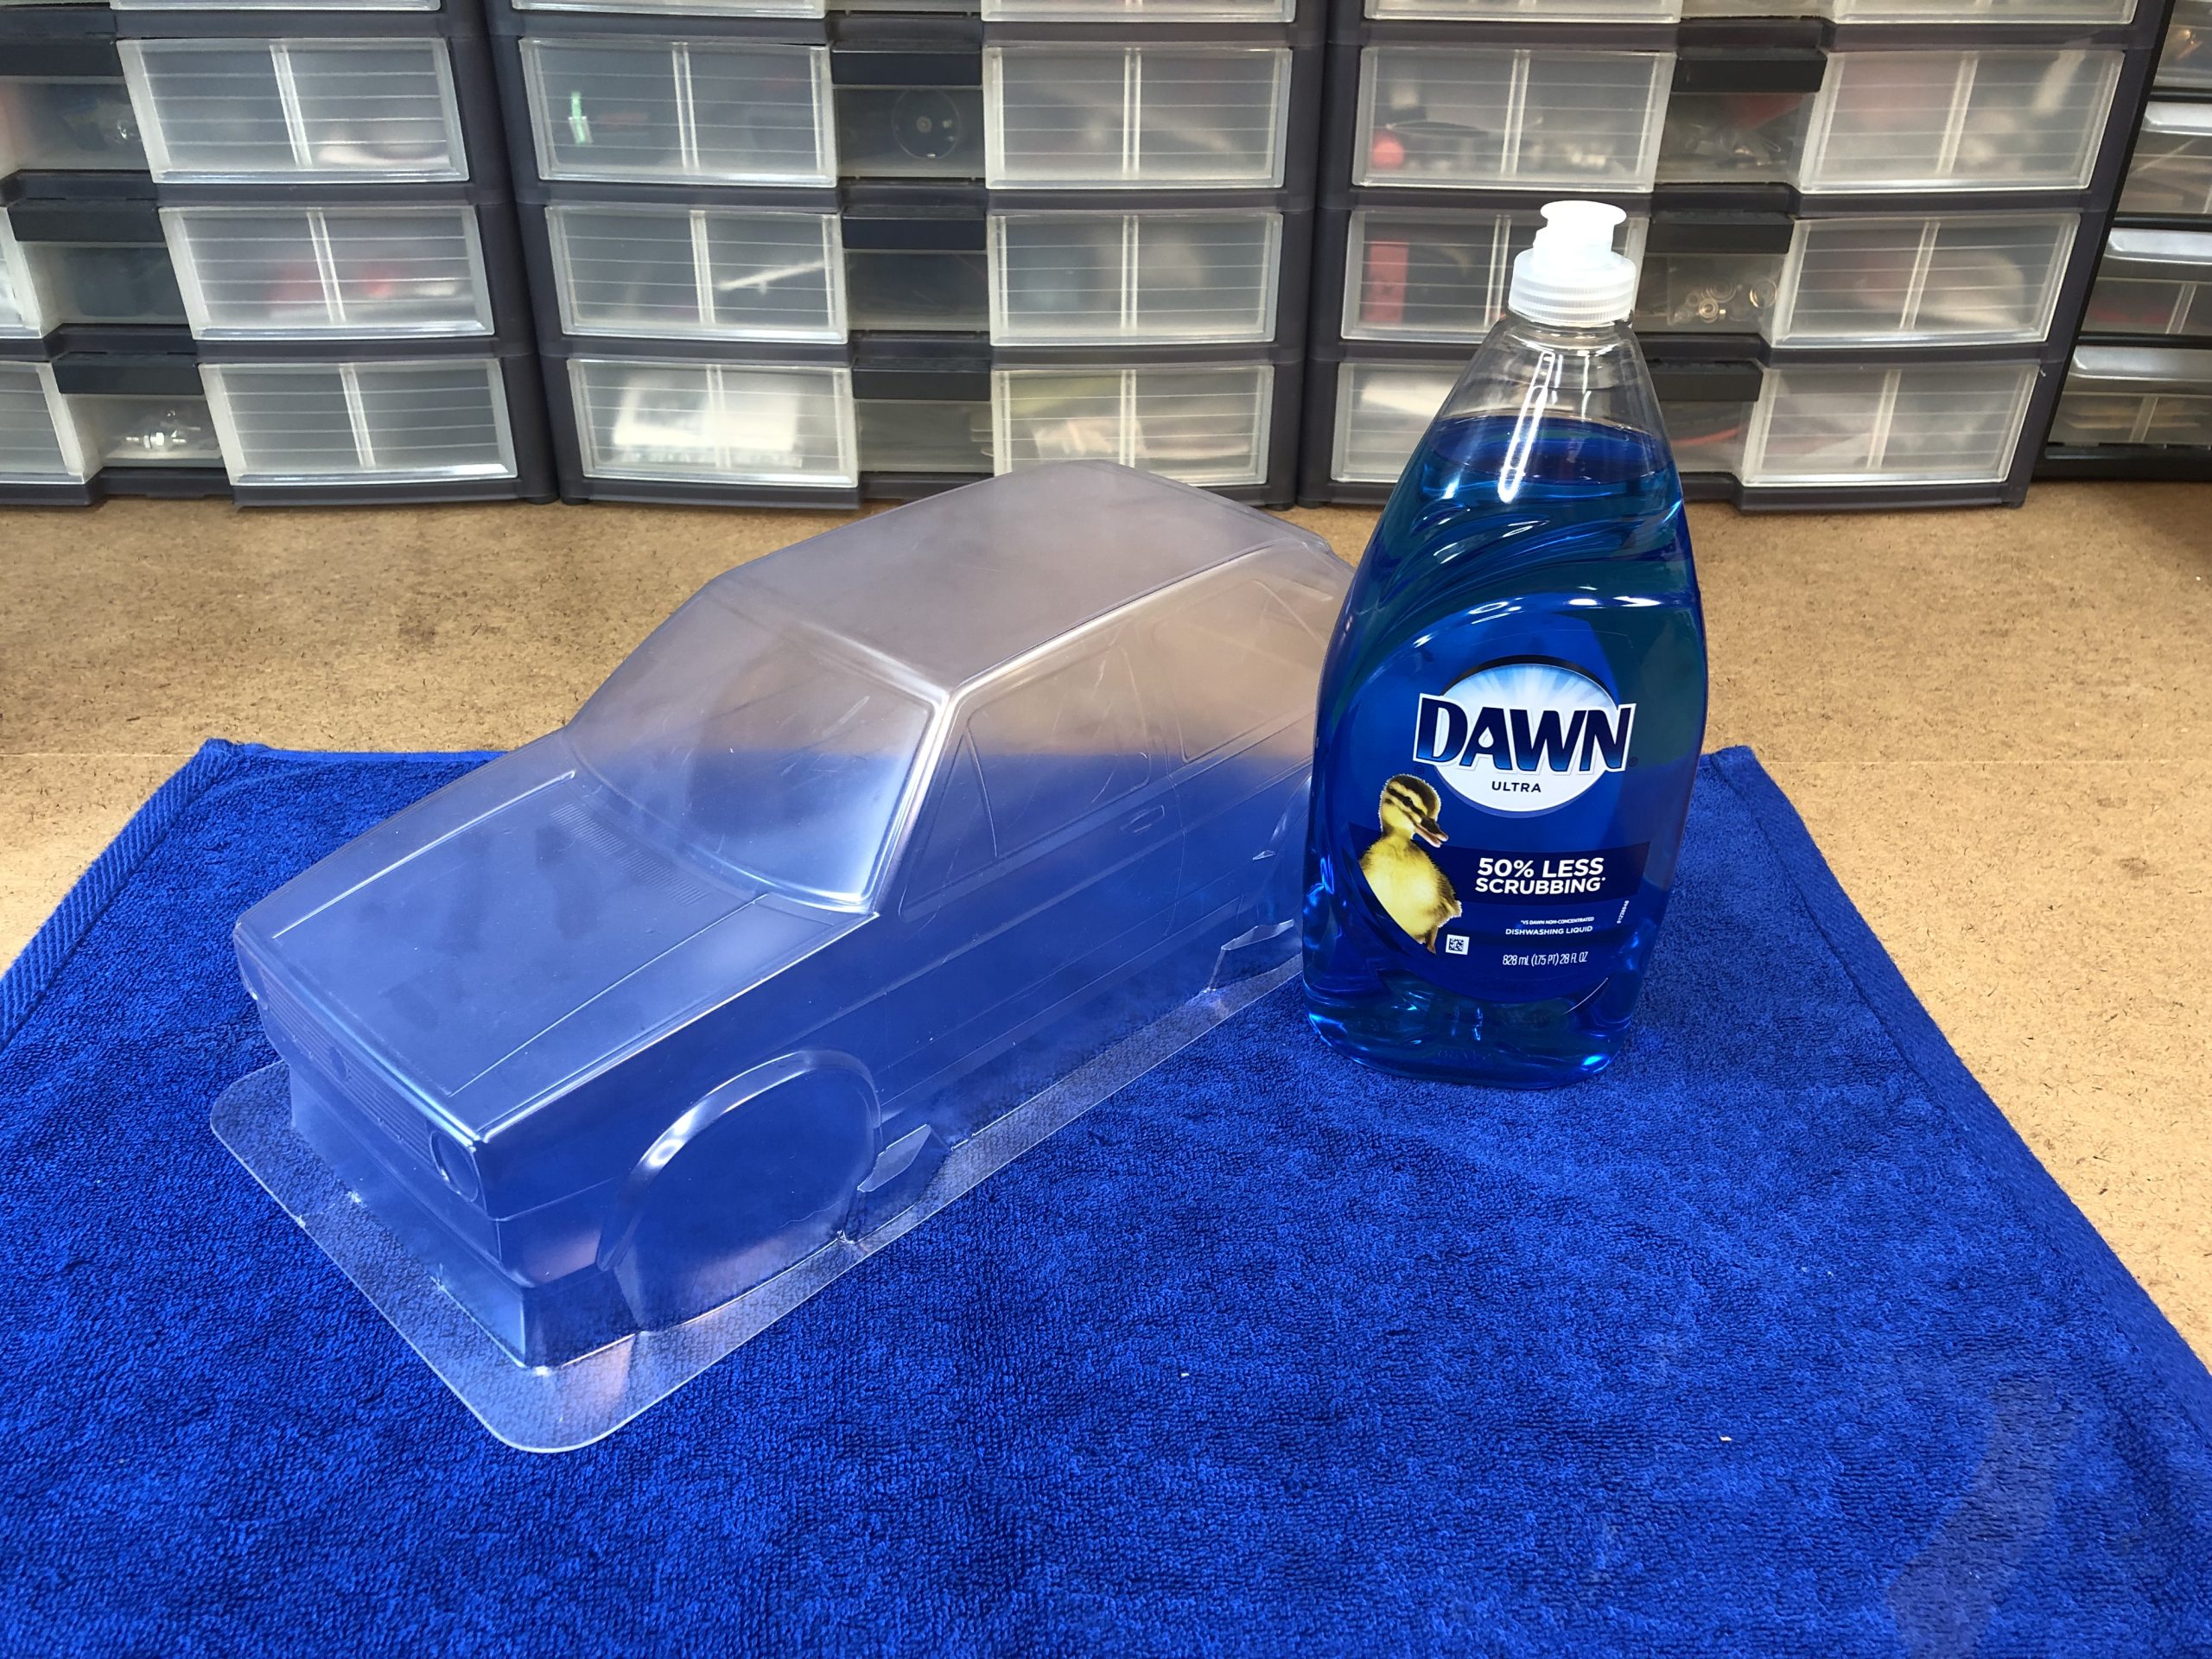
This is an absolute must! Washing the body is crucial for a pro-level finished body. Use good dish soap like Dawn with warm mater and wash the inside of the body. You don’t need to worry about the outside because it has overspray film on it. This step will remove any grime that found its way onto the body like the oils from your fingers and any residual mold release agent from when the body was made. Dry the body thoroughly with either a lint free cloth or a hairdryer. Now be careful to not touch the inside of the body because the oils from your fingers will stop the paint from properly adhering to where your fingers touched the body.
MARK THE BODY
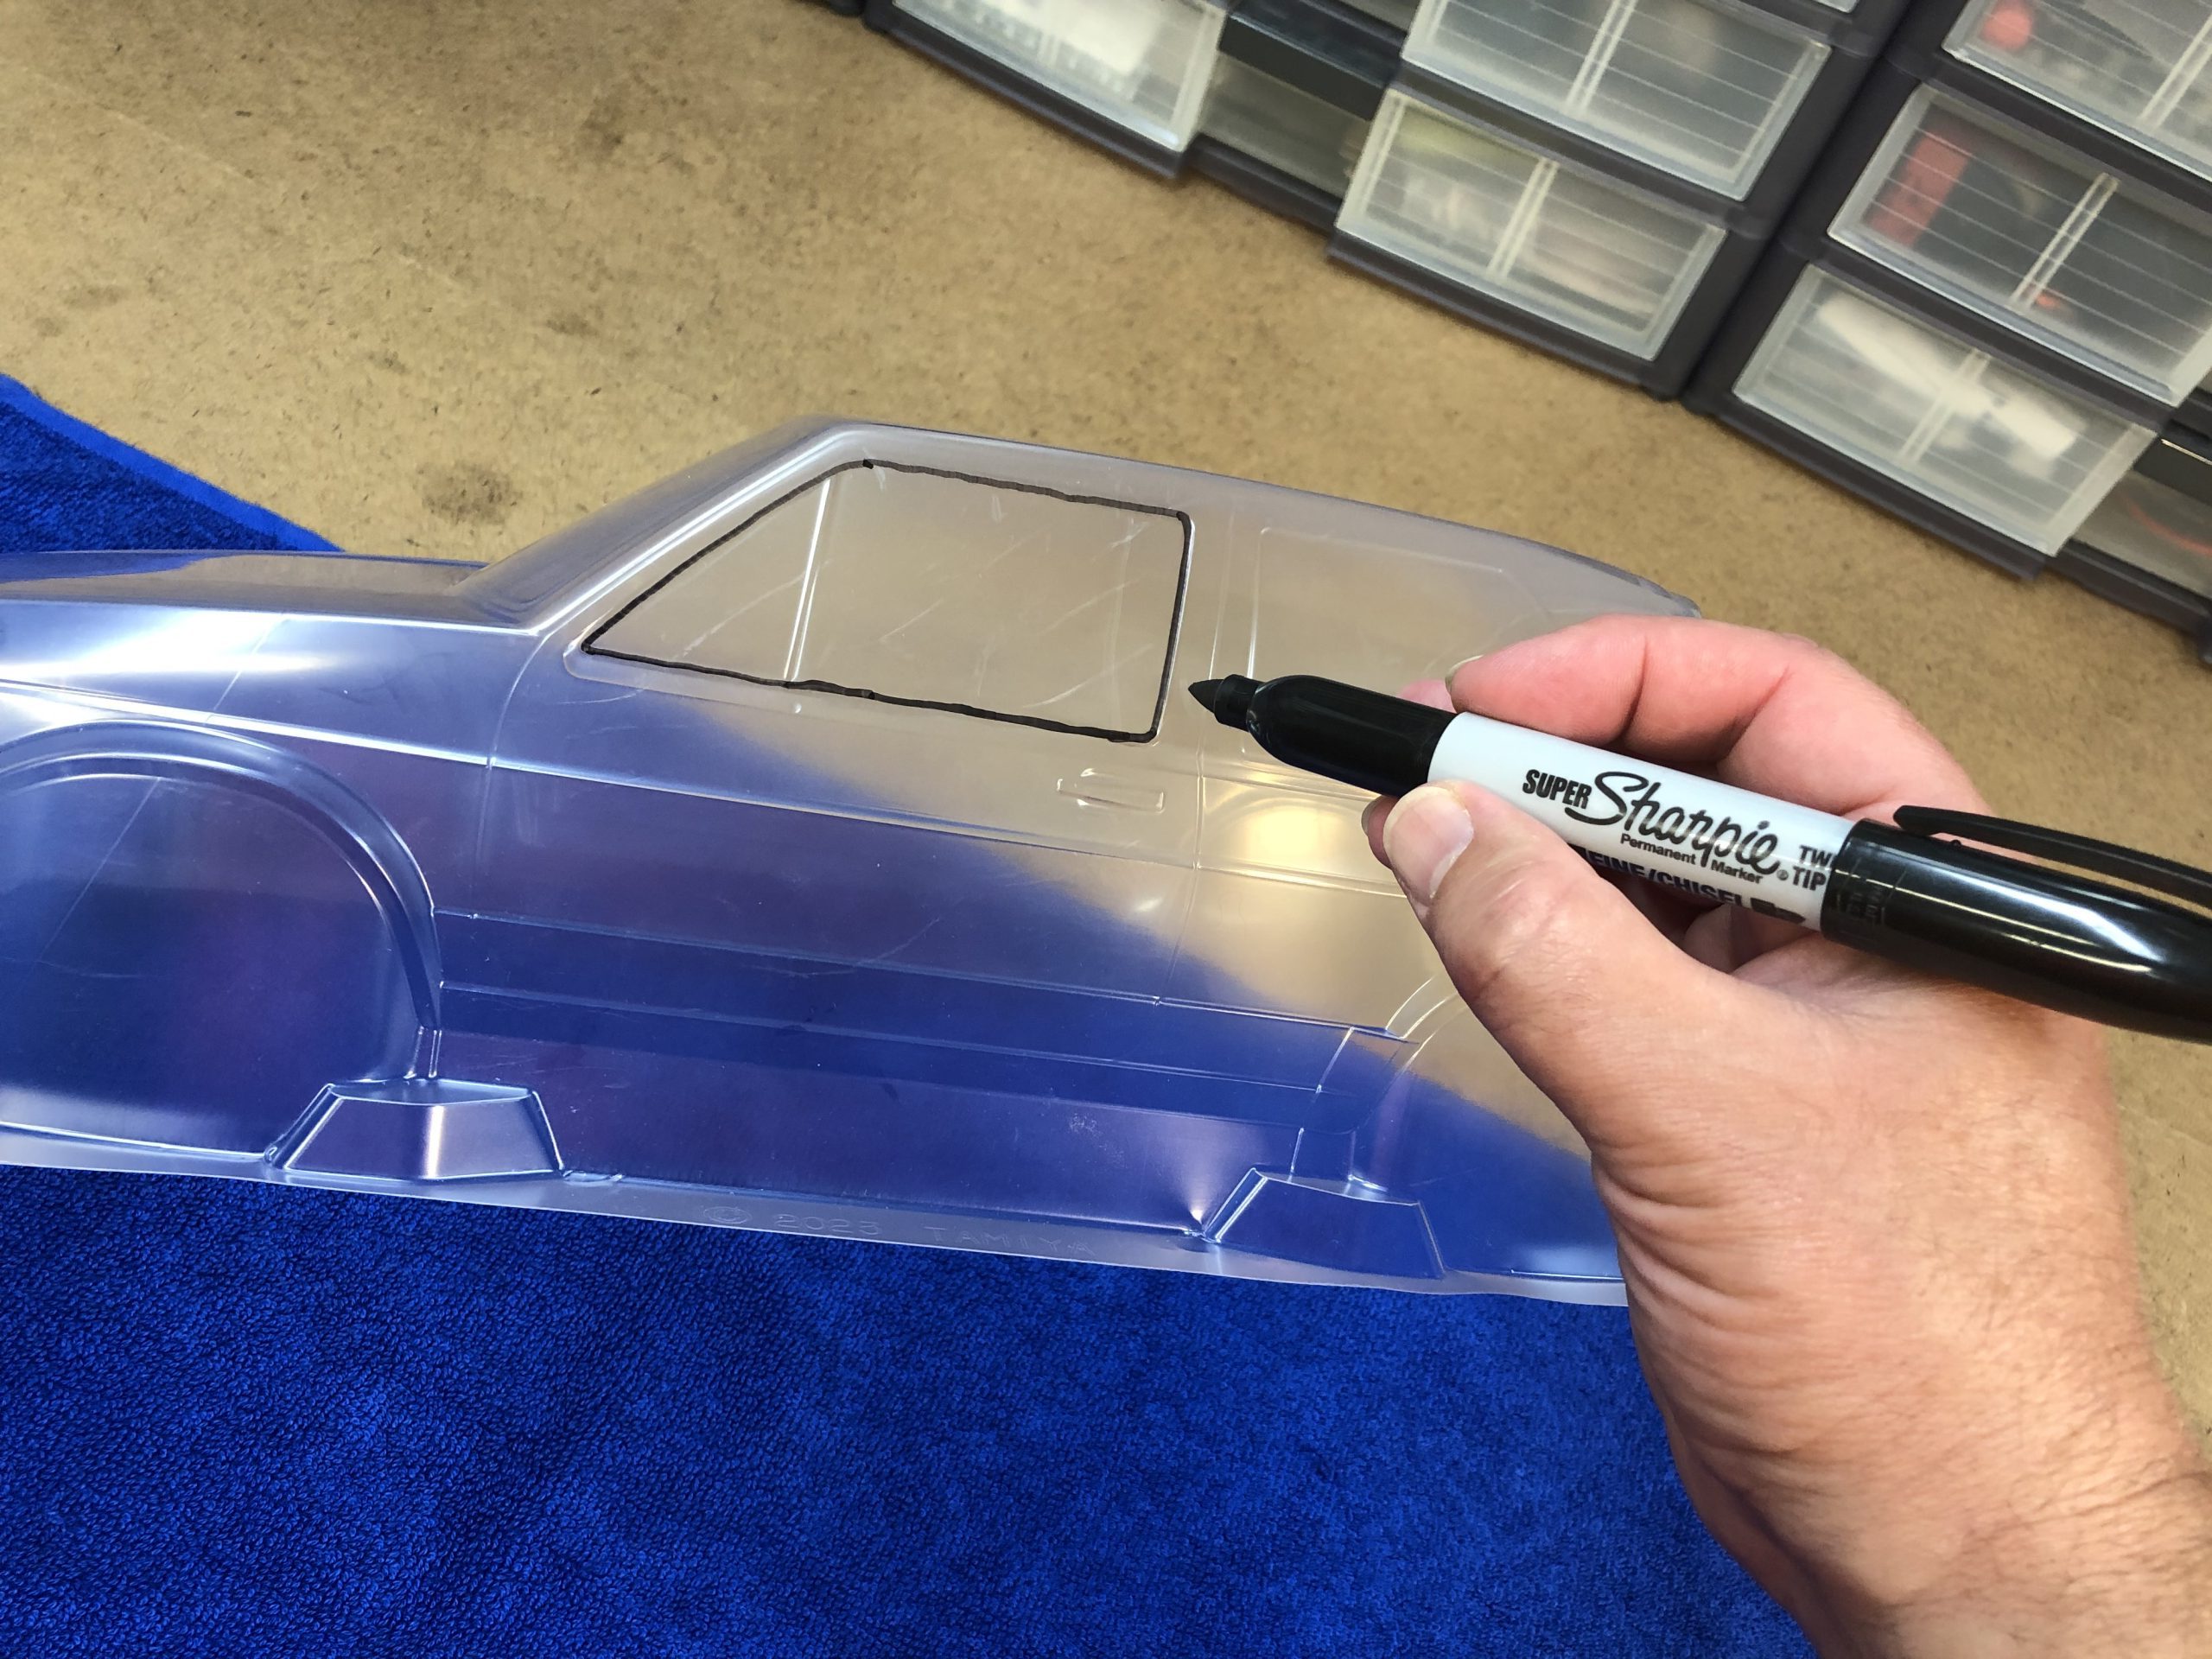
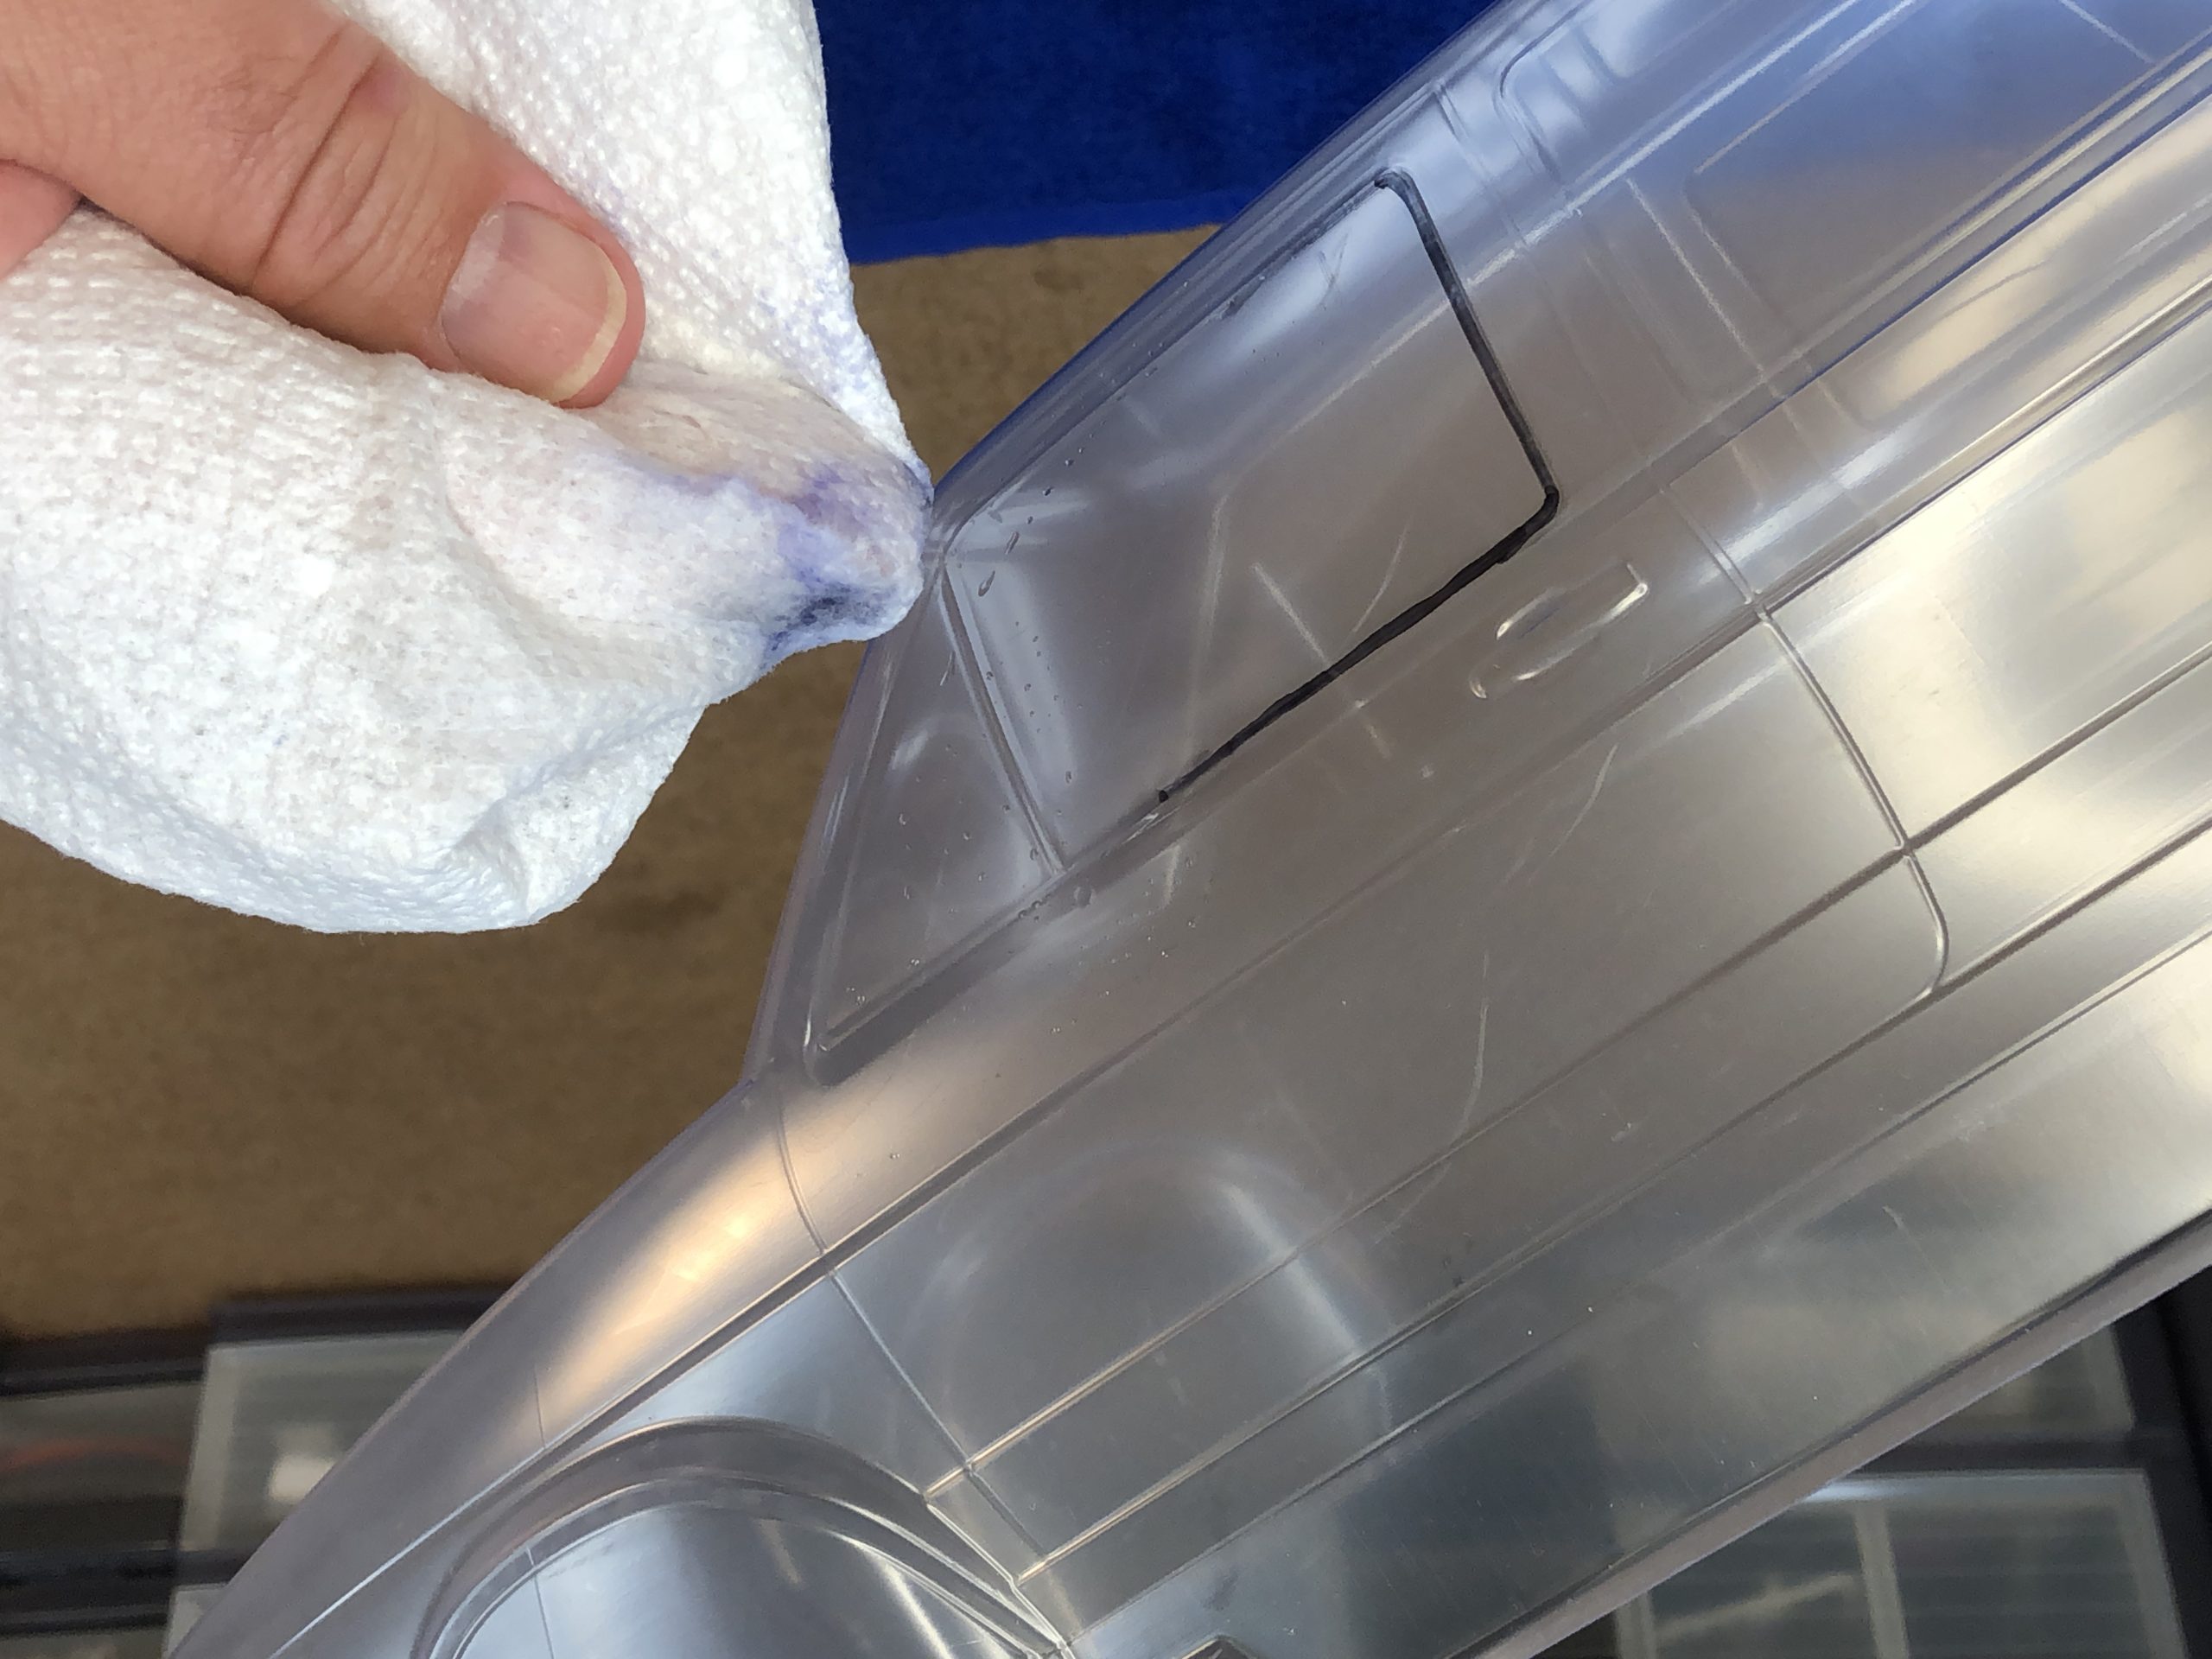
Using a Sharpie marker, draw a line on the perimeter of each window. This will make it much easier to see exactly where the edge of the window is located for placing the window masks. If you make a mistake with the marker, it easily rubs off with a paper towel damped with some rubbing alcohol.
A benefit with most Tamiya bodies, including this VW Golf II, is there are tiny dimples molded into the surface that let you know exactly where holes need to be added. Holes for things like body posts, the ABS plastic rally light buckets, bumpers and even the side view mirrors. If you have a body that does not have these helpful dimples, use a marker for the body post holes. It is much easier to figure this out while the body is unpainted. Same thing goes for the wheel well openings.
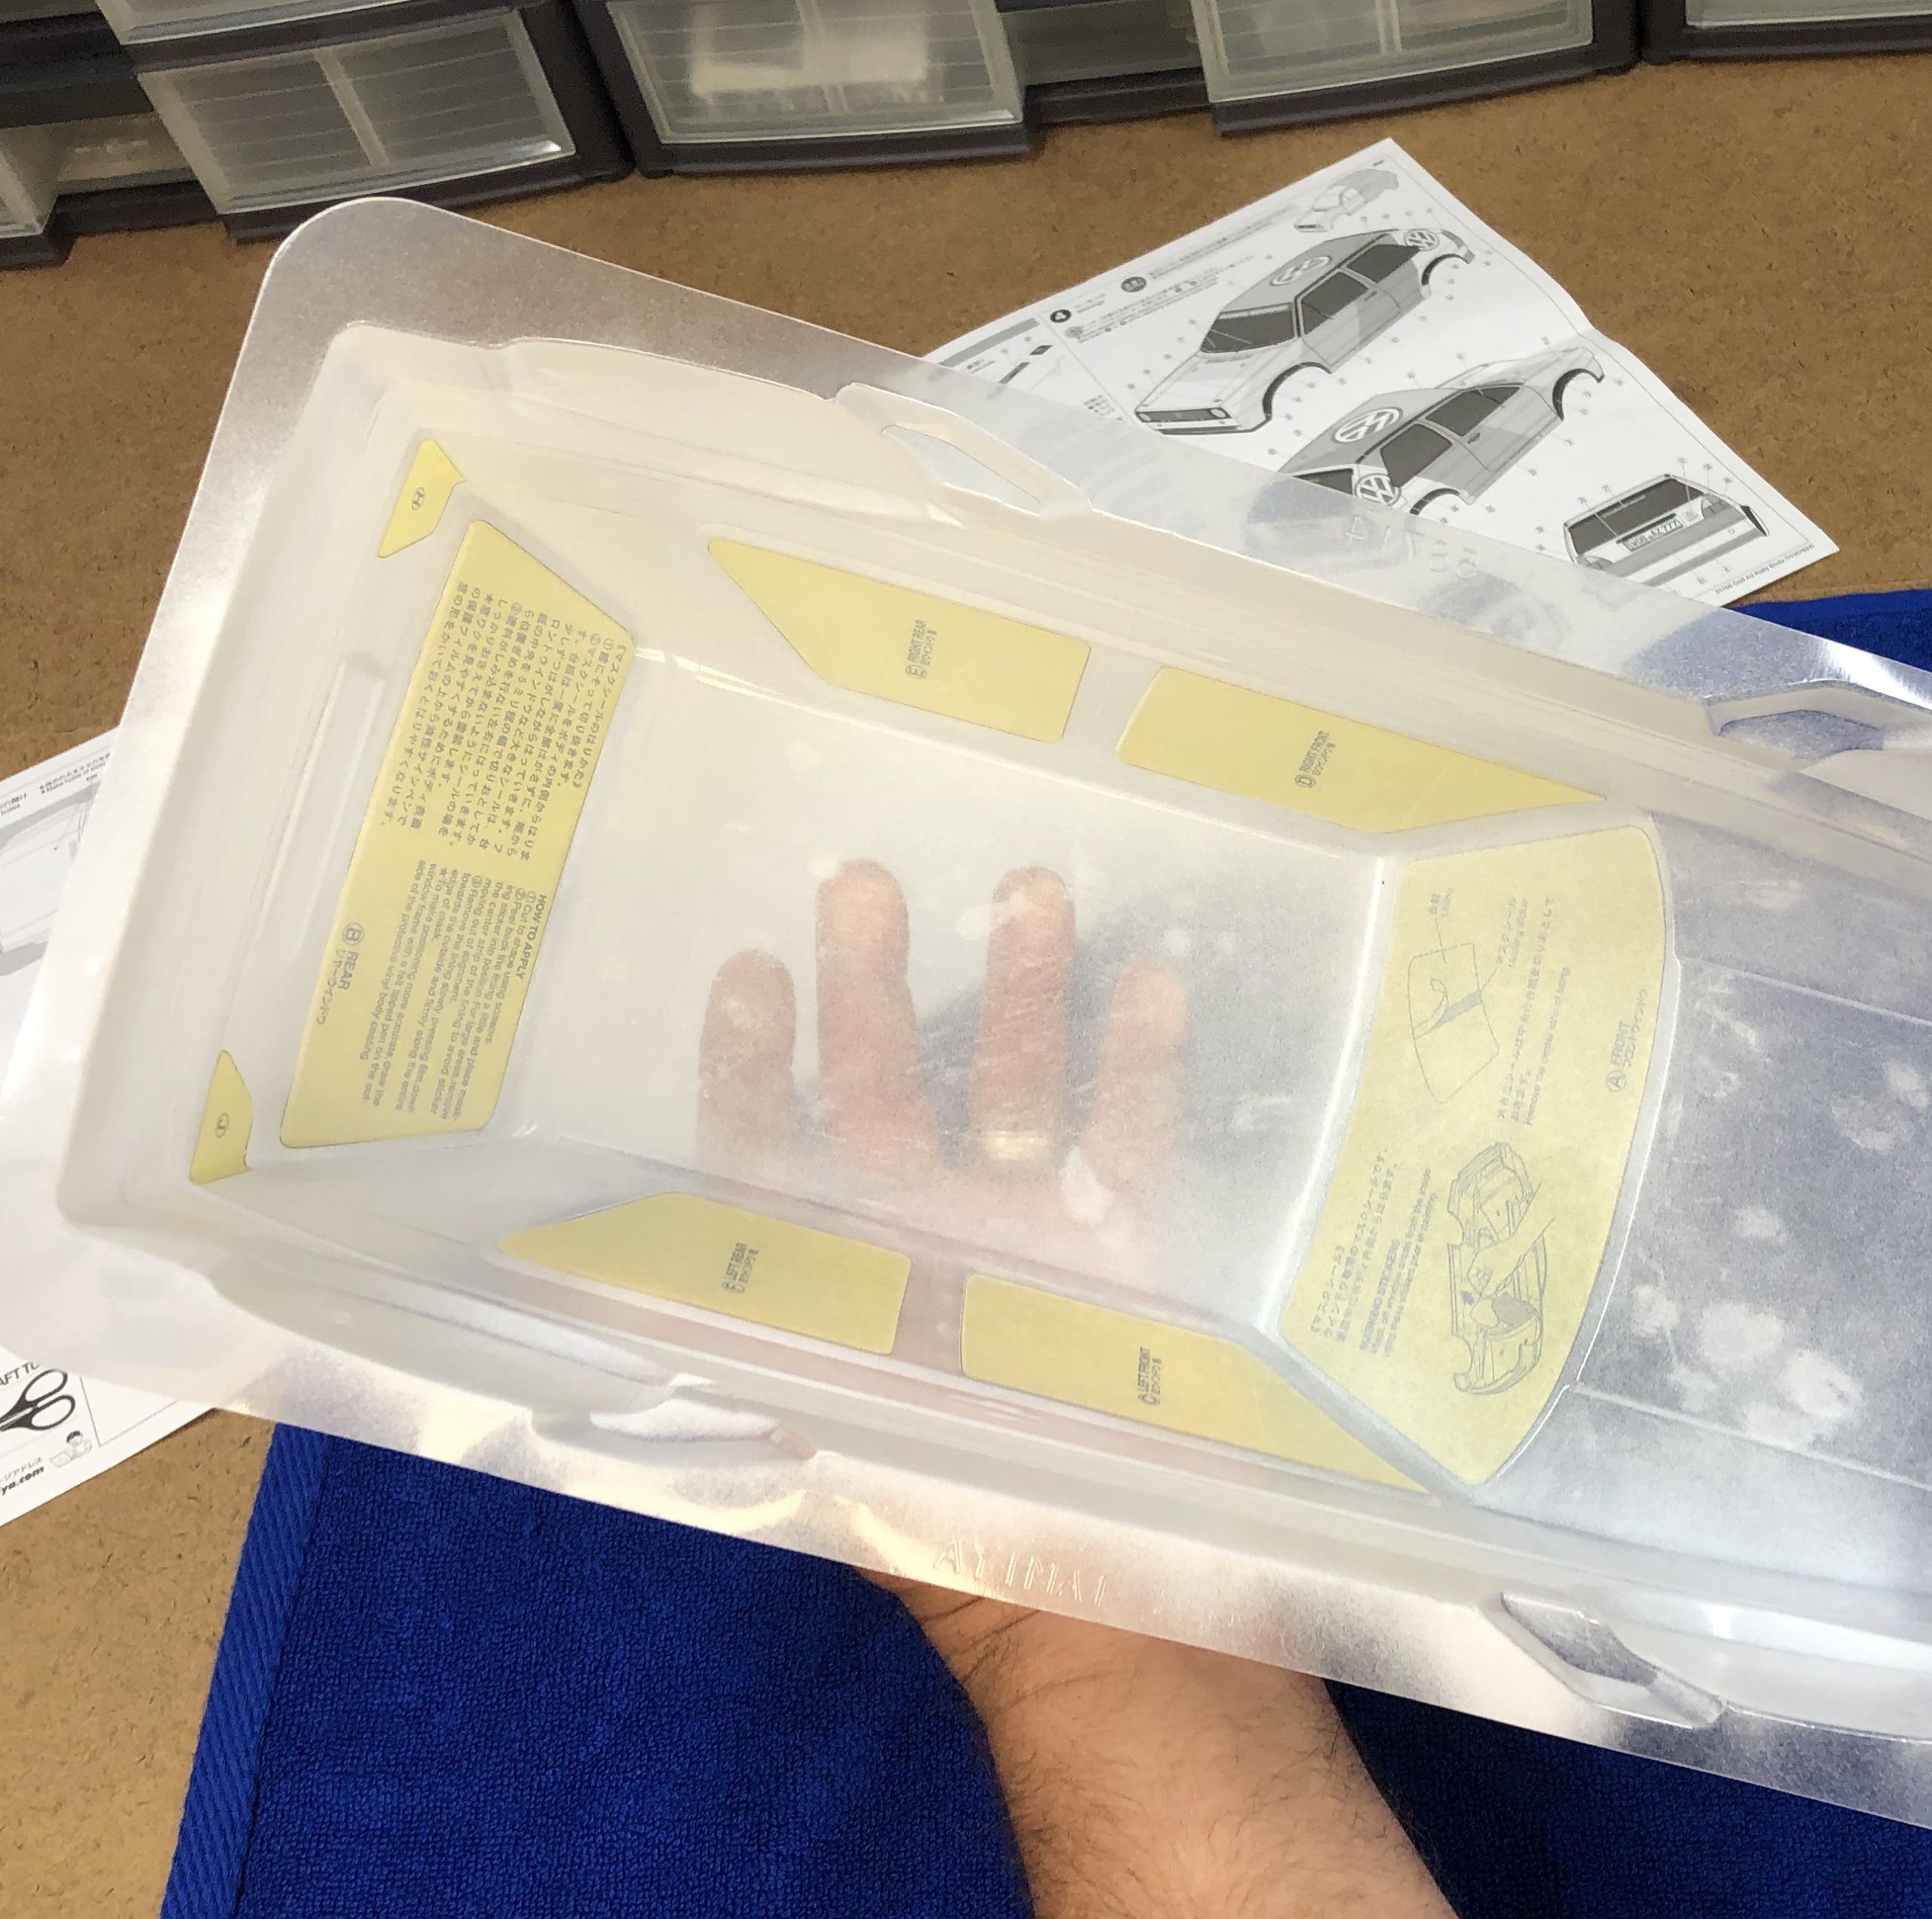
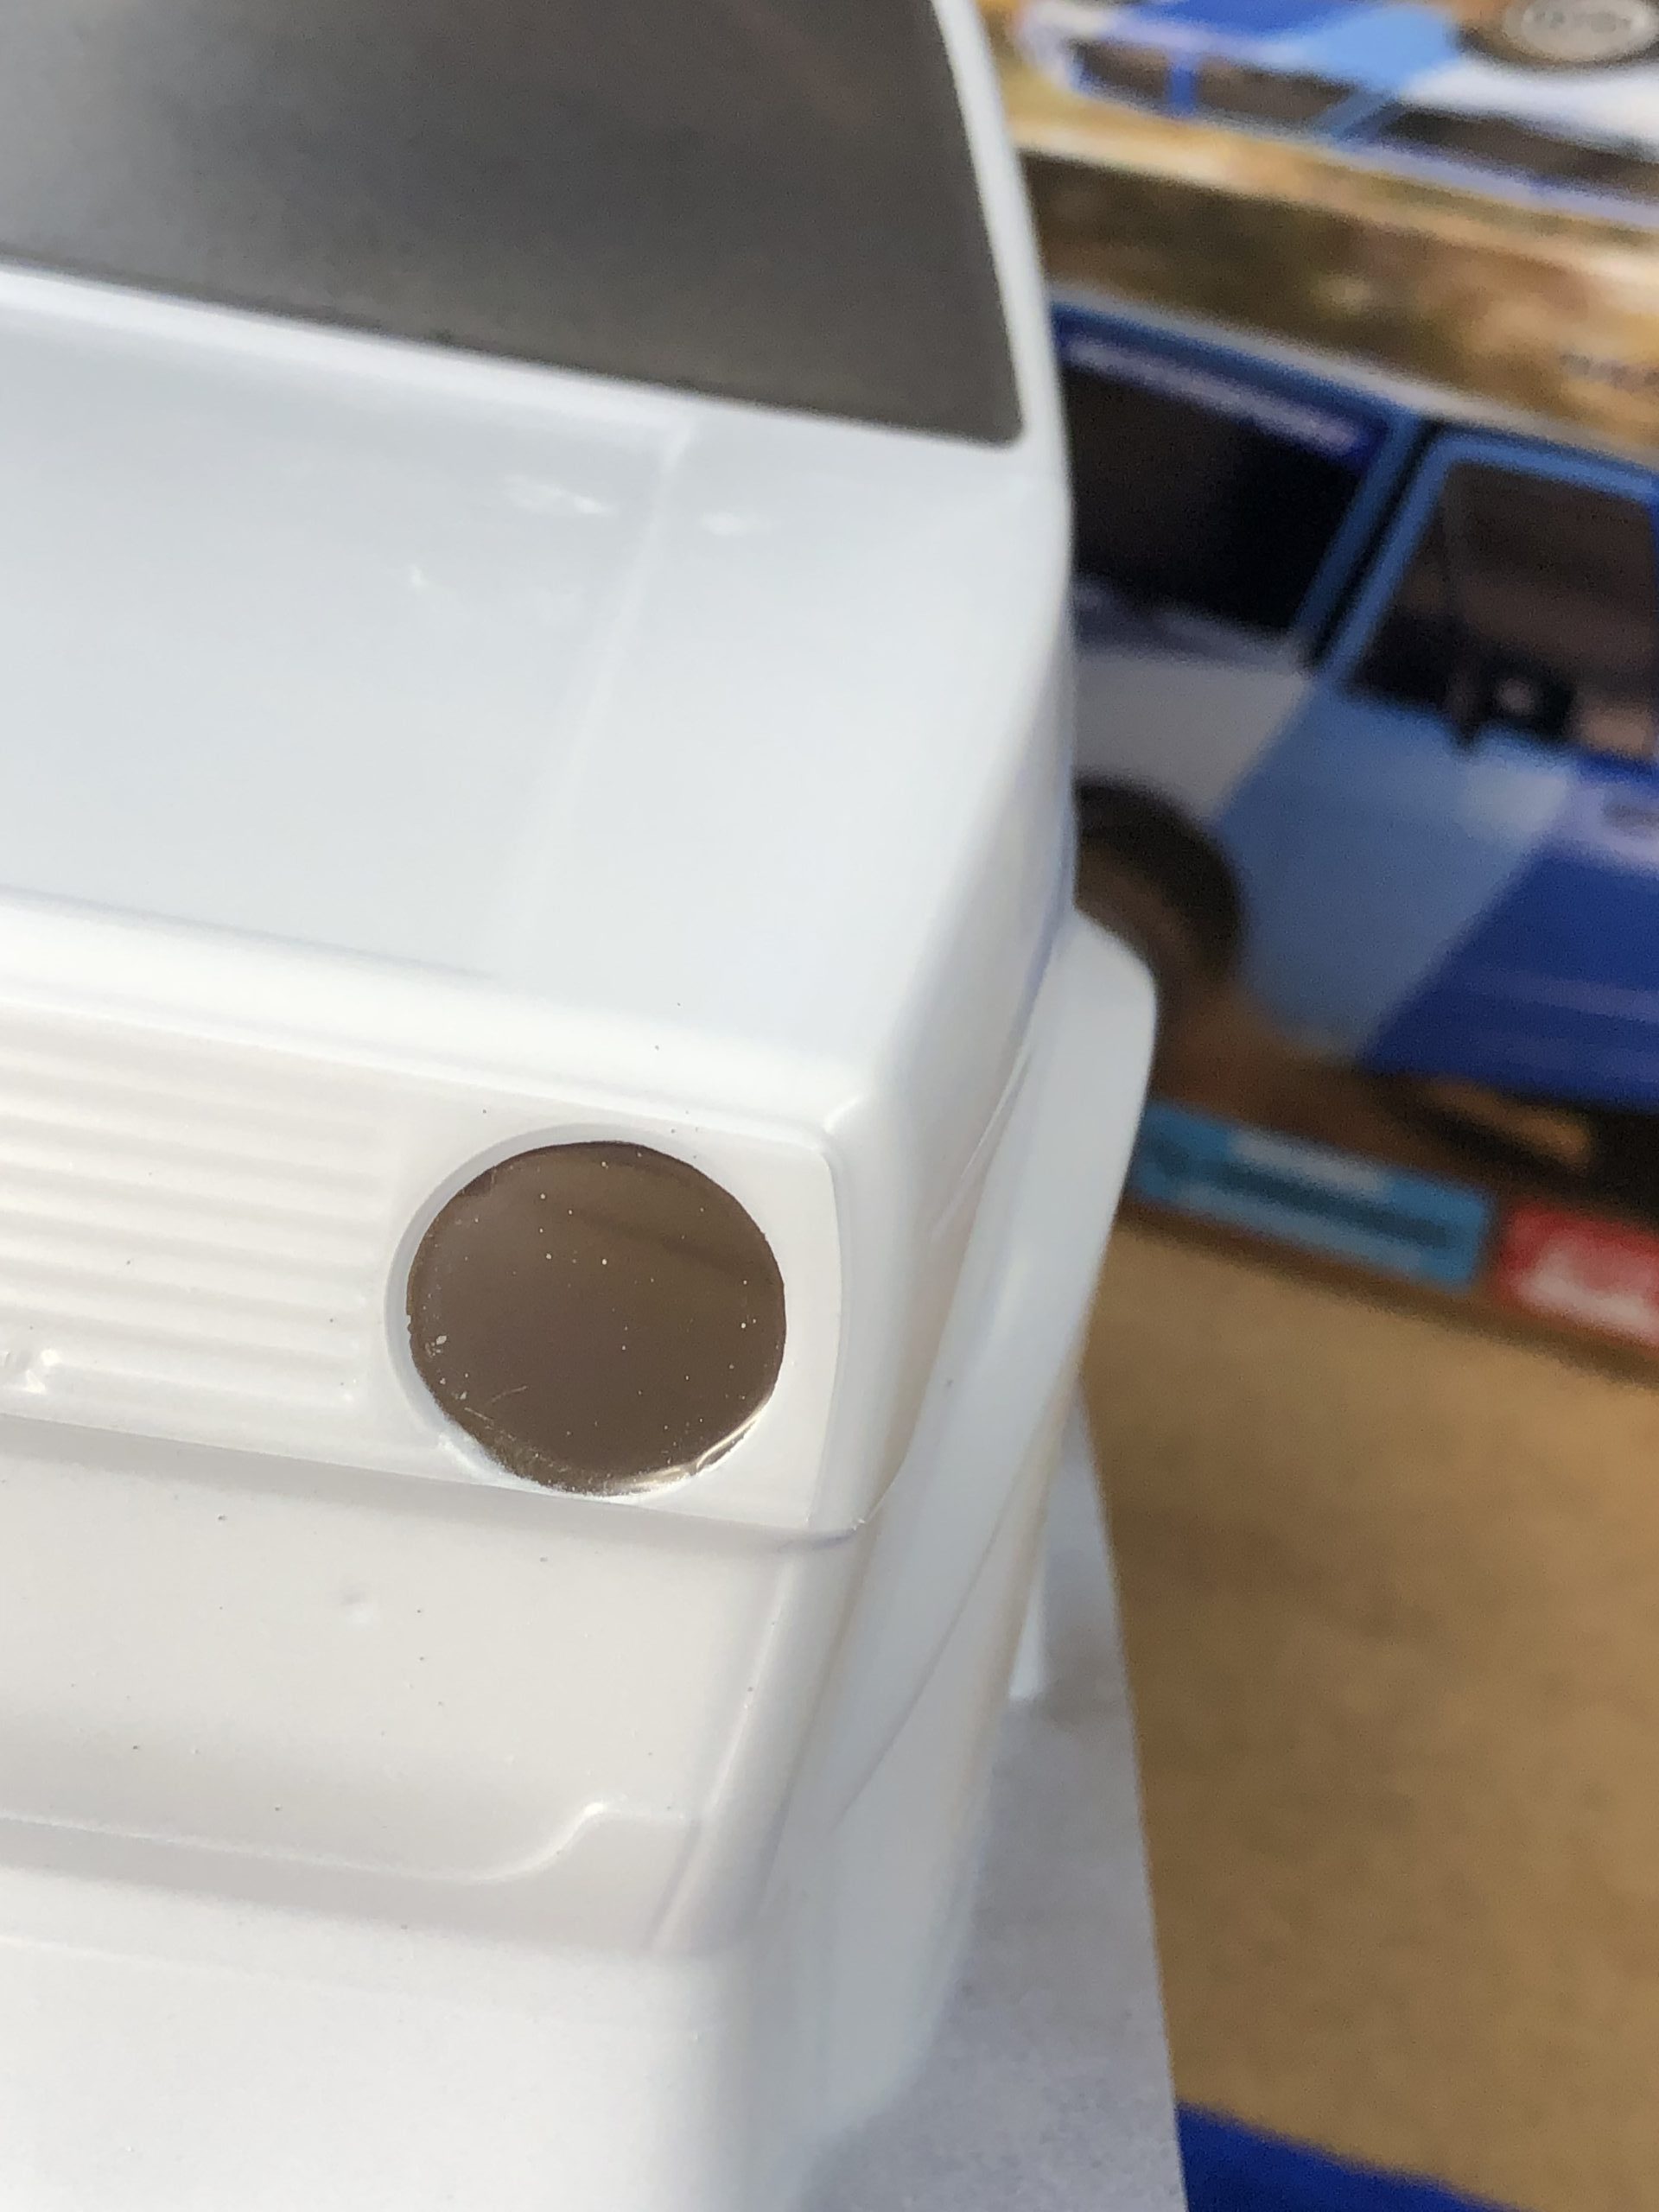
MASK THE WINDOWS HEADLIGHTS AND TAILLIGHTS
It makes a big difference in the realism of a RC car if the windows are clear or covered with a sticker. Since Tamiya is noticeably focused on realistic vehicles, they include masking for the windows as well as for the headlights and taillights so that they end up clear. Tamiya helps you out with this step and has each of the masks identified and drawn perfectly to the size needed for each part.
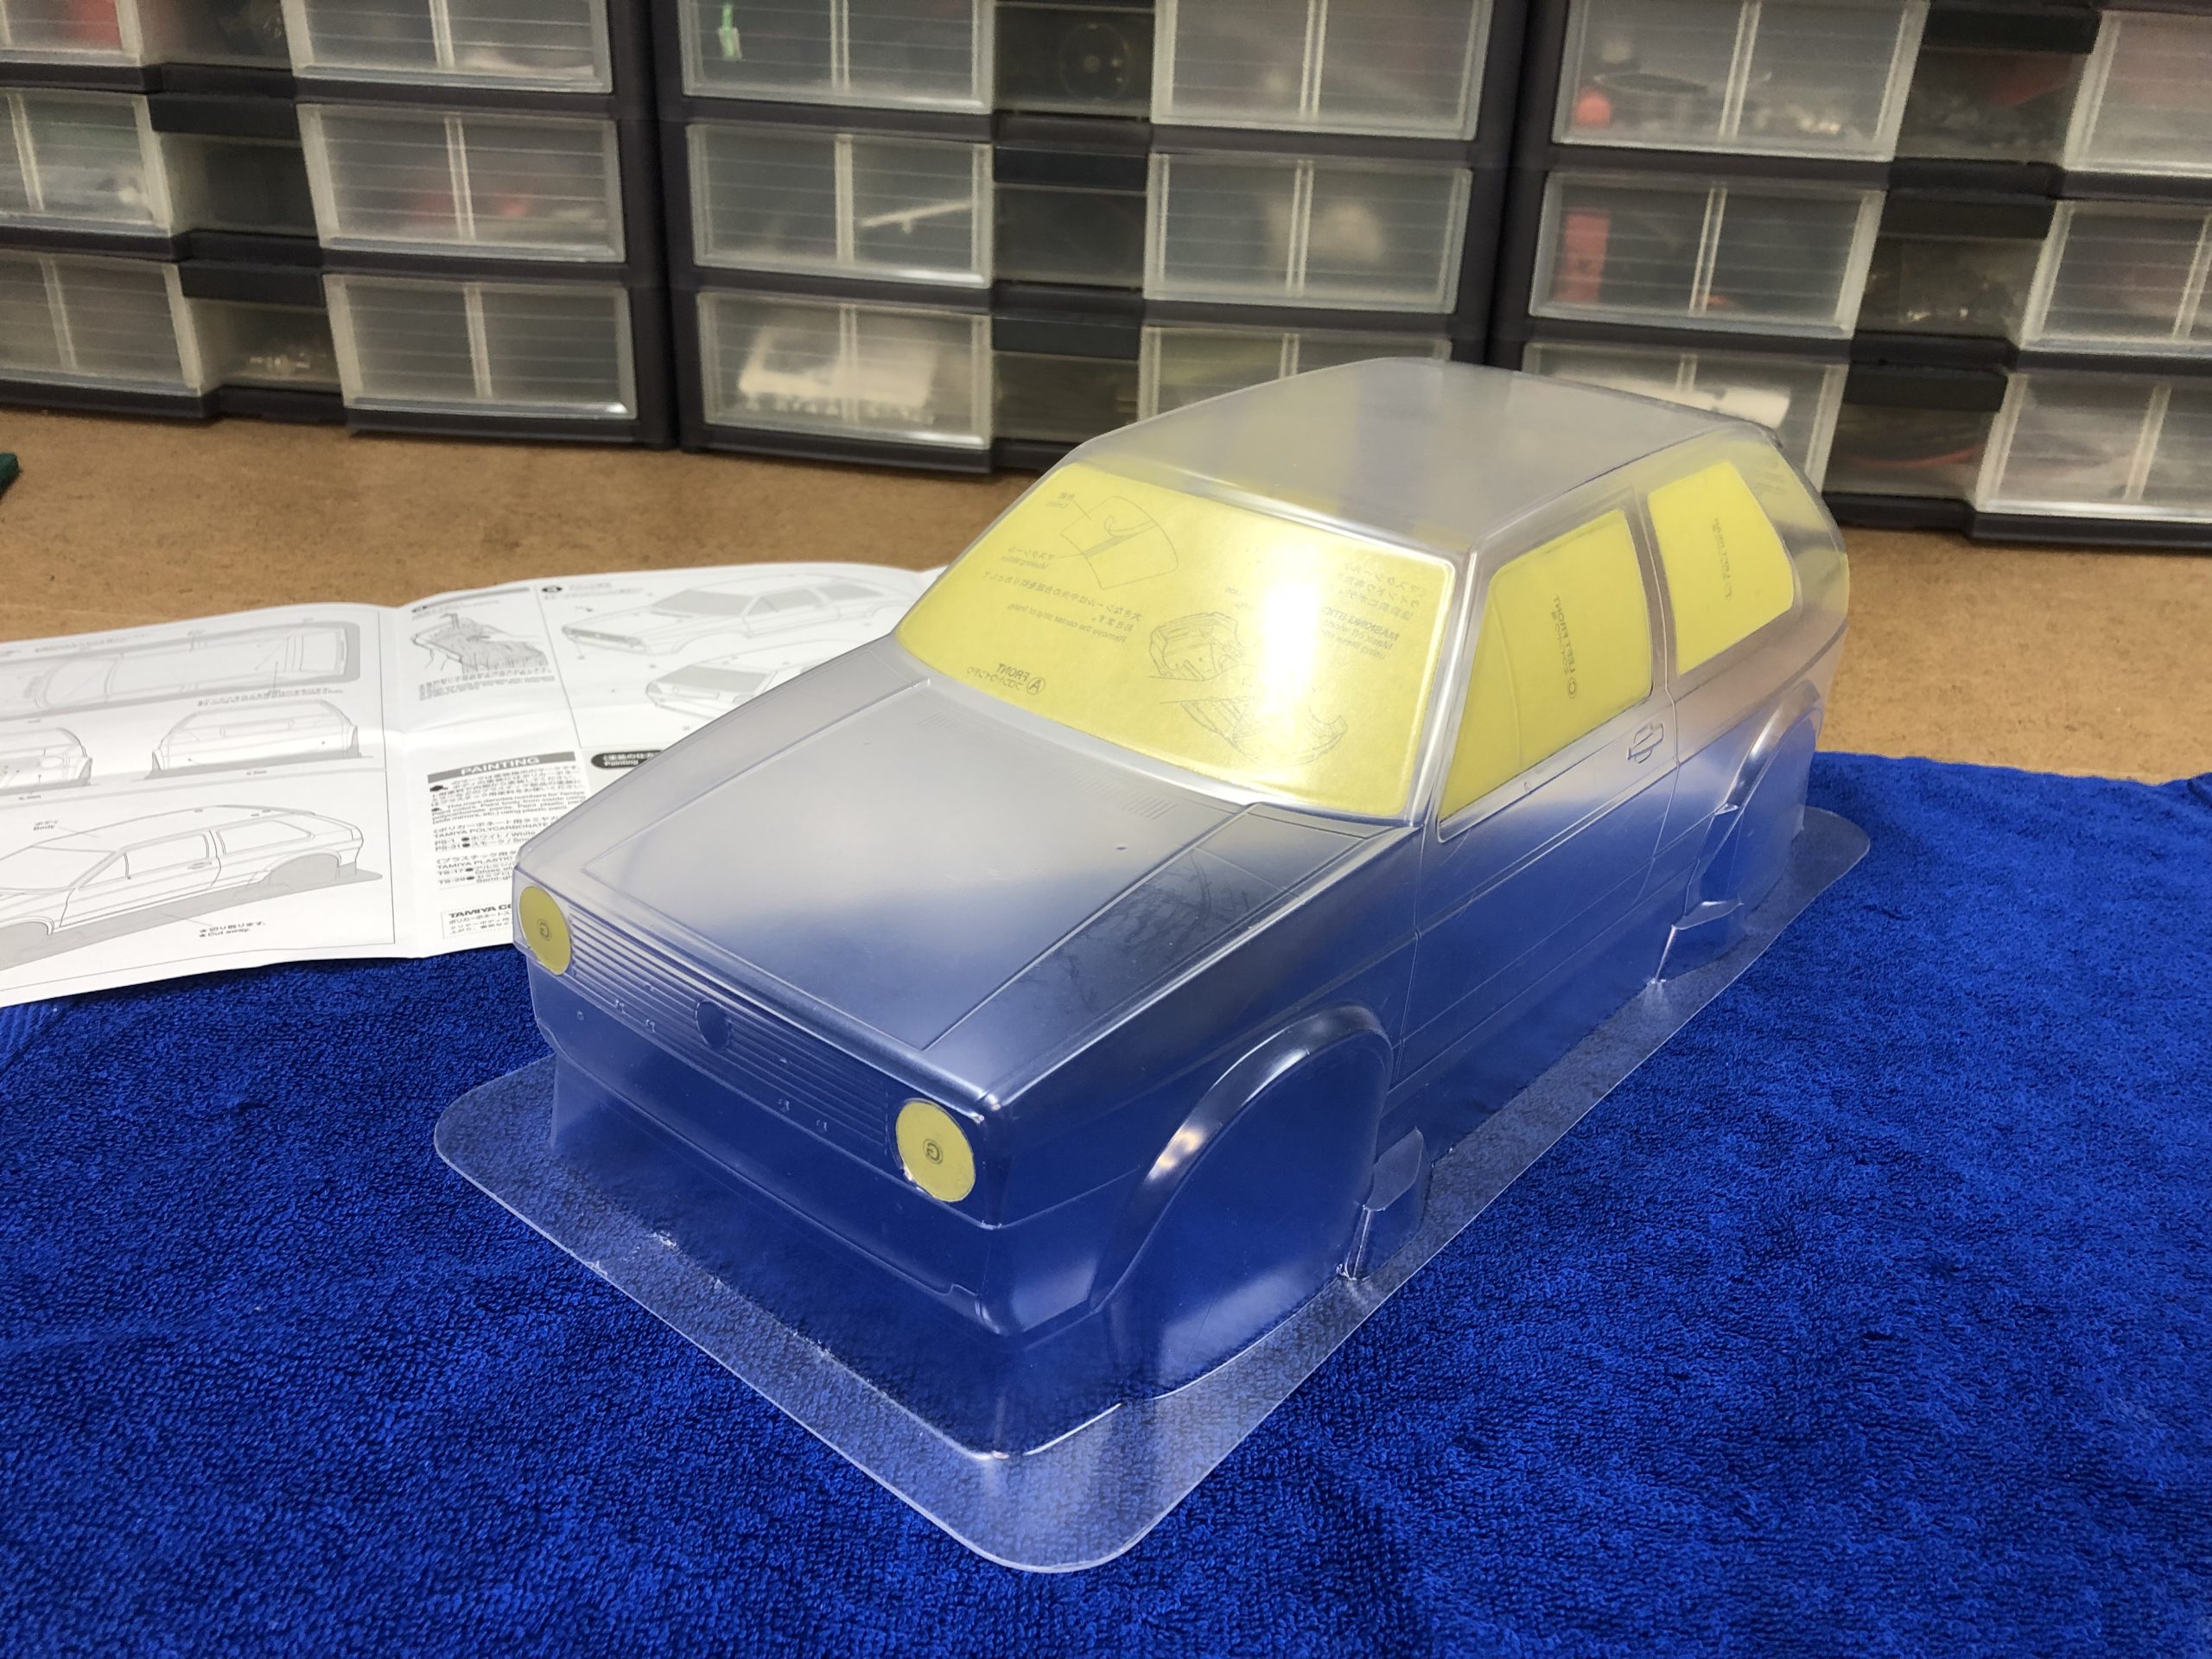

Cut out each mask following the perimeter lines that Tamiya added to the masks. For small masks like the headlights and taillights, remove the backing from the mask and carefully place it on the inside of the body in the appropriate spot. The larger masks like the front windshield takes some extra steps so that you get it perfectly positioned on the body. The last thing you want to do is needing to keep removing the mask to get it in the right spot. Each time you remove the mask, it won’t stay flat and it will roll up onto itself. You also take the chance of introducing oils from your hands onto the inside of the body and have adequate adhesion to keep the mask laying smoothly on the body.
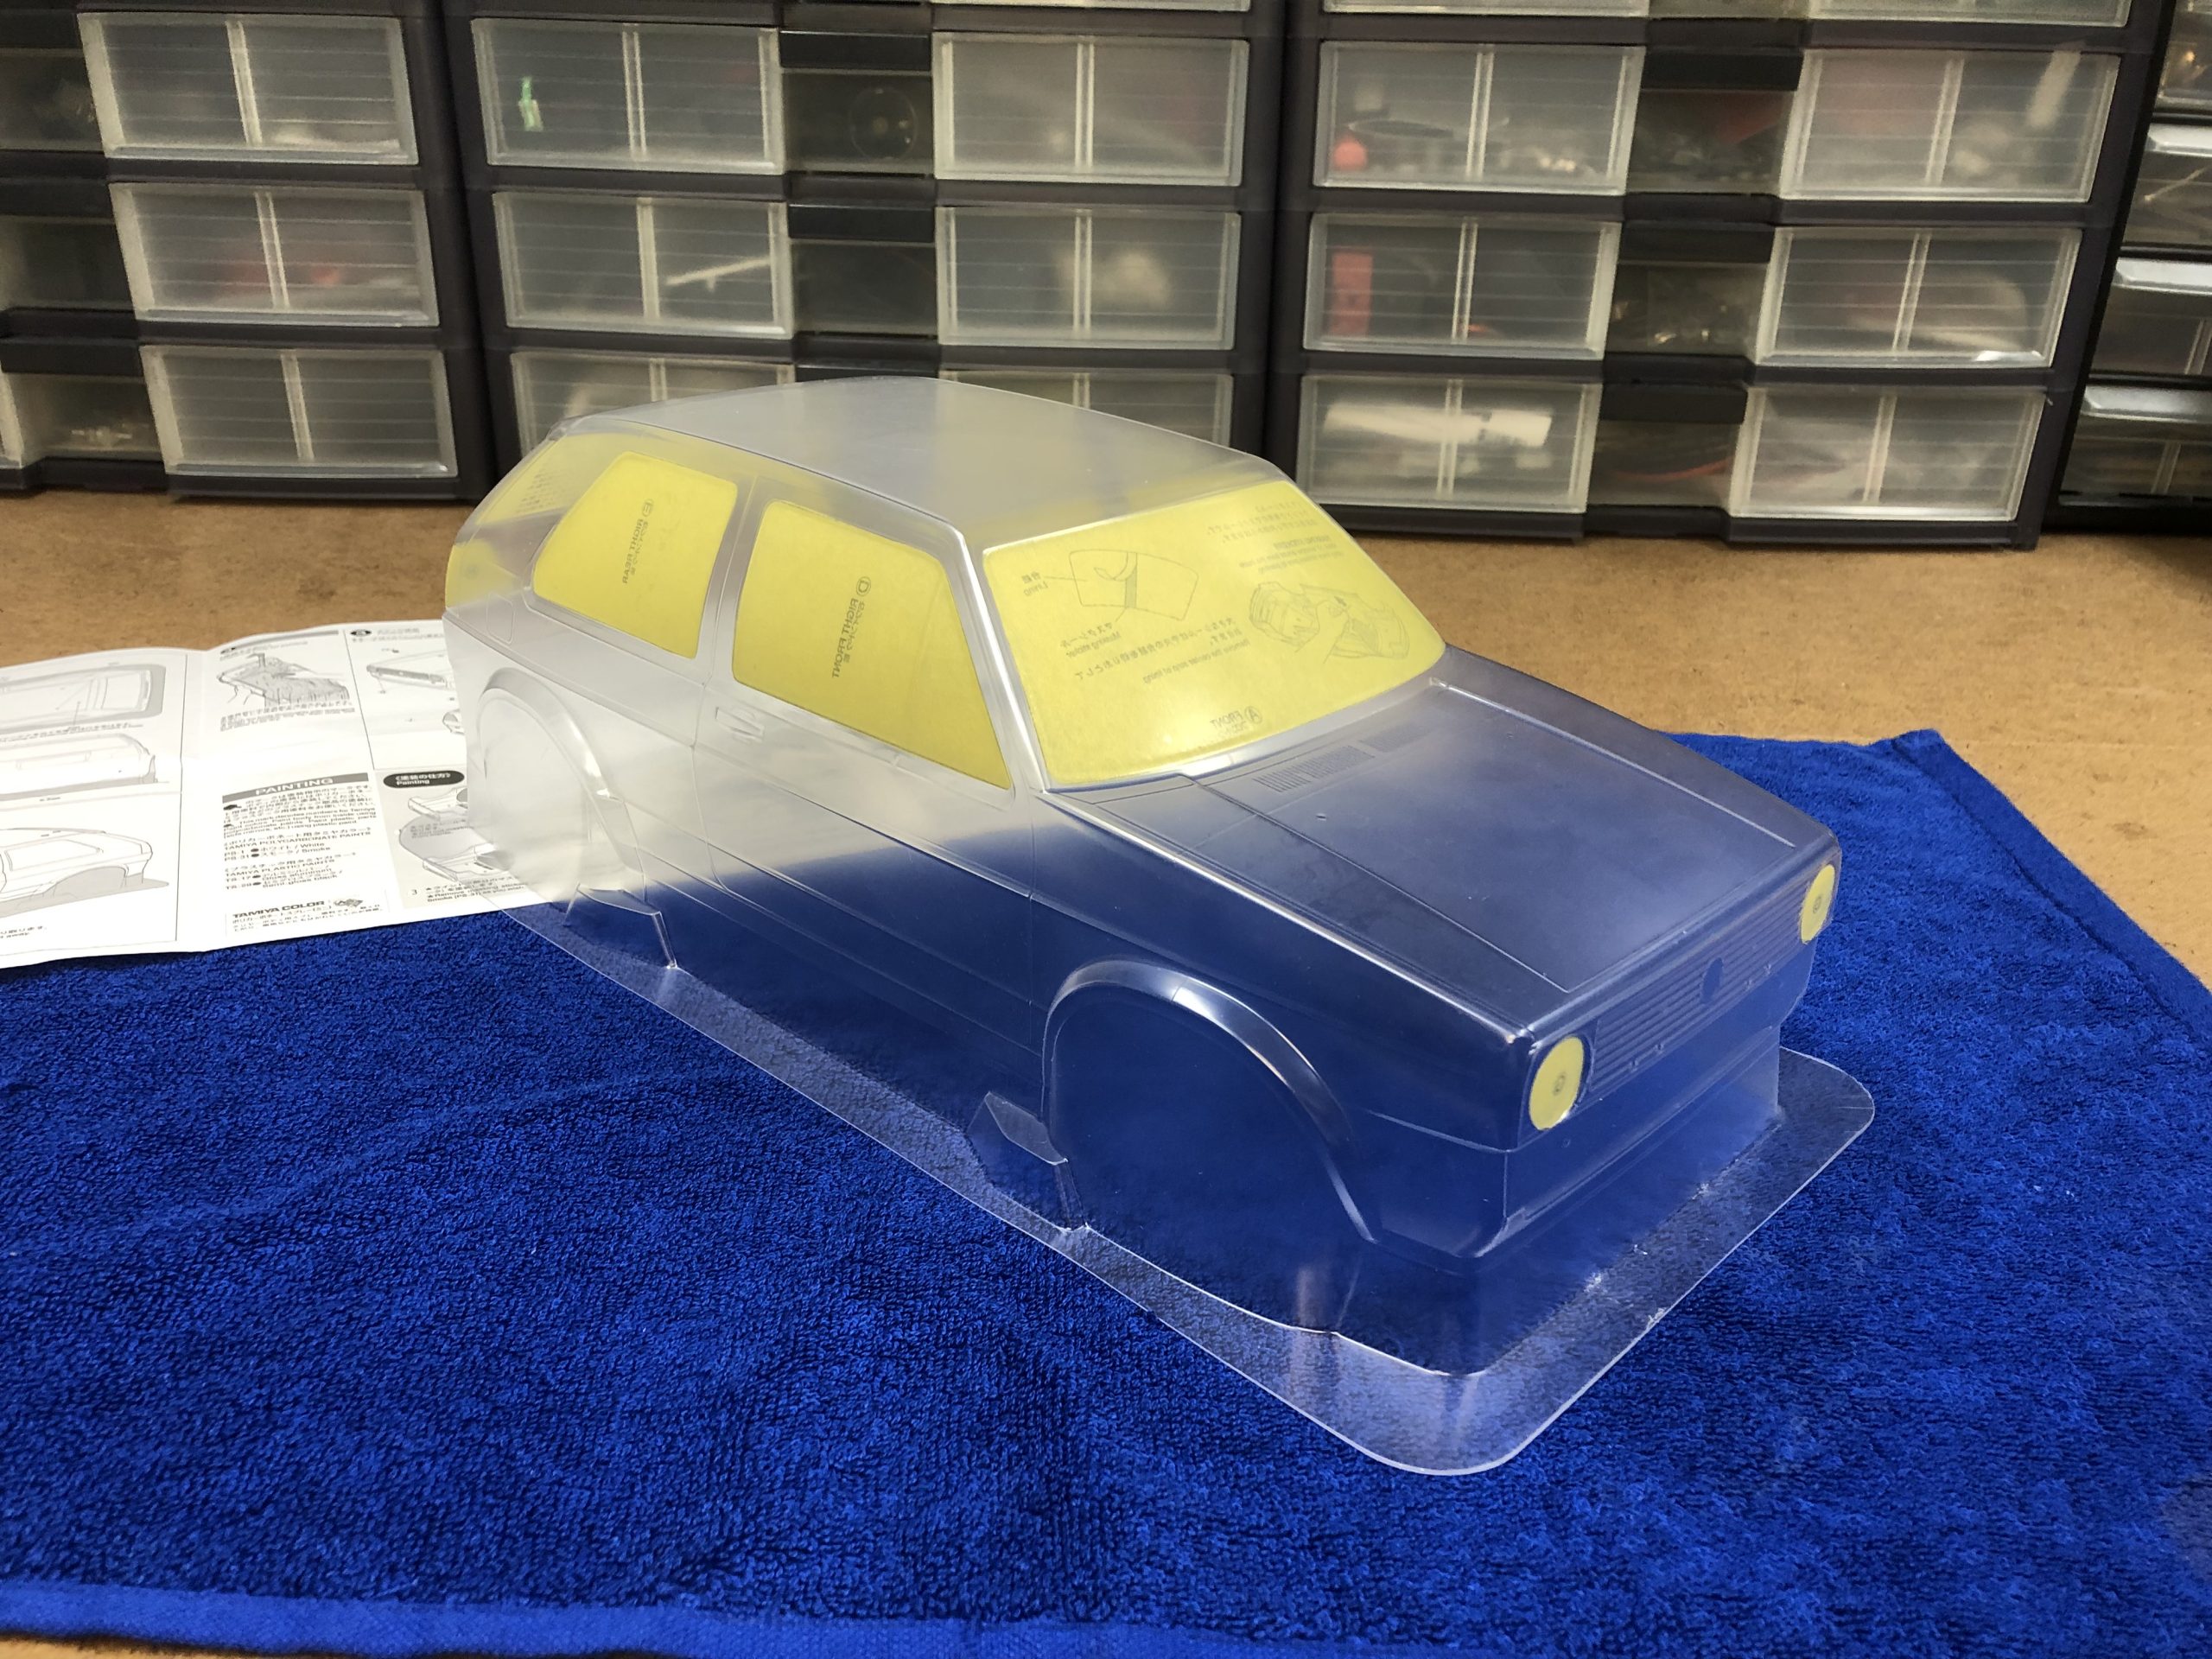
The trick with applying large masks is to remove a small section of the backing while leaving the rest intact. The exposed adhesive will give you enough stickiness to hold the mask in place while you work on getting it accurately lined up on the body. Once the mask it lined up, remove the remaining backing and lay the mask in place. Be sure to burnish the edges of the mask so they are laying perfectly flat against the surface of the body and this will help keep paint from running underneath. Use your fingernail or a credit card to work the edges of the masks.
SPRAY LIGHT FIRST COAT
Make sure the inside surface of the body does not have any lint or other debris on it from the masking process before you start painting. The trick here is to spray the first coat of paint very lightly. Light enough so that you can see your hand if you held it behind the body. A light coat of paint like this will help “seal” the edges of the masks and then they will act as a barrier to keep paint from running underneath. Going with a heavier first coat can lead to paint bleeding under the mask and the paint can pool in certain spots thus making a darker area and this could be visible when the body is completed.
A tip with spraying paint from a can is to warm up the can by soaking for a few minutes in warm water. Then when you spray, the paint will be more atomized and it will have a light mist which is ideally what you want.
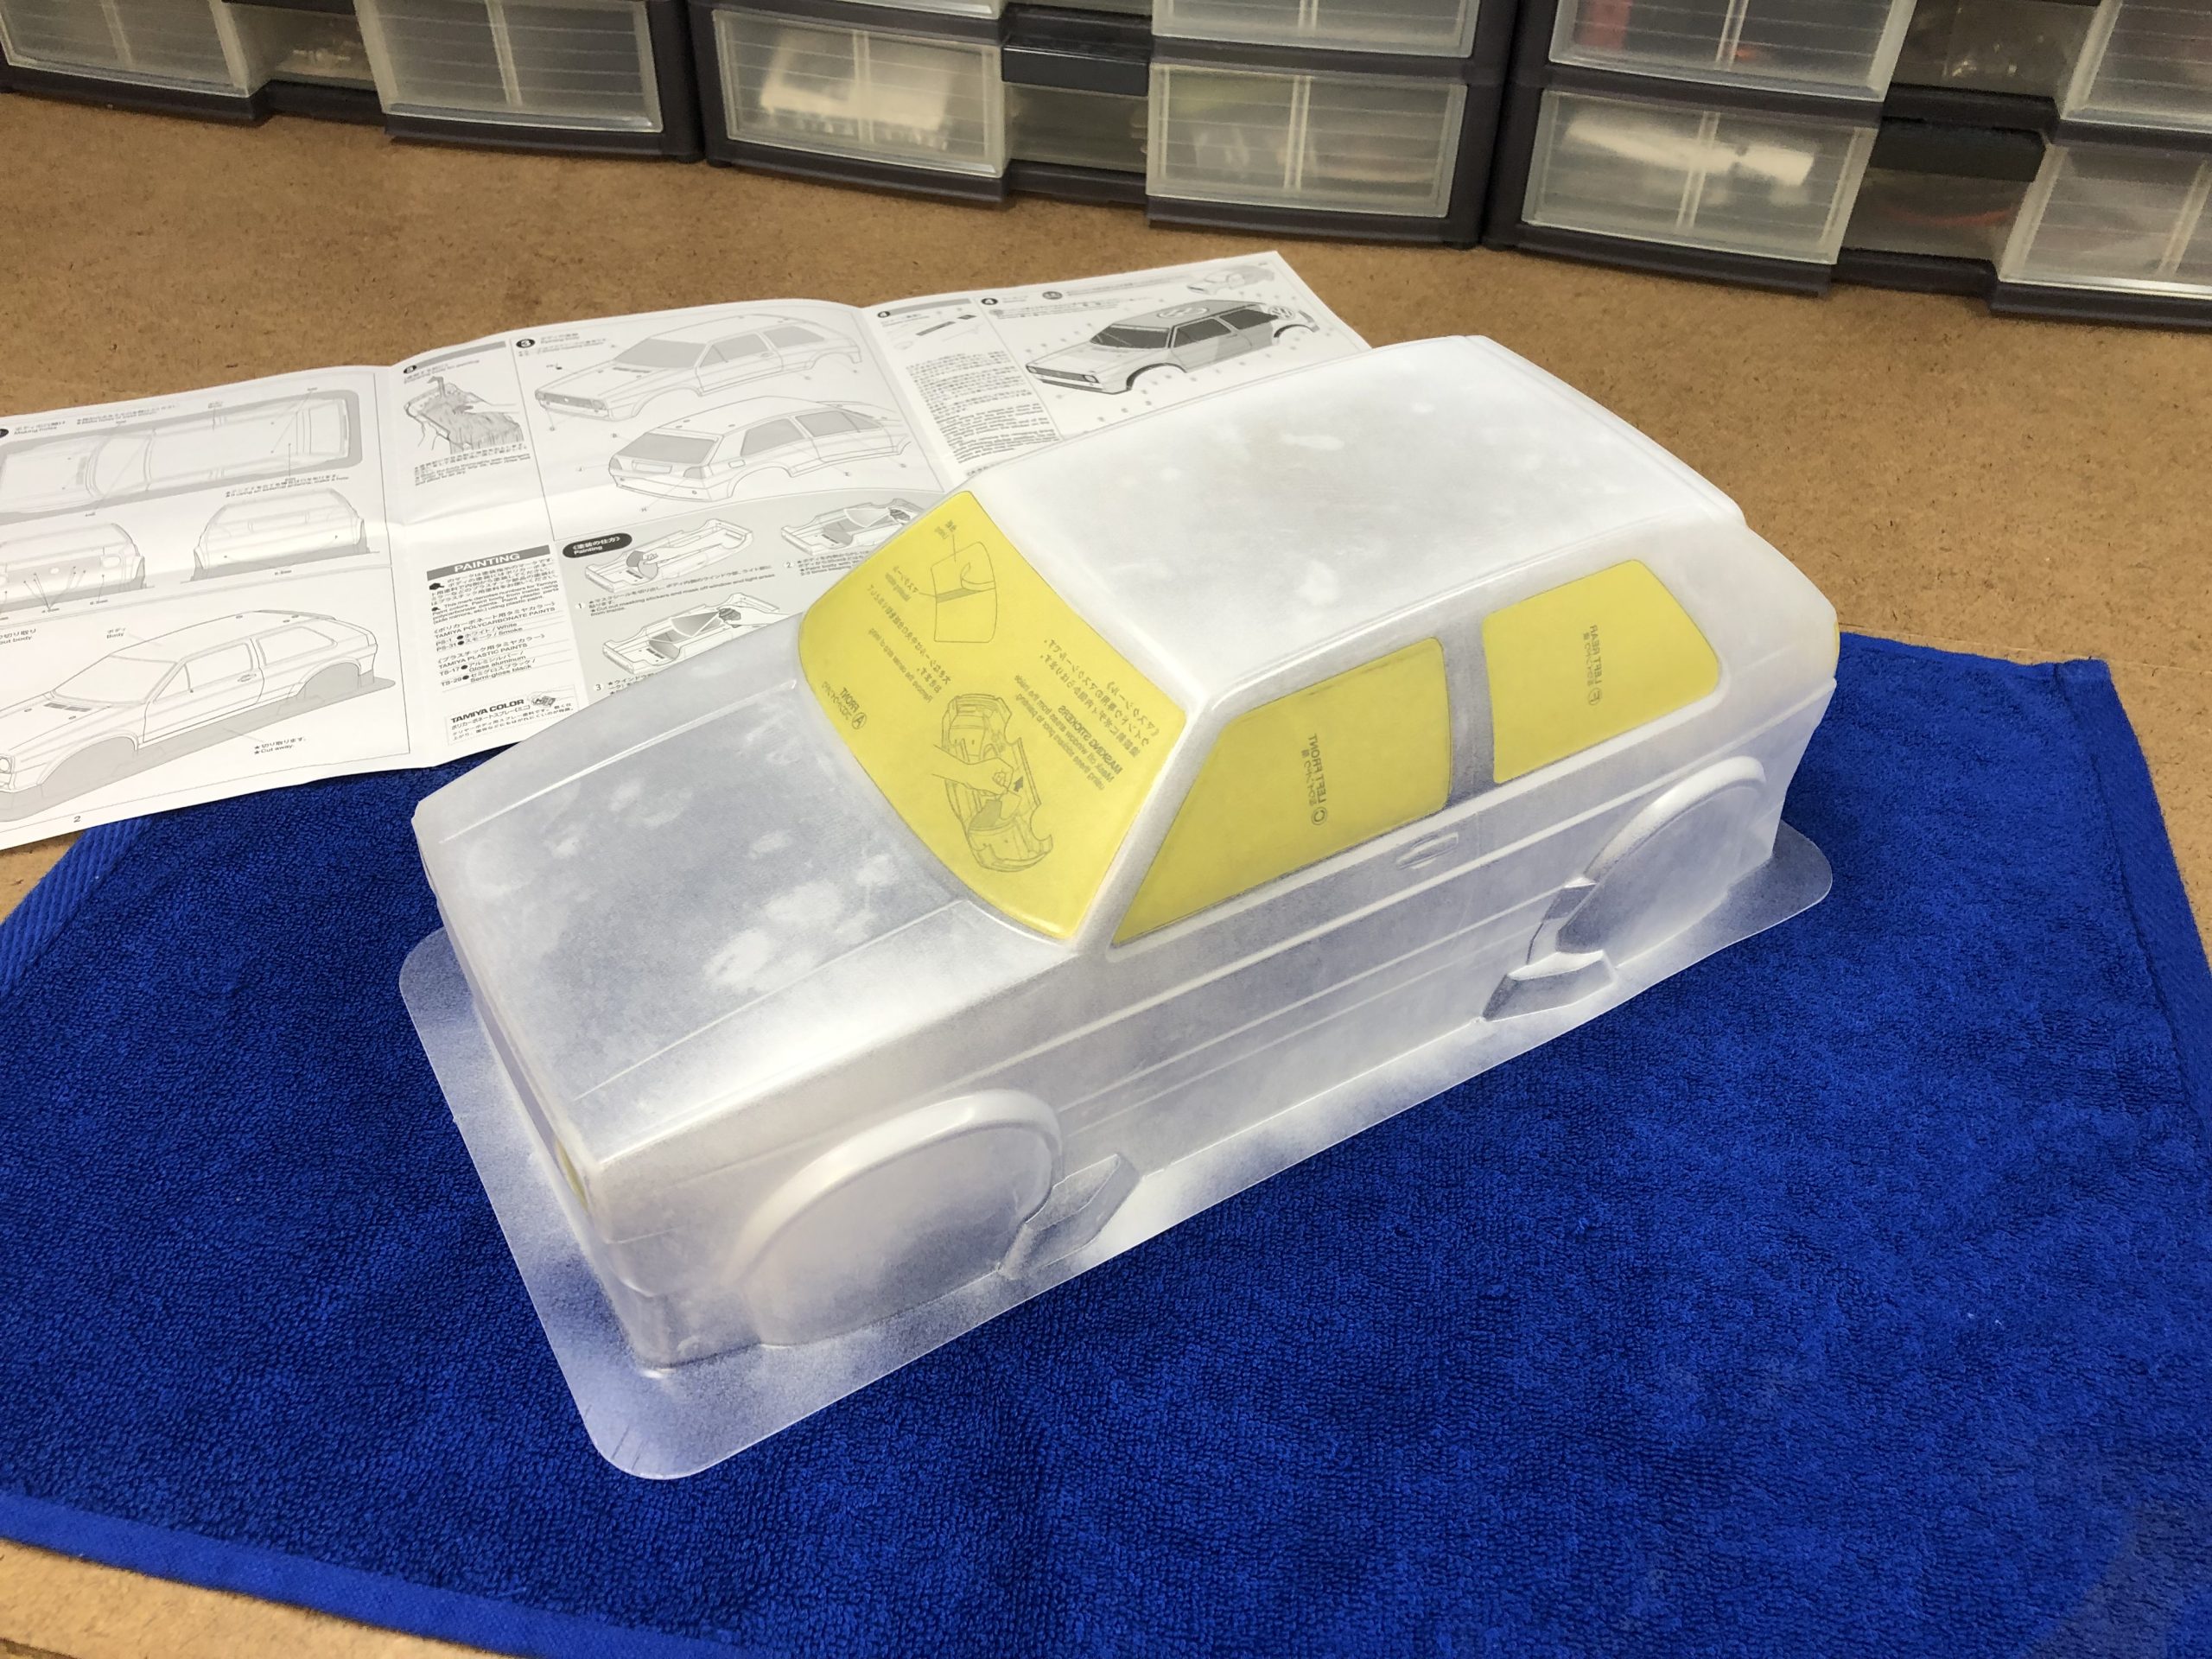
ALLOW PAINT TO DRY BETWEEN COATS
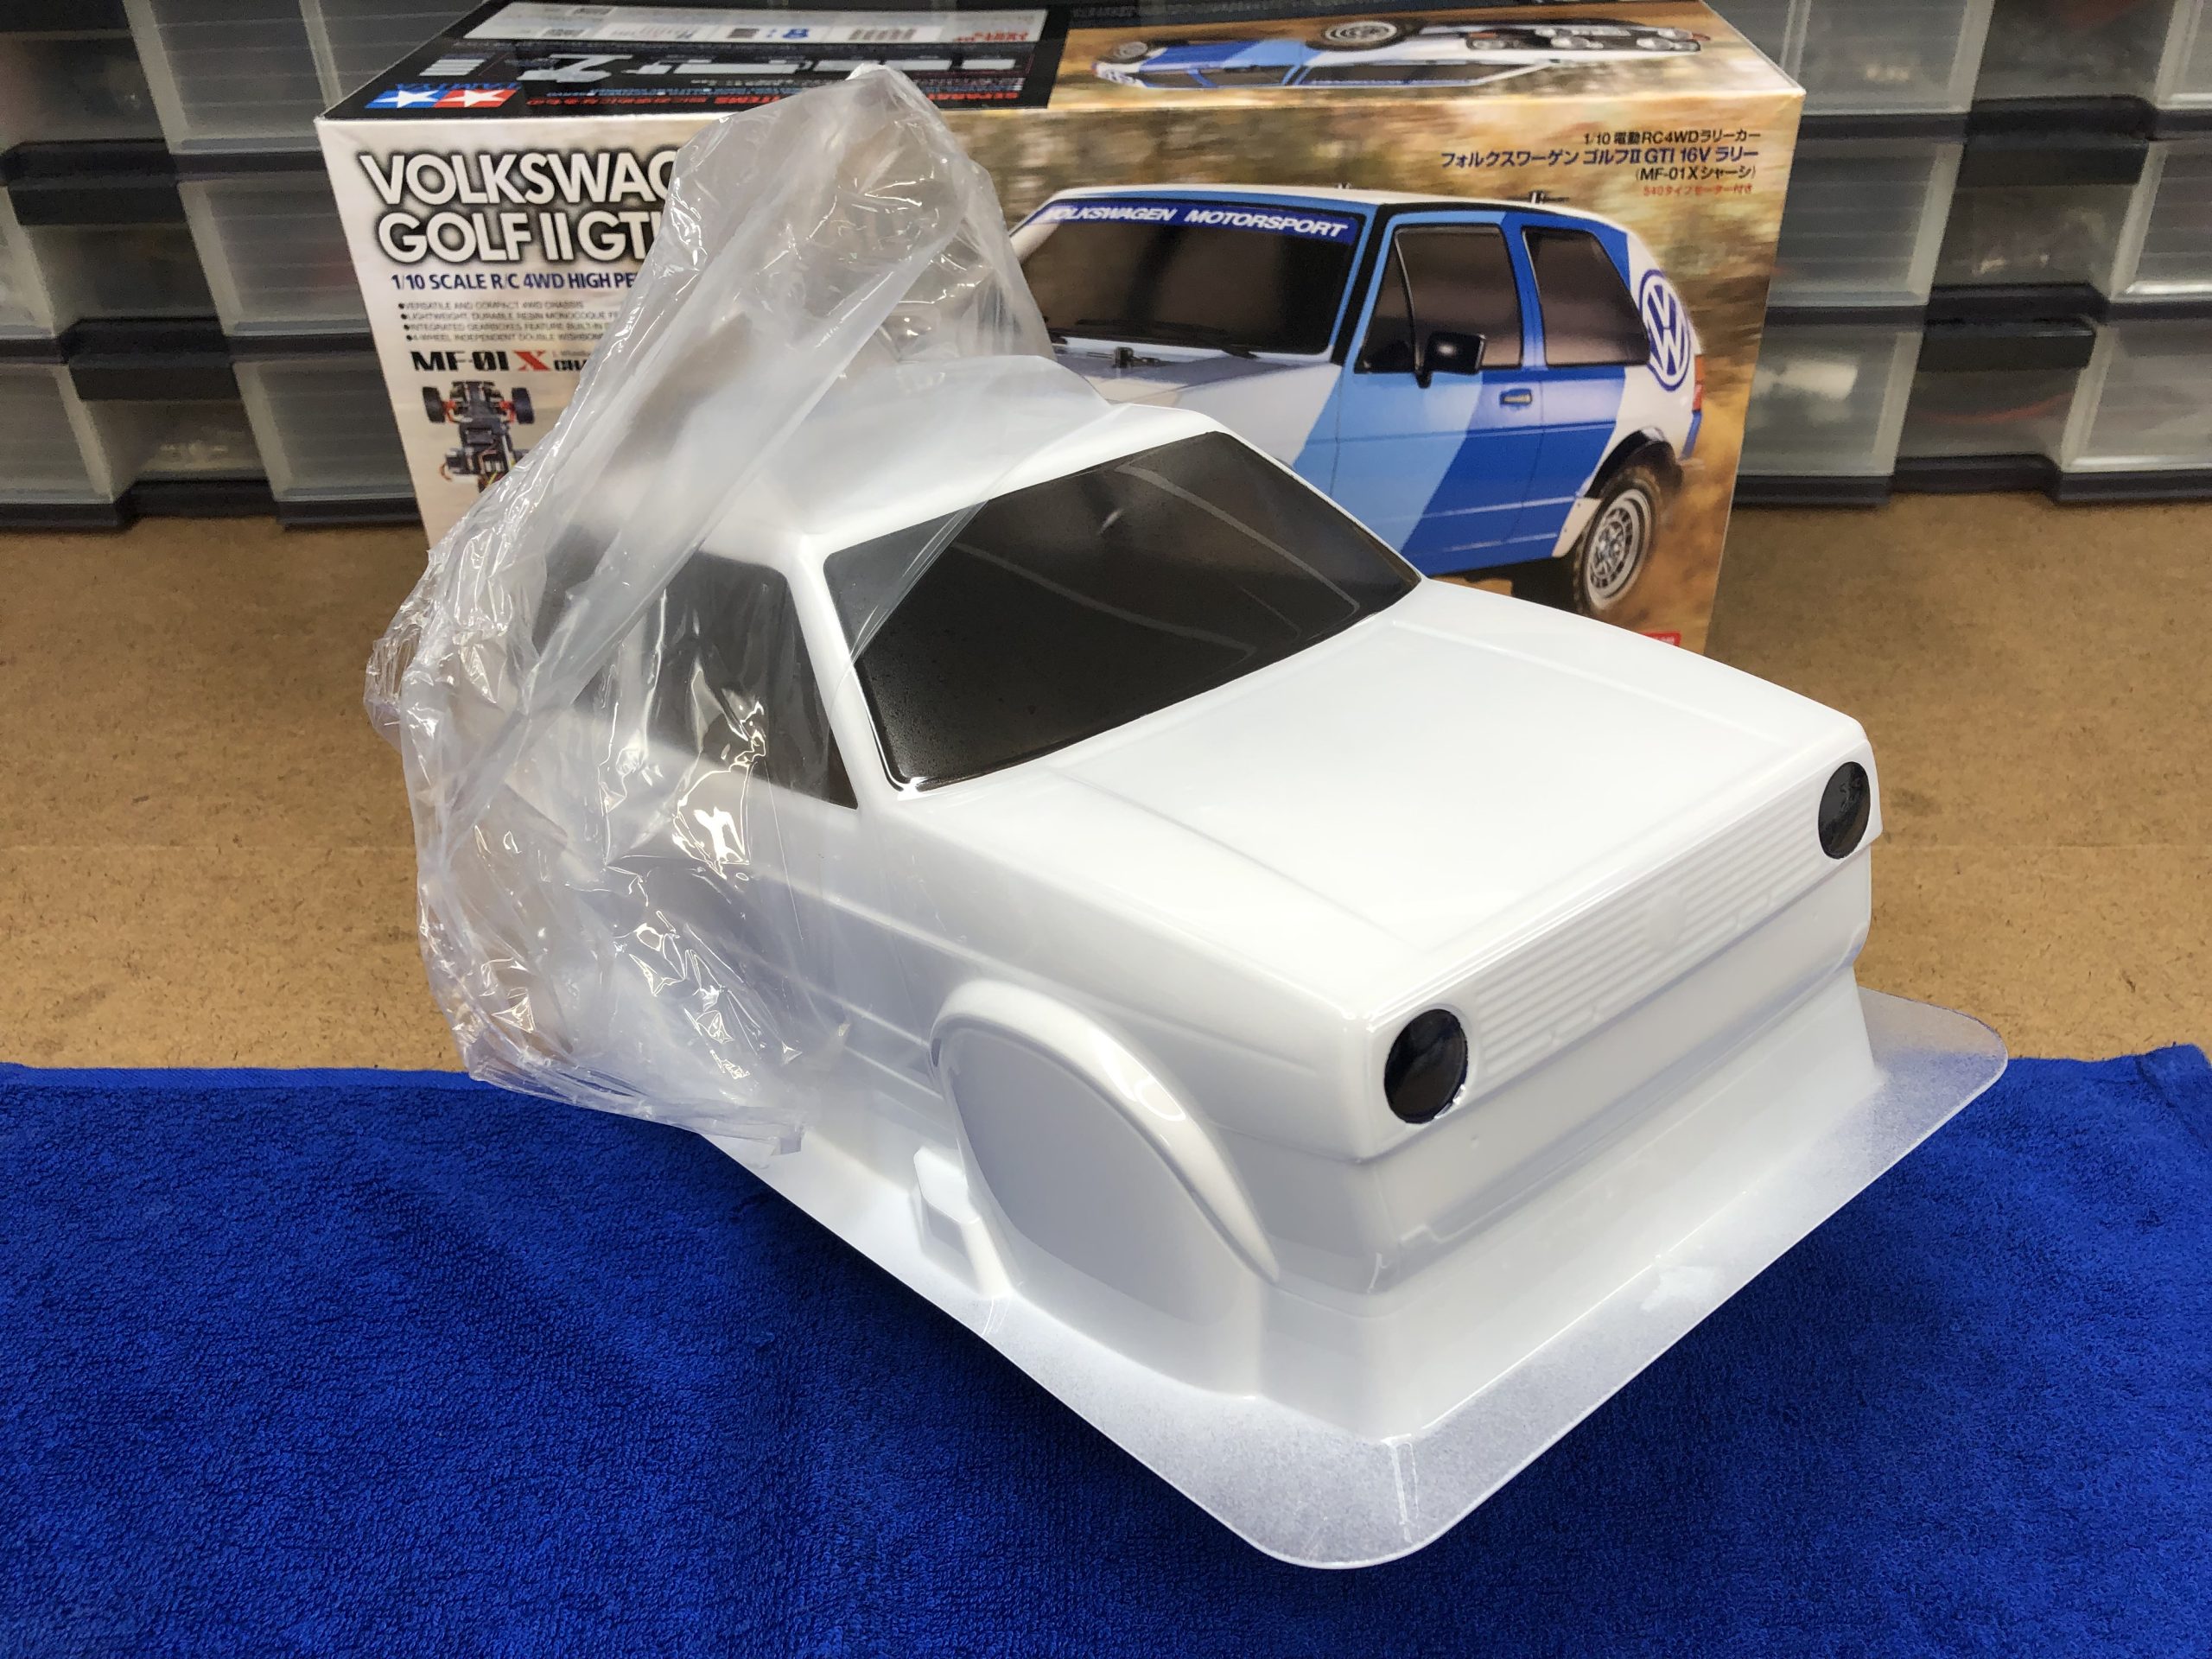
Be sure to allow the paint to dry before you spray the next coat of paint. A hairdryer can speed up this process, just be careful not to get too close to the body which can be deformed from too much heat. When the paint is dry, you can spray somewhat heavier coats than the first and continue to add coats until the color is opaque. Here is the body with the last coat of white we sprayed before we continued with the next step.
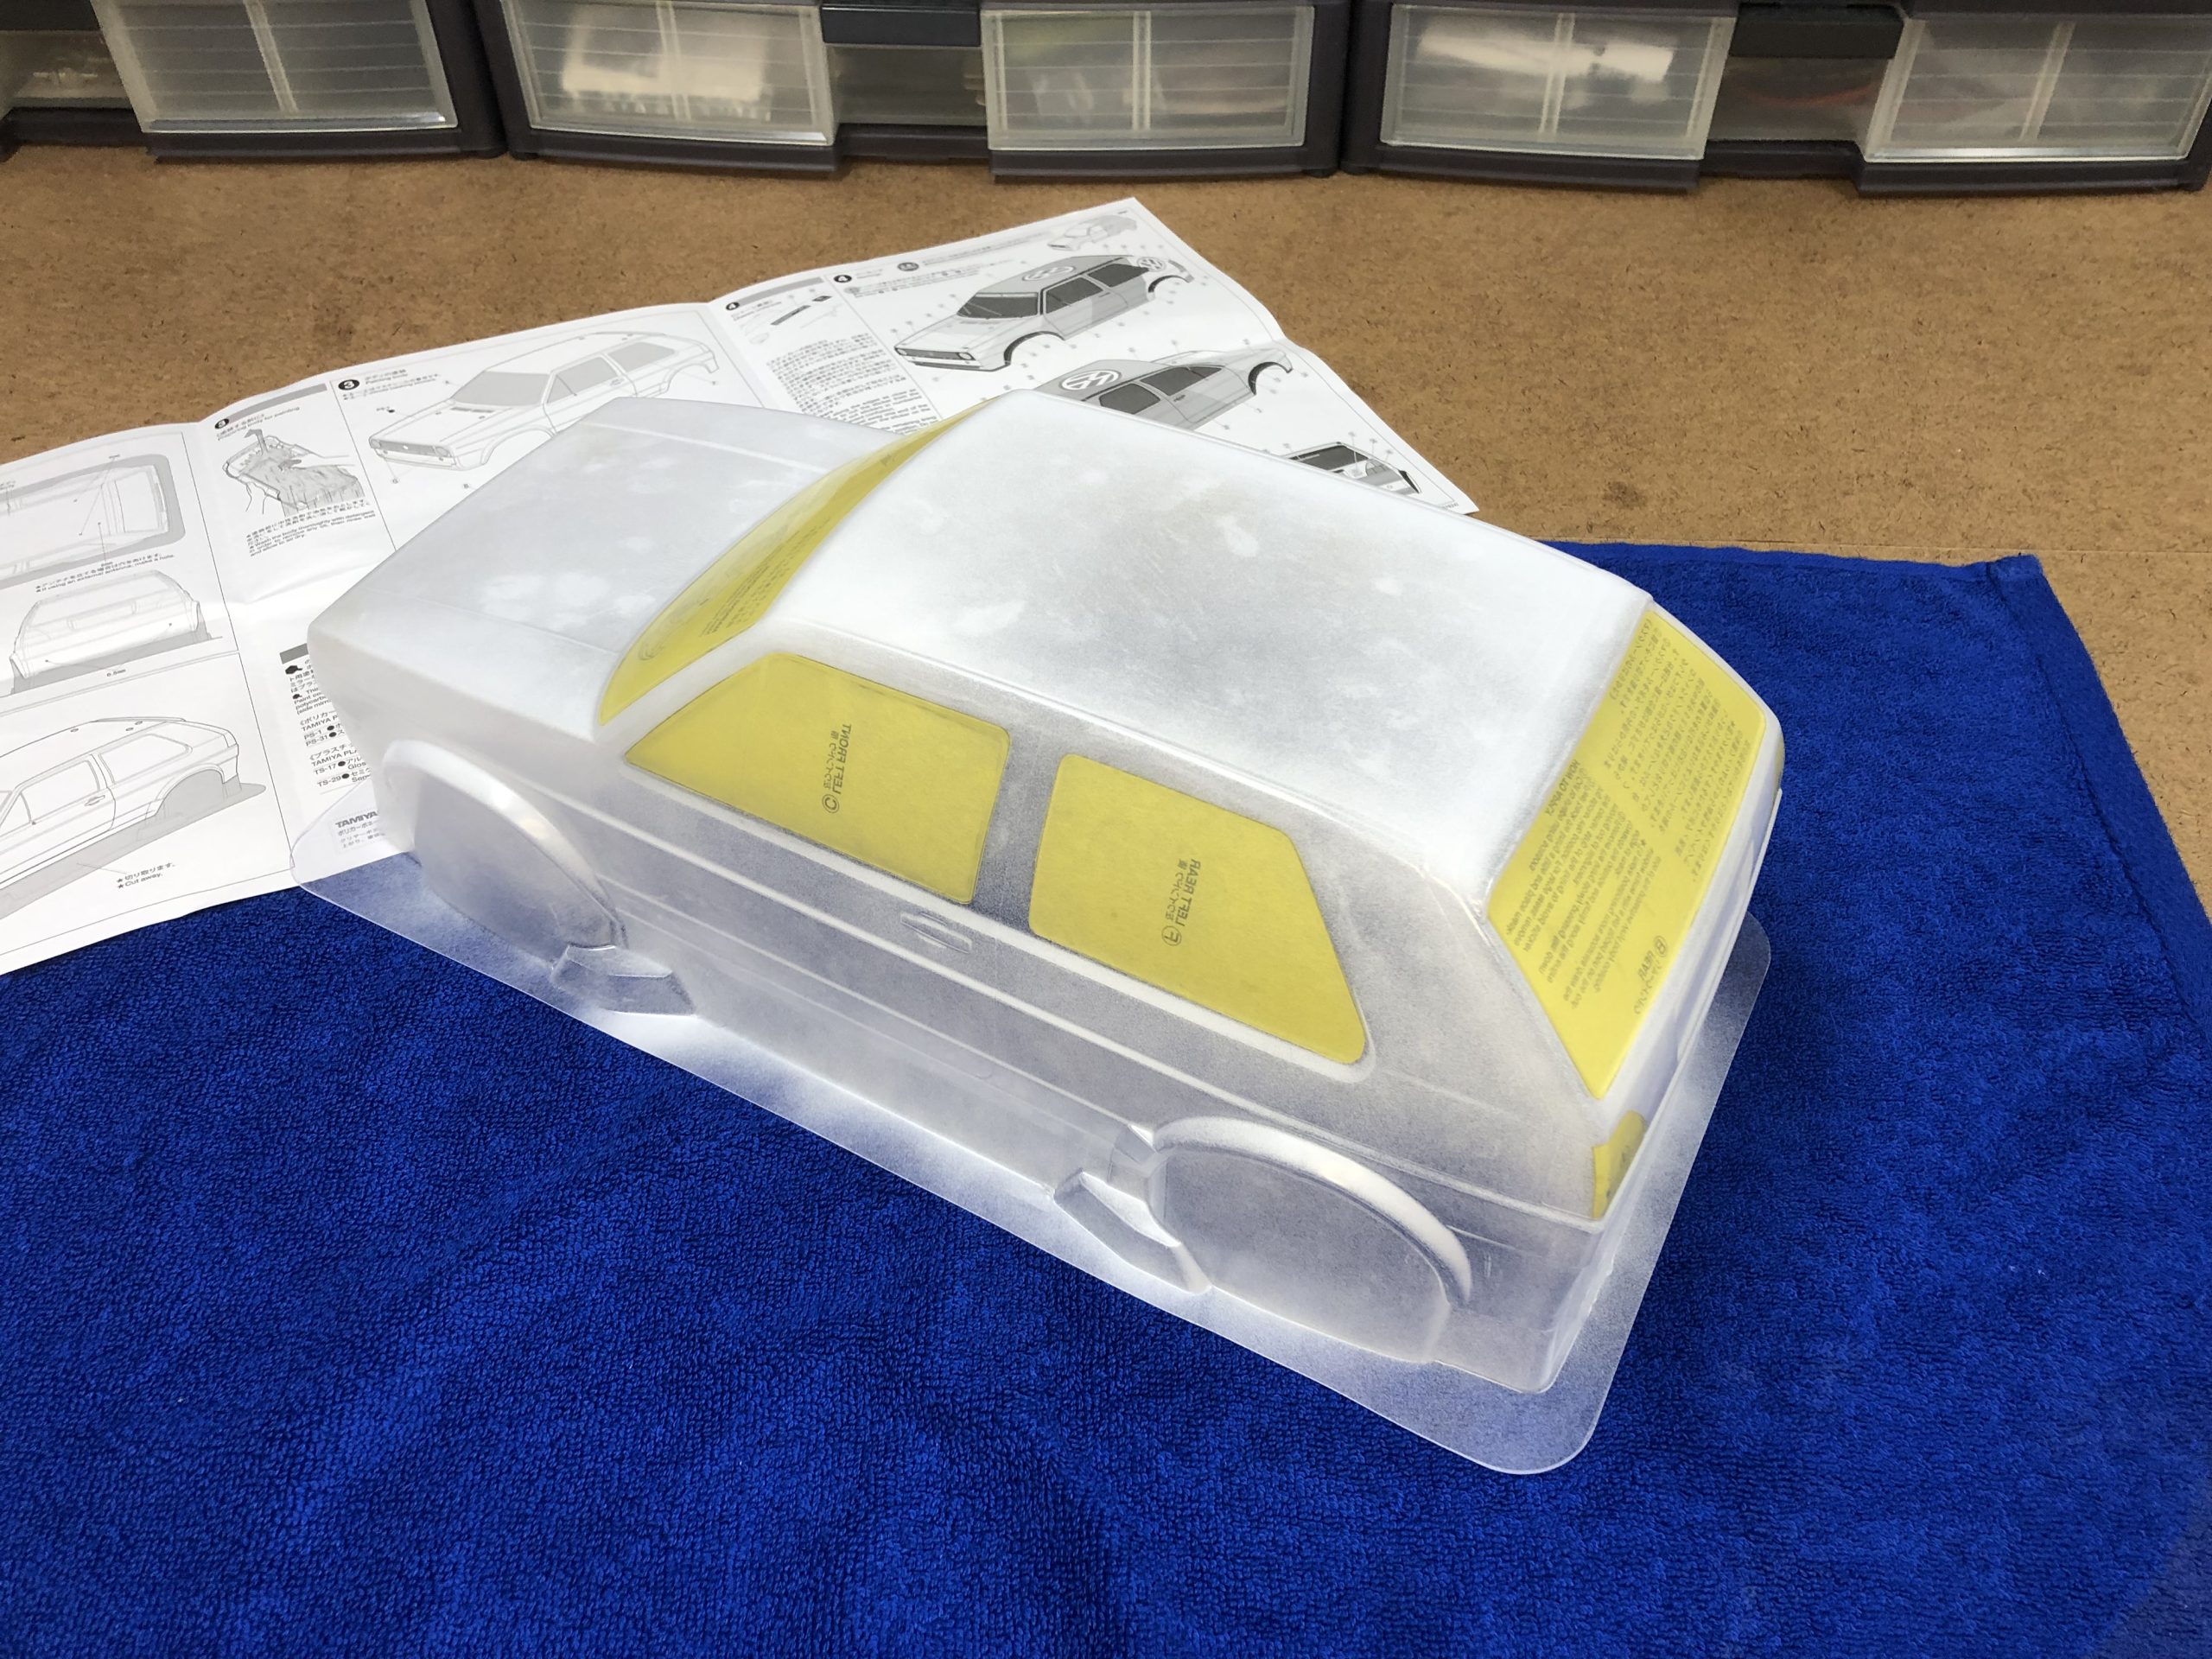
SPRAY SILVER TO BACK THE WHITE
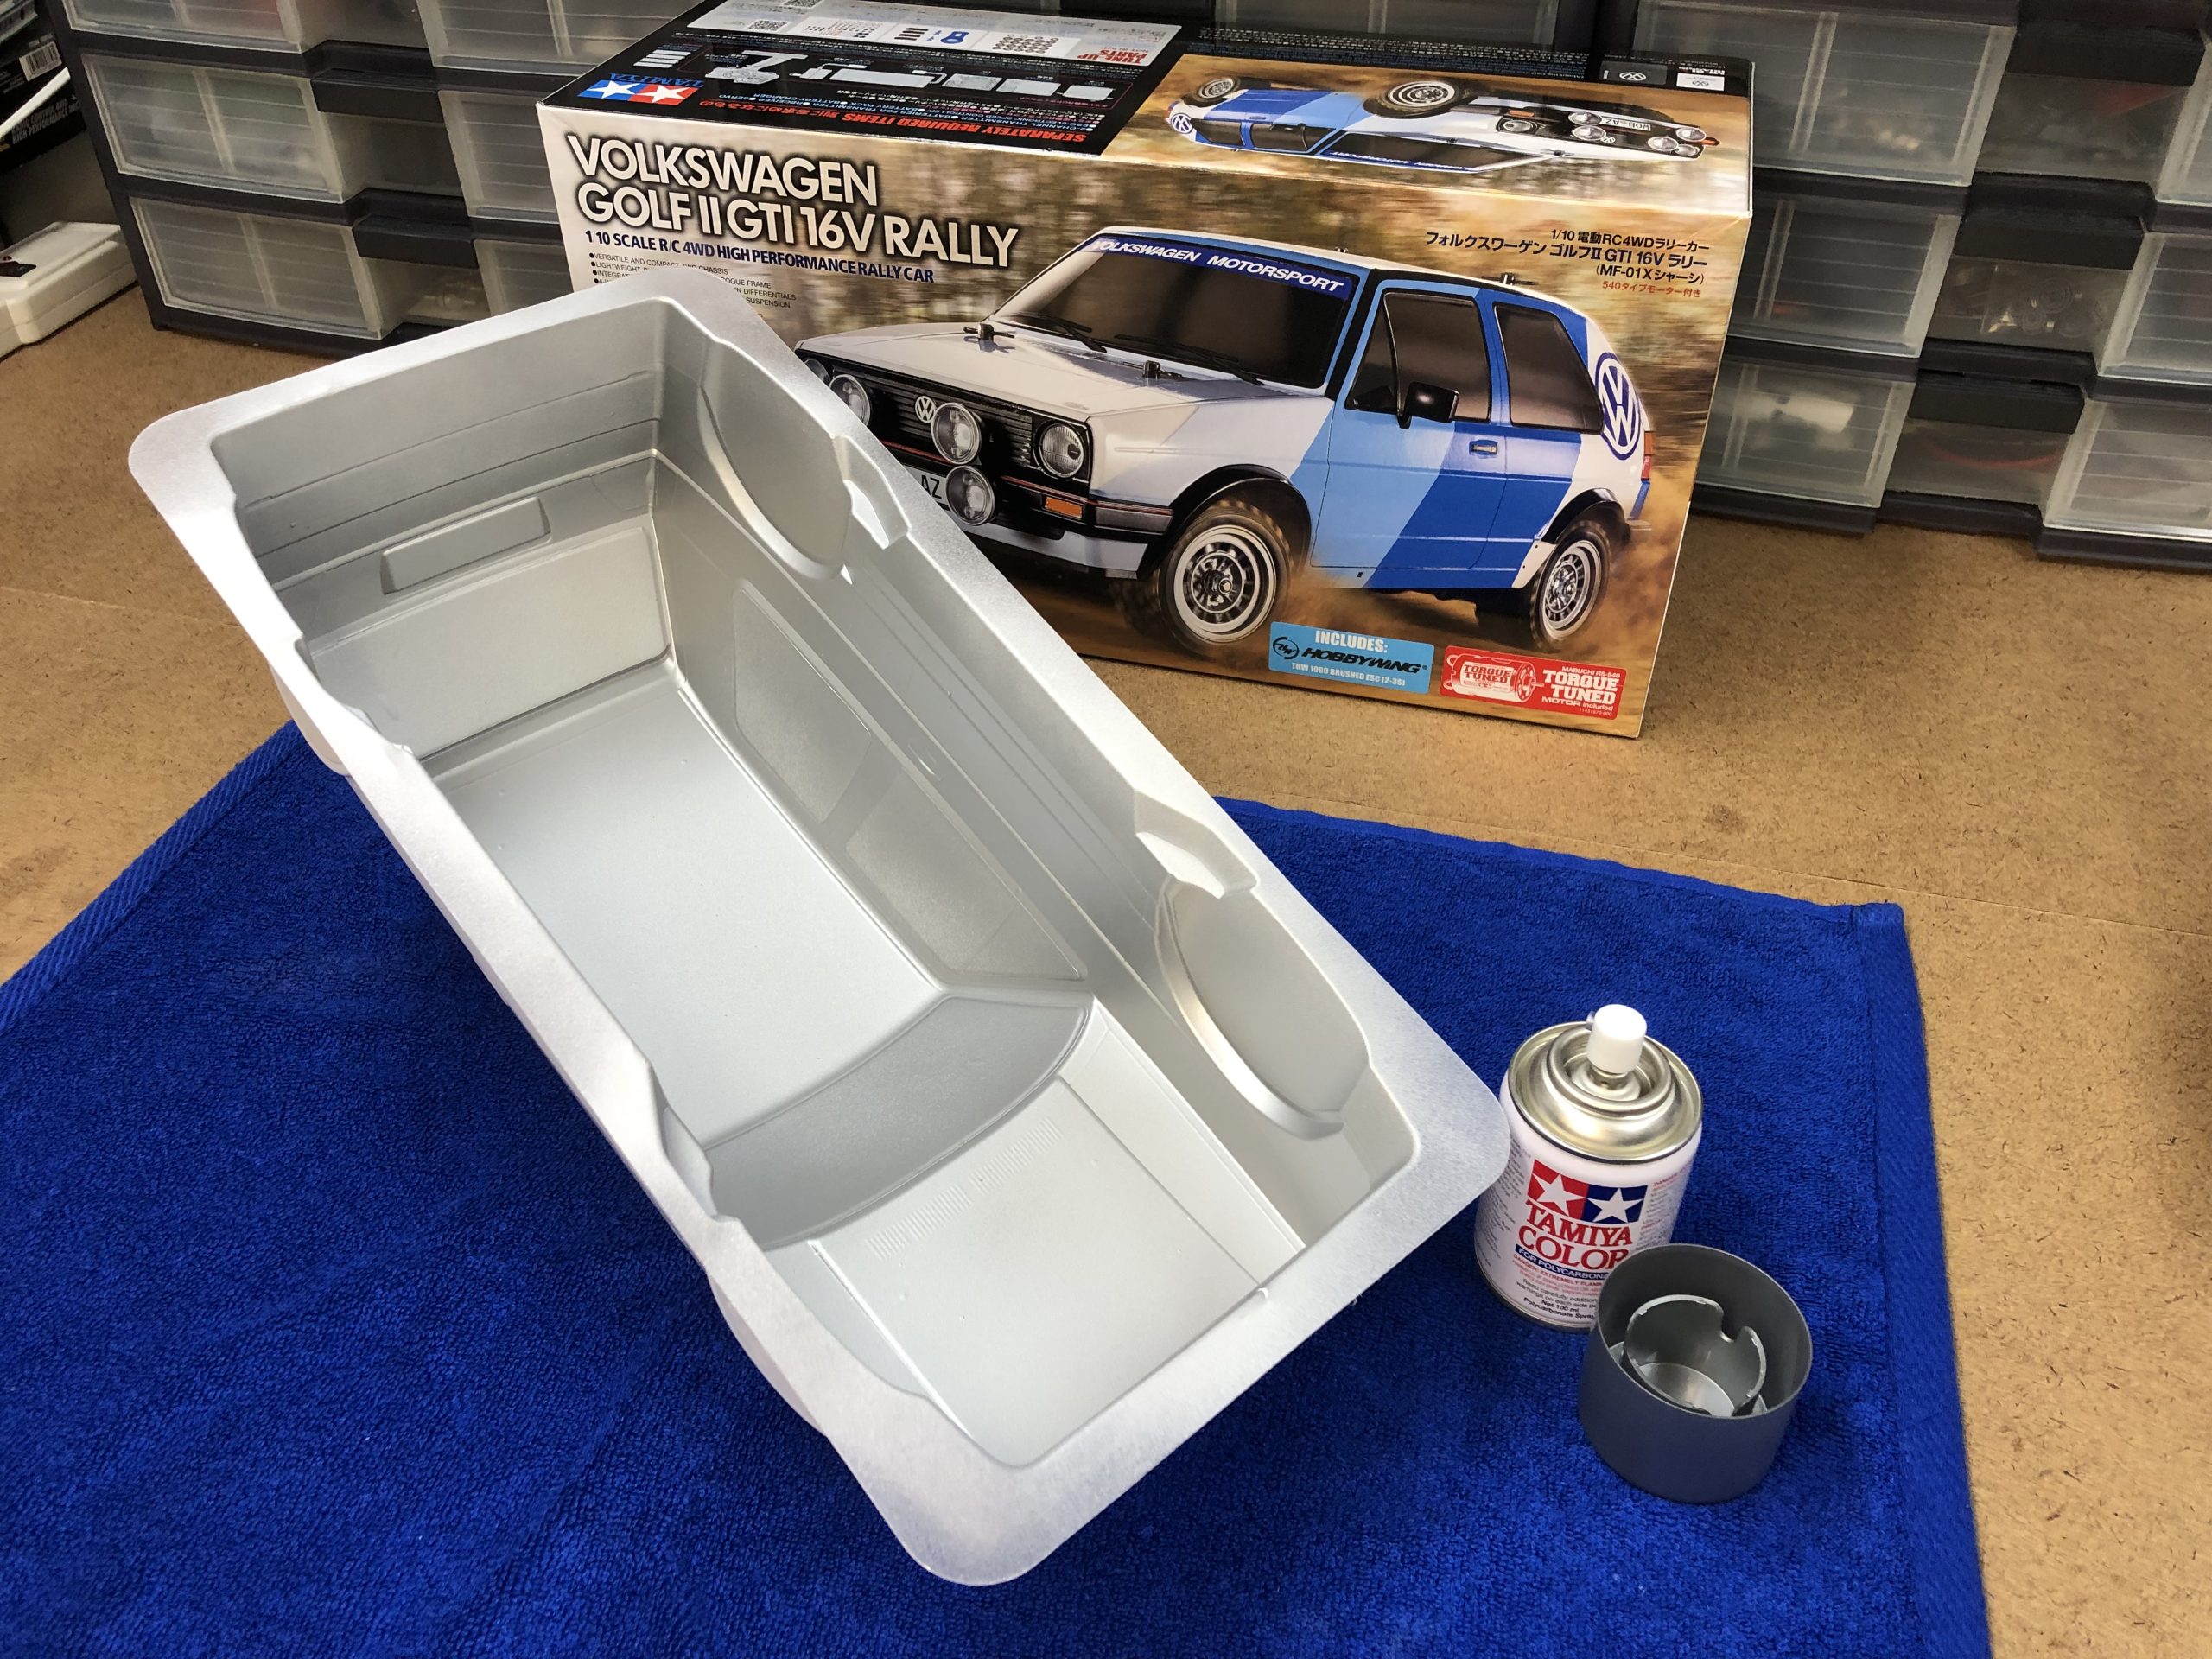
Light colors like white can still be slightly translucent which can make the finished body look a bit off and less realistic. An easy way to remedy this is with a final coat of silver to back the white. This added step will make the paint have a deeper look not to mention making it completely opaque.
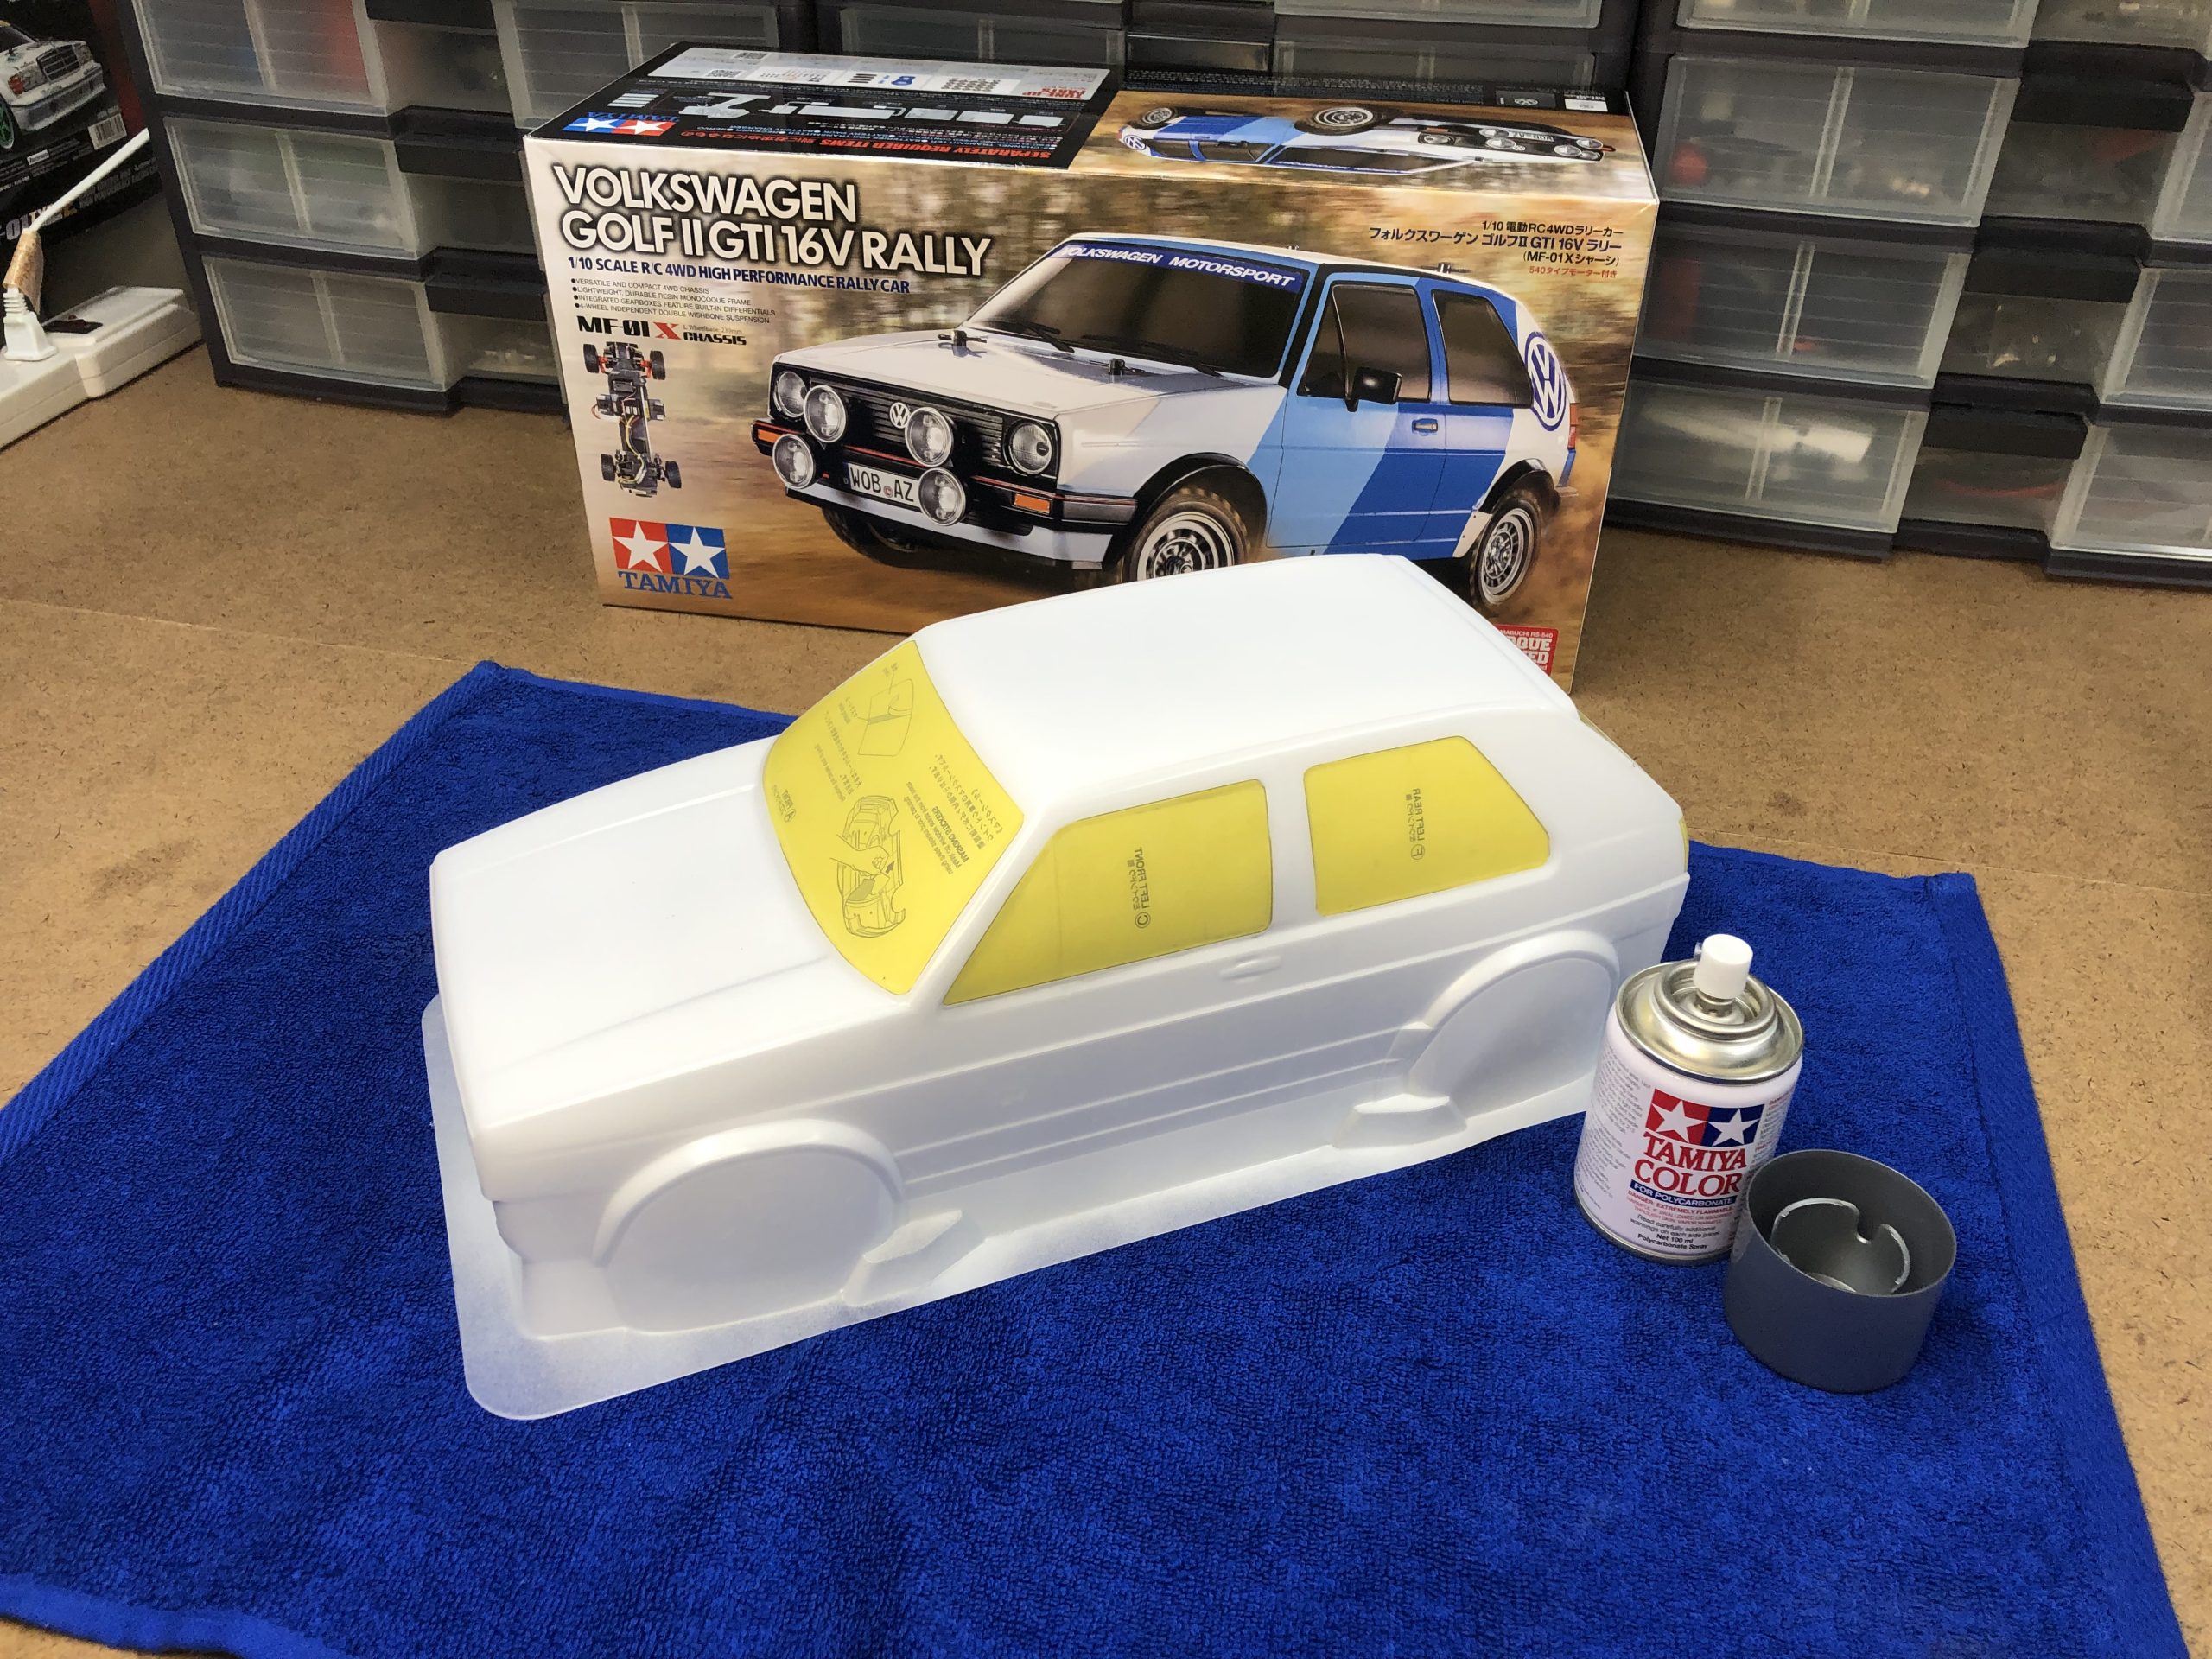
REMOVE WINDOW MASKS AND SPRAY WINDOW TINT
Once the silver coat of paint is dry, go ahead and remove the window masks and leave the headlight and taillight masks in place. Then using Tamiya’s PS-31 Smoke spray paint, spray very light coats onto the window to create a window tint effect. It is very important to go very light with the PS-31 or else it will run and will be visible from the outside of the body. We went with a light coat of Smoke and if you want something darker, just continue to add light coats until you achieve the look you are going for.
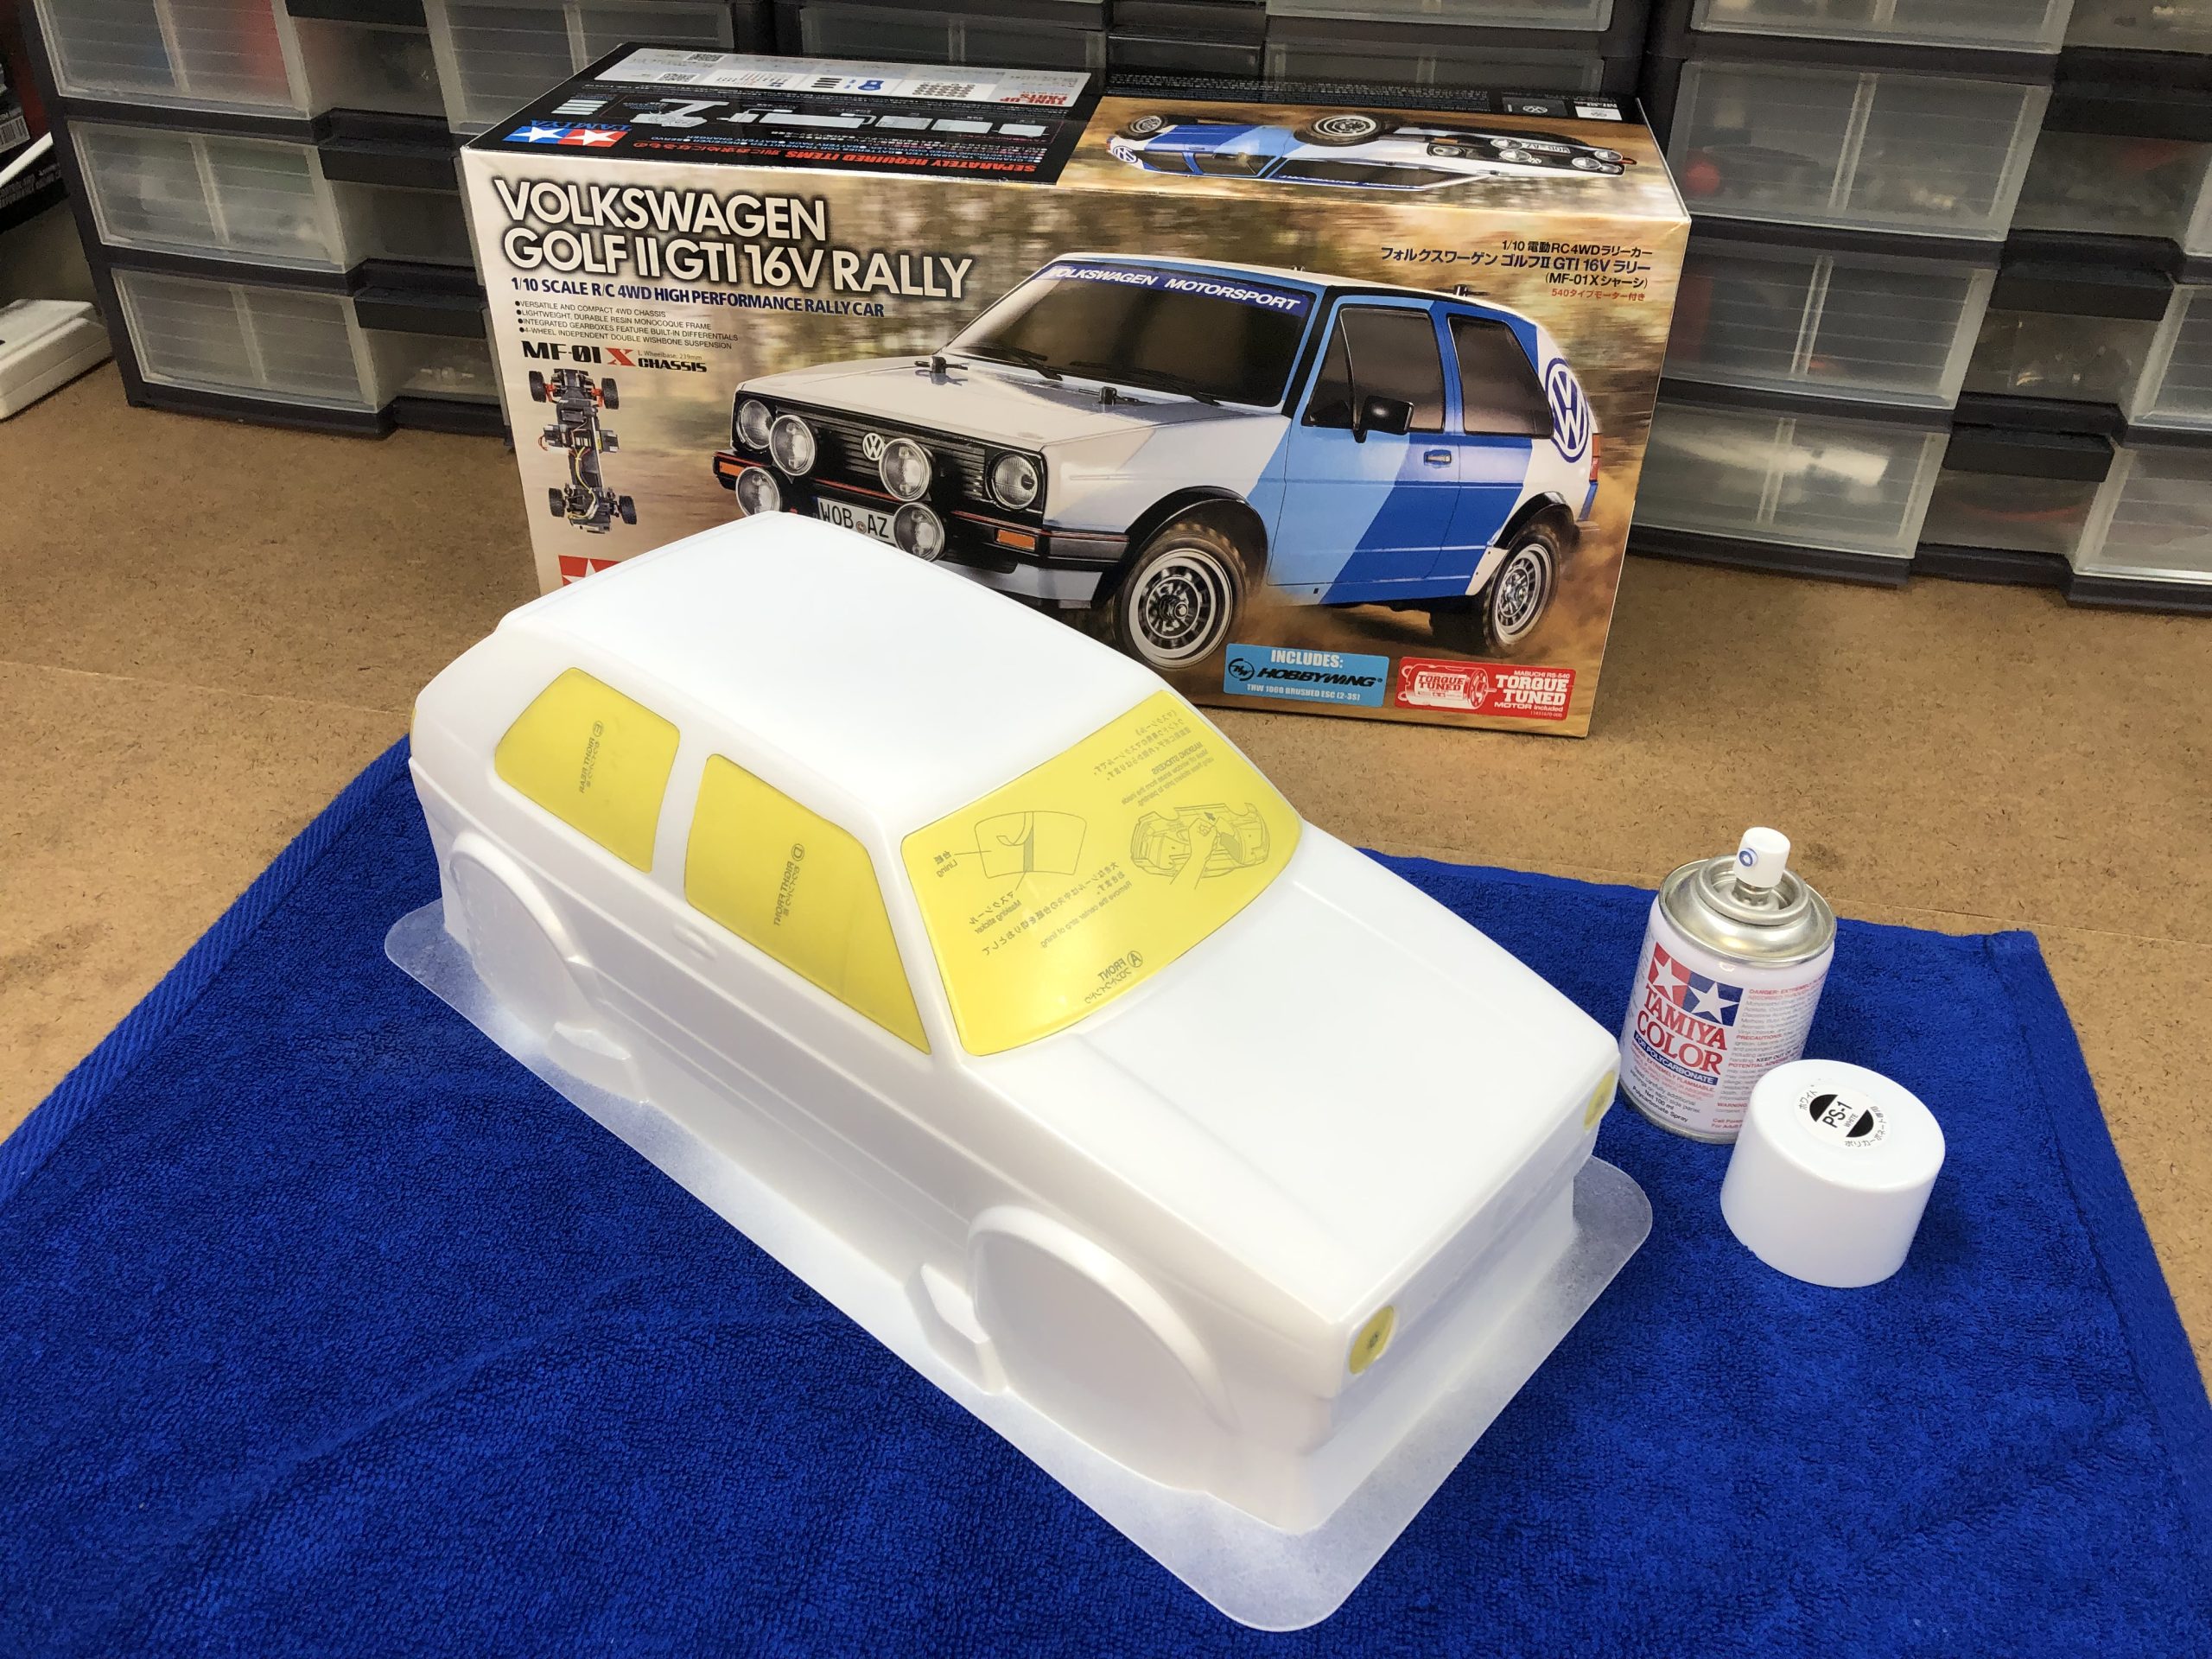
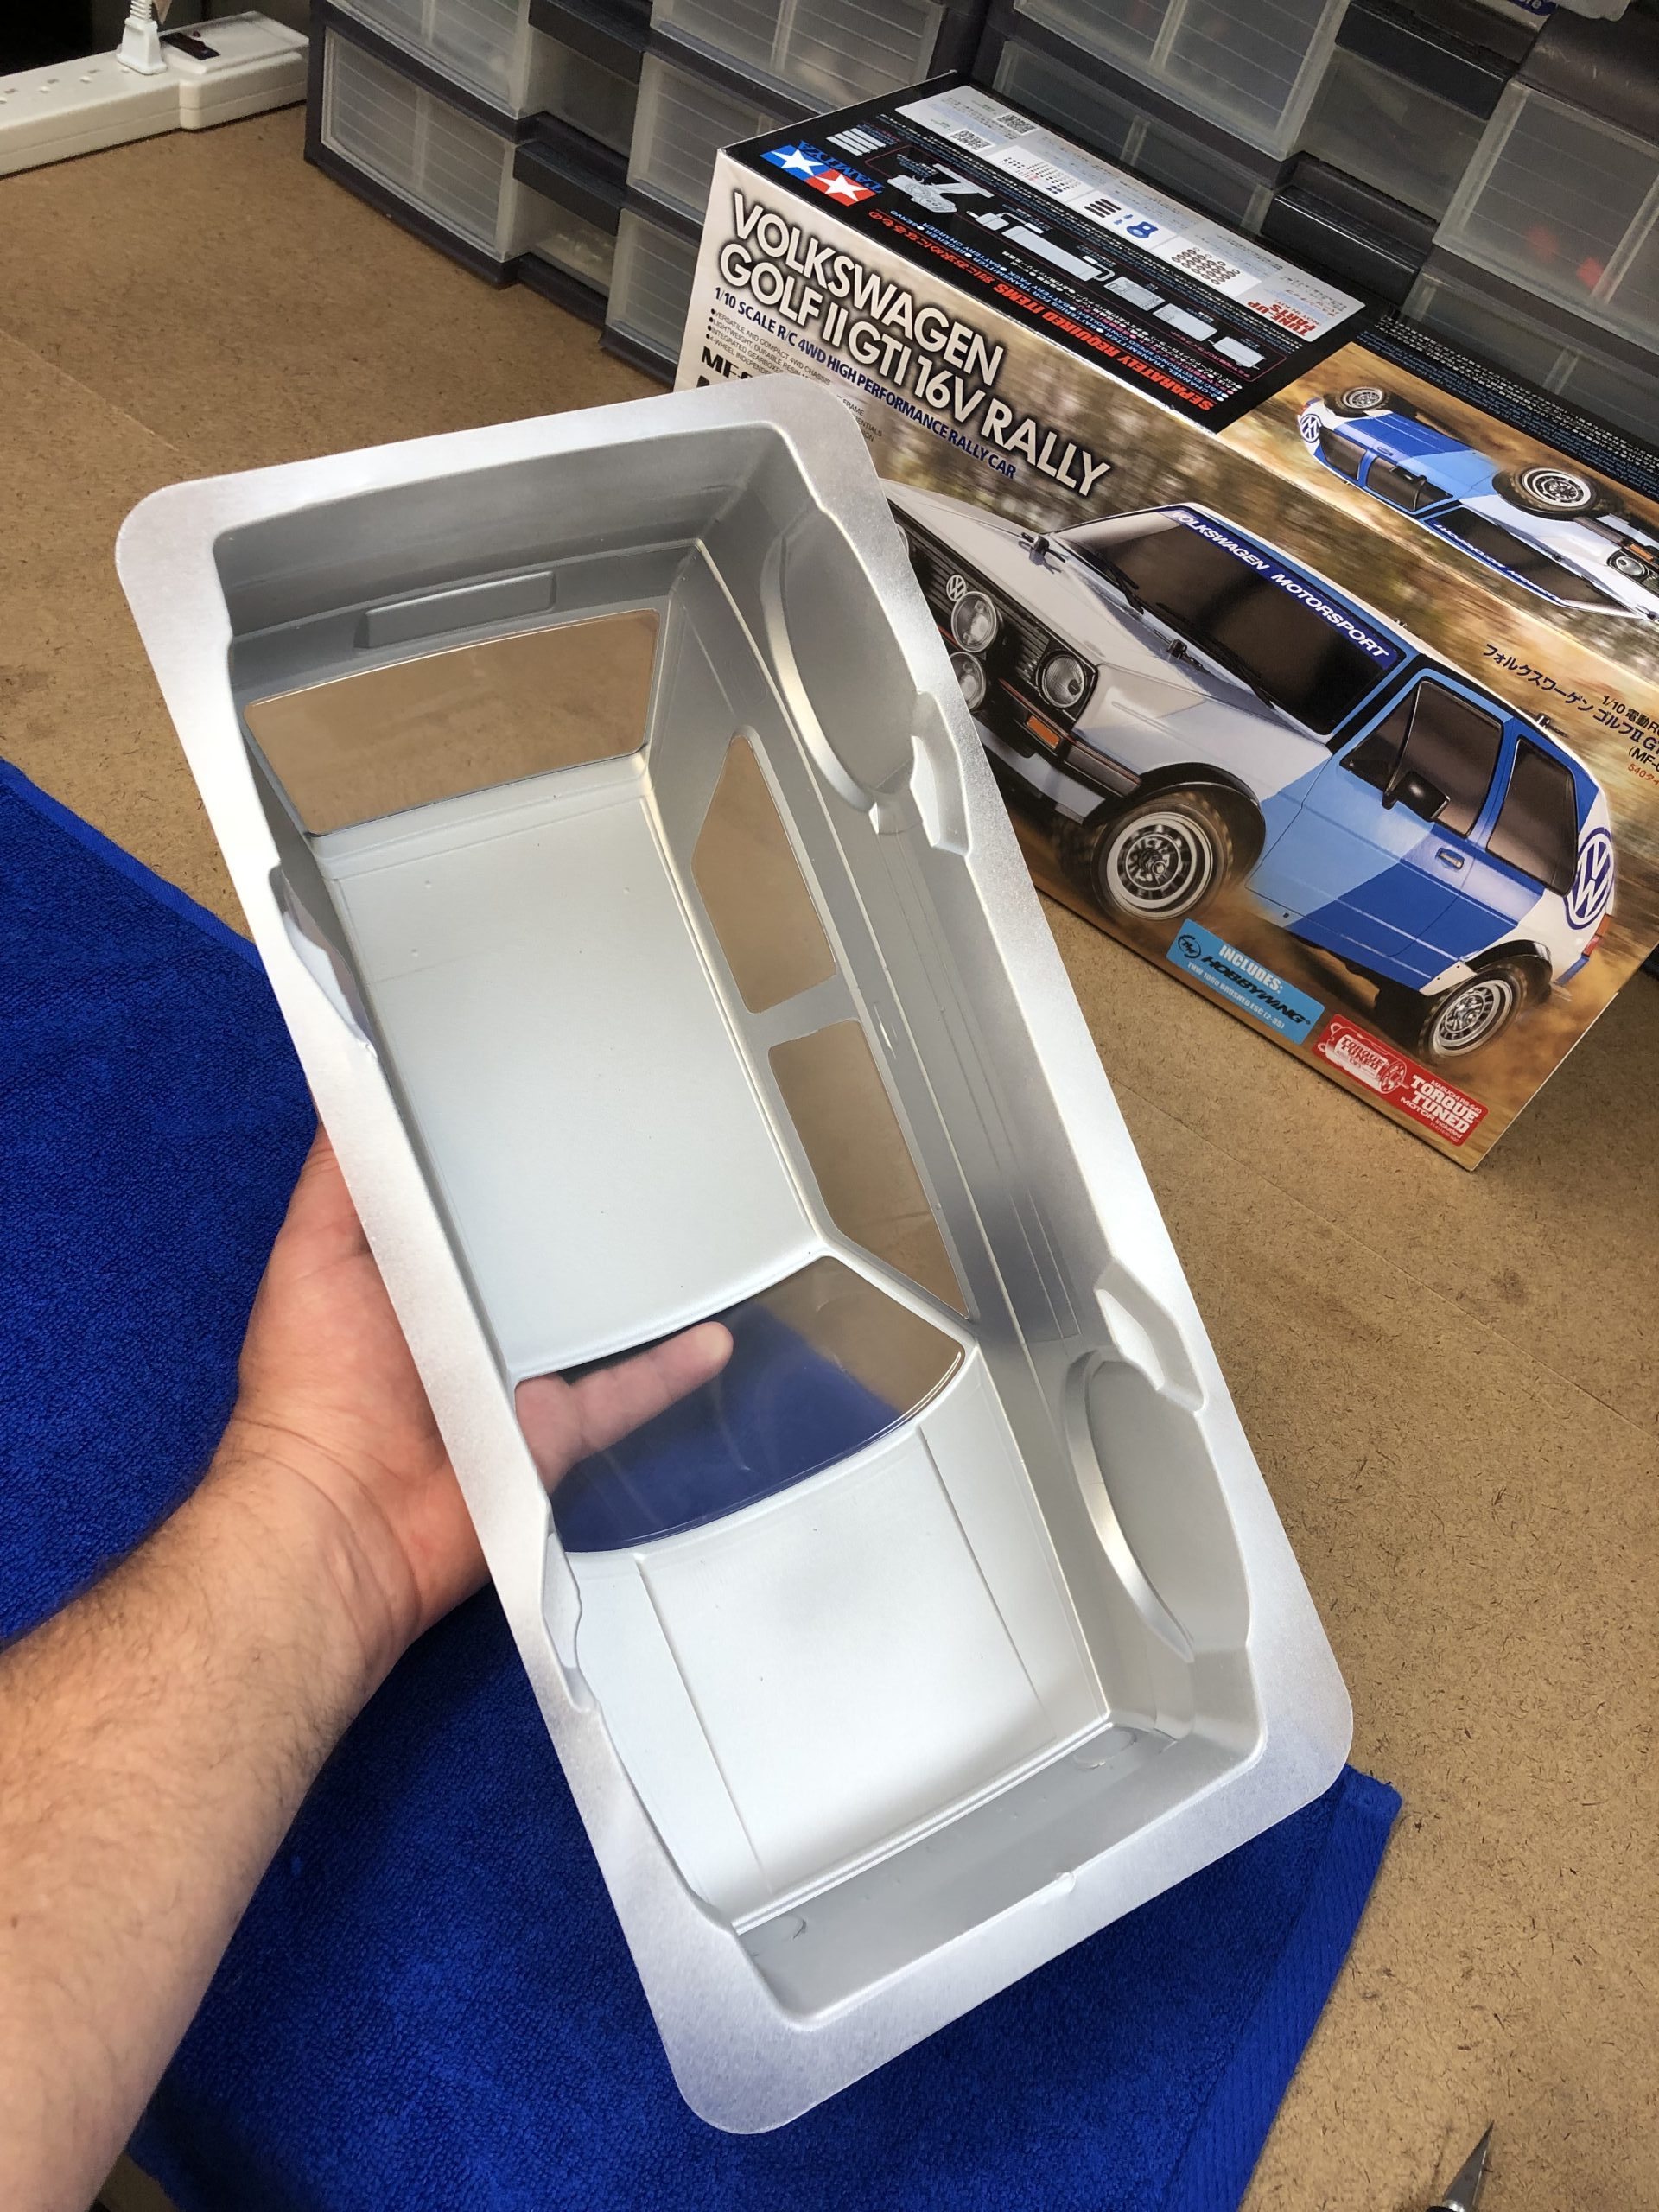
REMOVE REMAINING MASKS AND OVERSPRAY FILM
Now you can remove the remaining masks from the body that cover the head- and taillights. If the mask was properly placed on the body and you sprayed the body with light coats of paint, there should not be any paint bleeds onto these areas. The specks of paint you see on the photo of the headlight area are actually on the outside of the body and stuck to the overspray film.
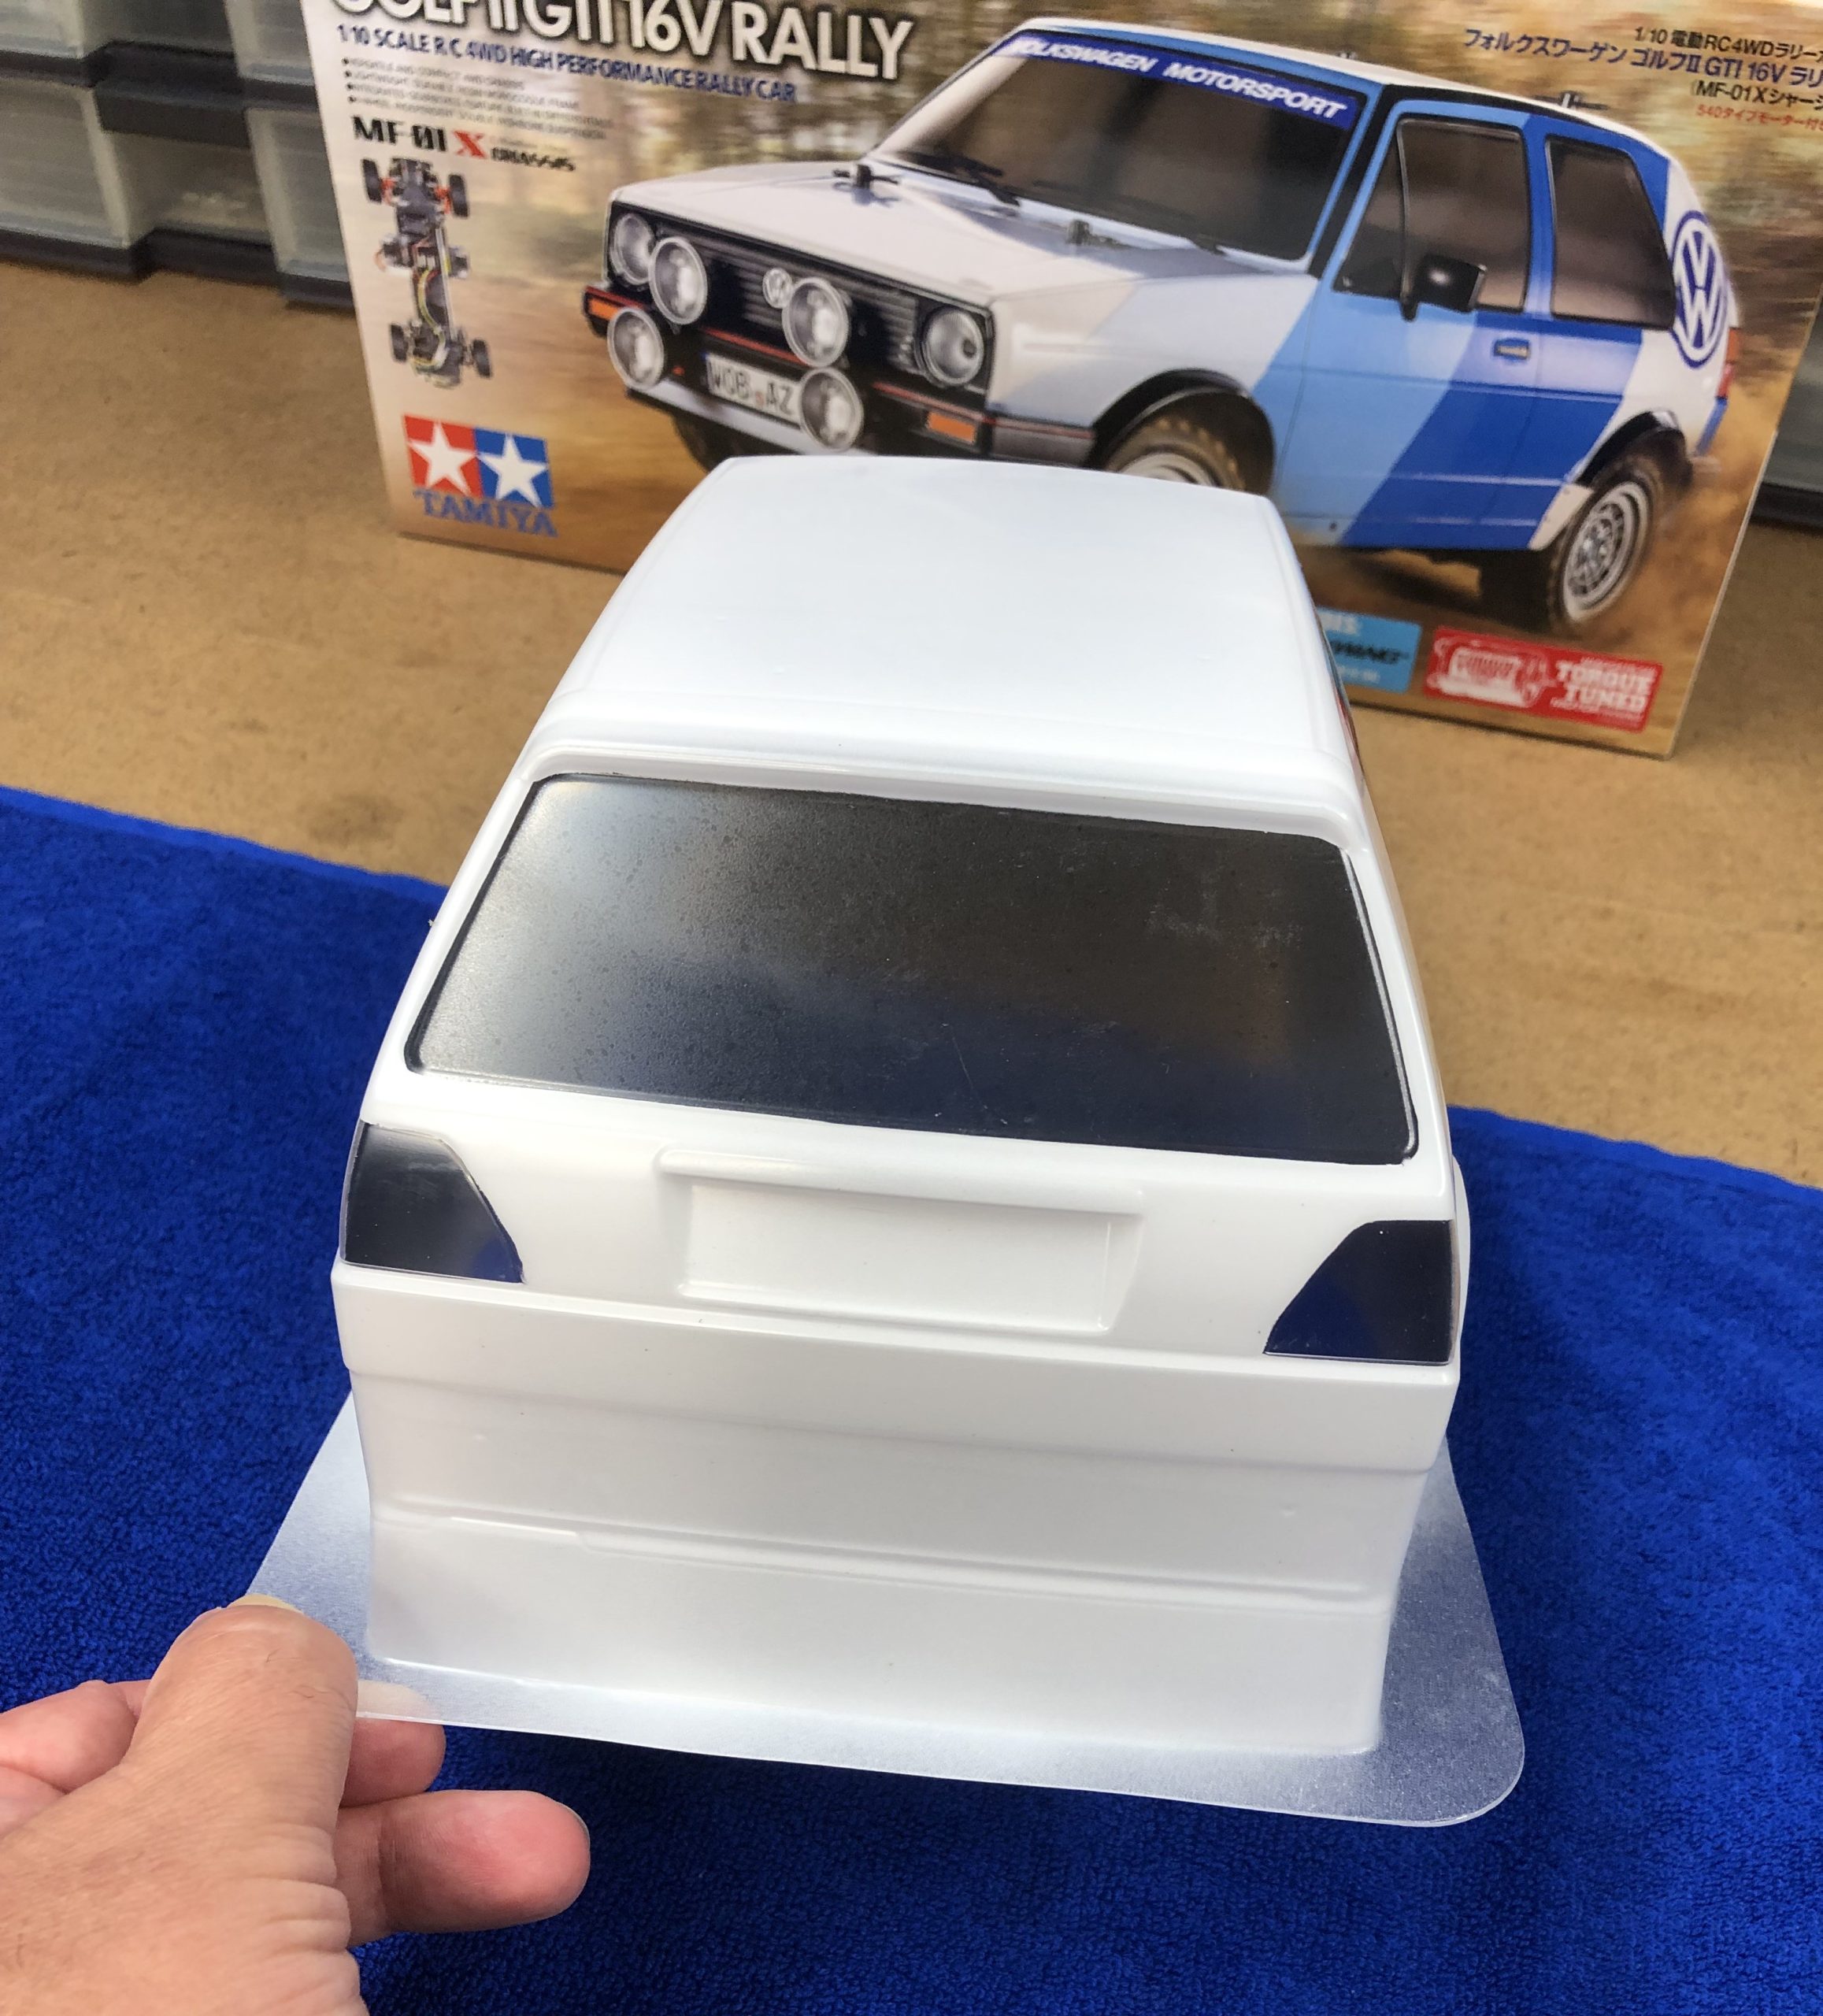
Pulling off the overspray film is one of our favorite parts in the painting process. It is at this point you truly get to see what the color looks like and the glossiness of the polycarbonate really brings it to life.
PAINTING THE ABS PLASTIC PARTS
The Tamiya VW Golf II Rally comes with some ABS plastic parts that need to be painted along with the polycarbonate body. The big difference is that you need to use the correct paint for the different plastic and we used Tamiya’s TS spray paint created just for this purpose. You can also use bottled Tamiya acrylic paint and brush it on, however spray paint worked perfectly for these ABS parts.
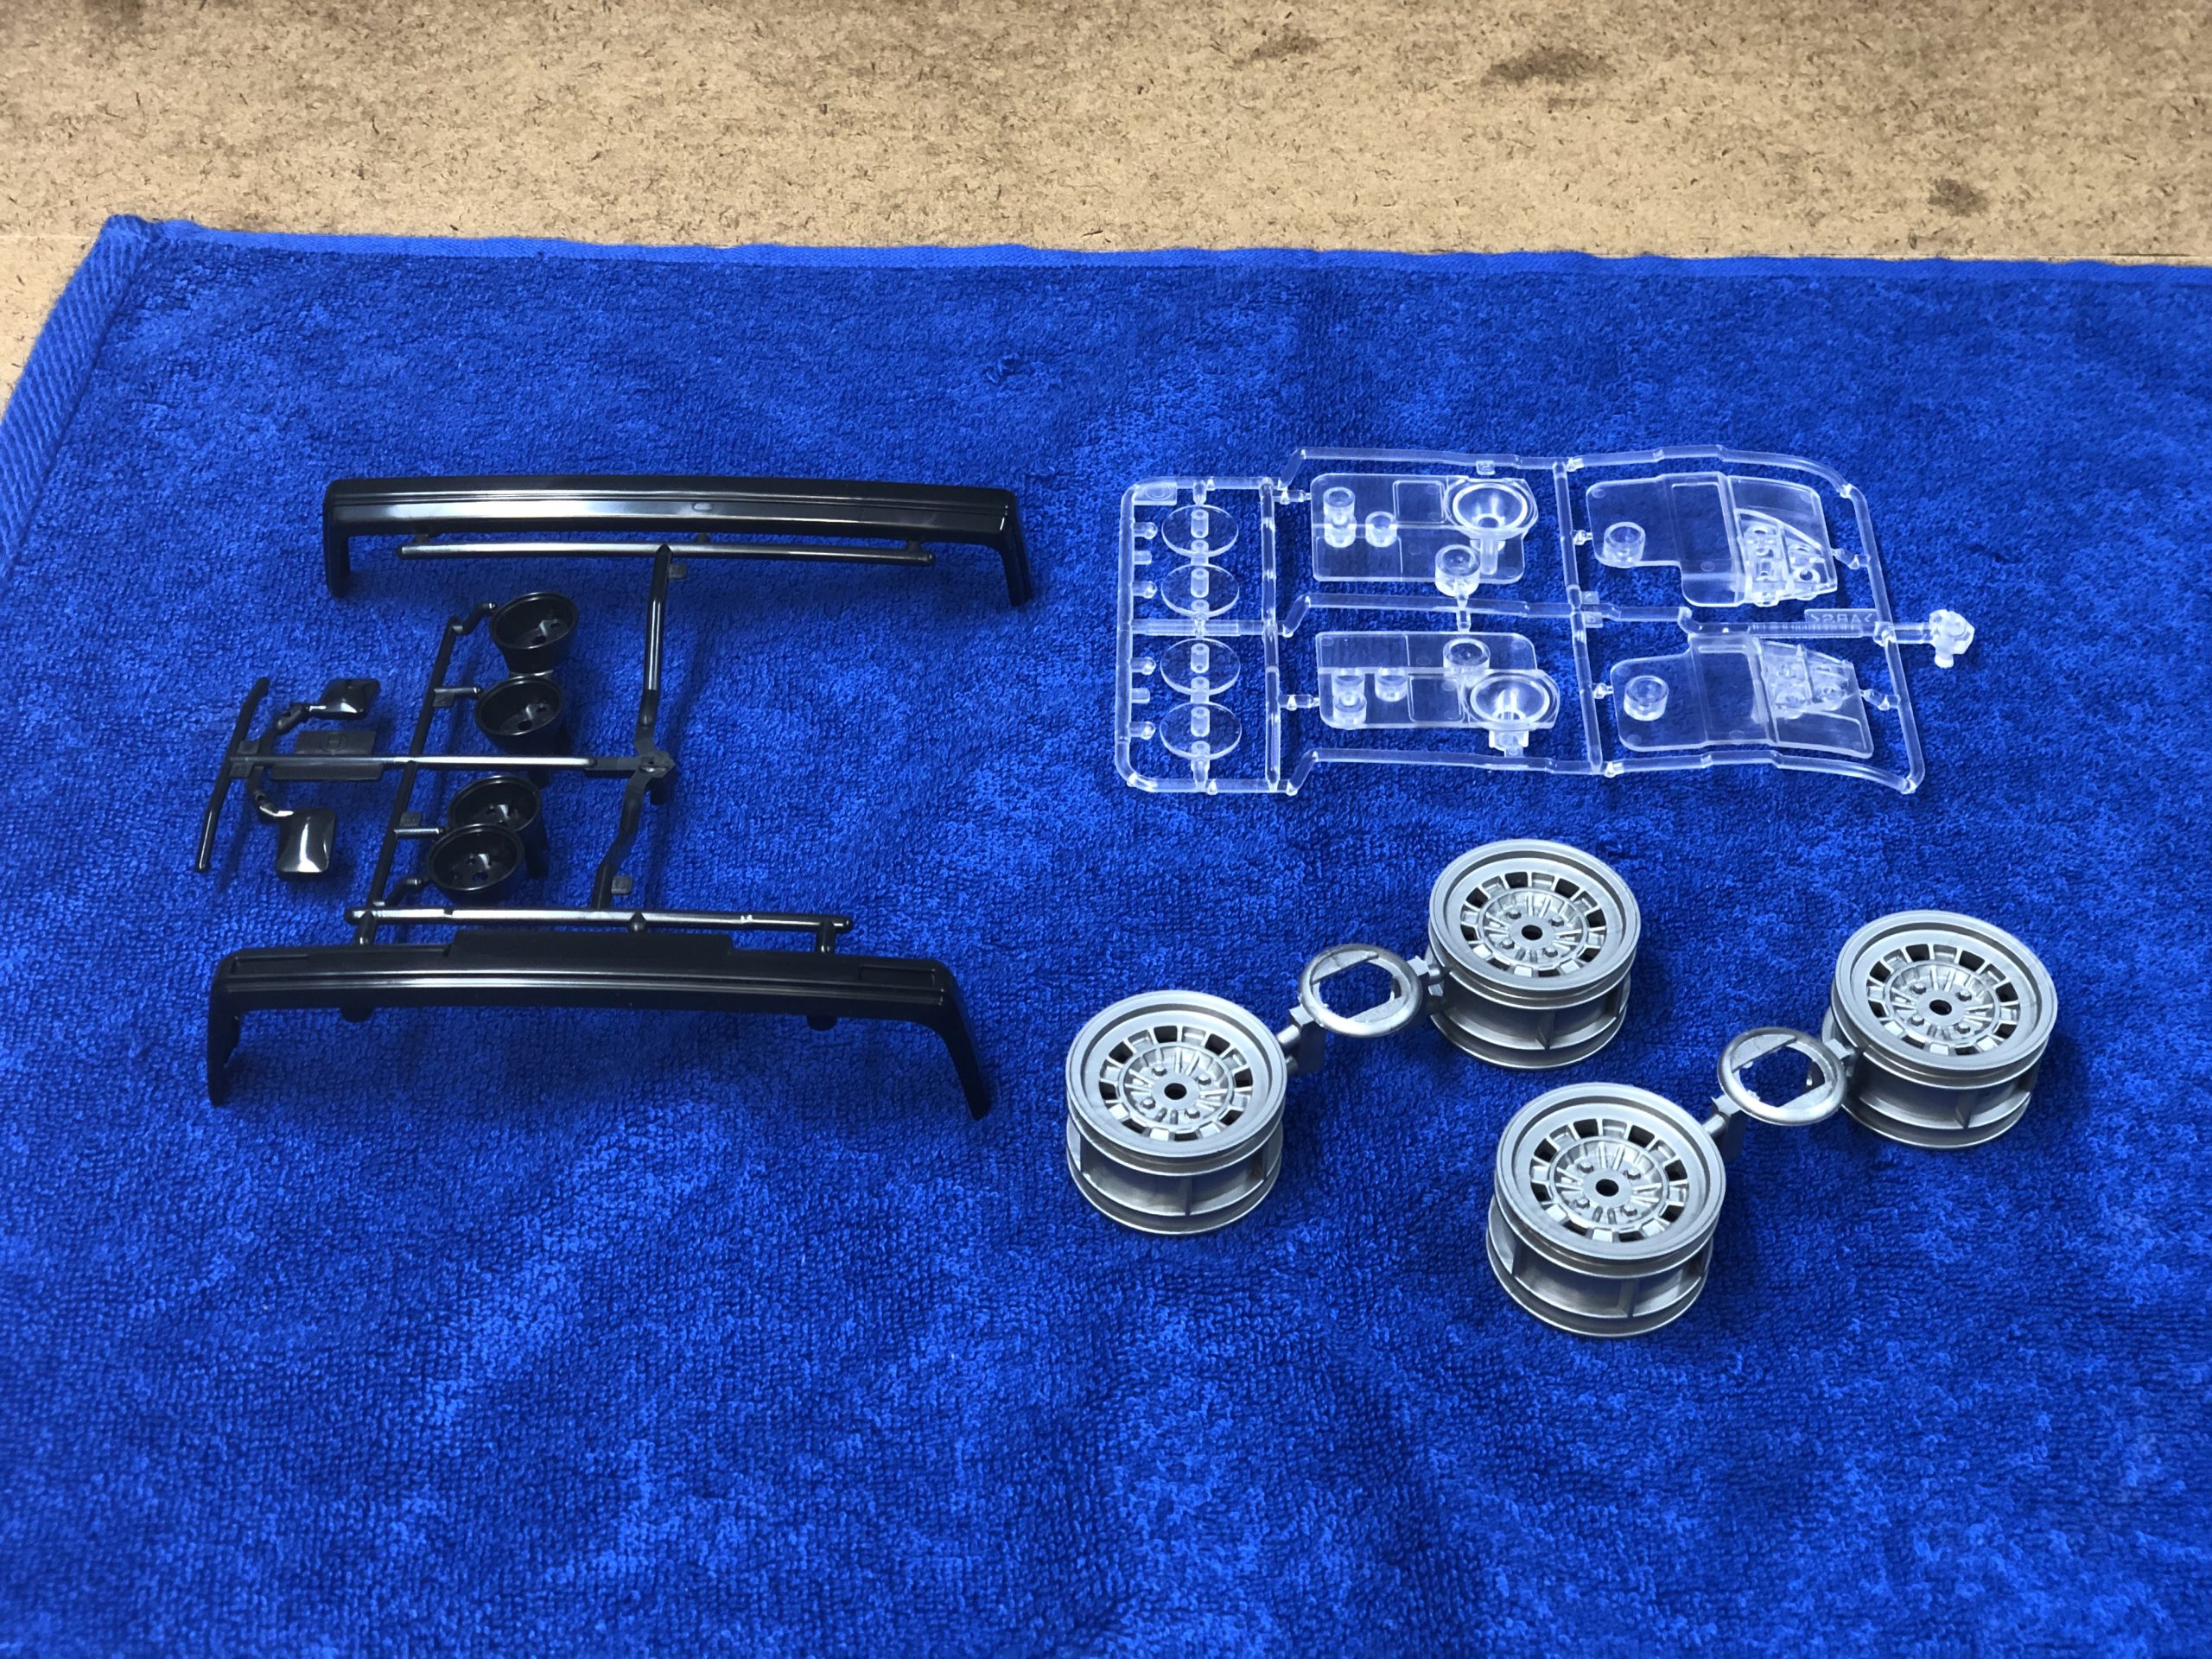
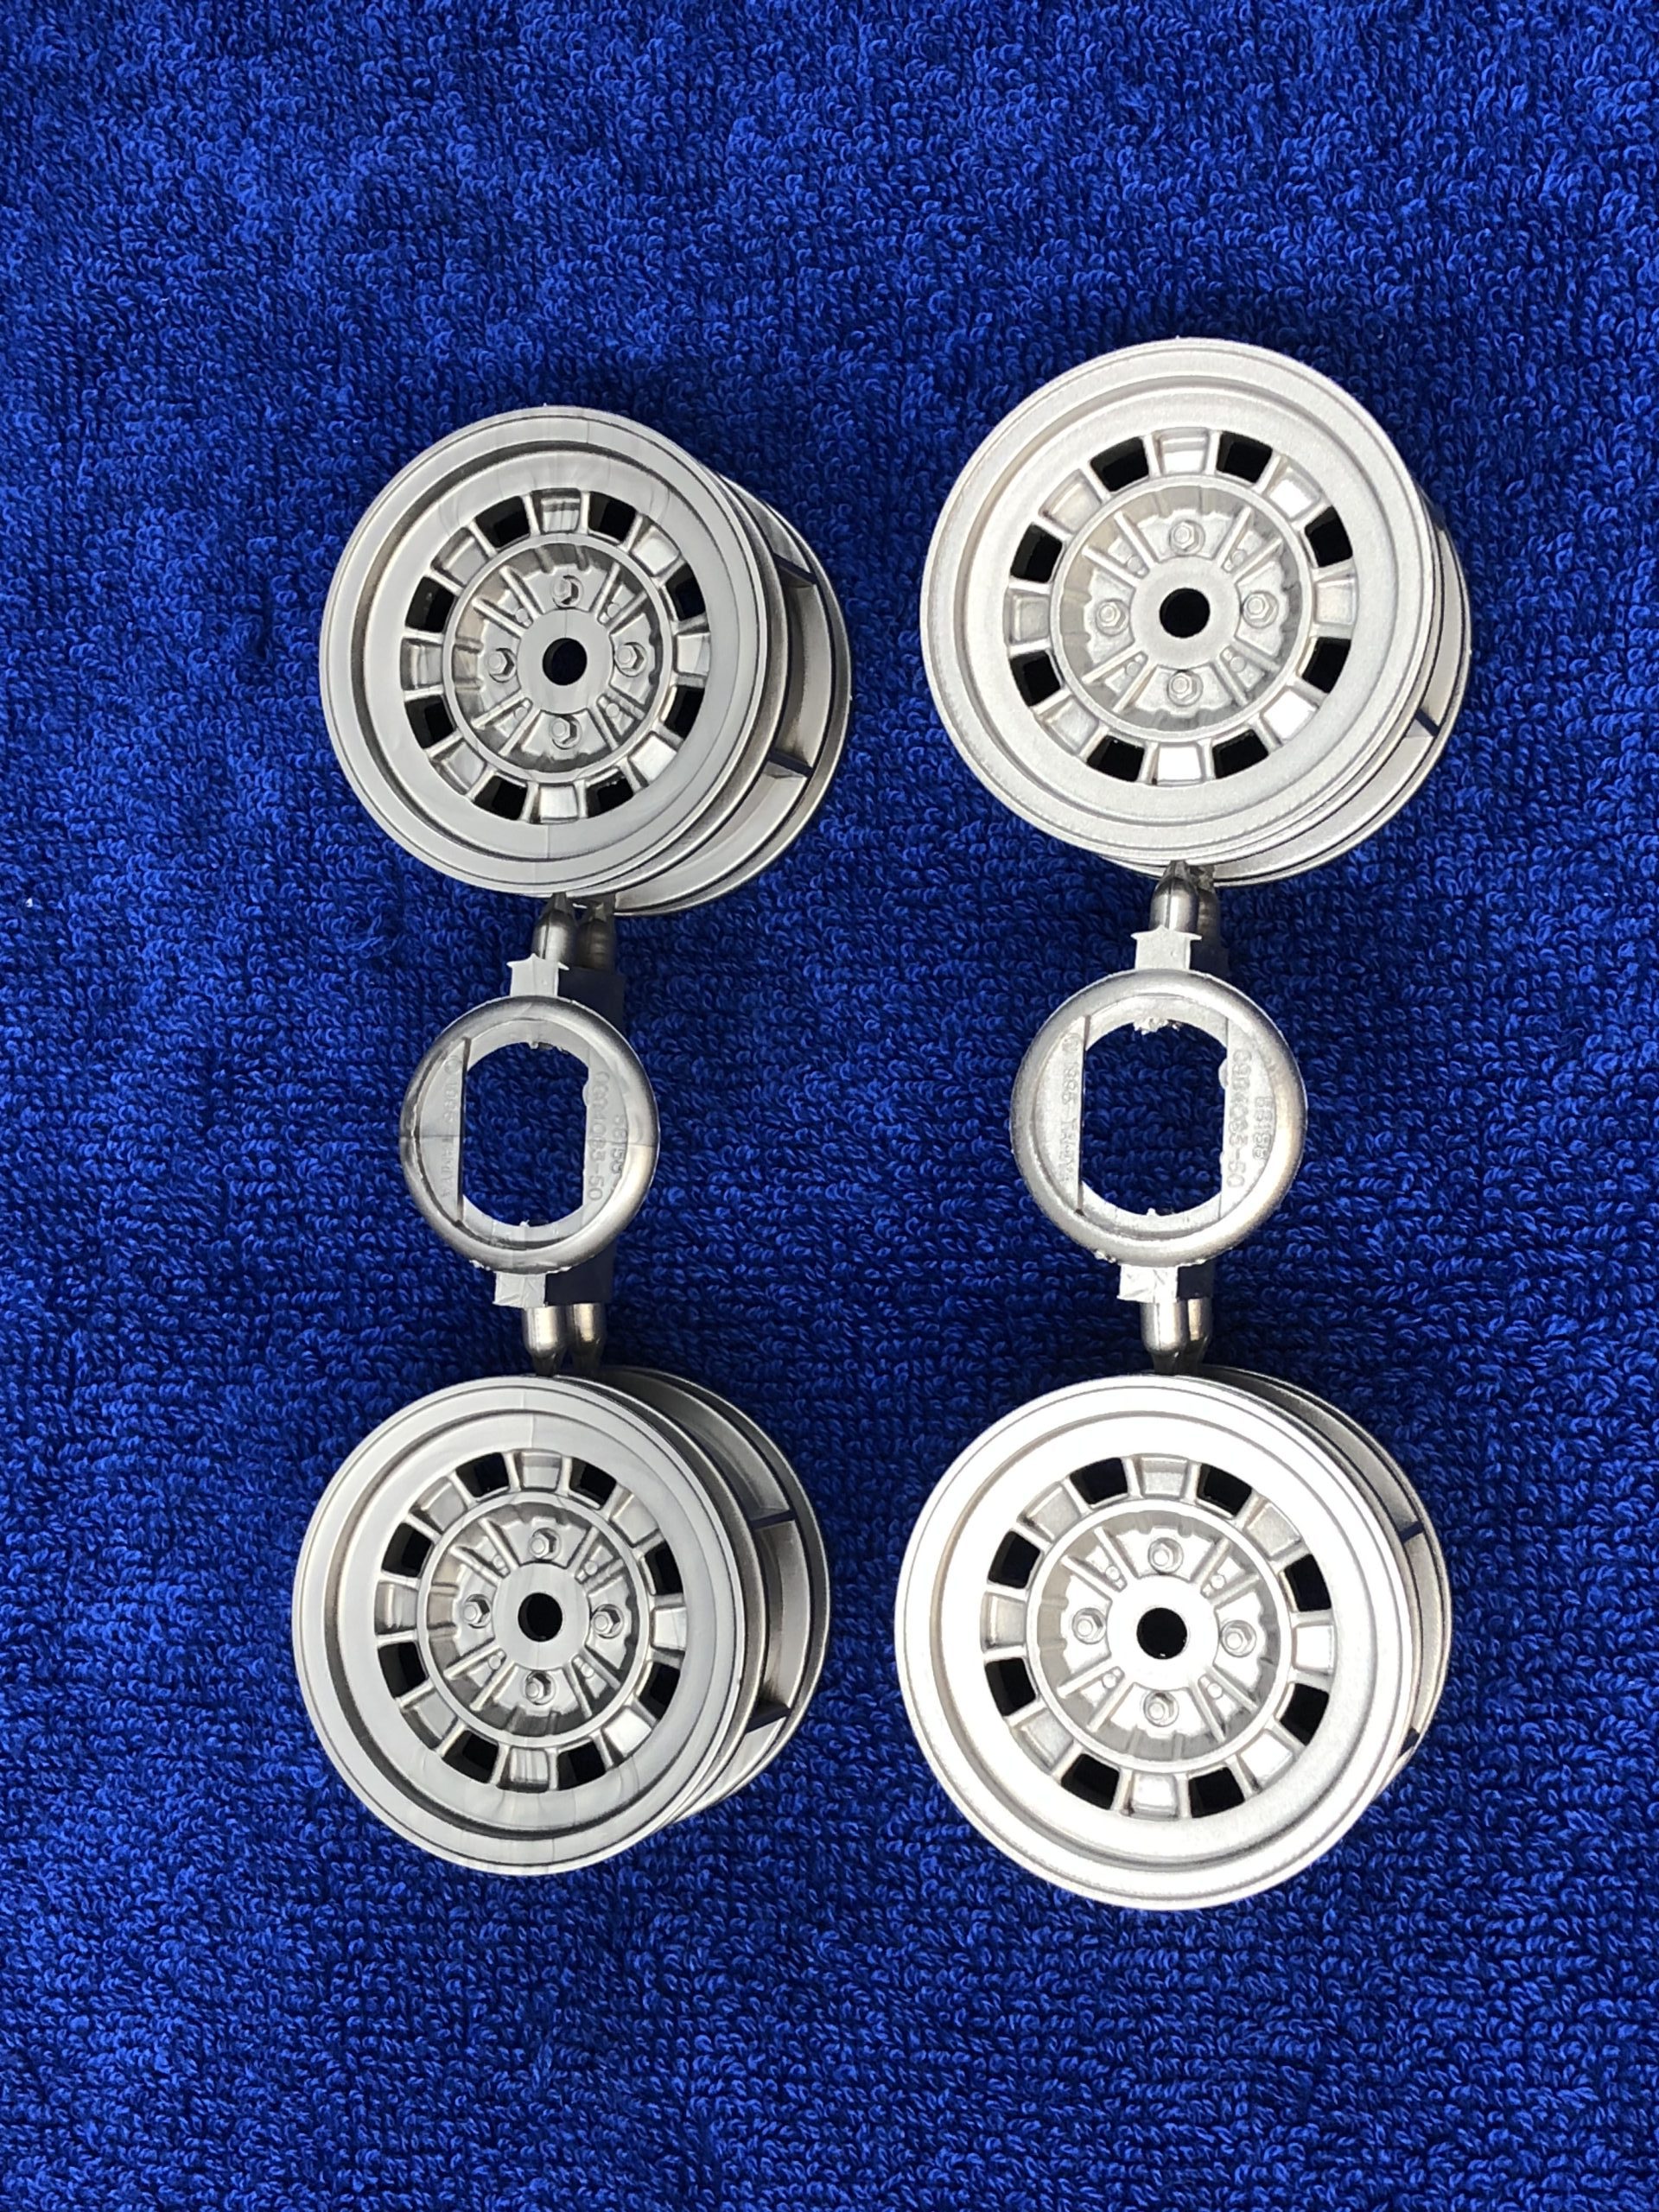
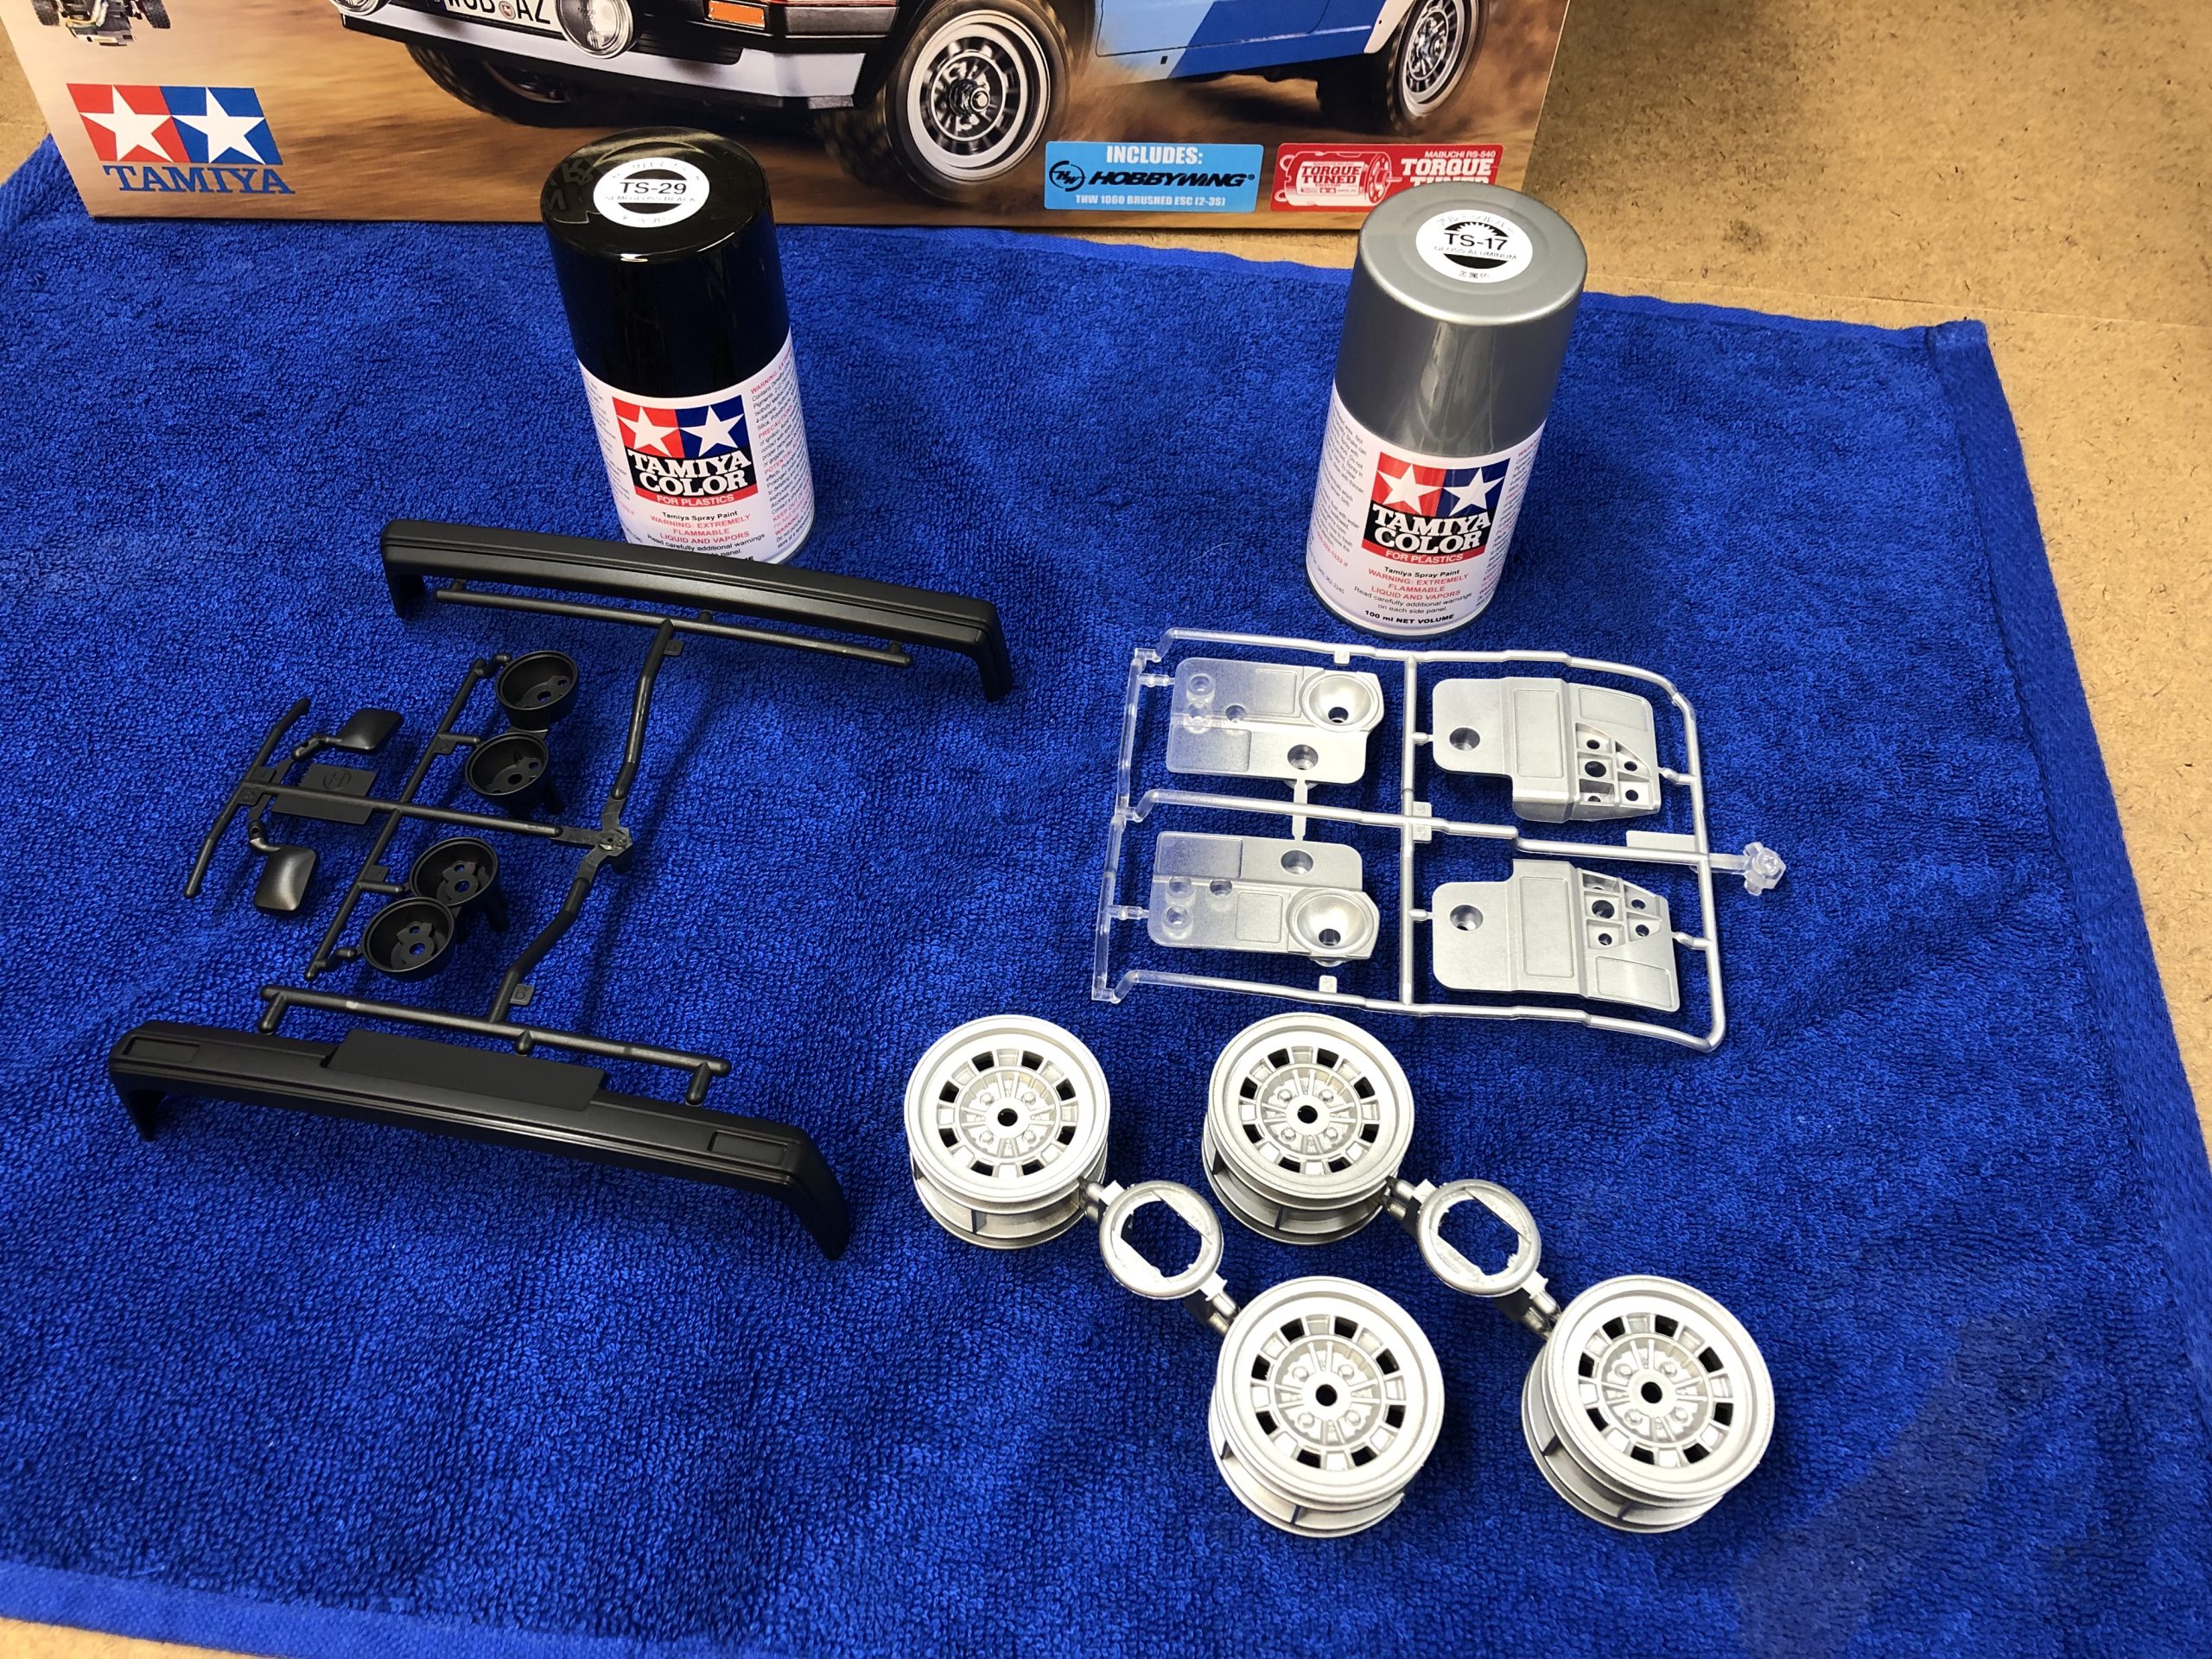
It is easier to paint the ABS parts while they are still attached to the parts tree. This way you can grab the tree instead of the part and not risk getting finger prints on the newly painted part. It allows you to manipulate the part while spraying so you can get complete paint coverage. Shown here are all the parts painted their respective color.
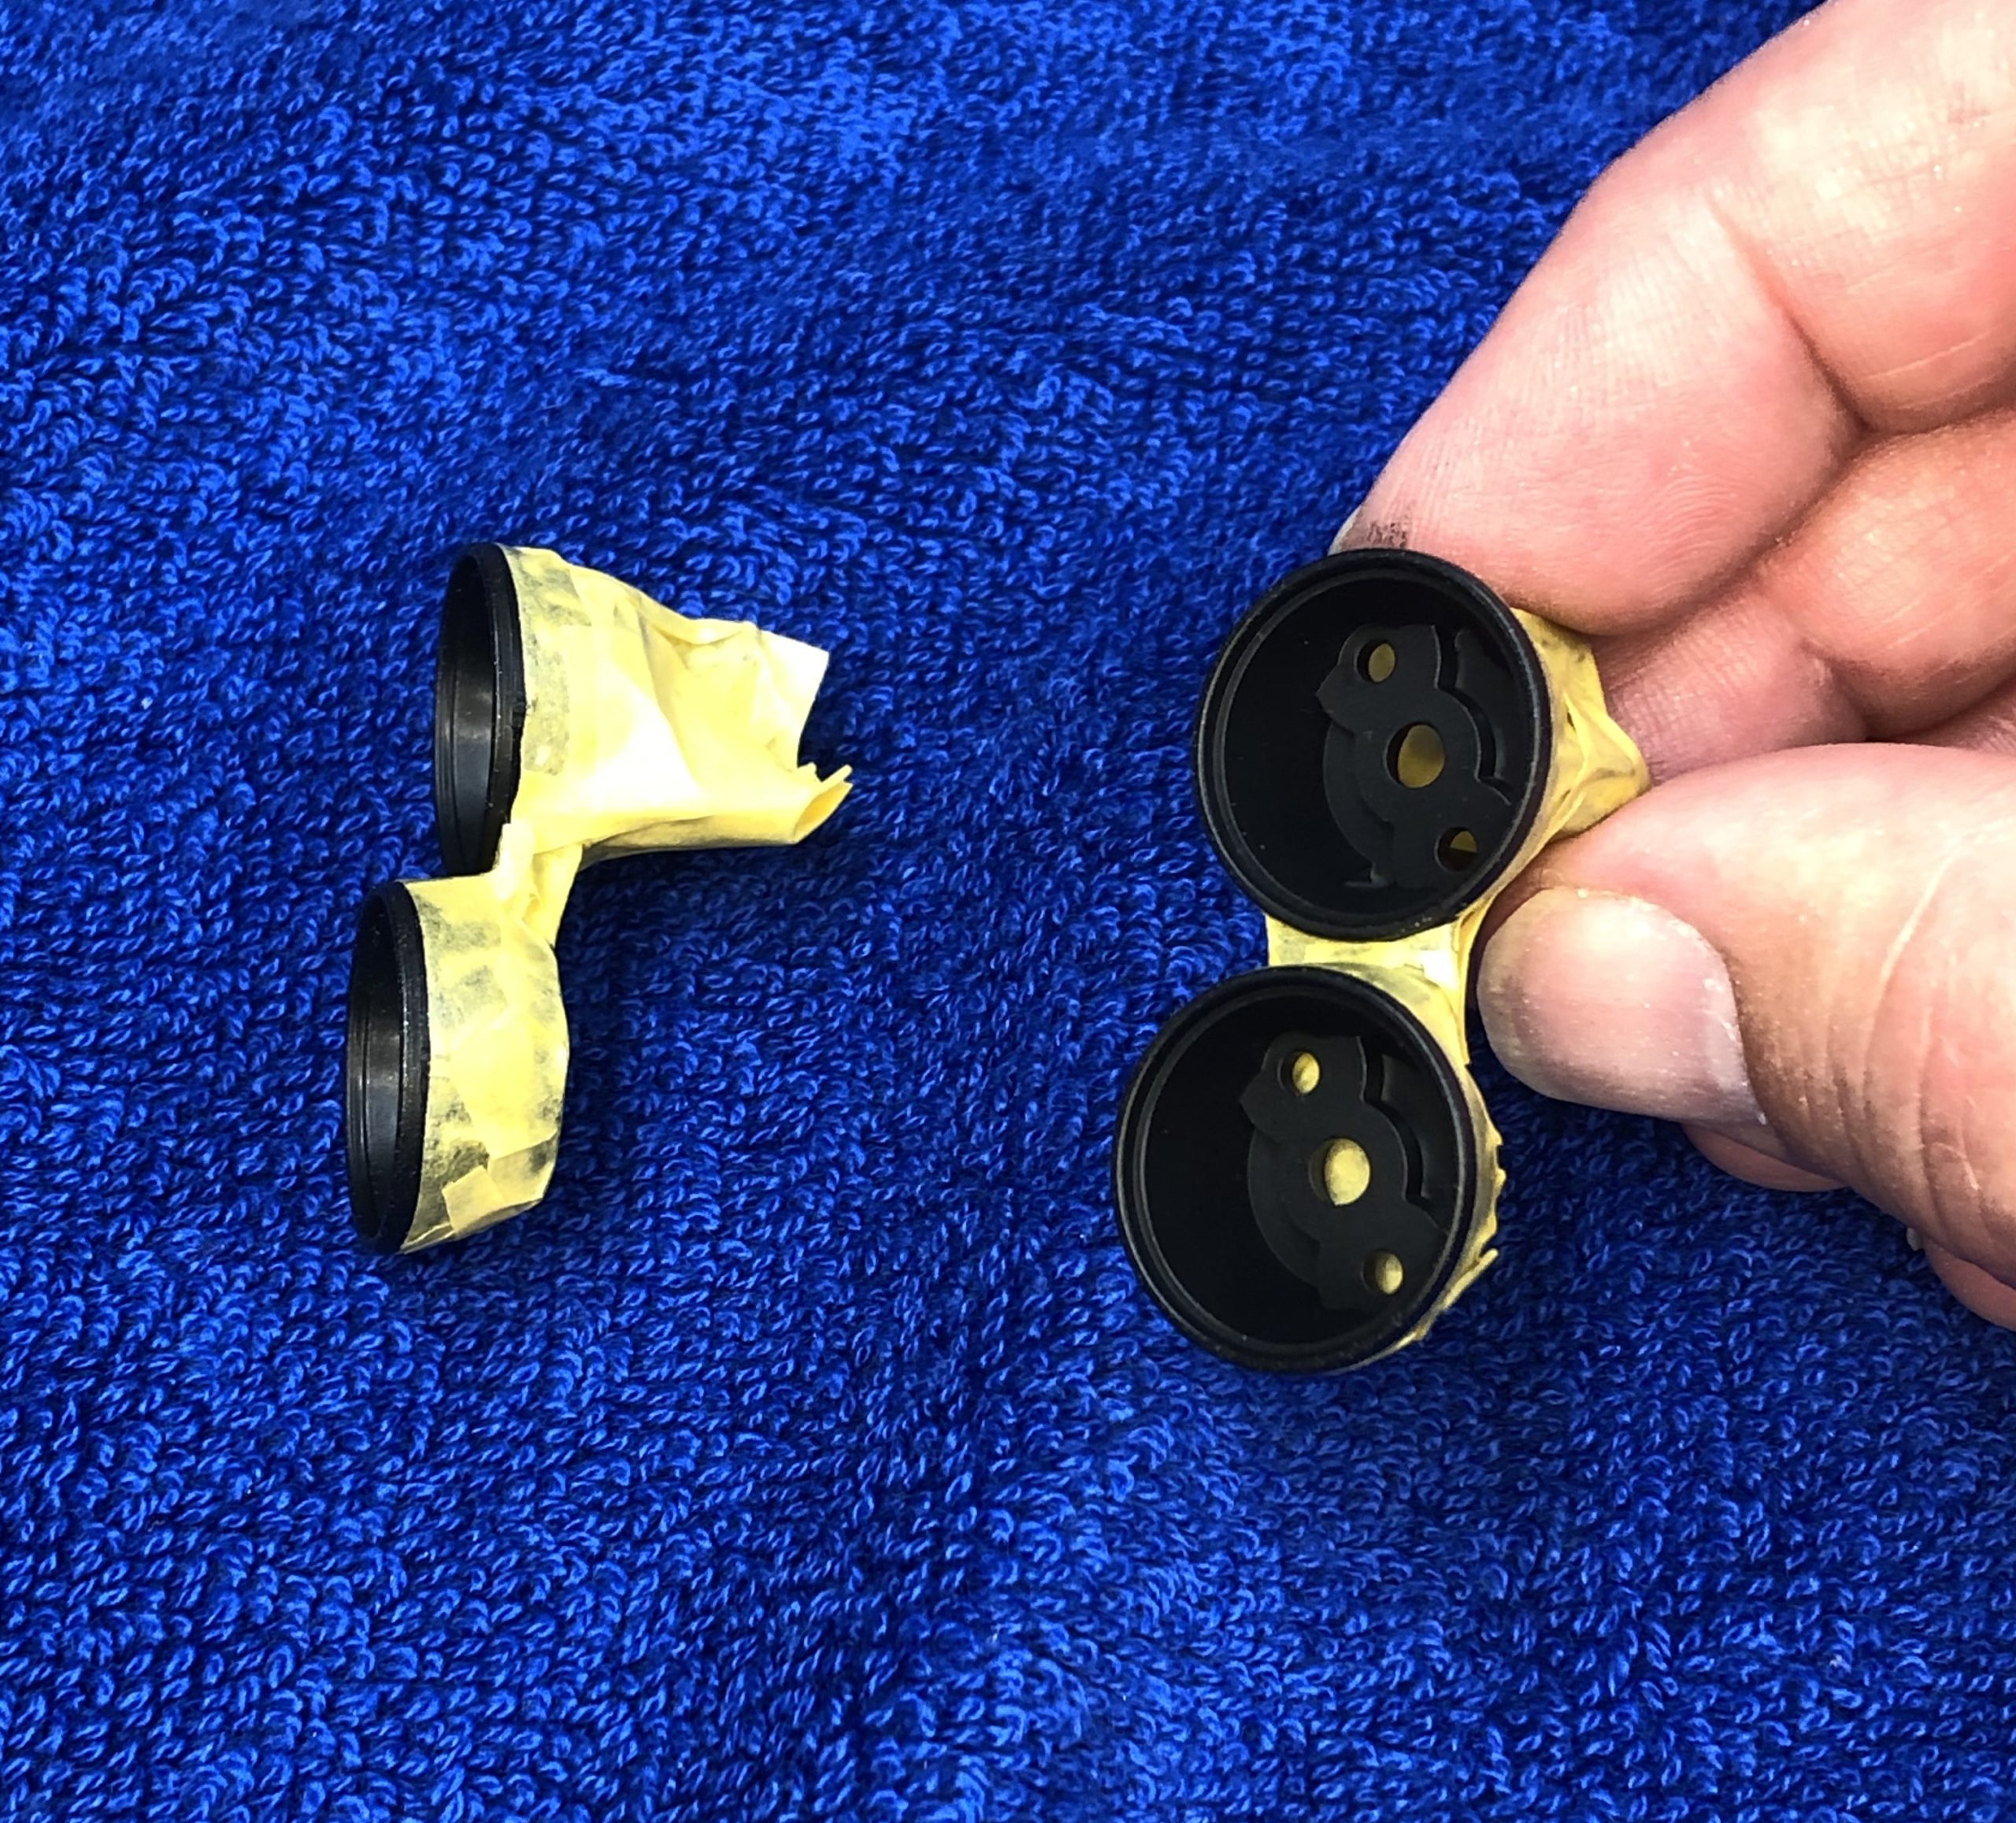
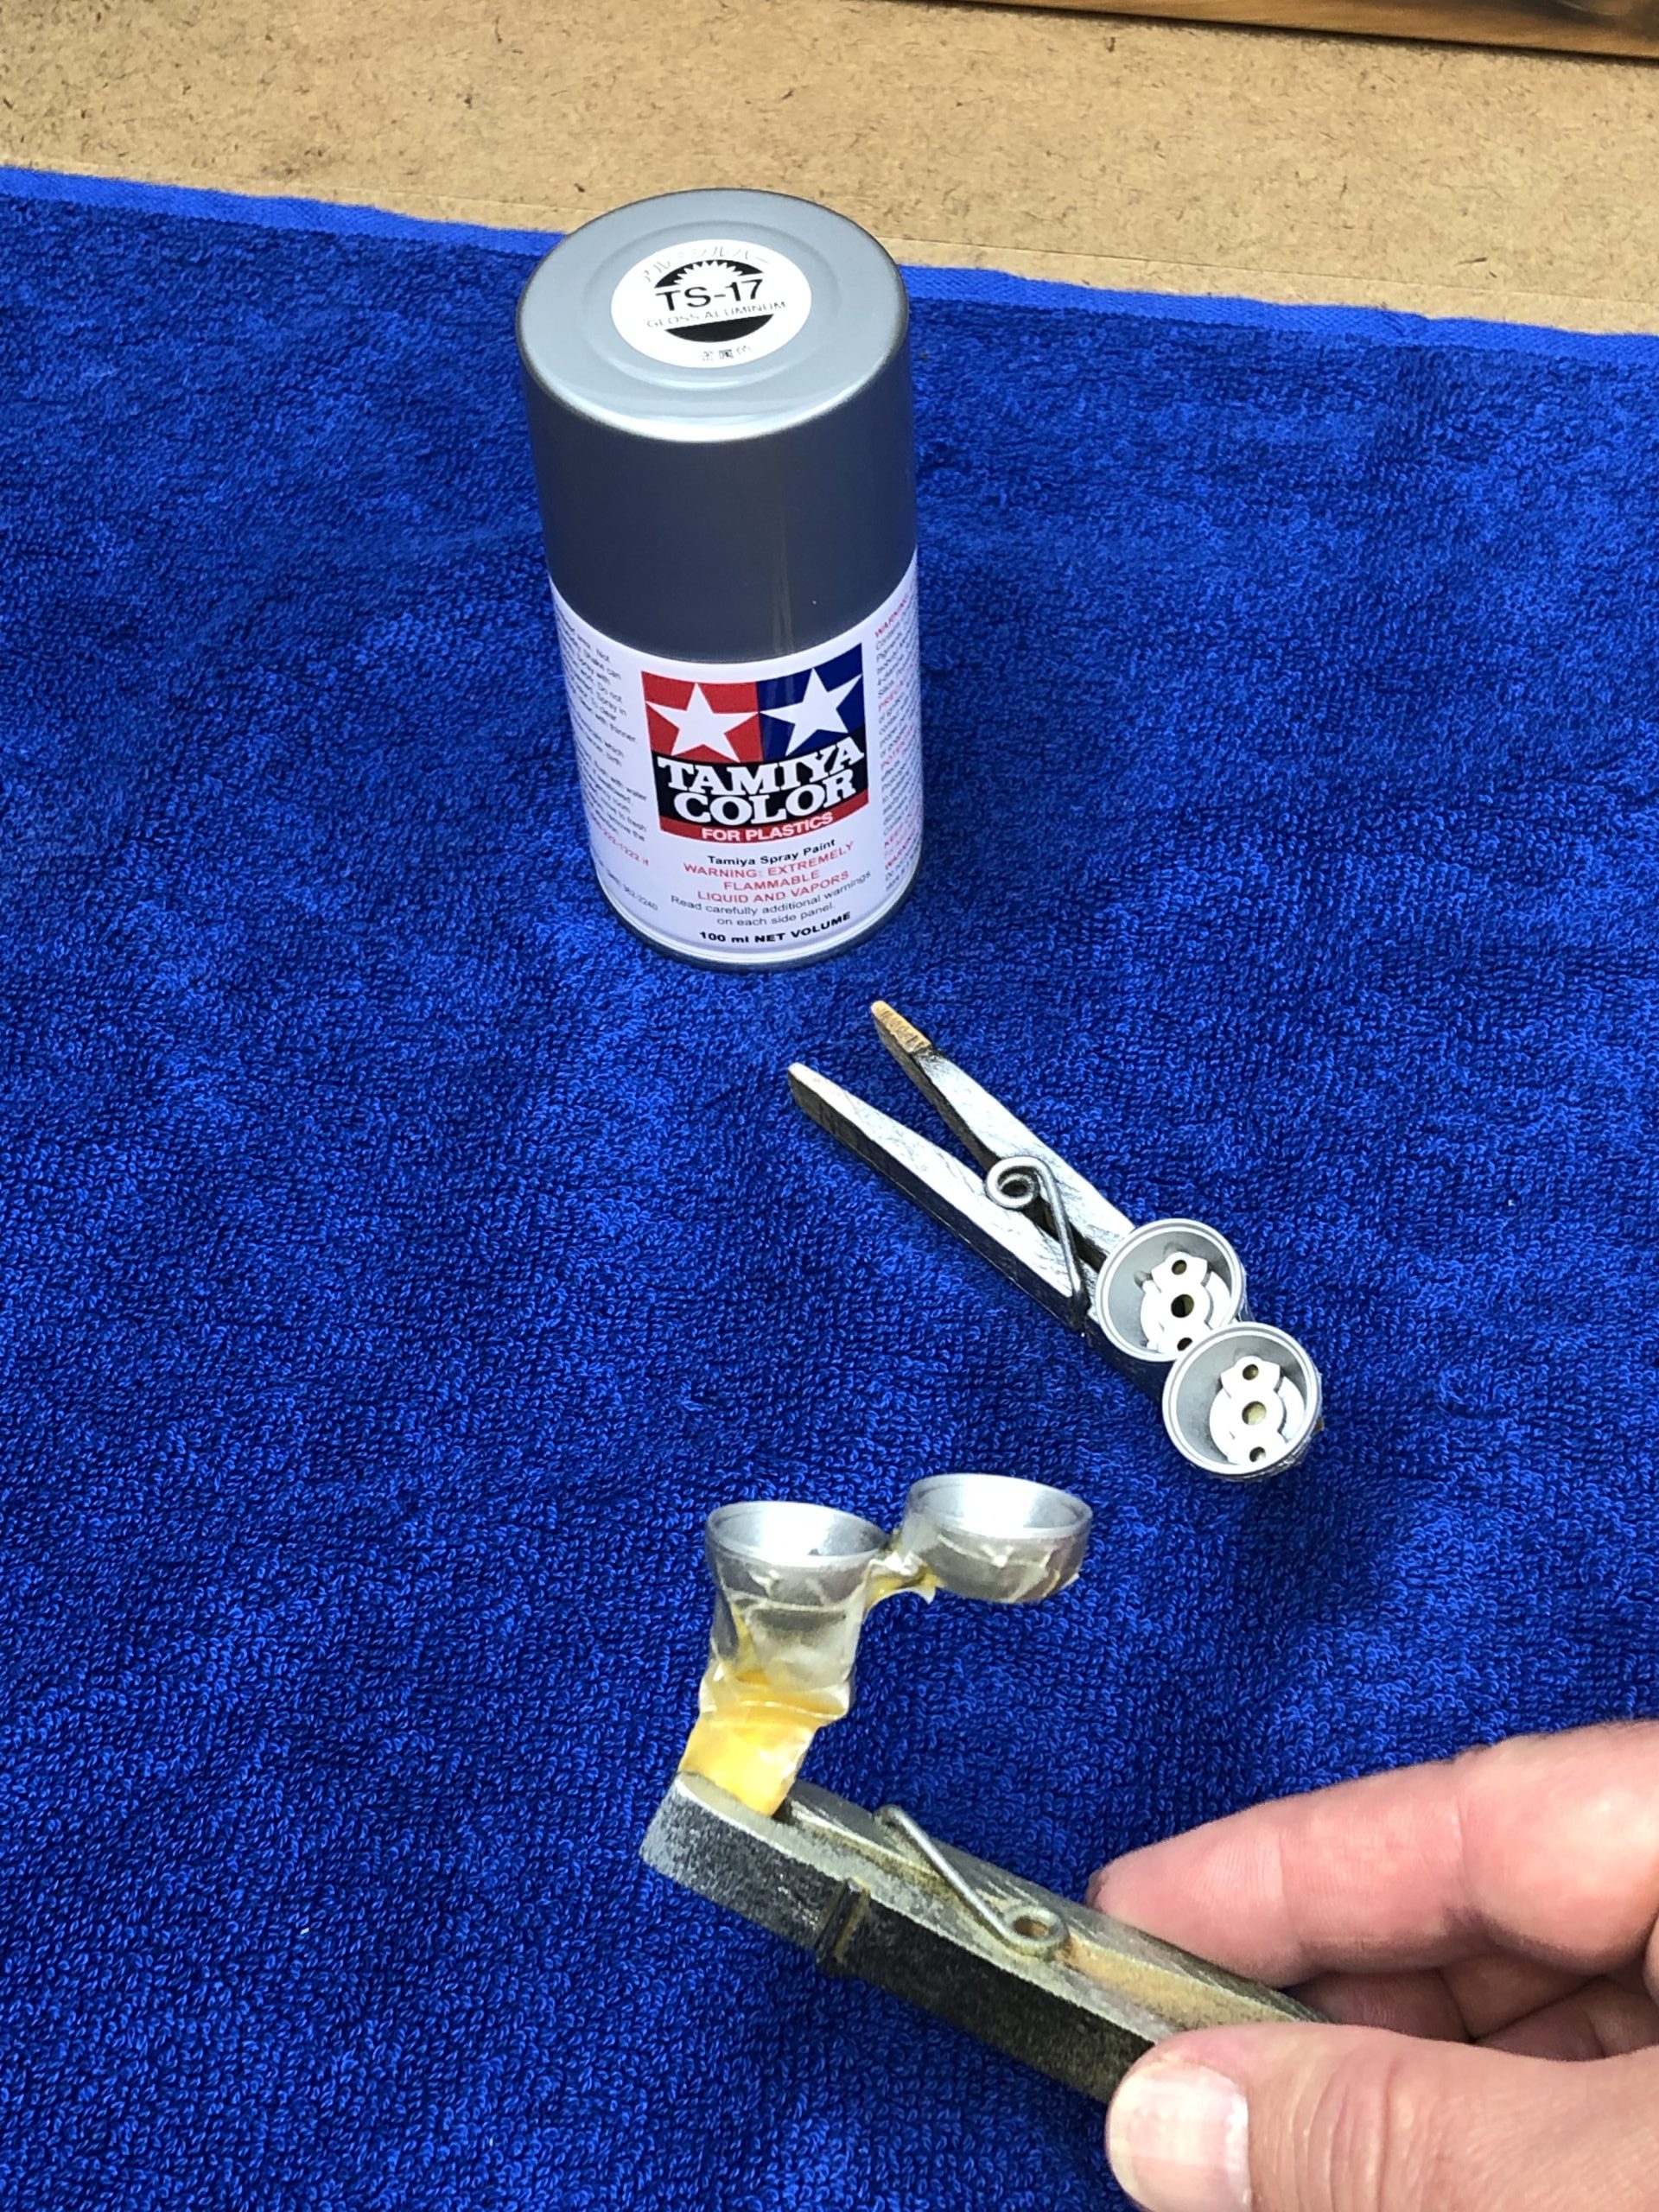
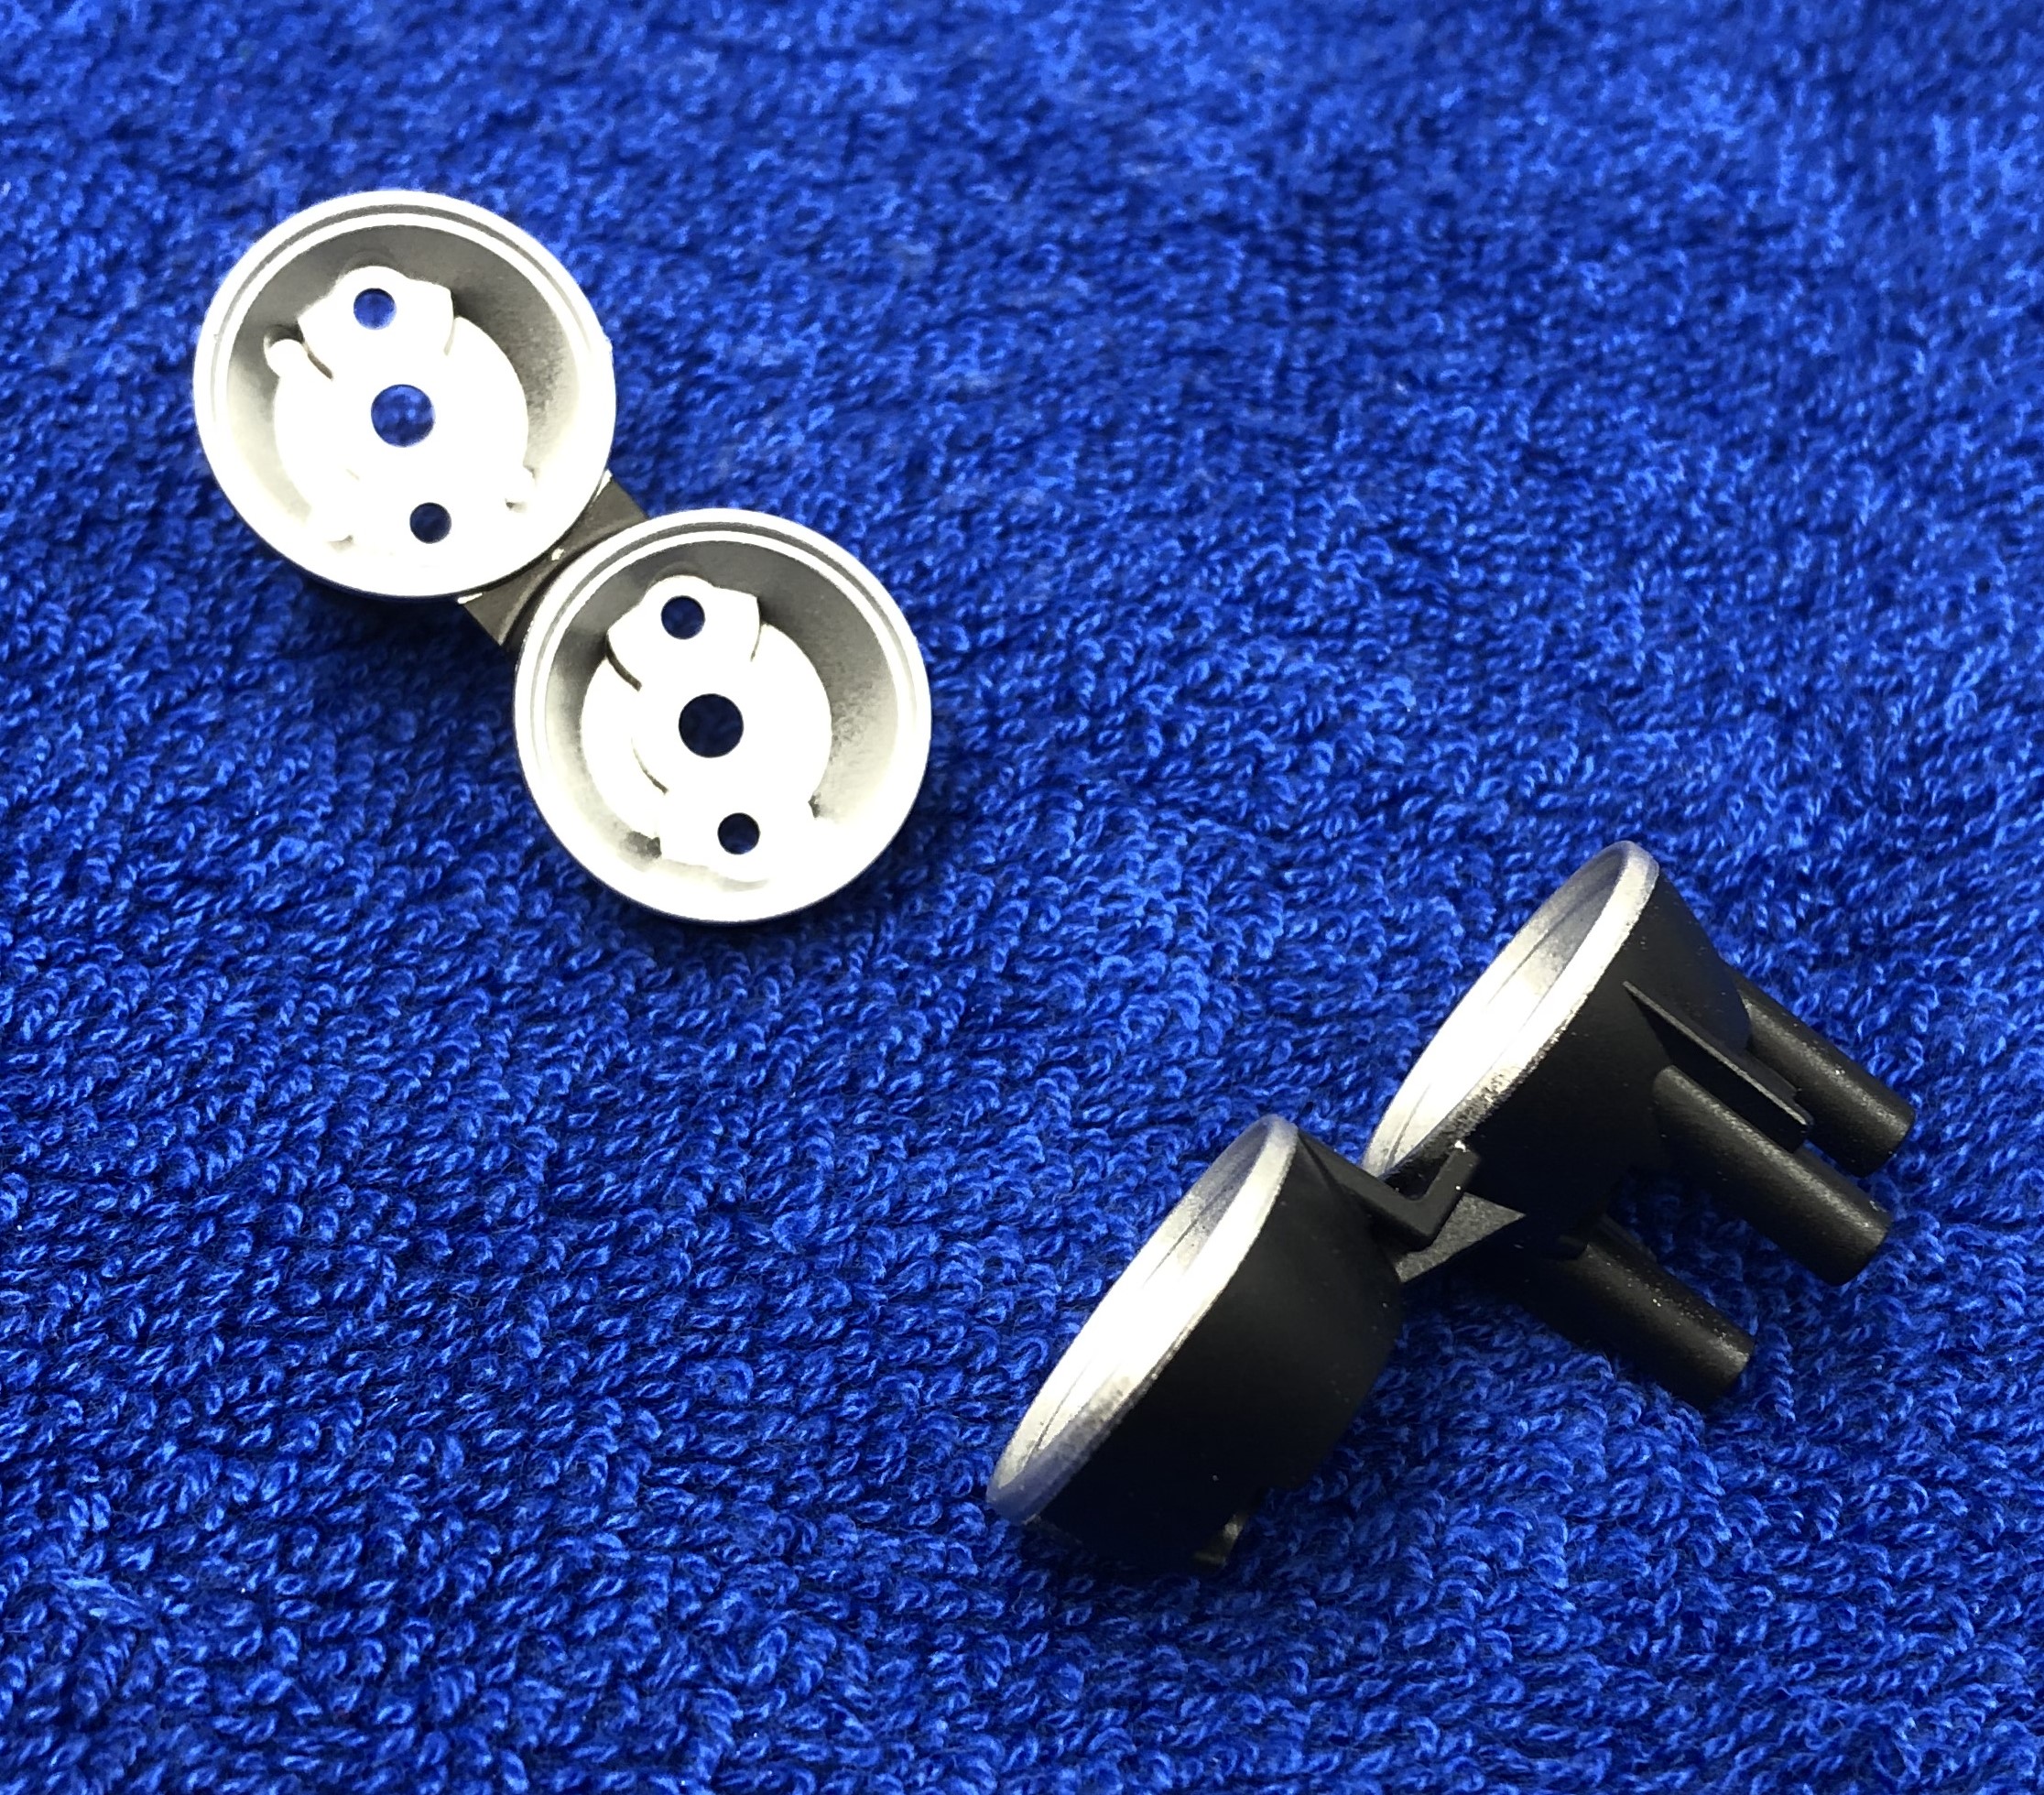
PAINTING THE RALLY LIGHTS
Out of all the ABS parts, the rally lights require a couple extra steps to complete them and the effort is totally worth it. You start off with spraying them black and then they get detailed with some gloss aluminum paint.
After the TS-29 Semi-gloss black has dried, mask off the sections of the rally lights that need to remain black. At first, this does not seem very difficult until you realize that a thin edge around the circumference of the lights needs to be gloss aluminum.
Be sure to check out Part II of Painting and Detailing the Tamiya VW Golf II Rally. In that article we will complete the body including trimming the body, adding stickers and attaching all of the ABS plastic parts.
For more information about Tamiya products, visit: TAMIYA
SPONSORED ARTICLE


