 RC Driver The Best In RC Car & Truck News, Reviews & Video


SPONSORED ARTICLE
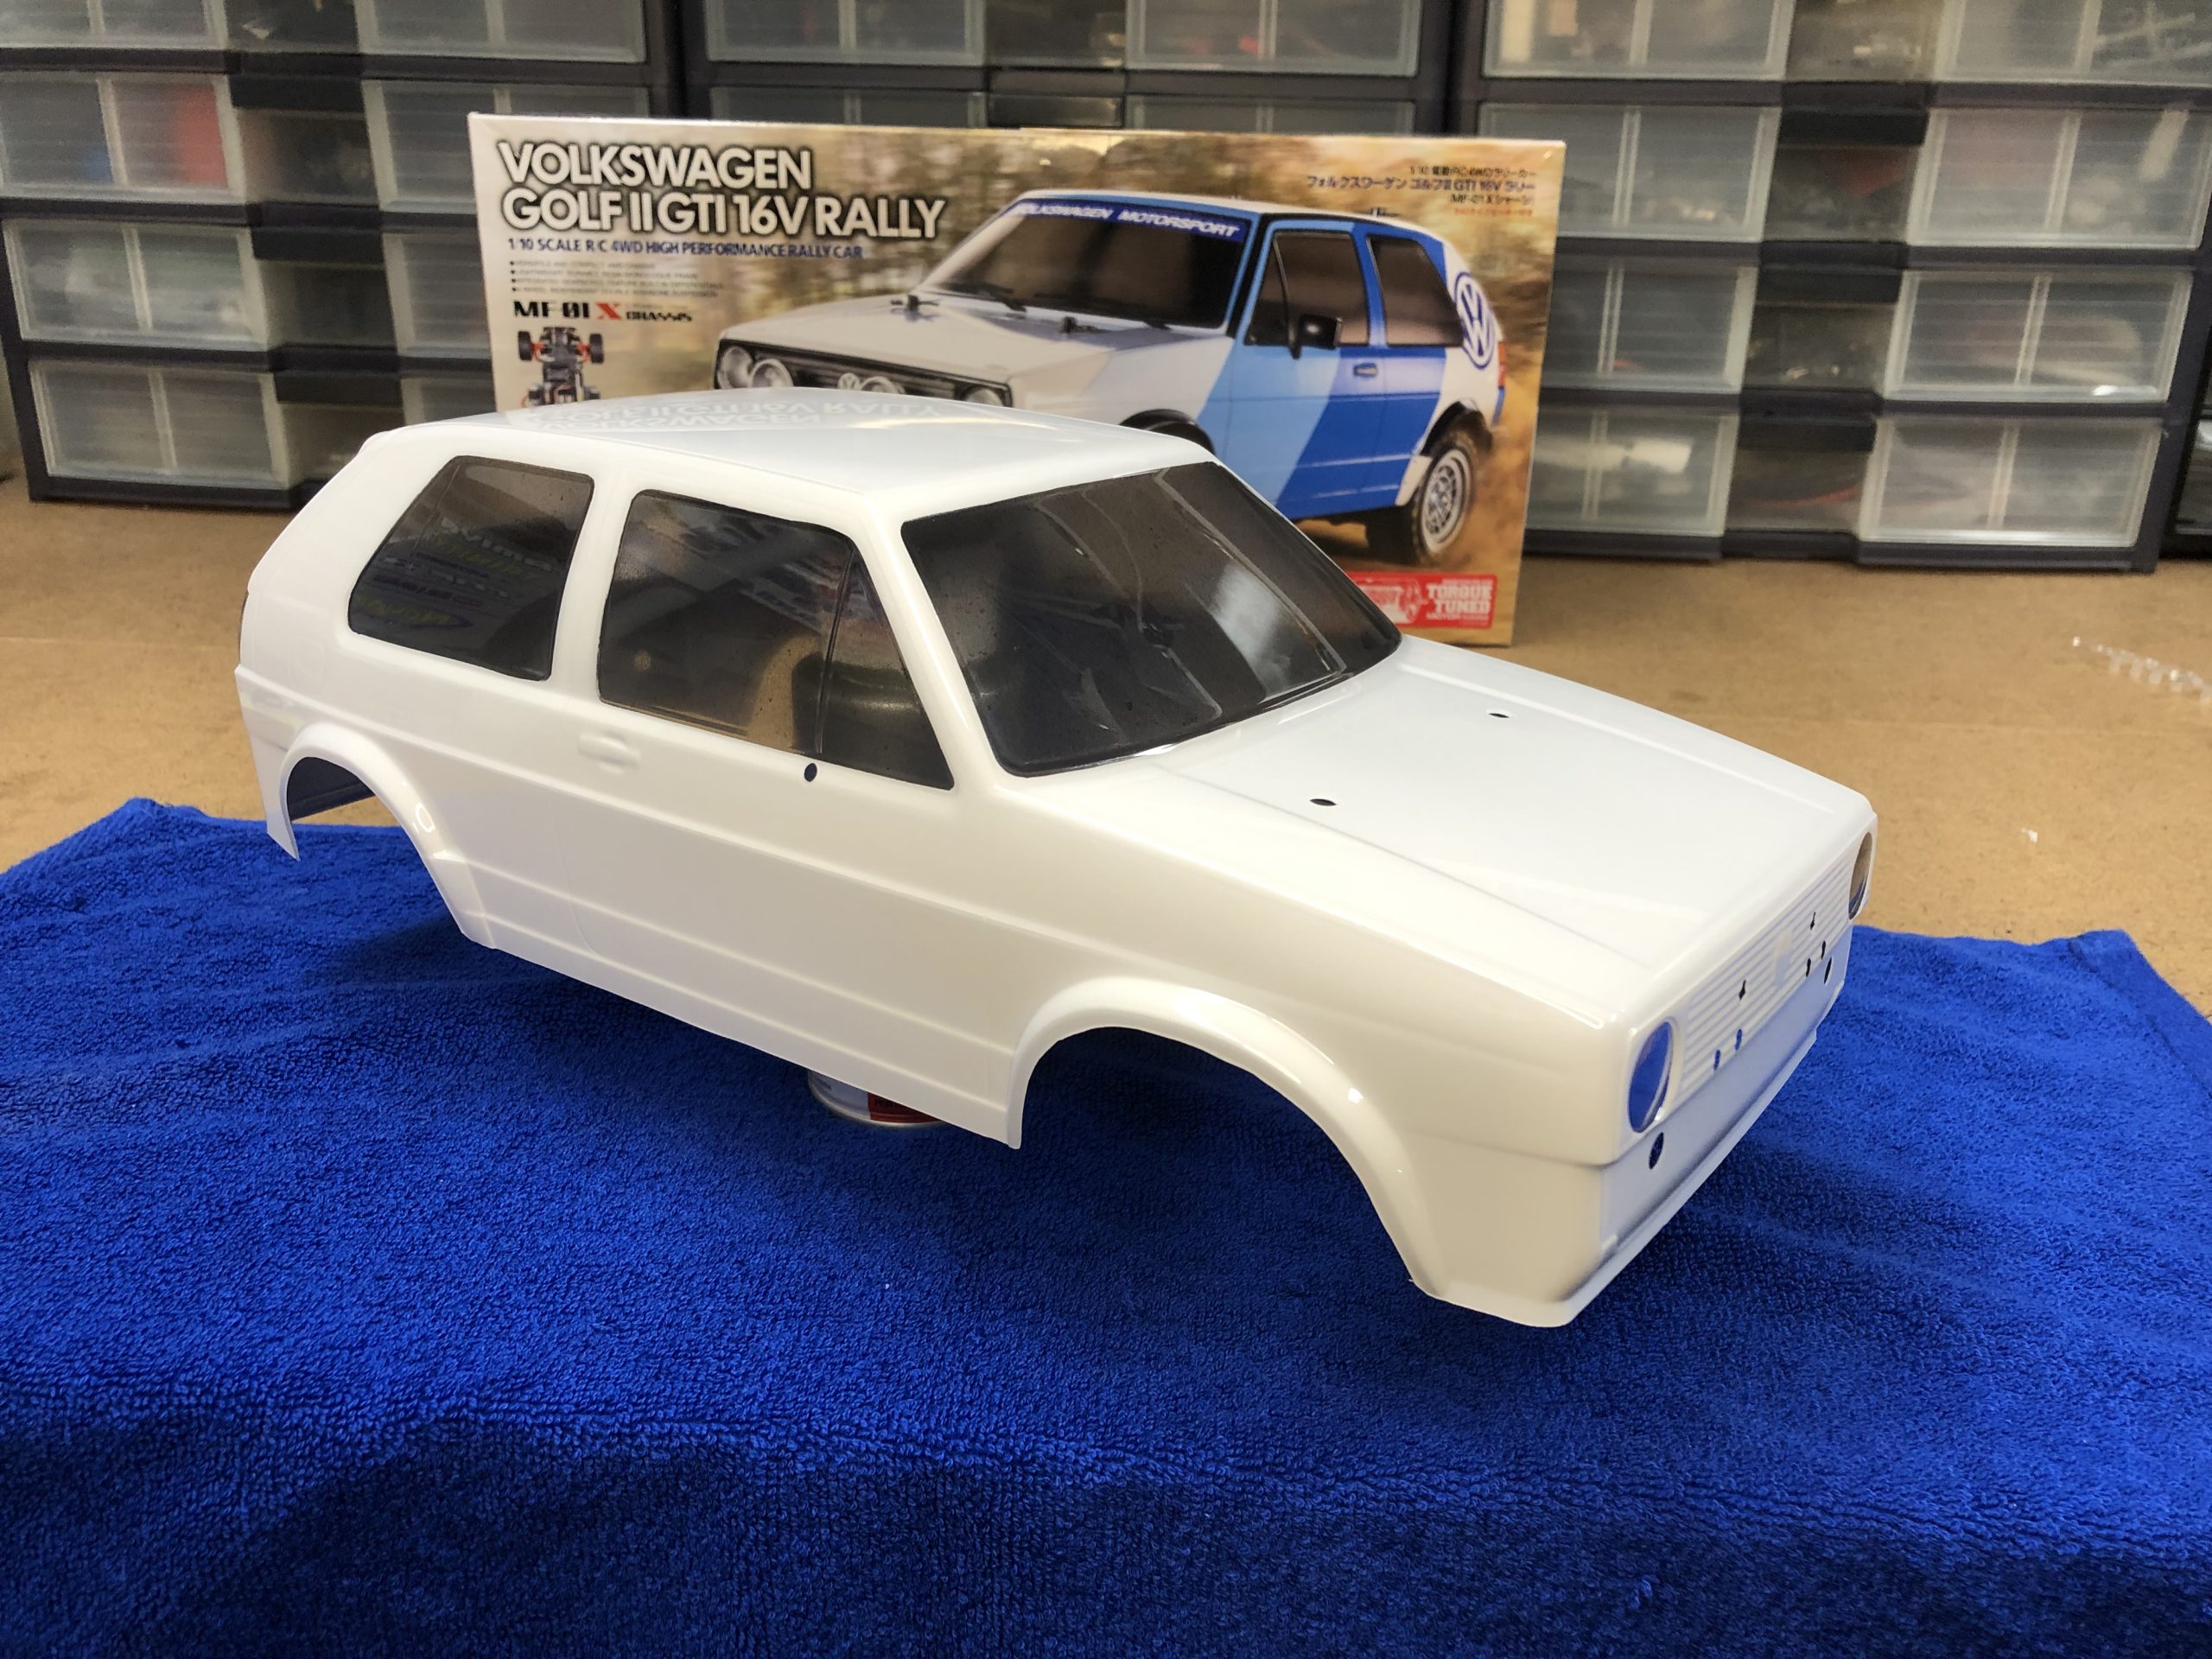
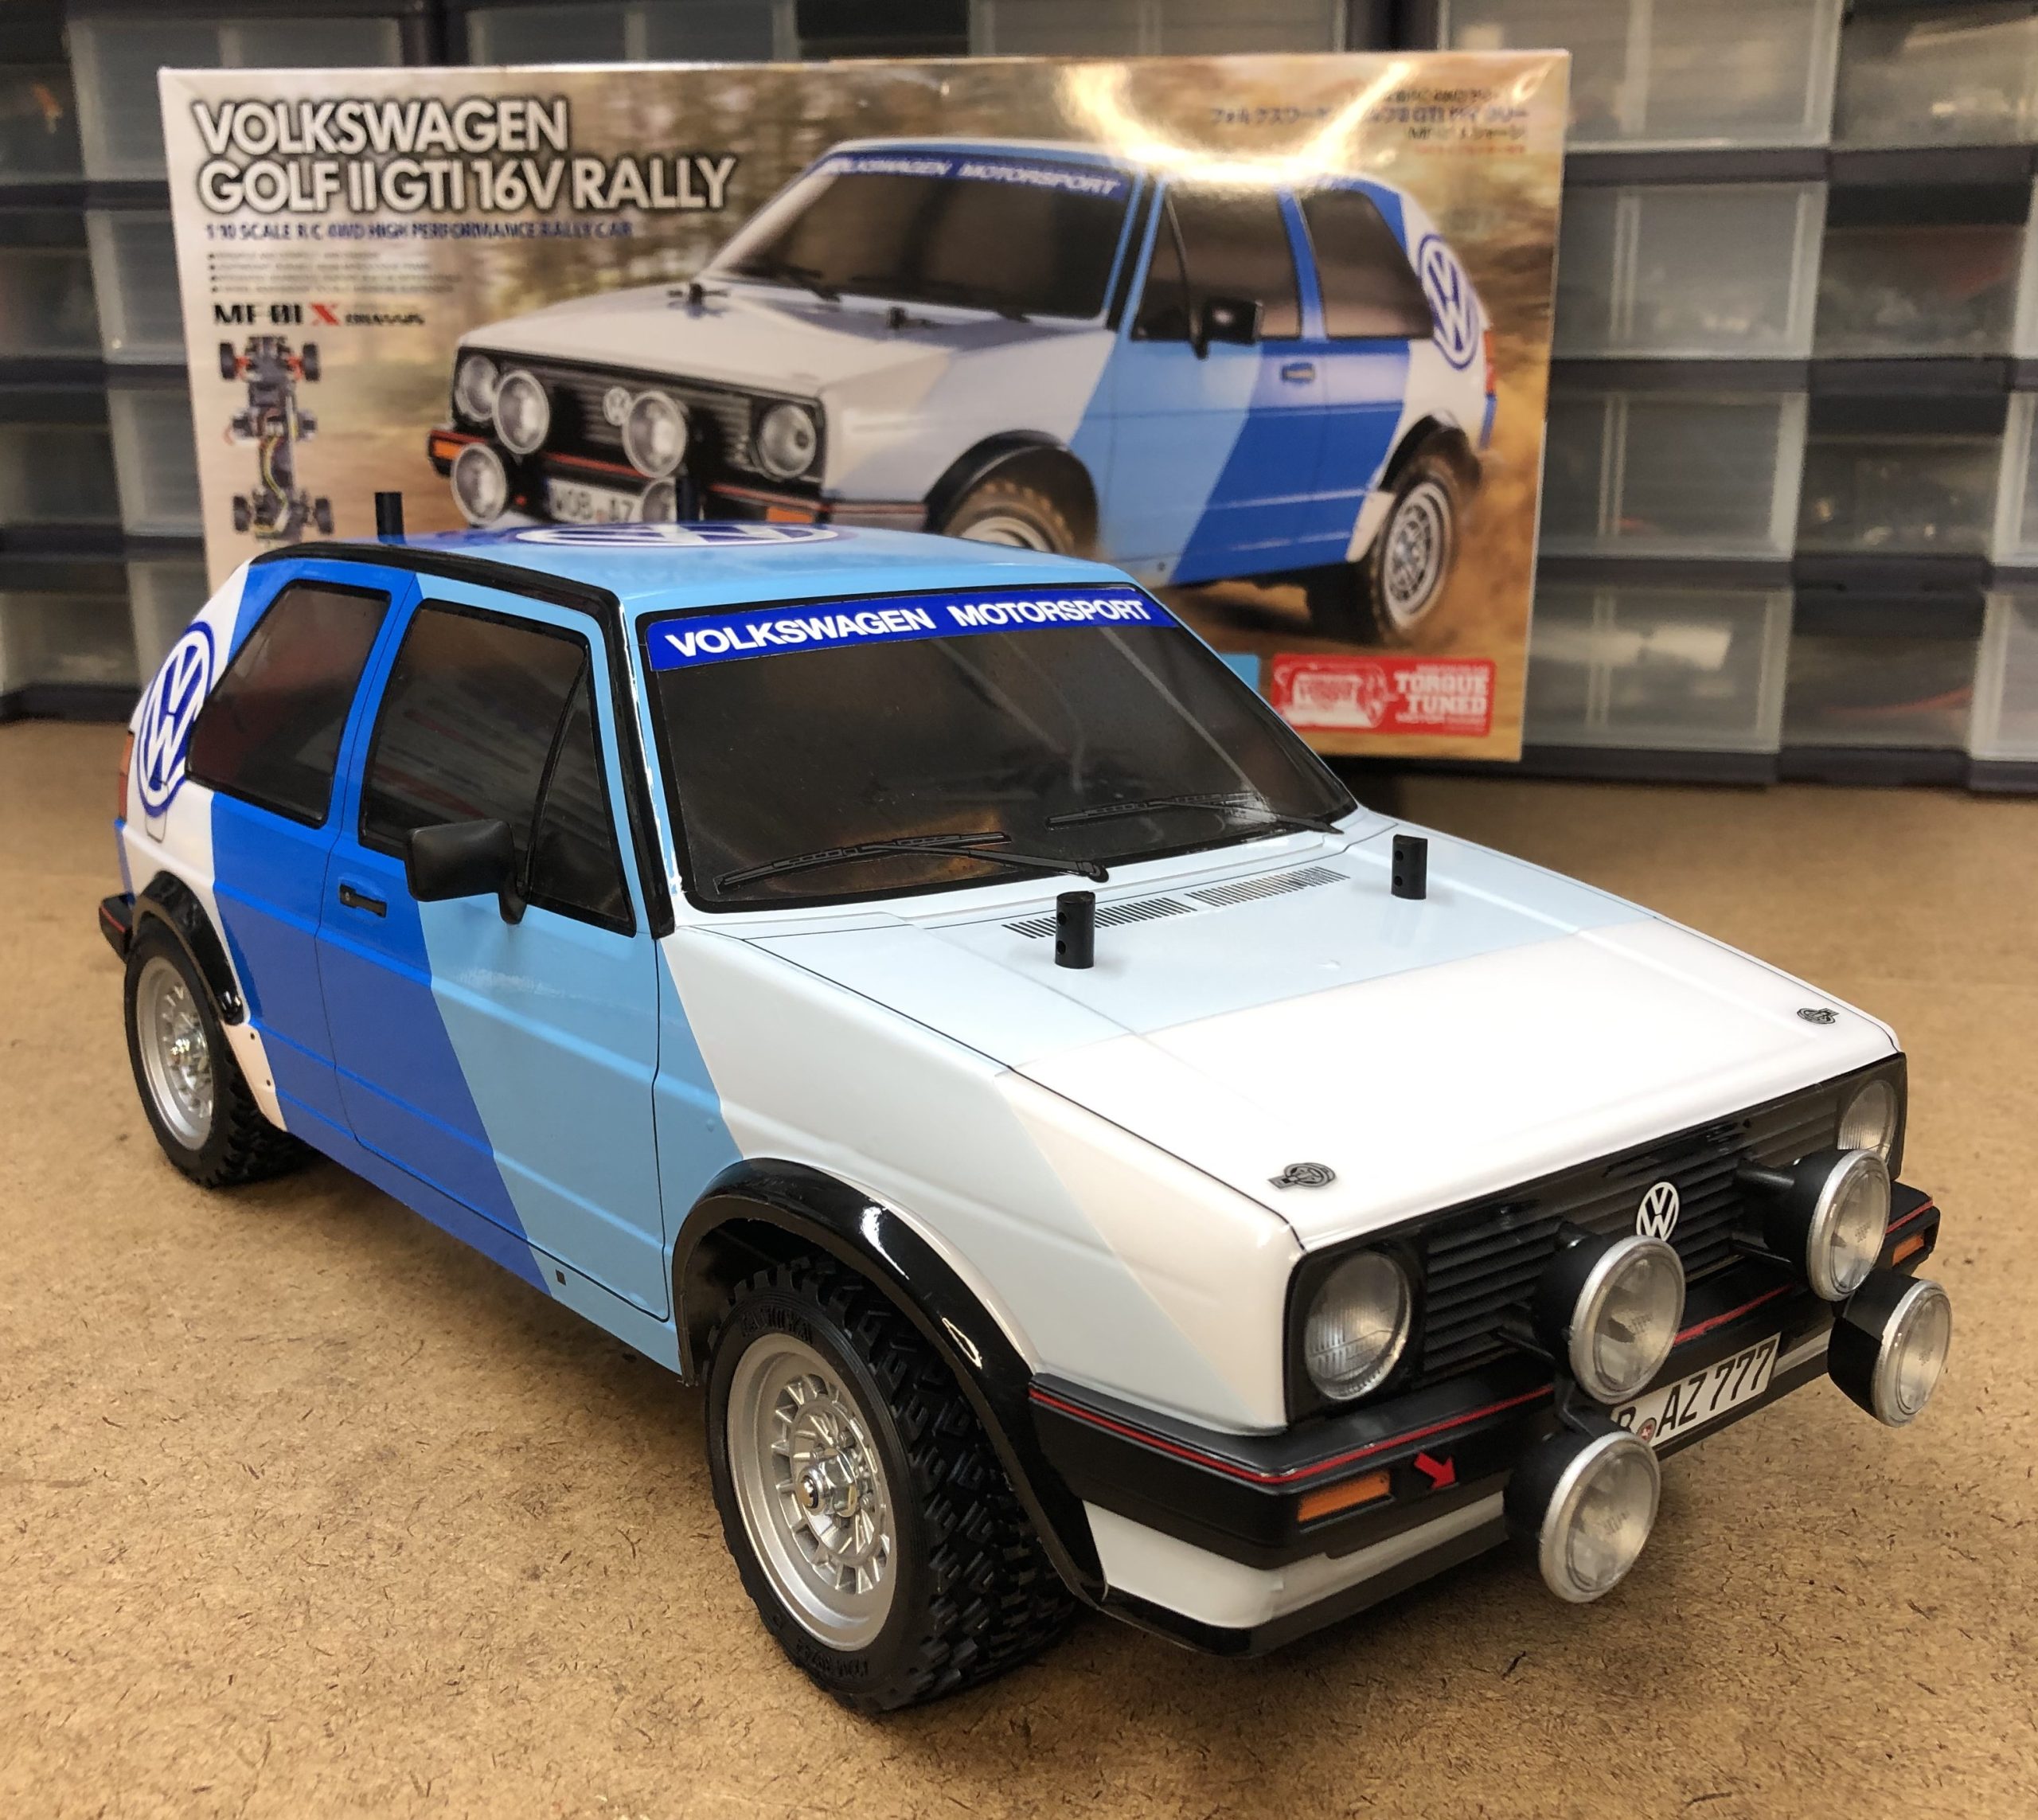
Time for our Painting and detailing the Tamiya VW Golf II Rally, part 2 article. Last month we gave you part 1 where we showed you the step-by-step process on how to paint the VW Golf II Rally body and its accessories. In that article are some helpful tips and tricks to painting the Golf II that can also be applied to other bodies. Here in part two we will illustrate how to complete the VW body with some more useful tips so that you can end up with a display worthy finished product. Let’s get to it!

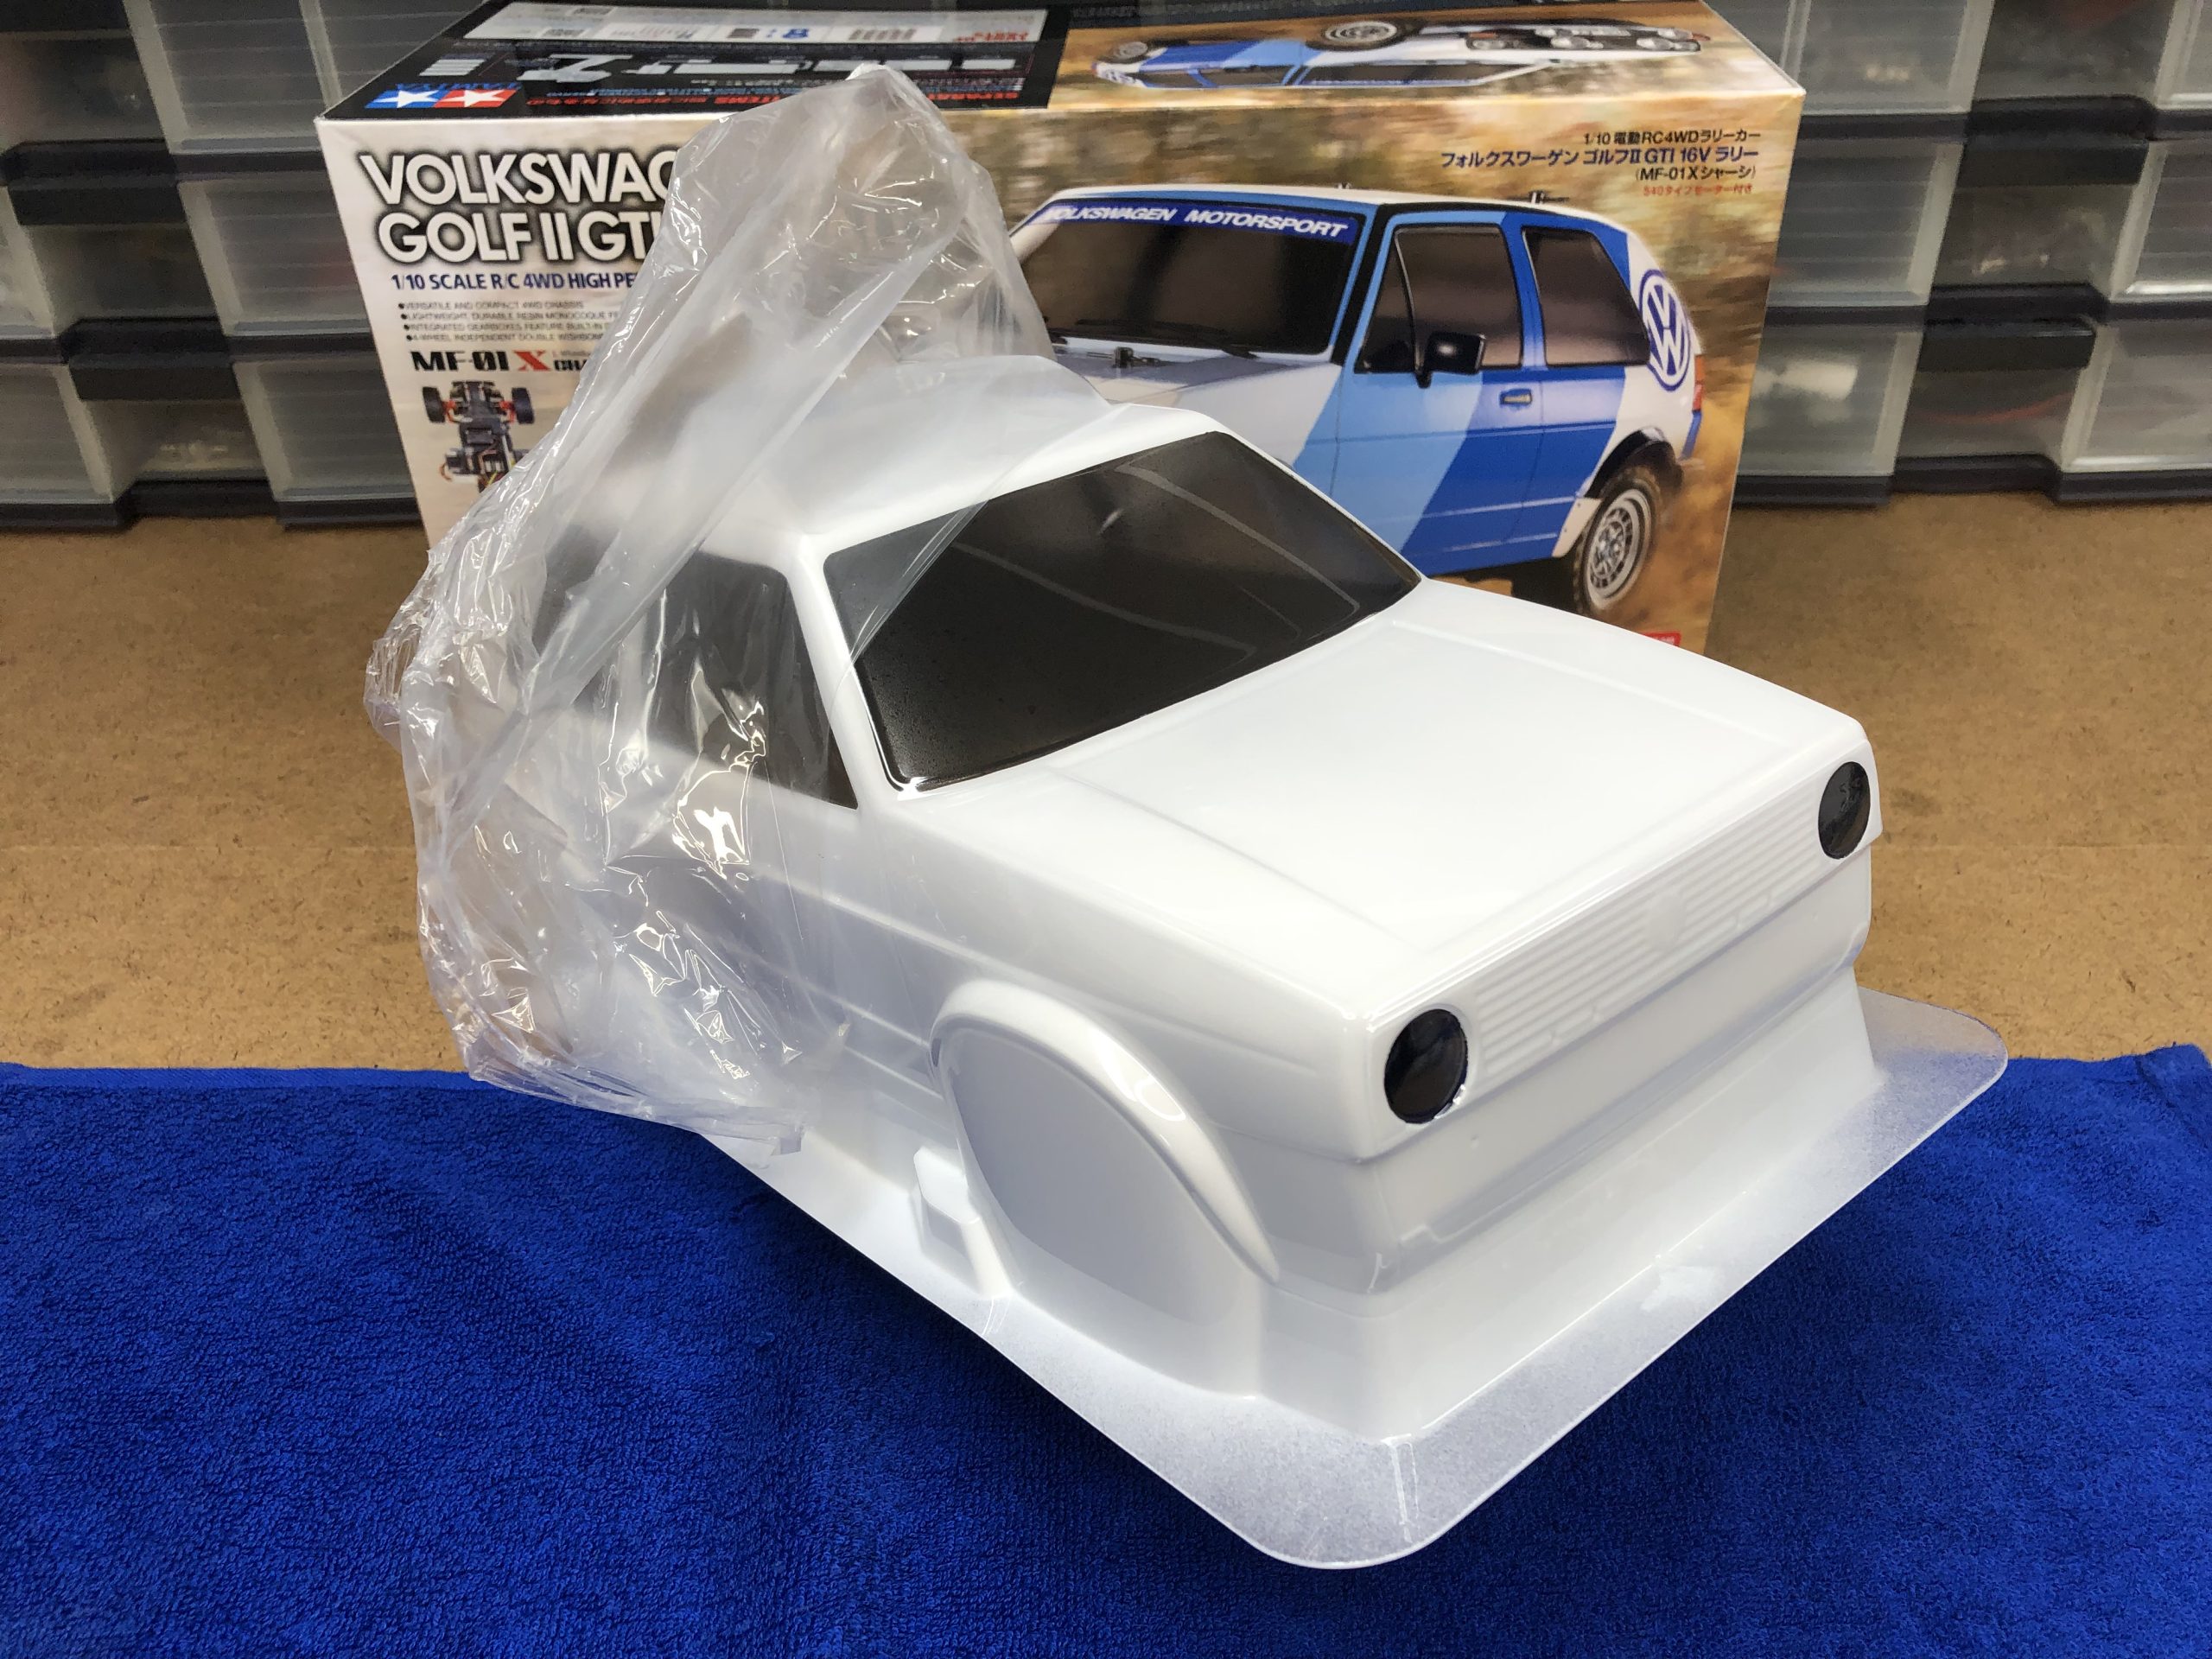
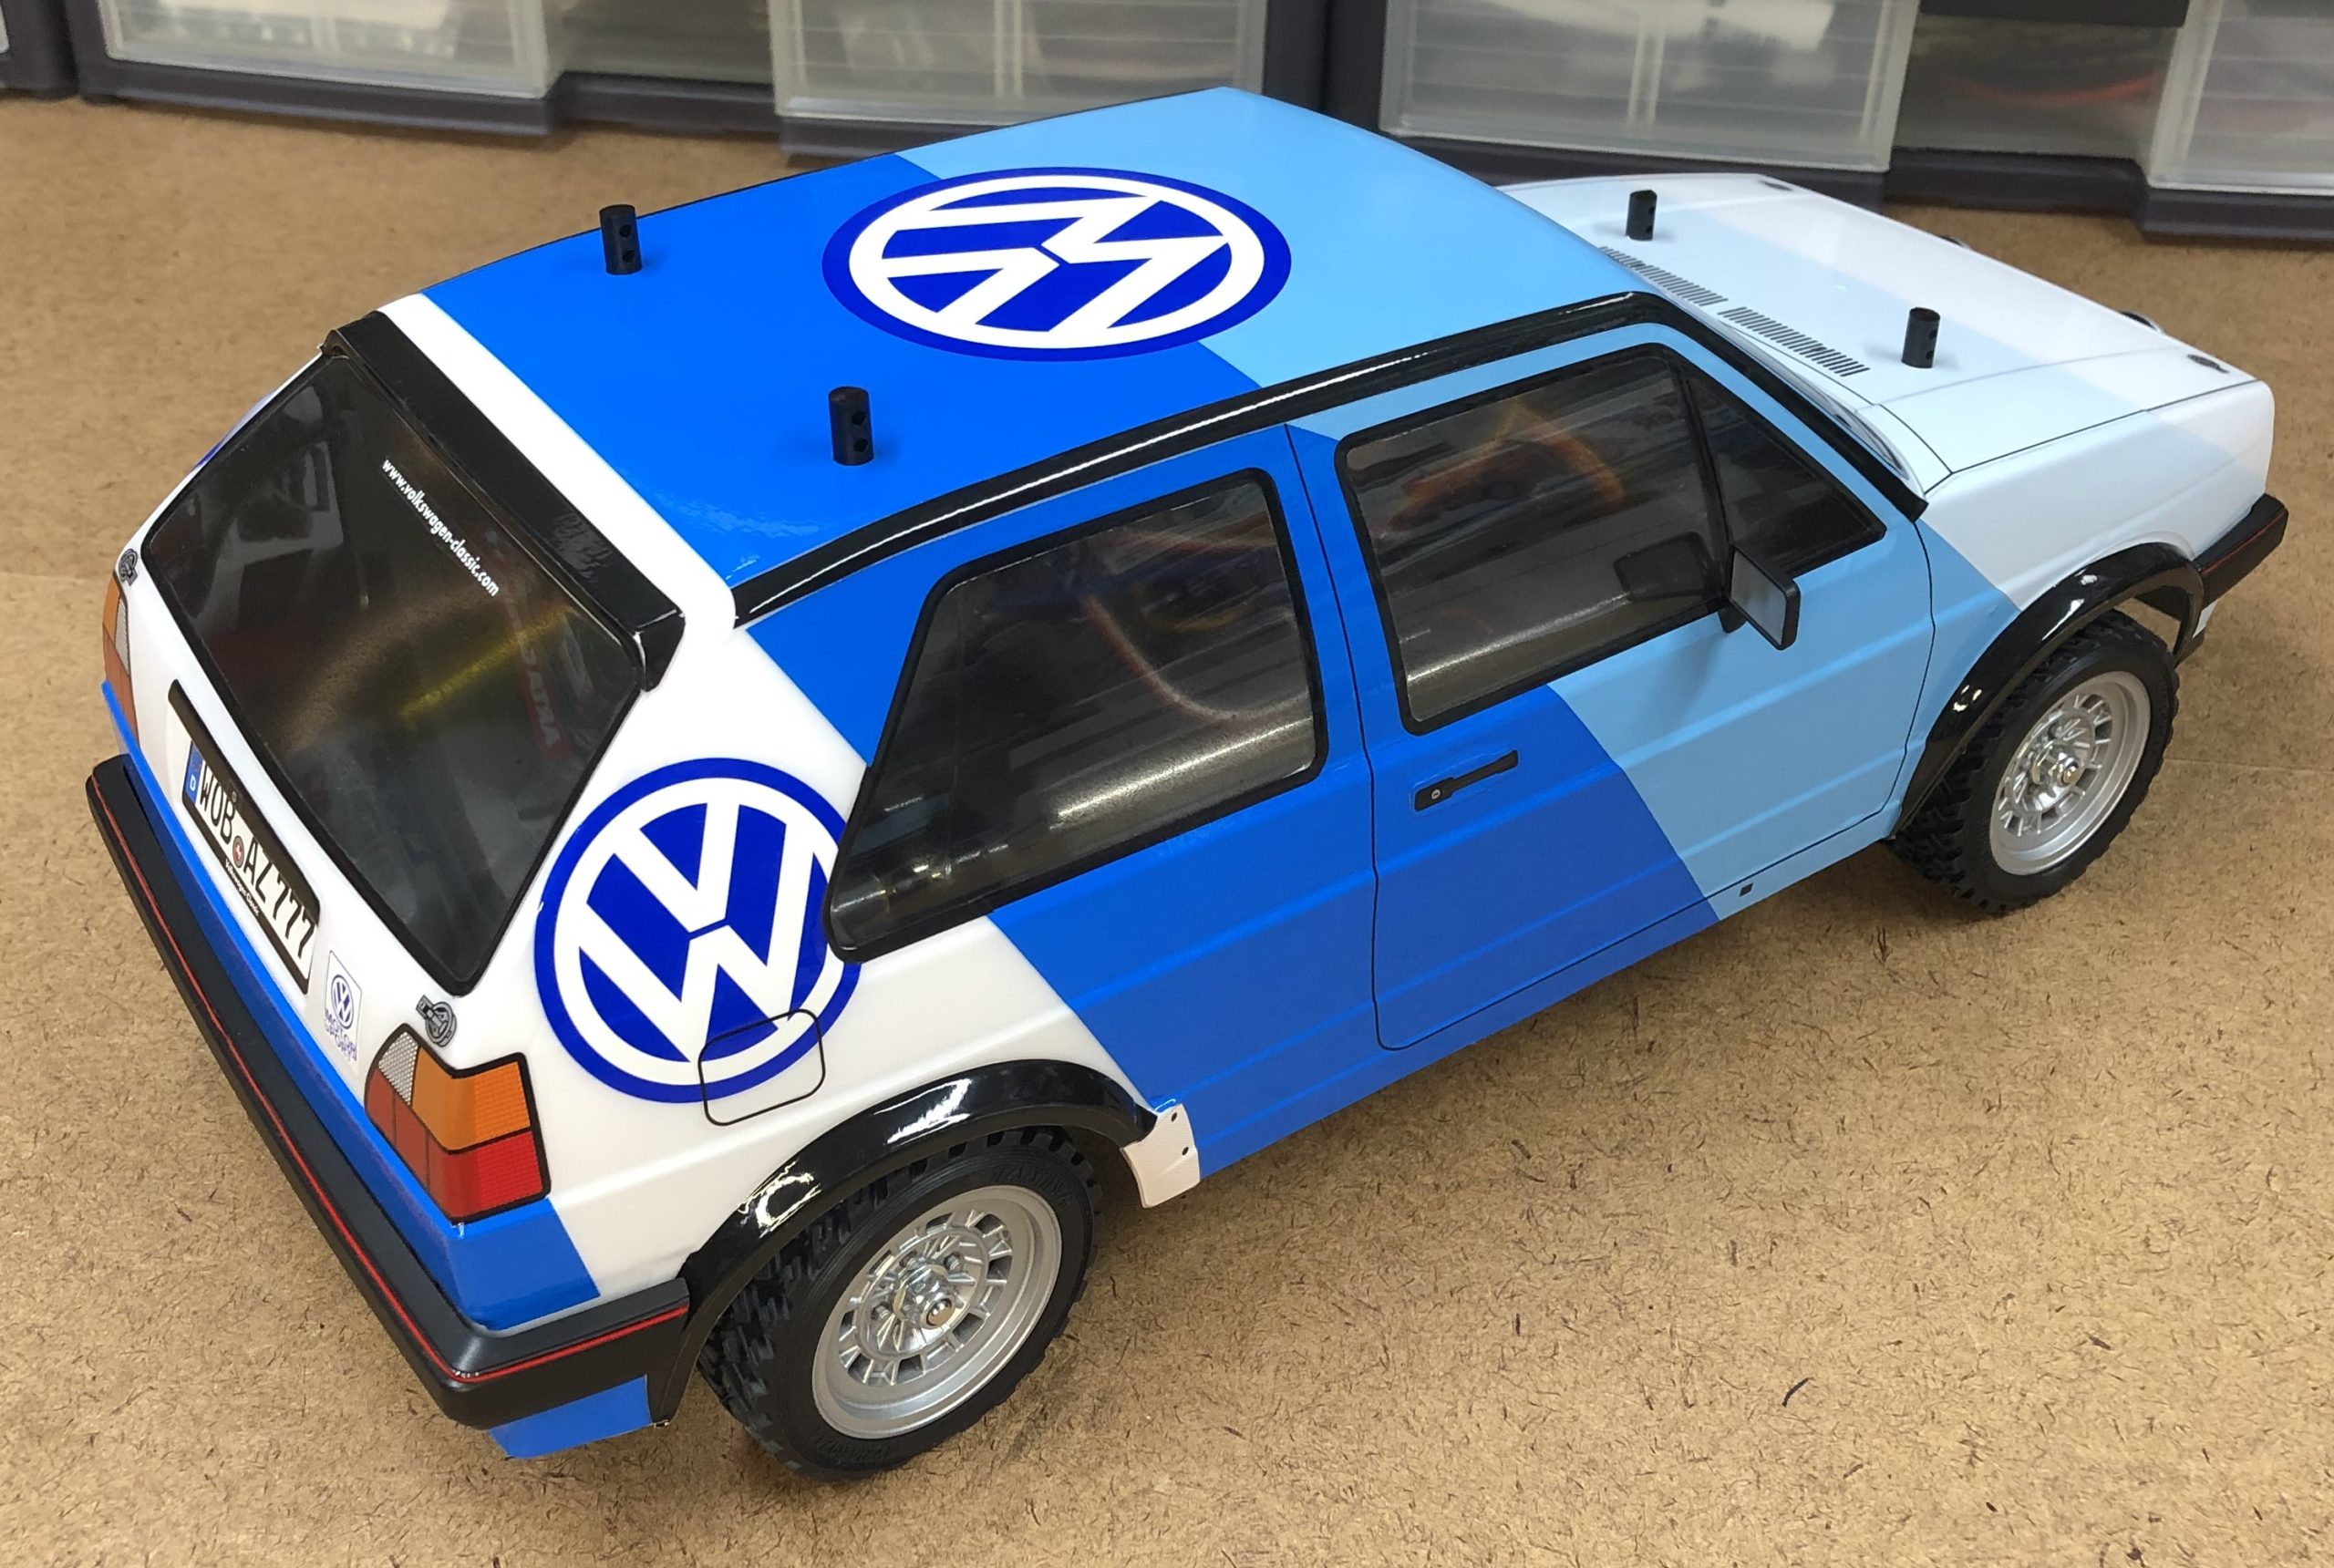
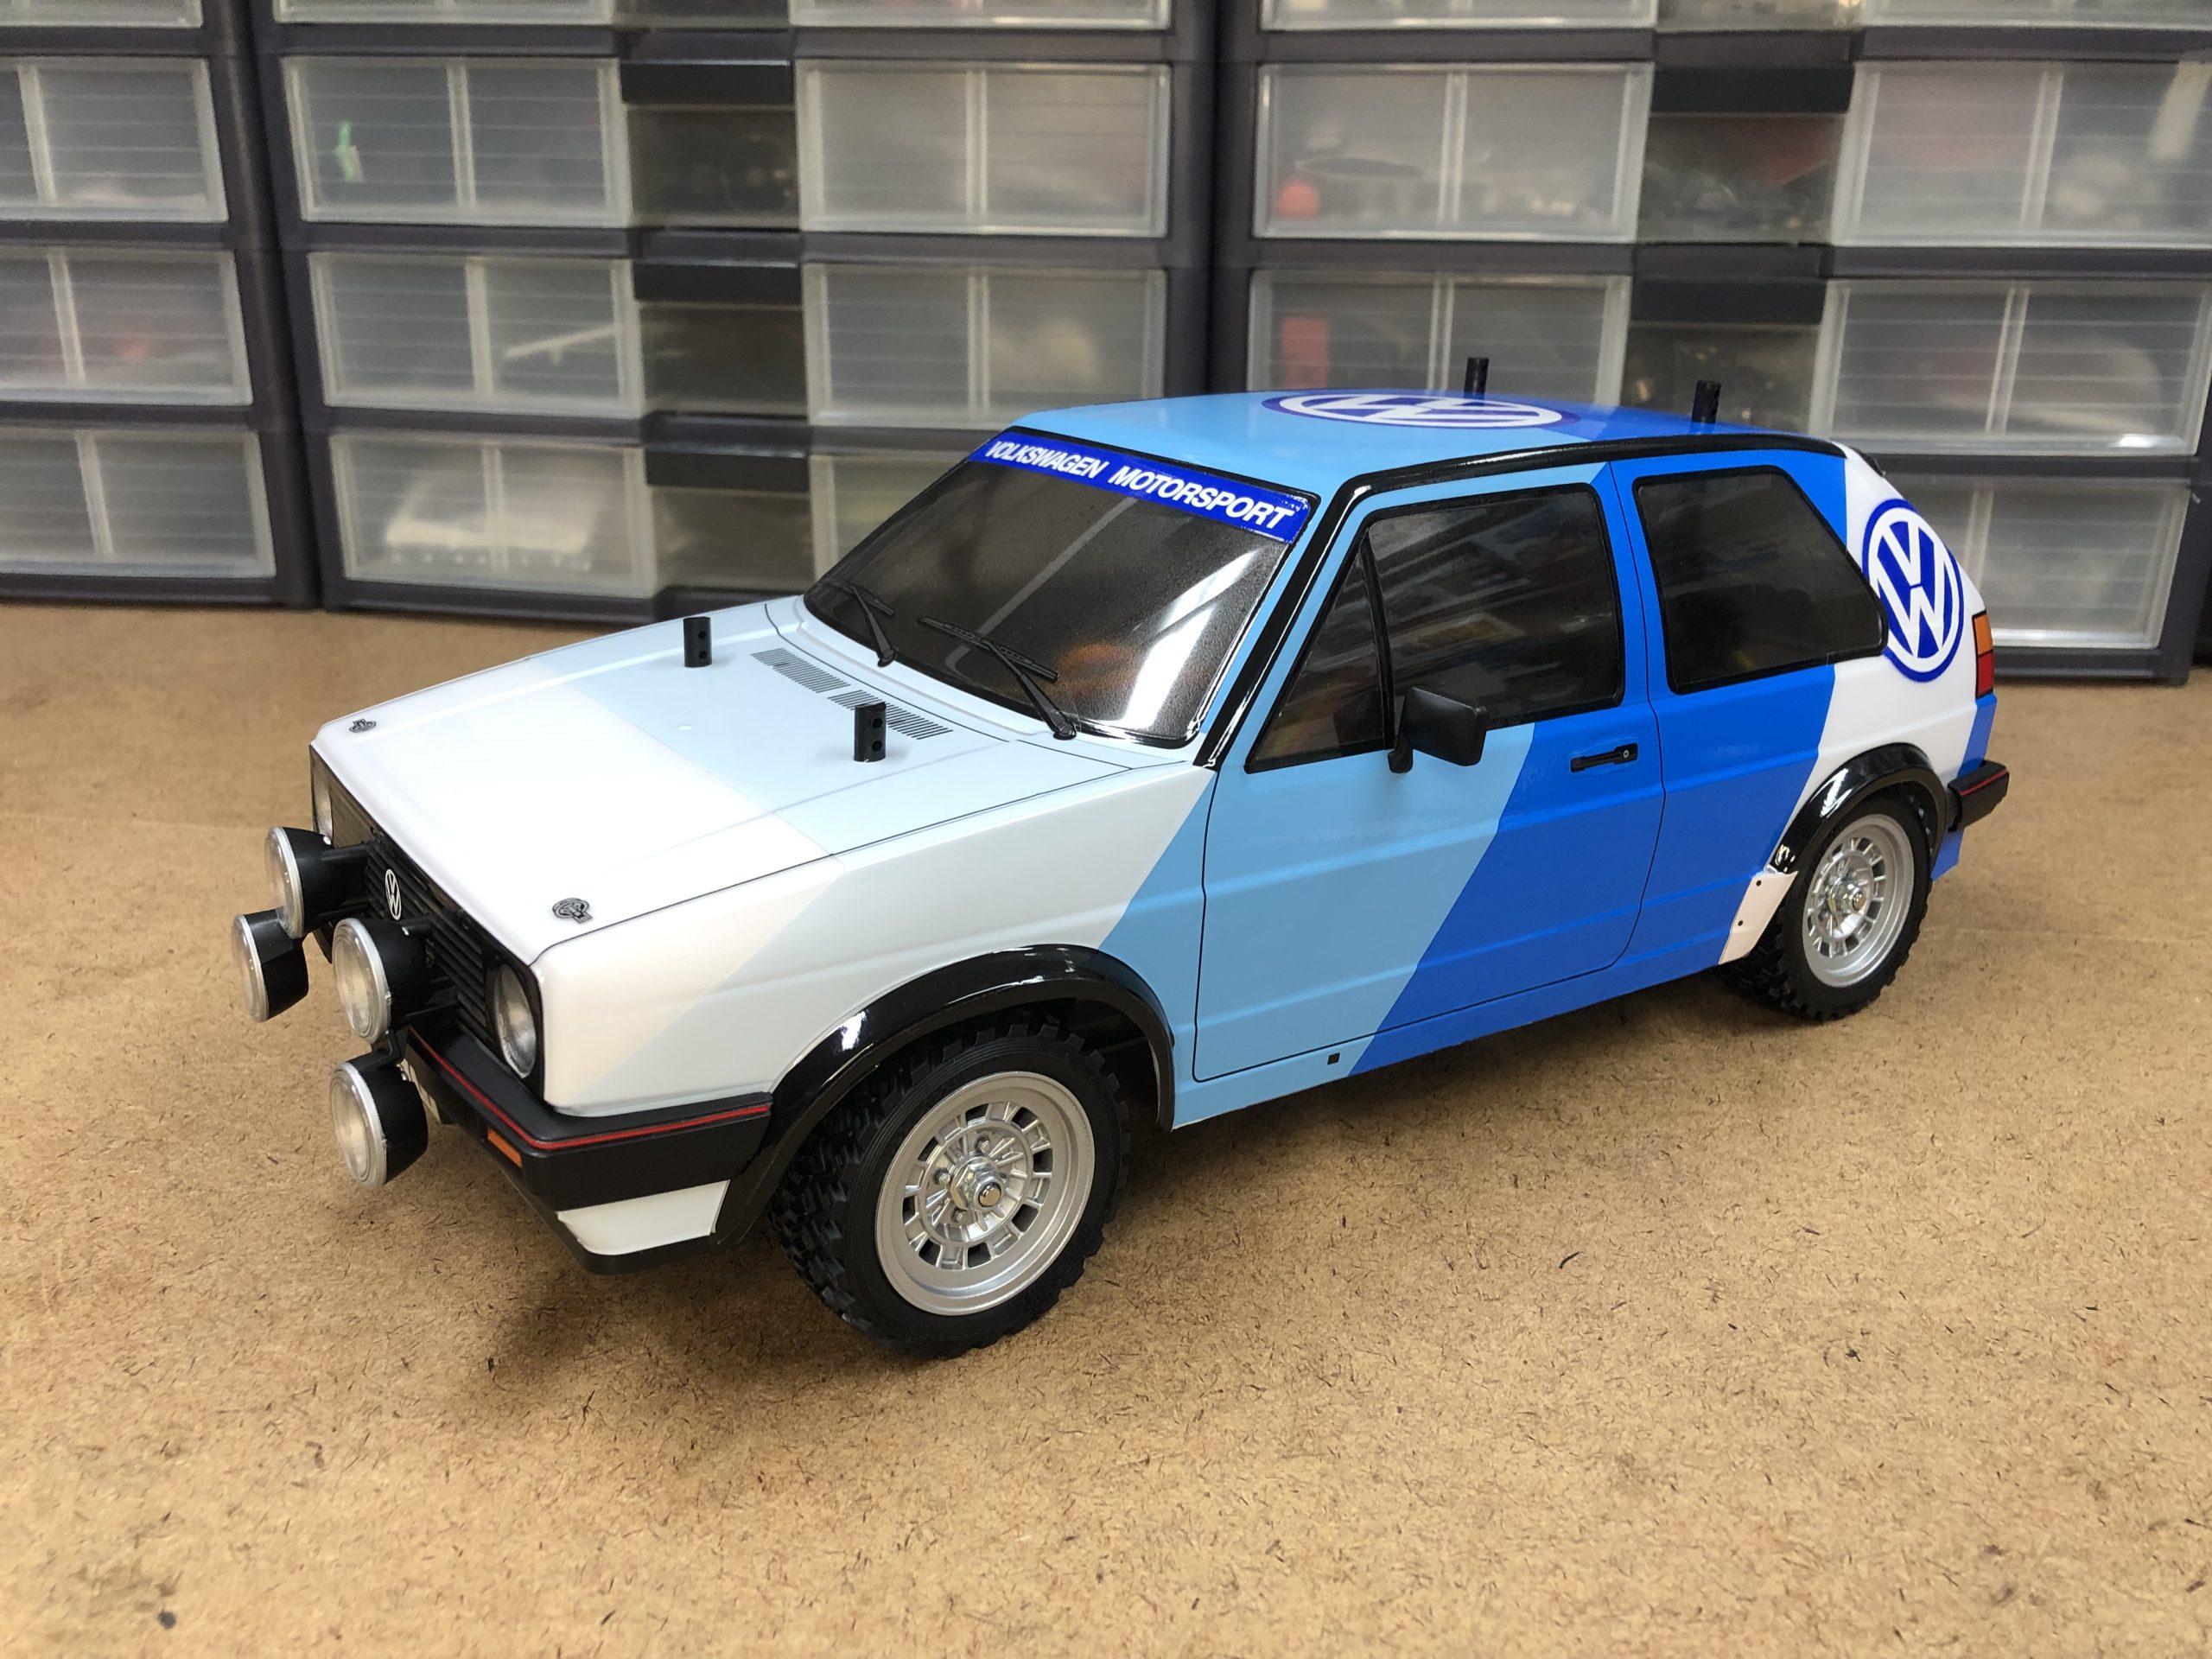
Where we left off in part 1 of this article is with a completely painted VW Golf II Rally body along with the ABS accessories including the rally lights, front and rear bumpers, side view mirrors, the internal front and rear light buckets and the rally wheels. Now we will finish off the body by trimming out the polycarbonate body, adding stickers and installing the ABS accessories.
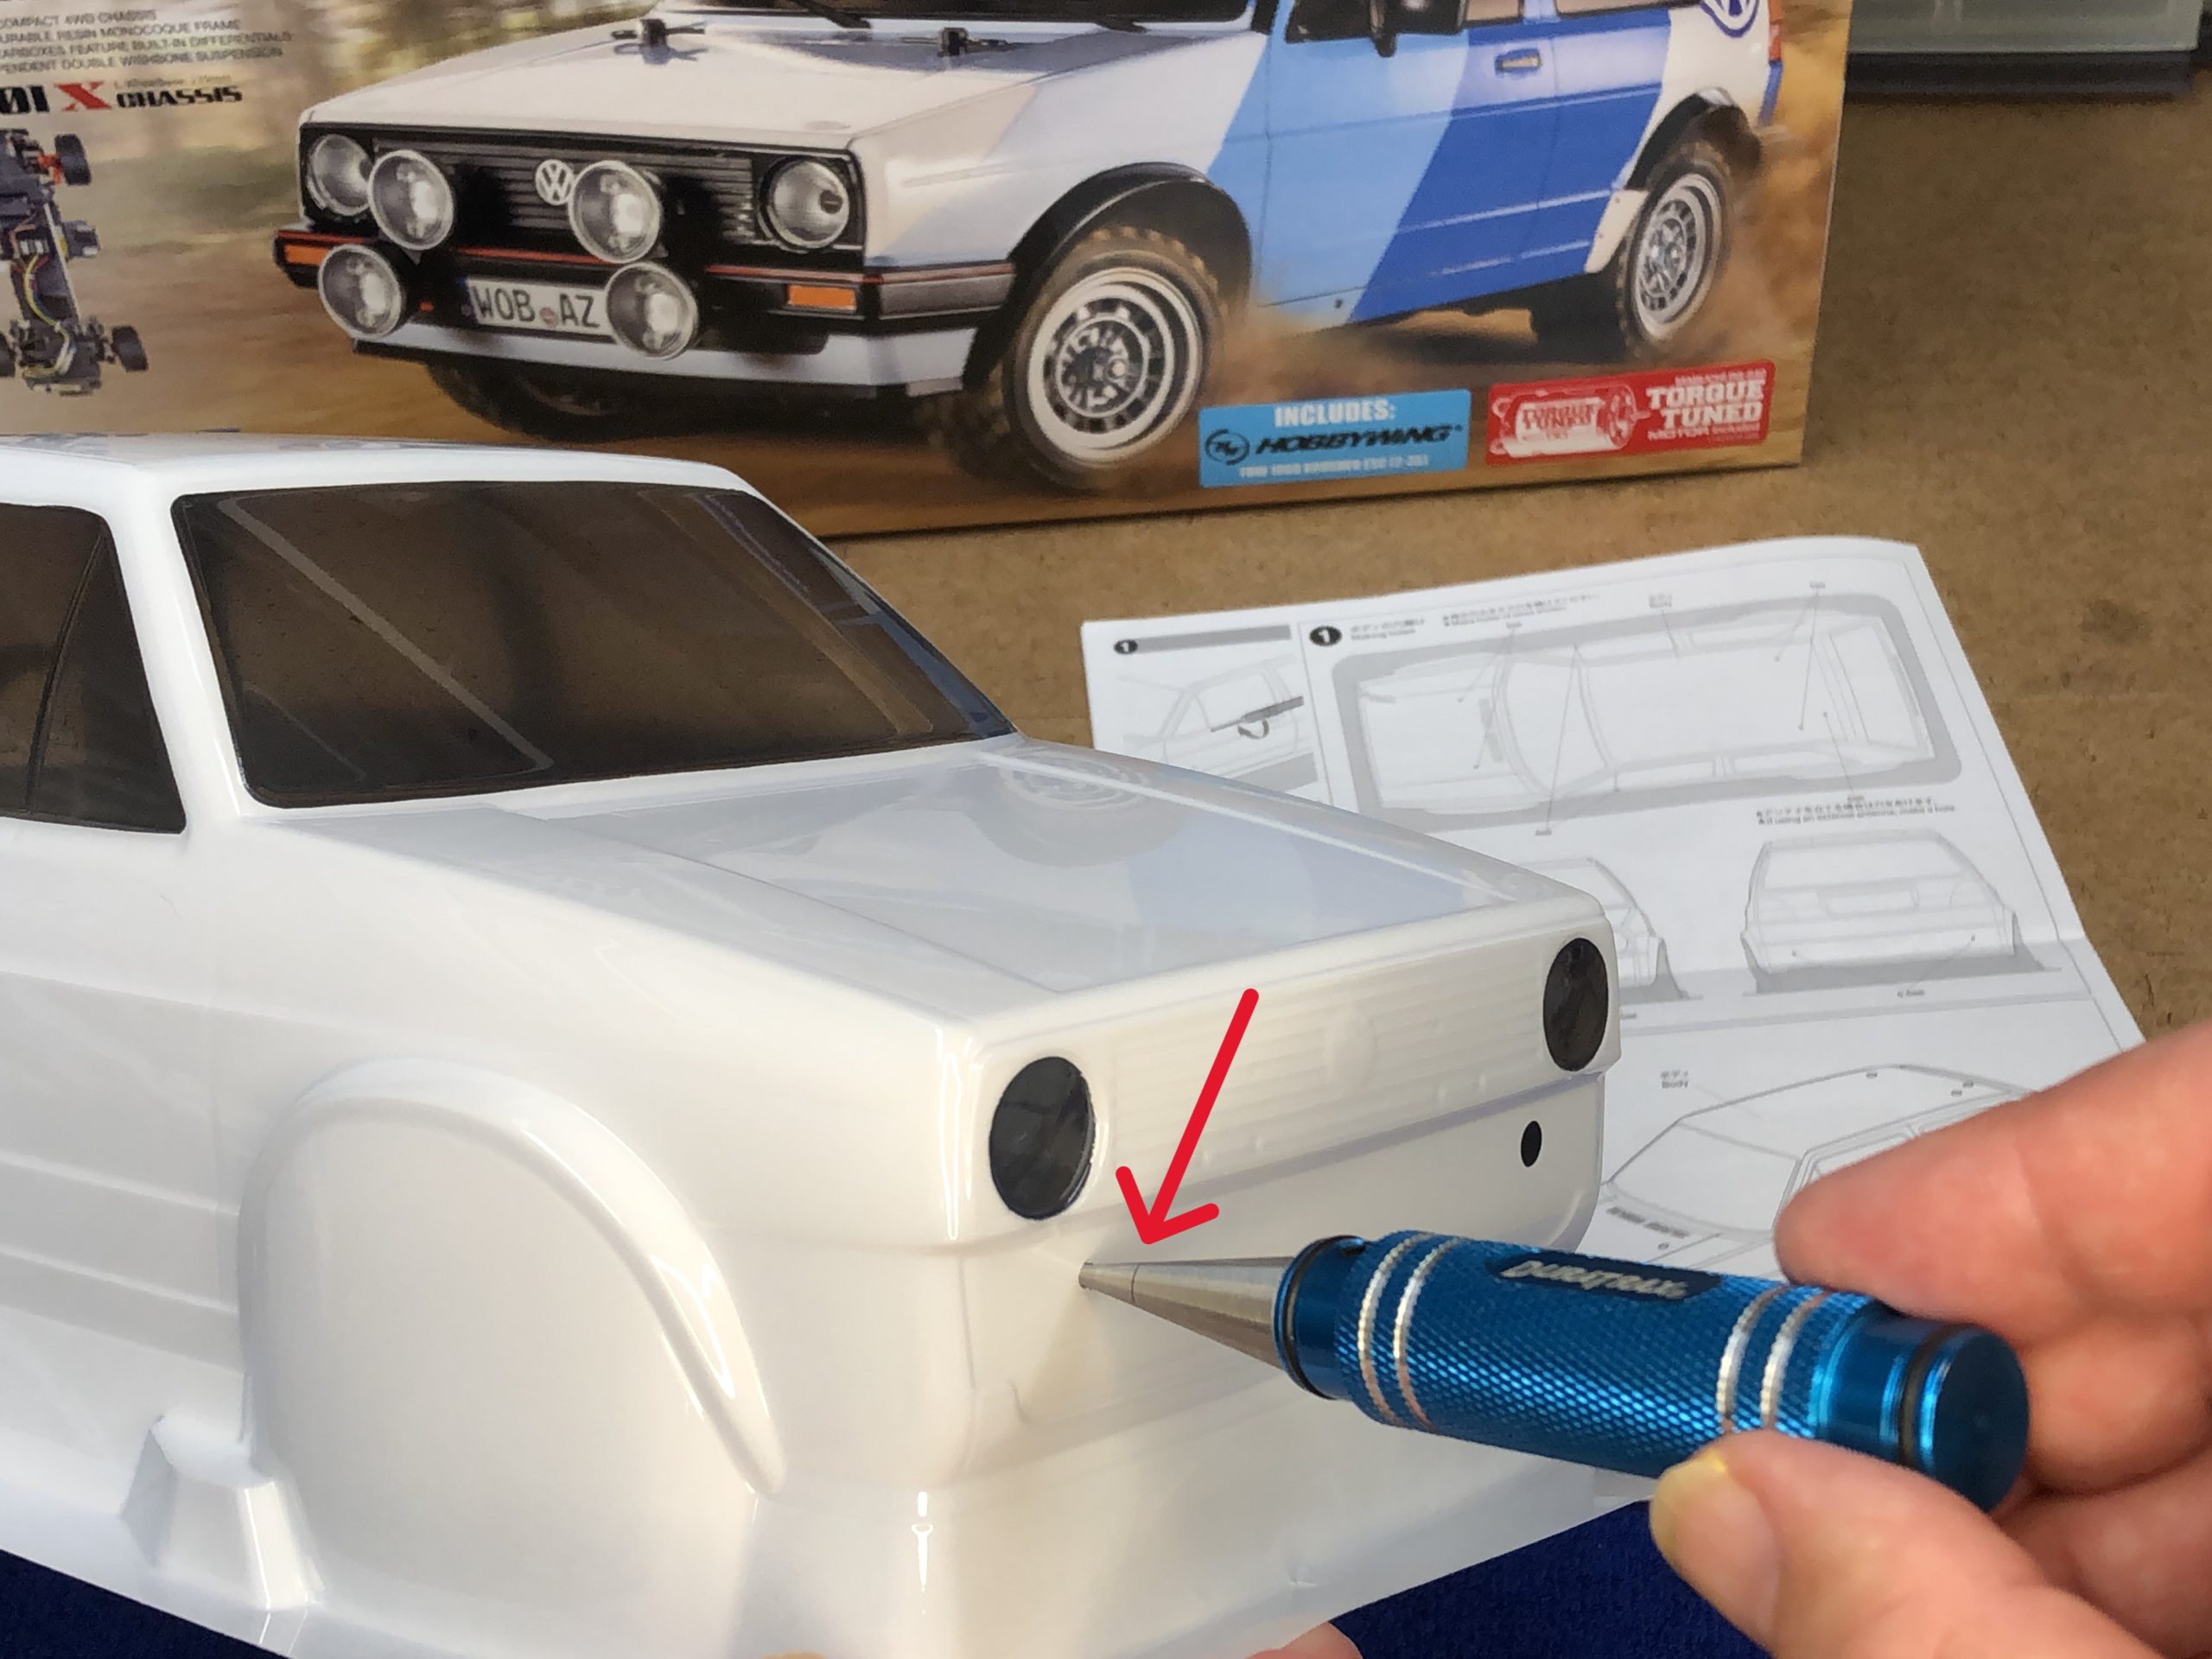
MAKE MOUNTING HOLES IN BODY
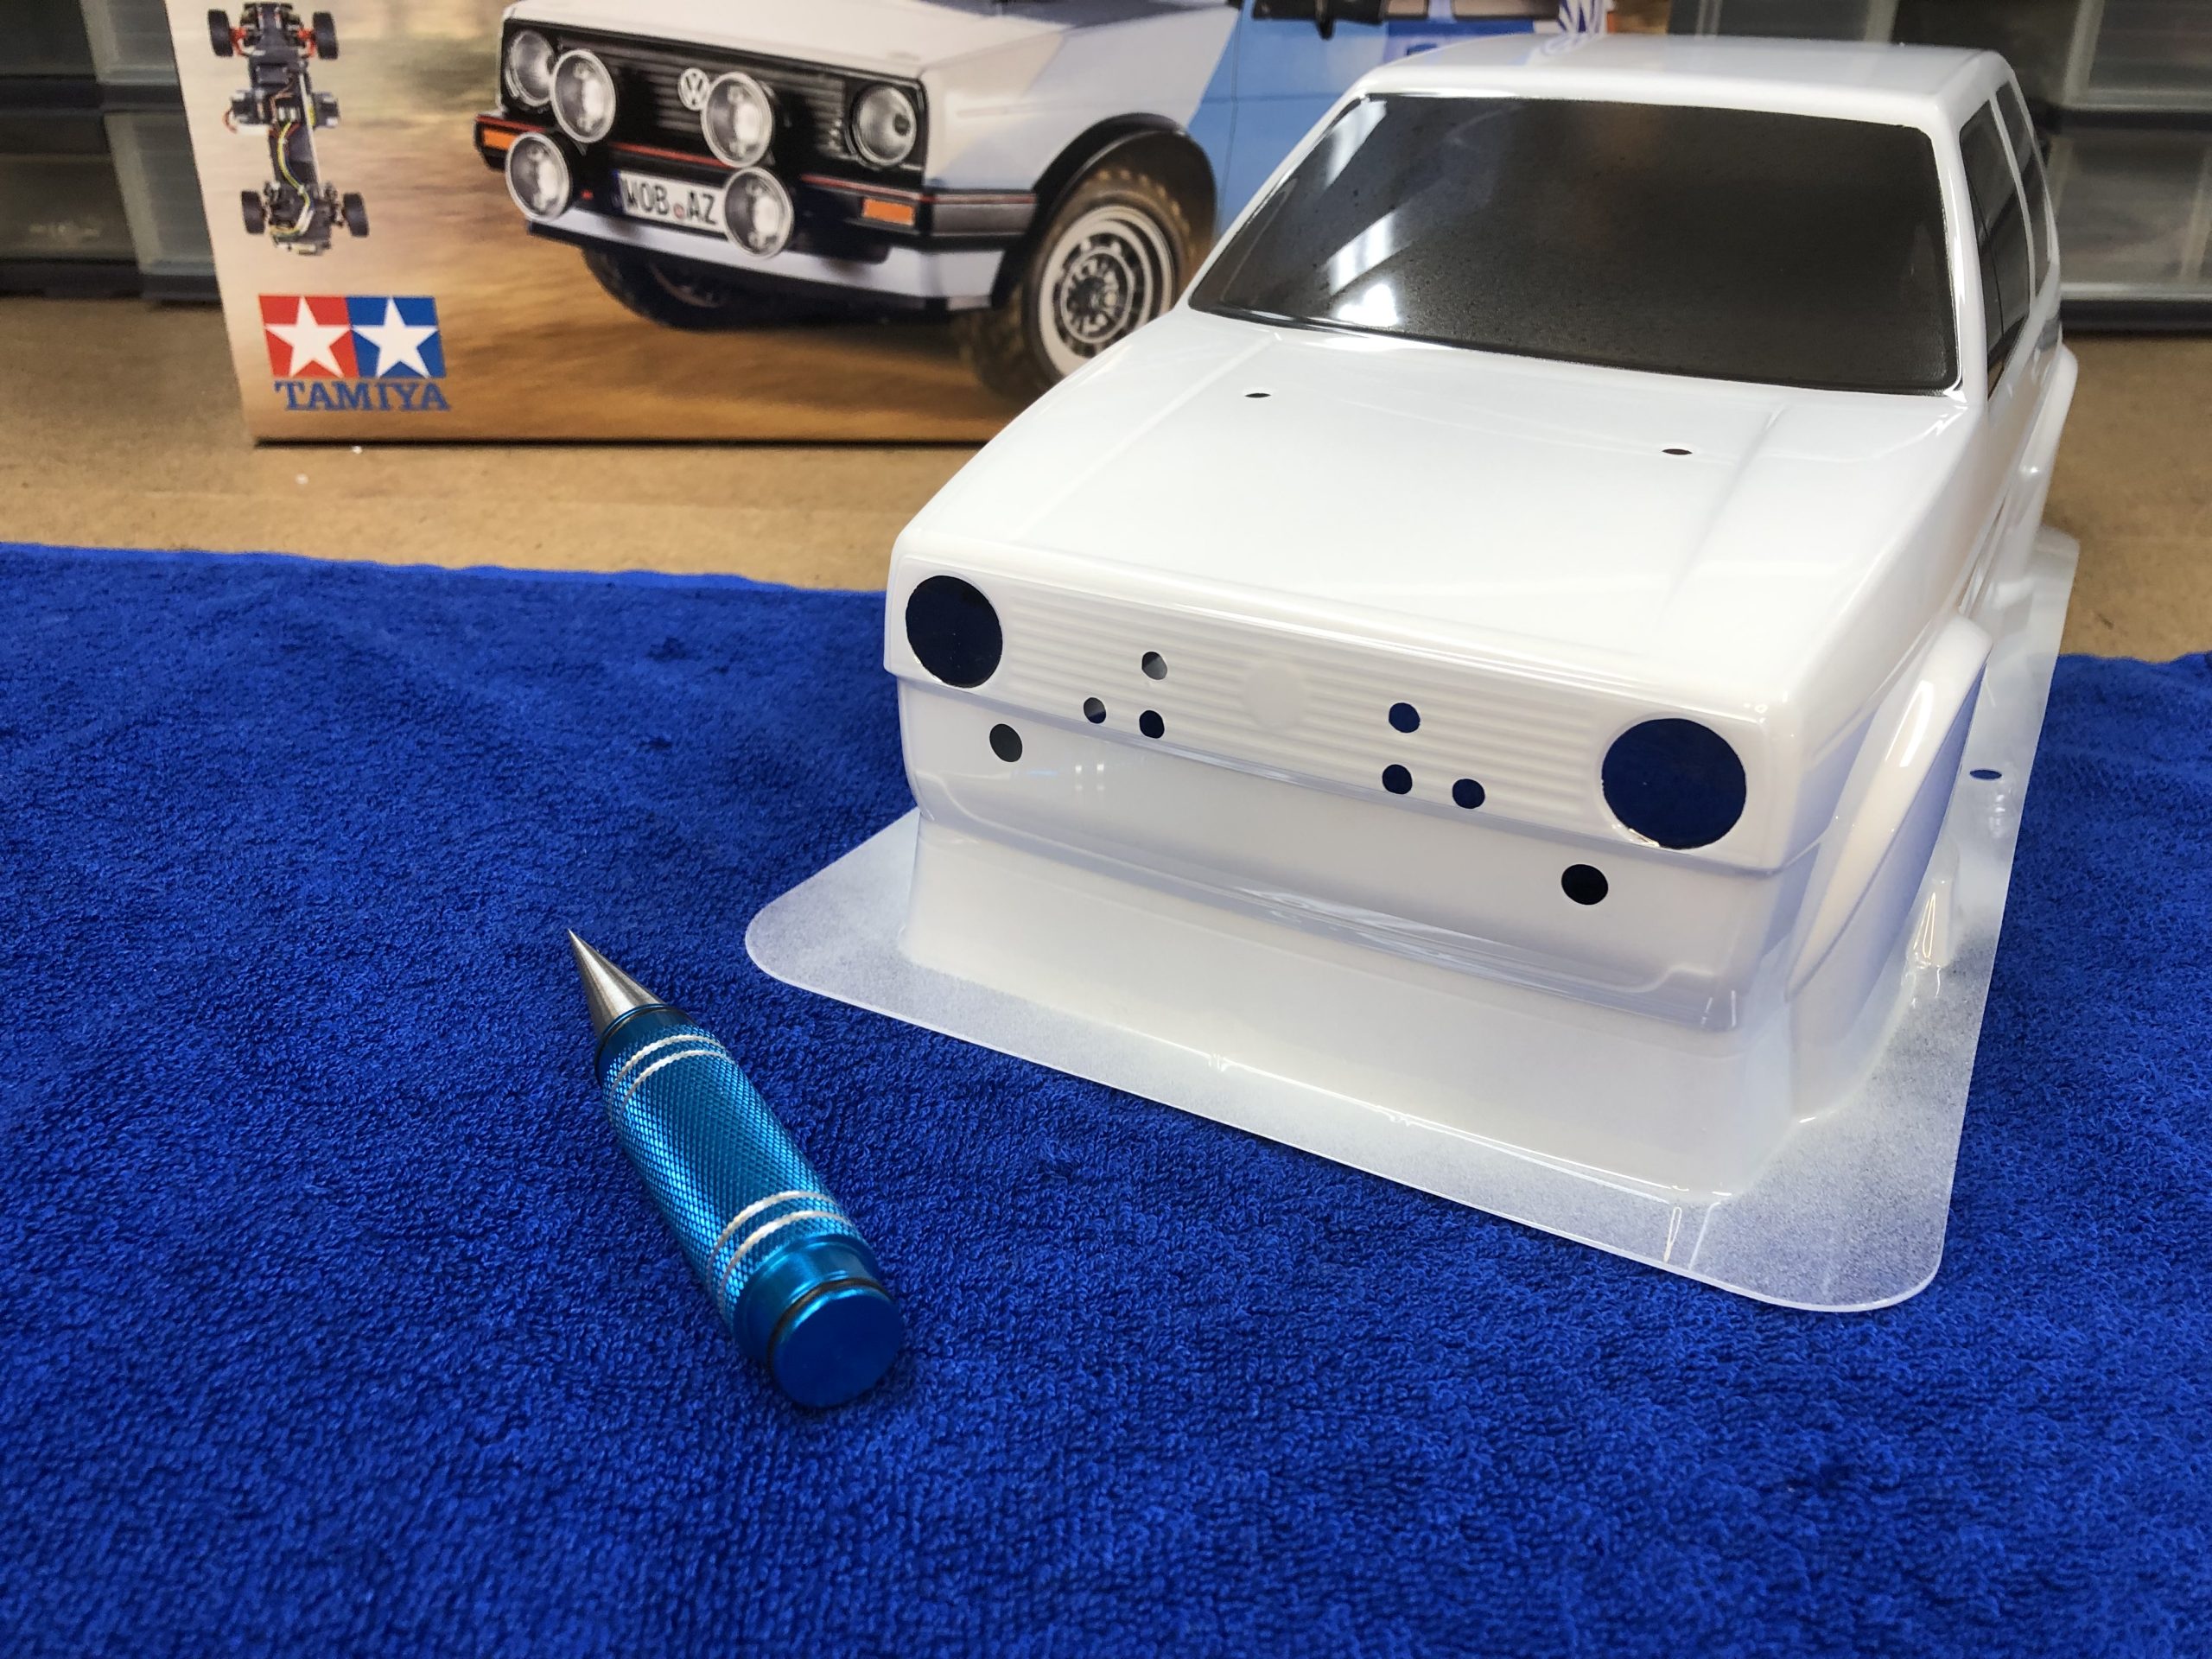
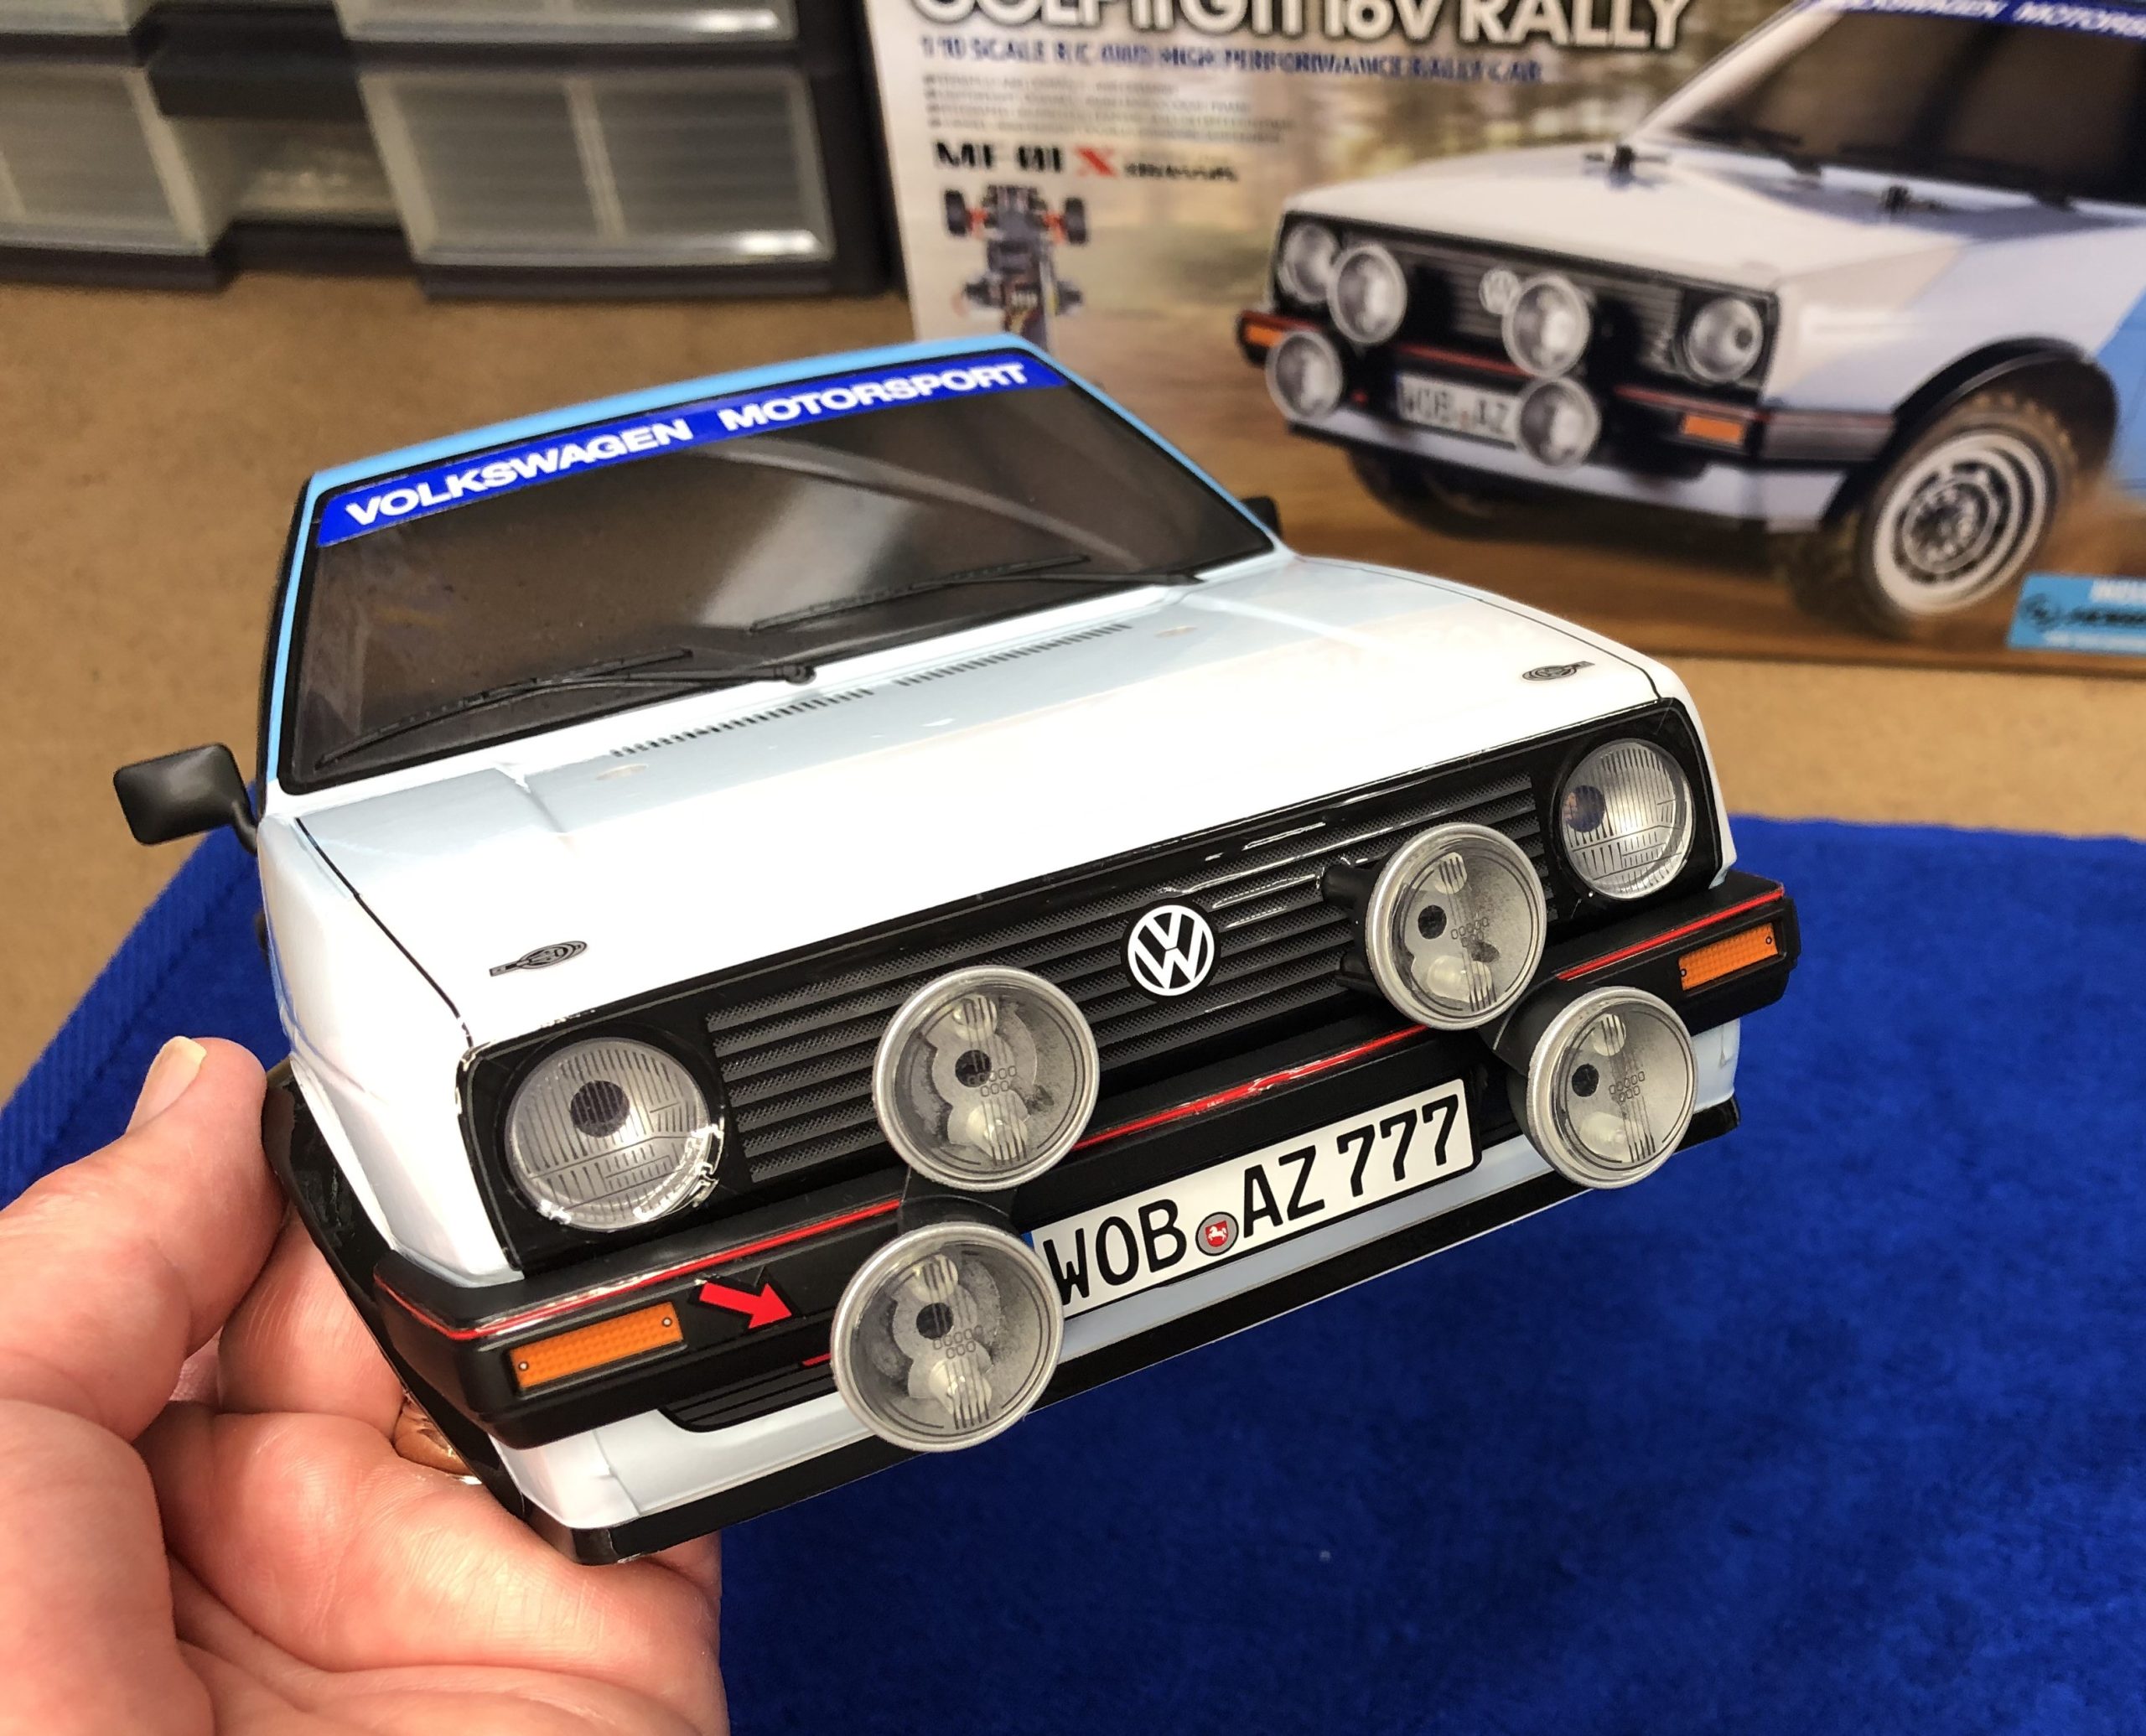
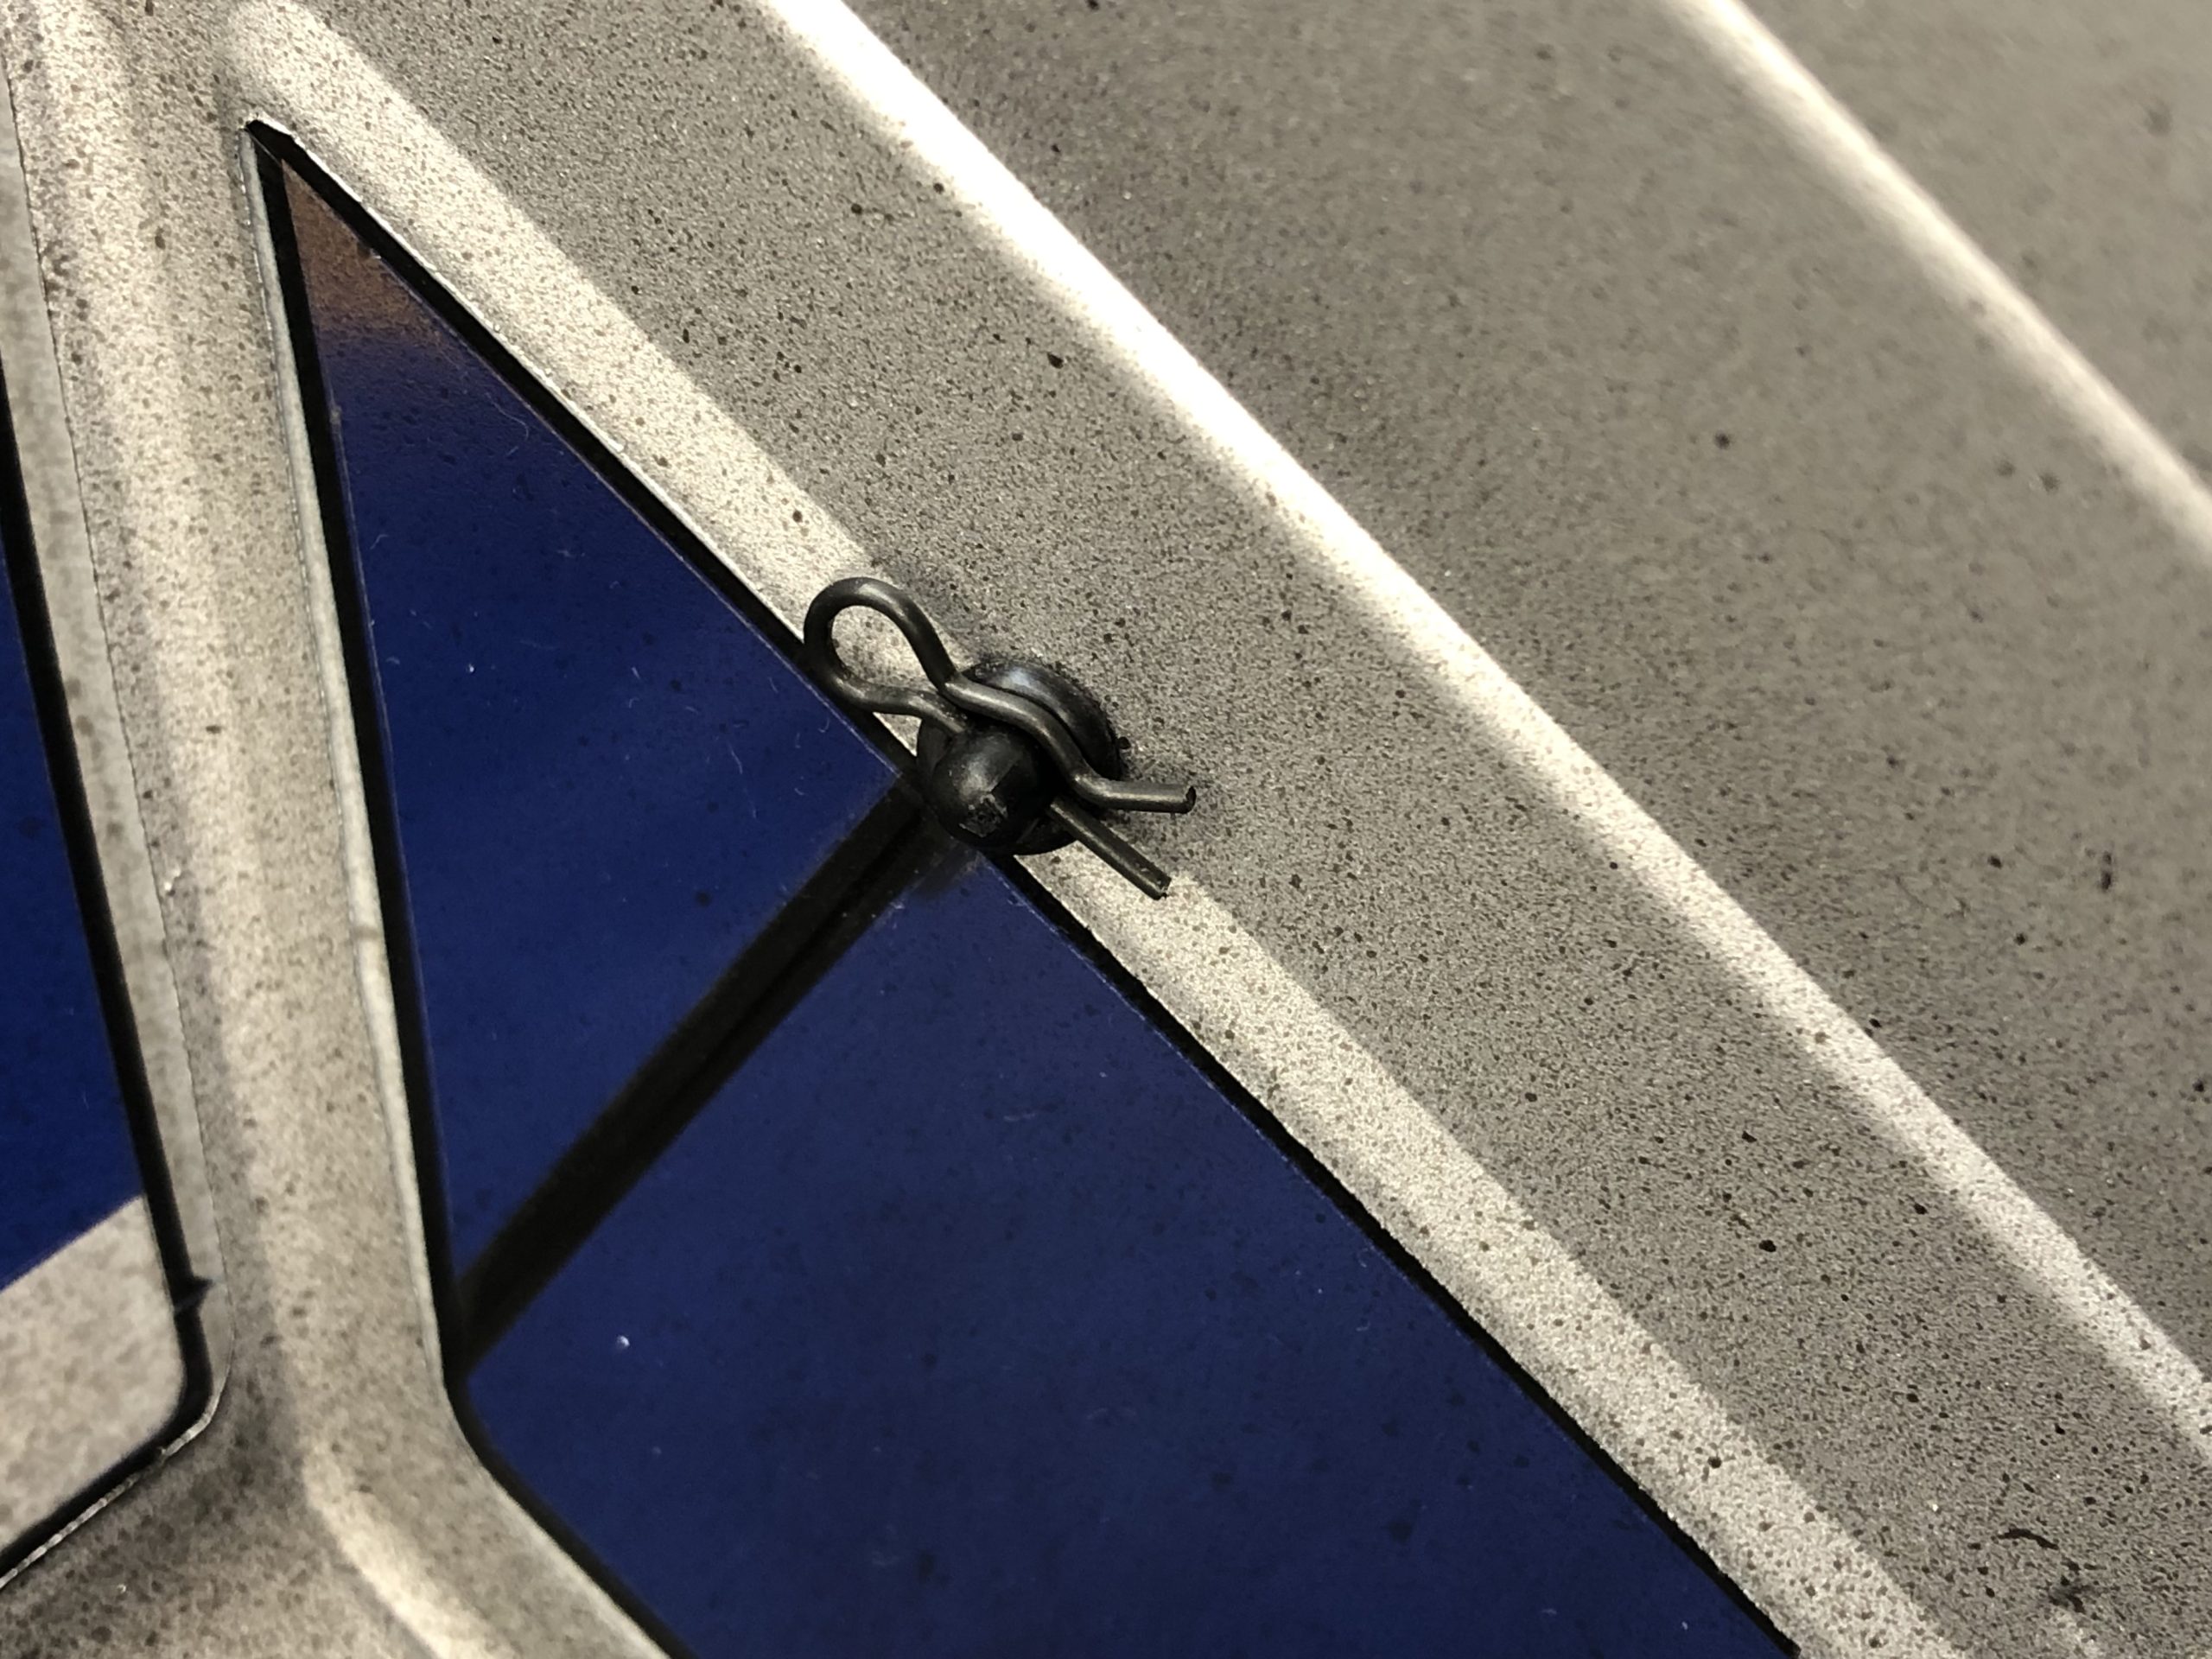
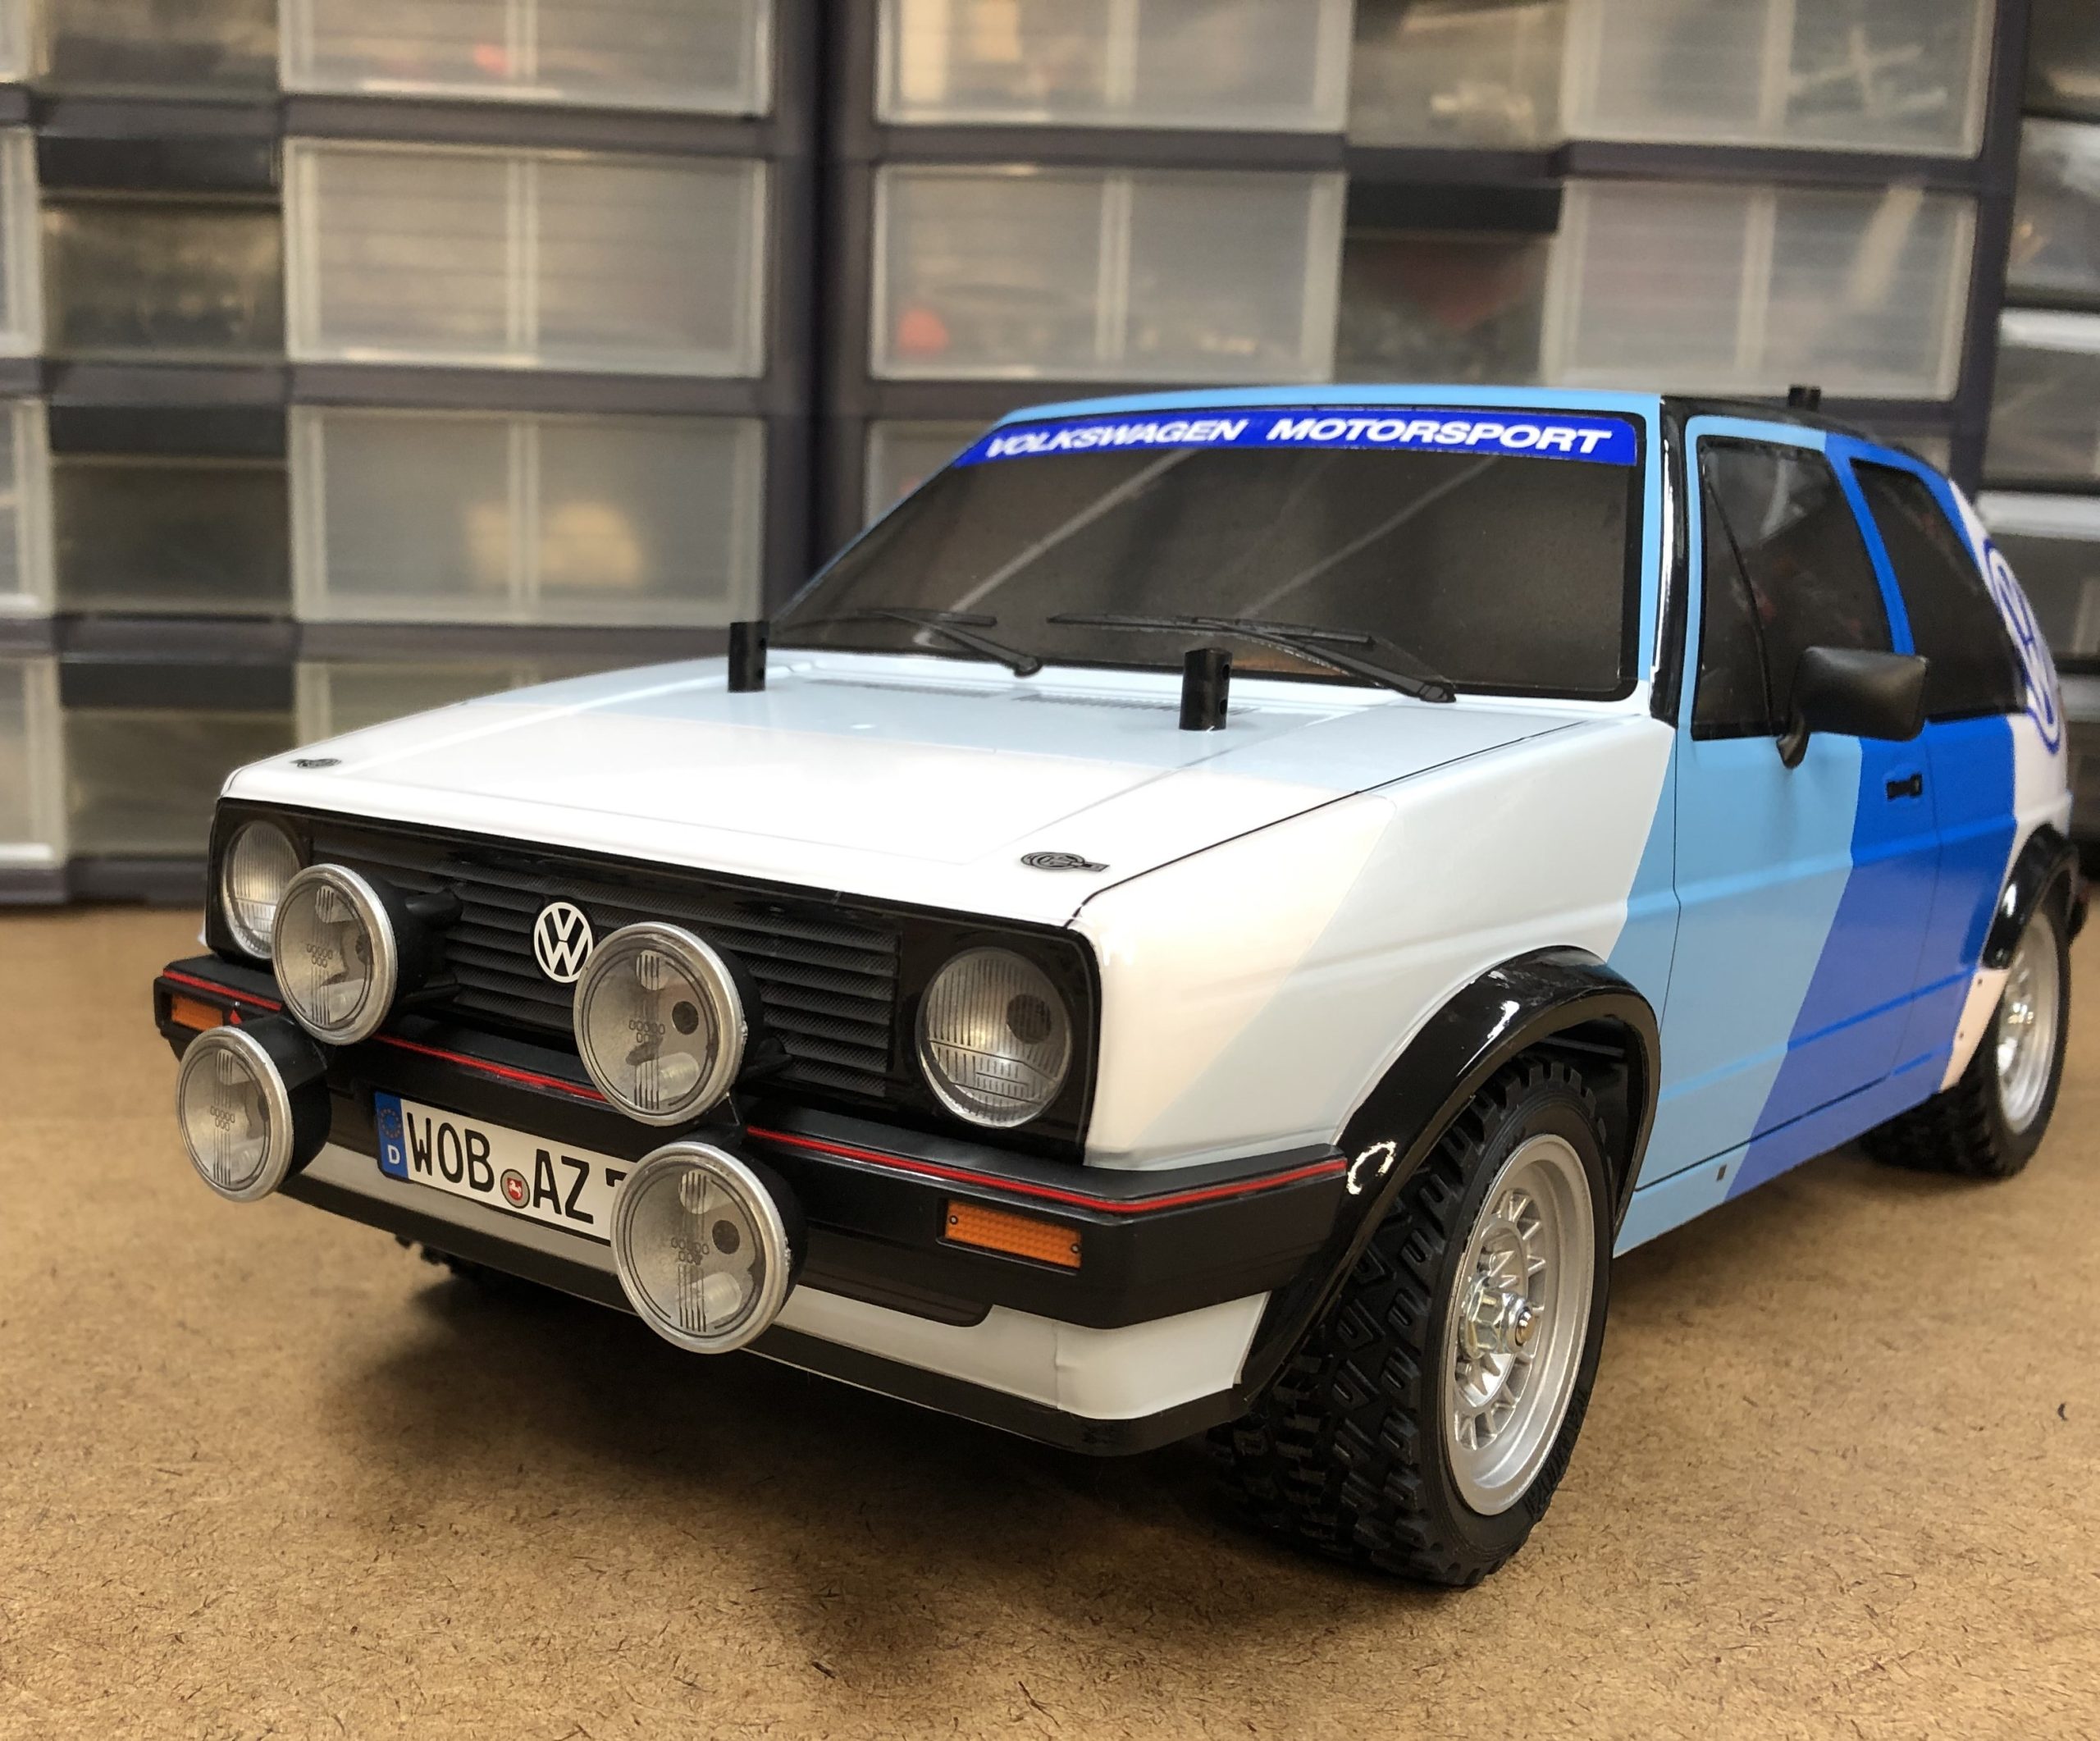
This Tamiya VW Golf II Rally body requires several holes to be made in the body for not only mounting it onto the MF-01X chassis, but also for attaching the bumpers, side view mirrors and cool looking rally lights. Pay close attention to the instructions because the holes range in sizes to accommodate the different ABS parts.
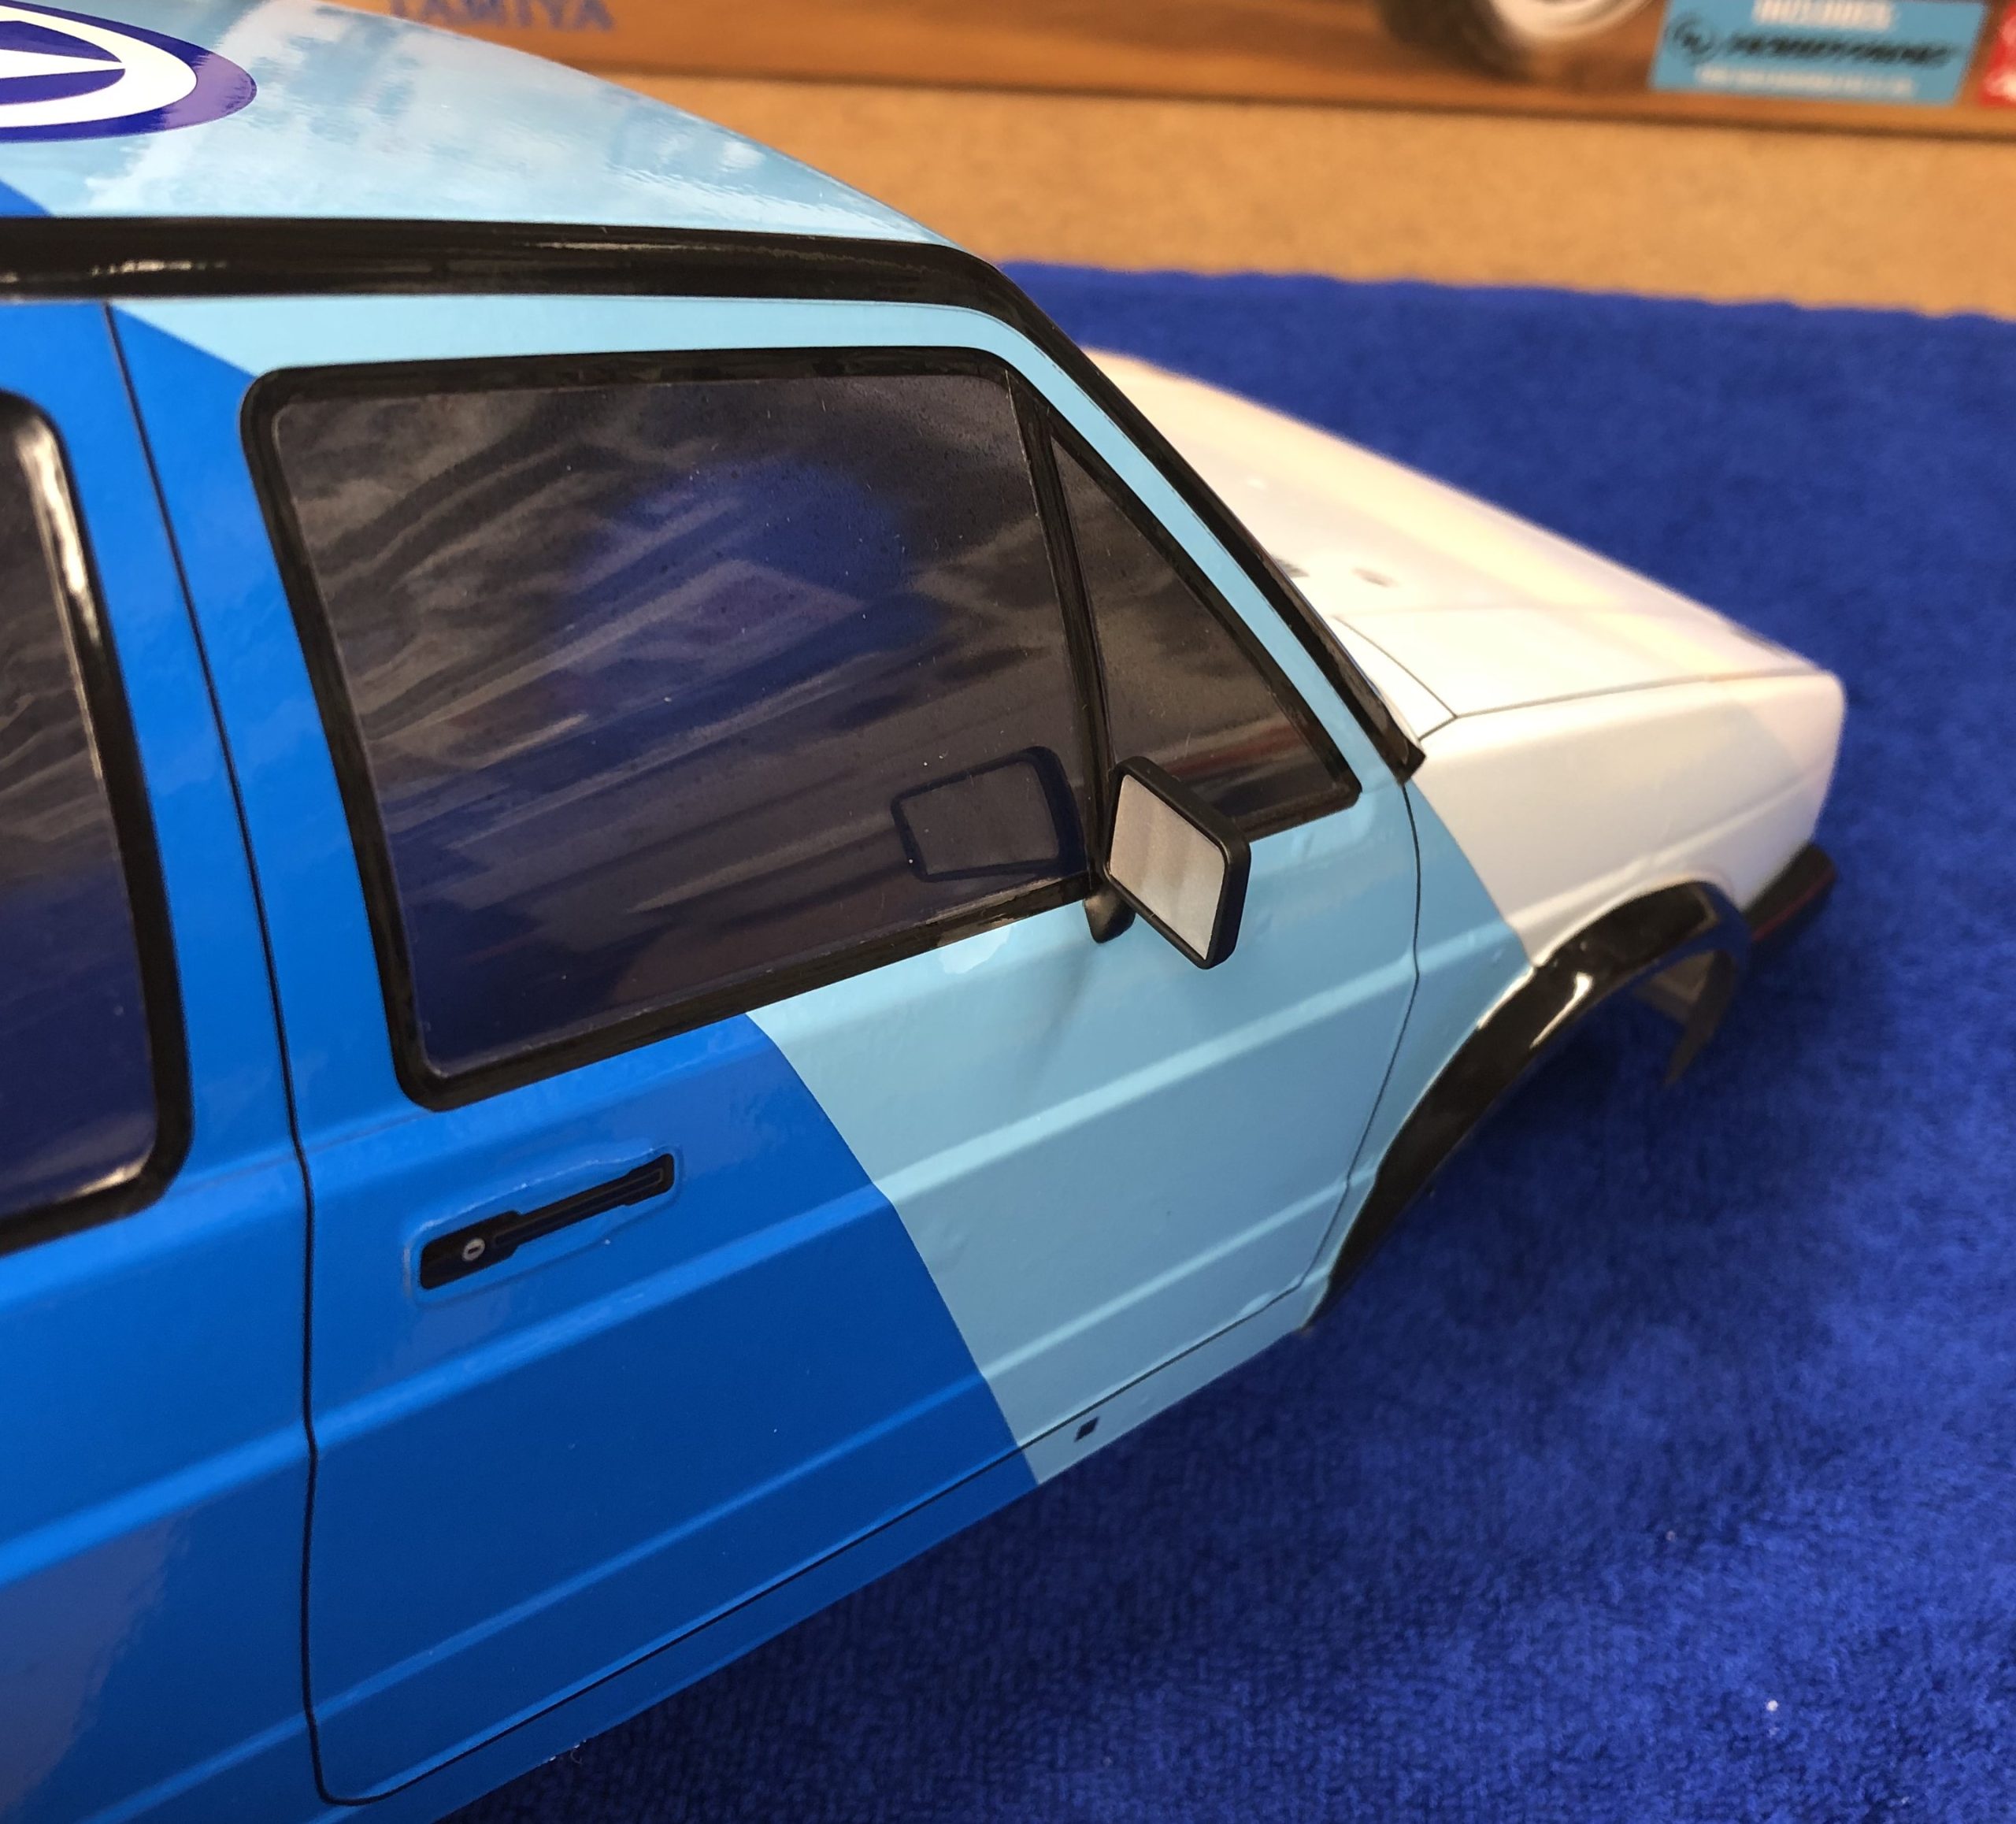
For the smallest holes, use a pin vise with the appropriate size drill bit. This will give you the precise sized hole to guarantee a secure fit for the part being inserted into it and then it won’t be loose and/or flop around while running your car. We used the pin vise for the 4mm side view mirror holes and the 4.5mm holes where the rally lights attach on the front end. Now you can use a body reamer for these holes, however we don’t recommend it because it is difficult to control the size of the opening when the diameter is so tiny and it needs to be exact.
A terrific feature with Tamiya bodies, are that they are almost always molded with minuscule locating dimples so you know precisely where to make the necessary mounting holes.
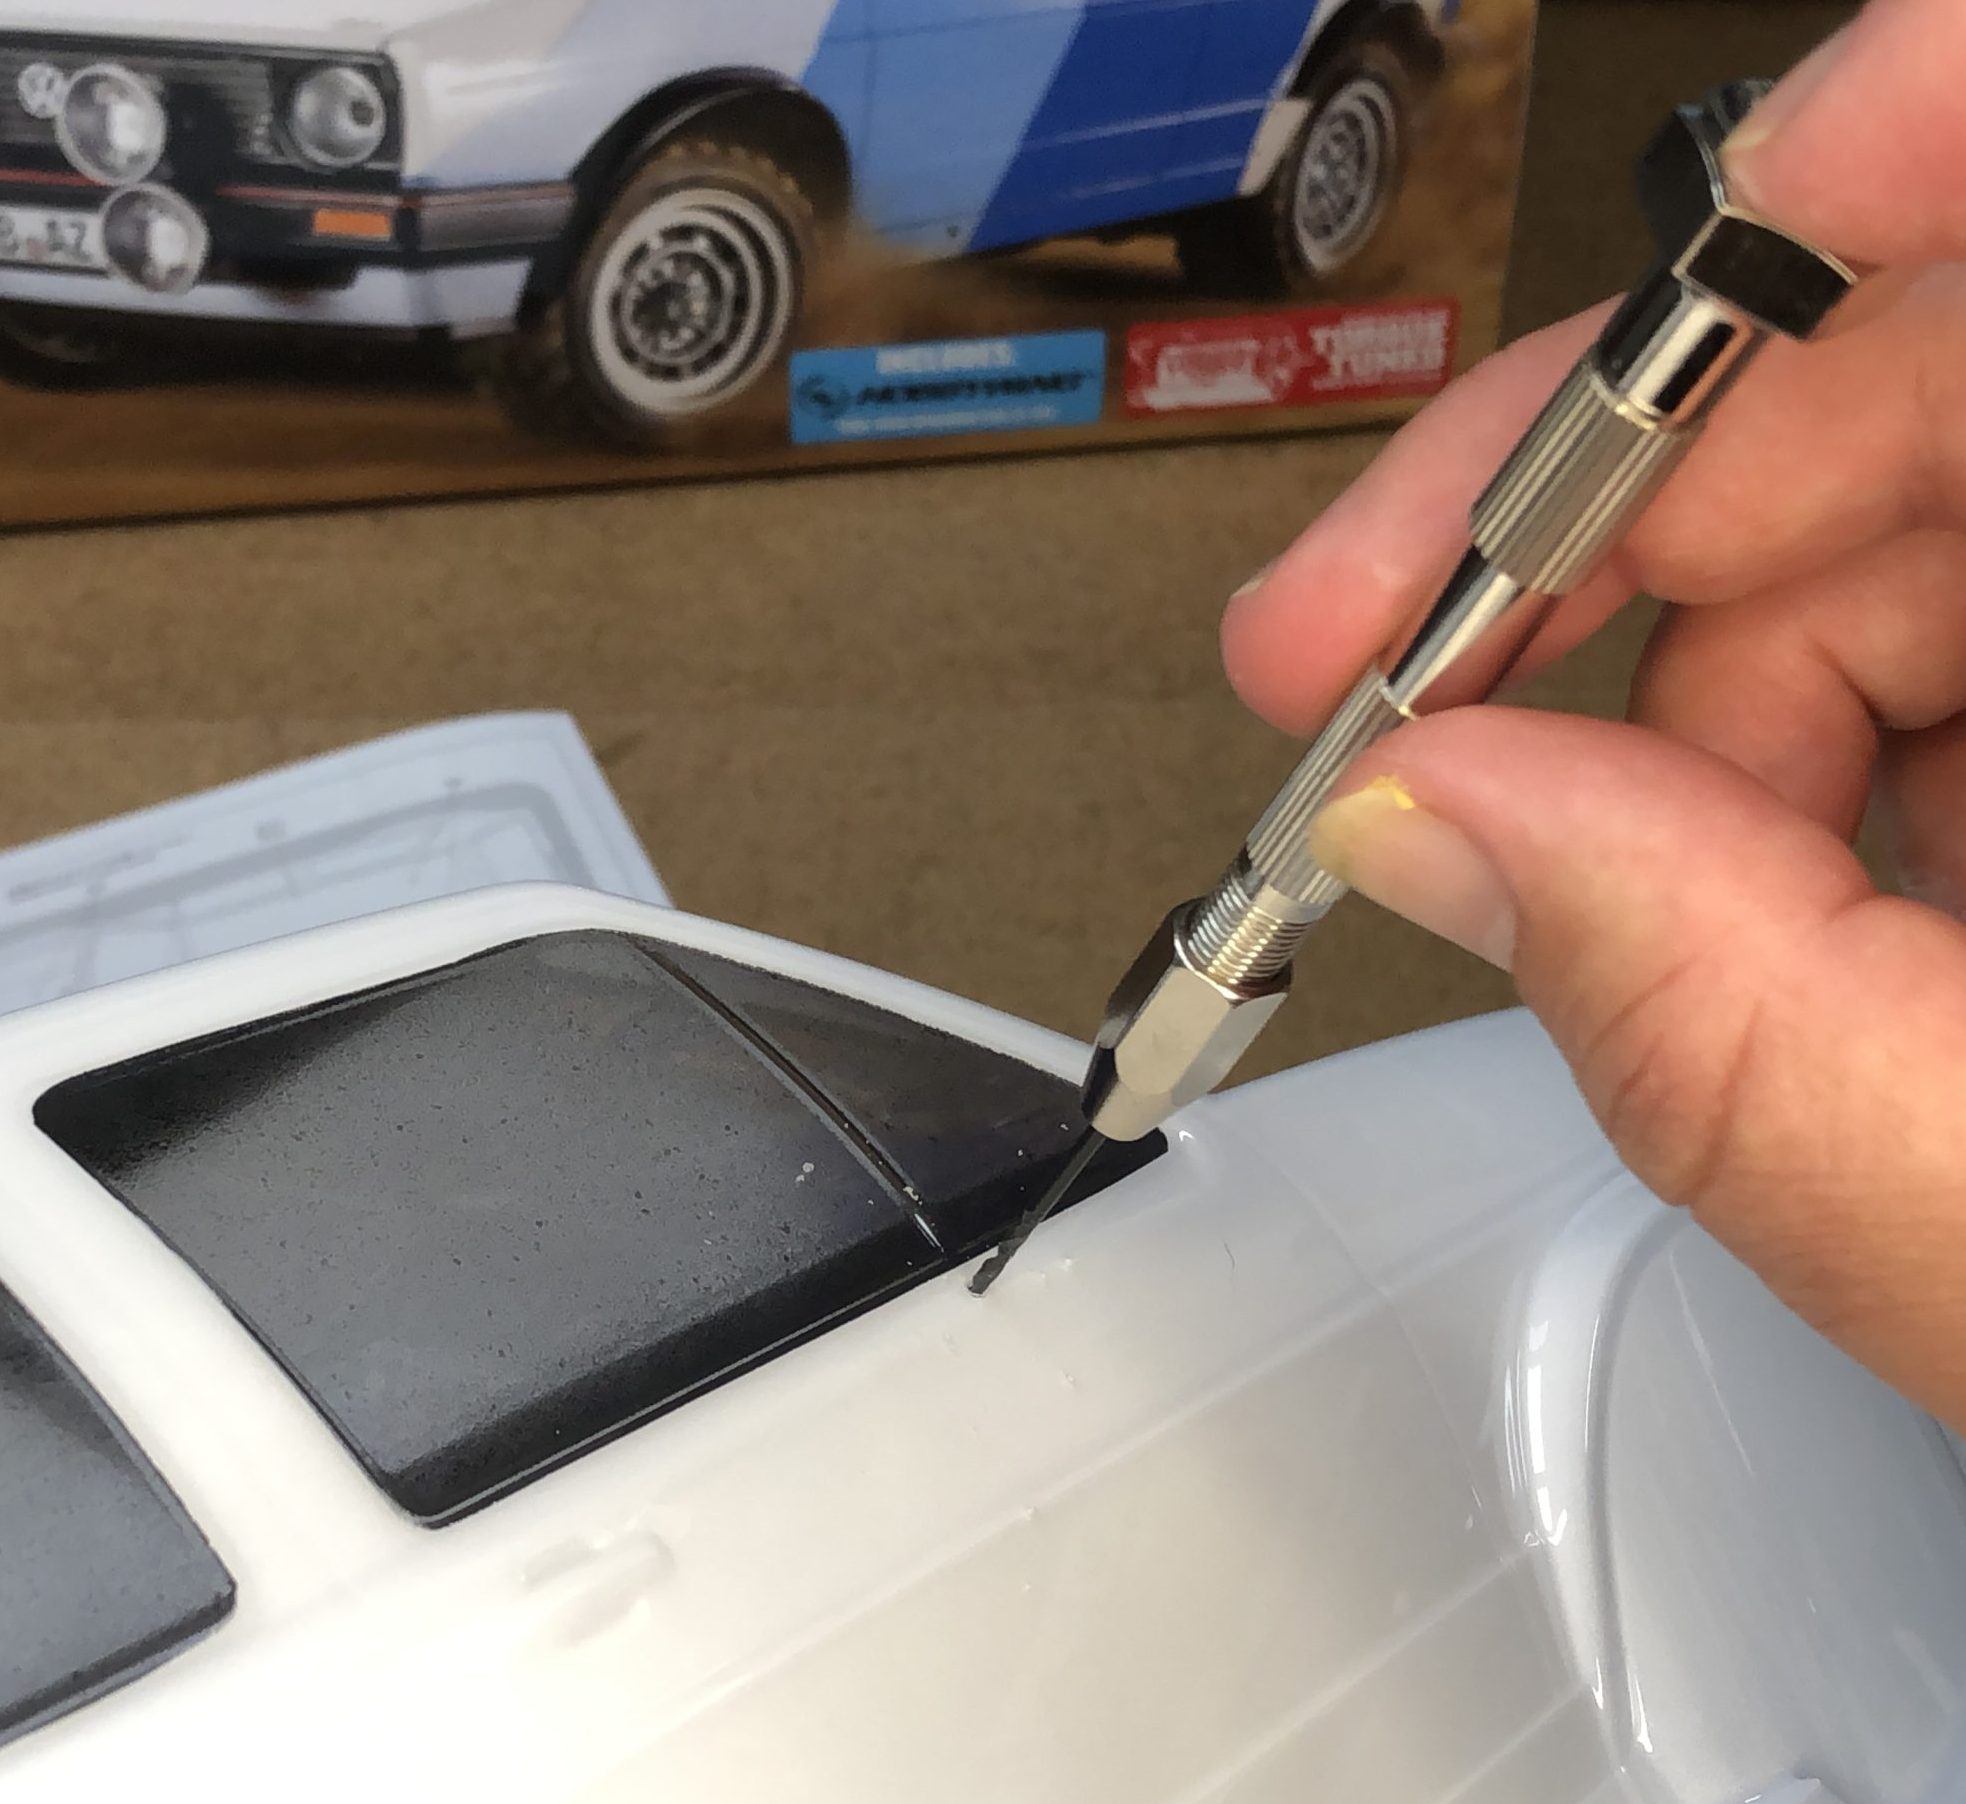
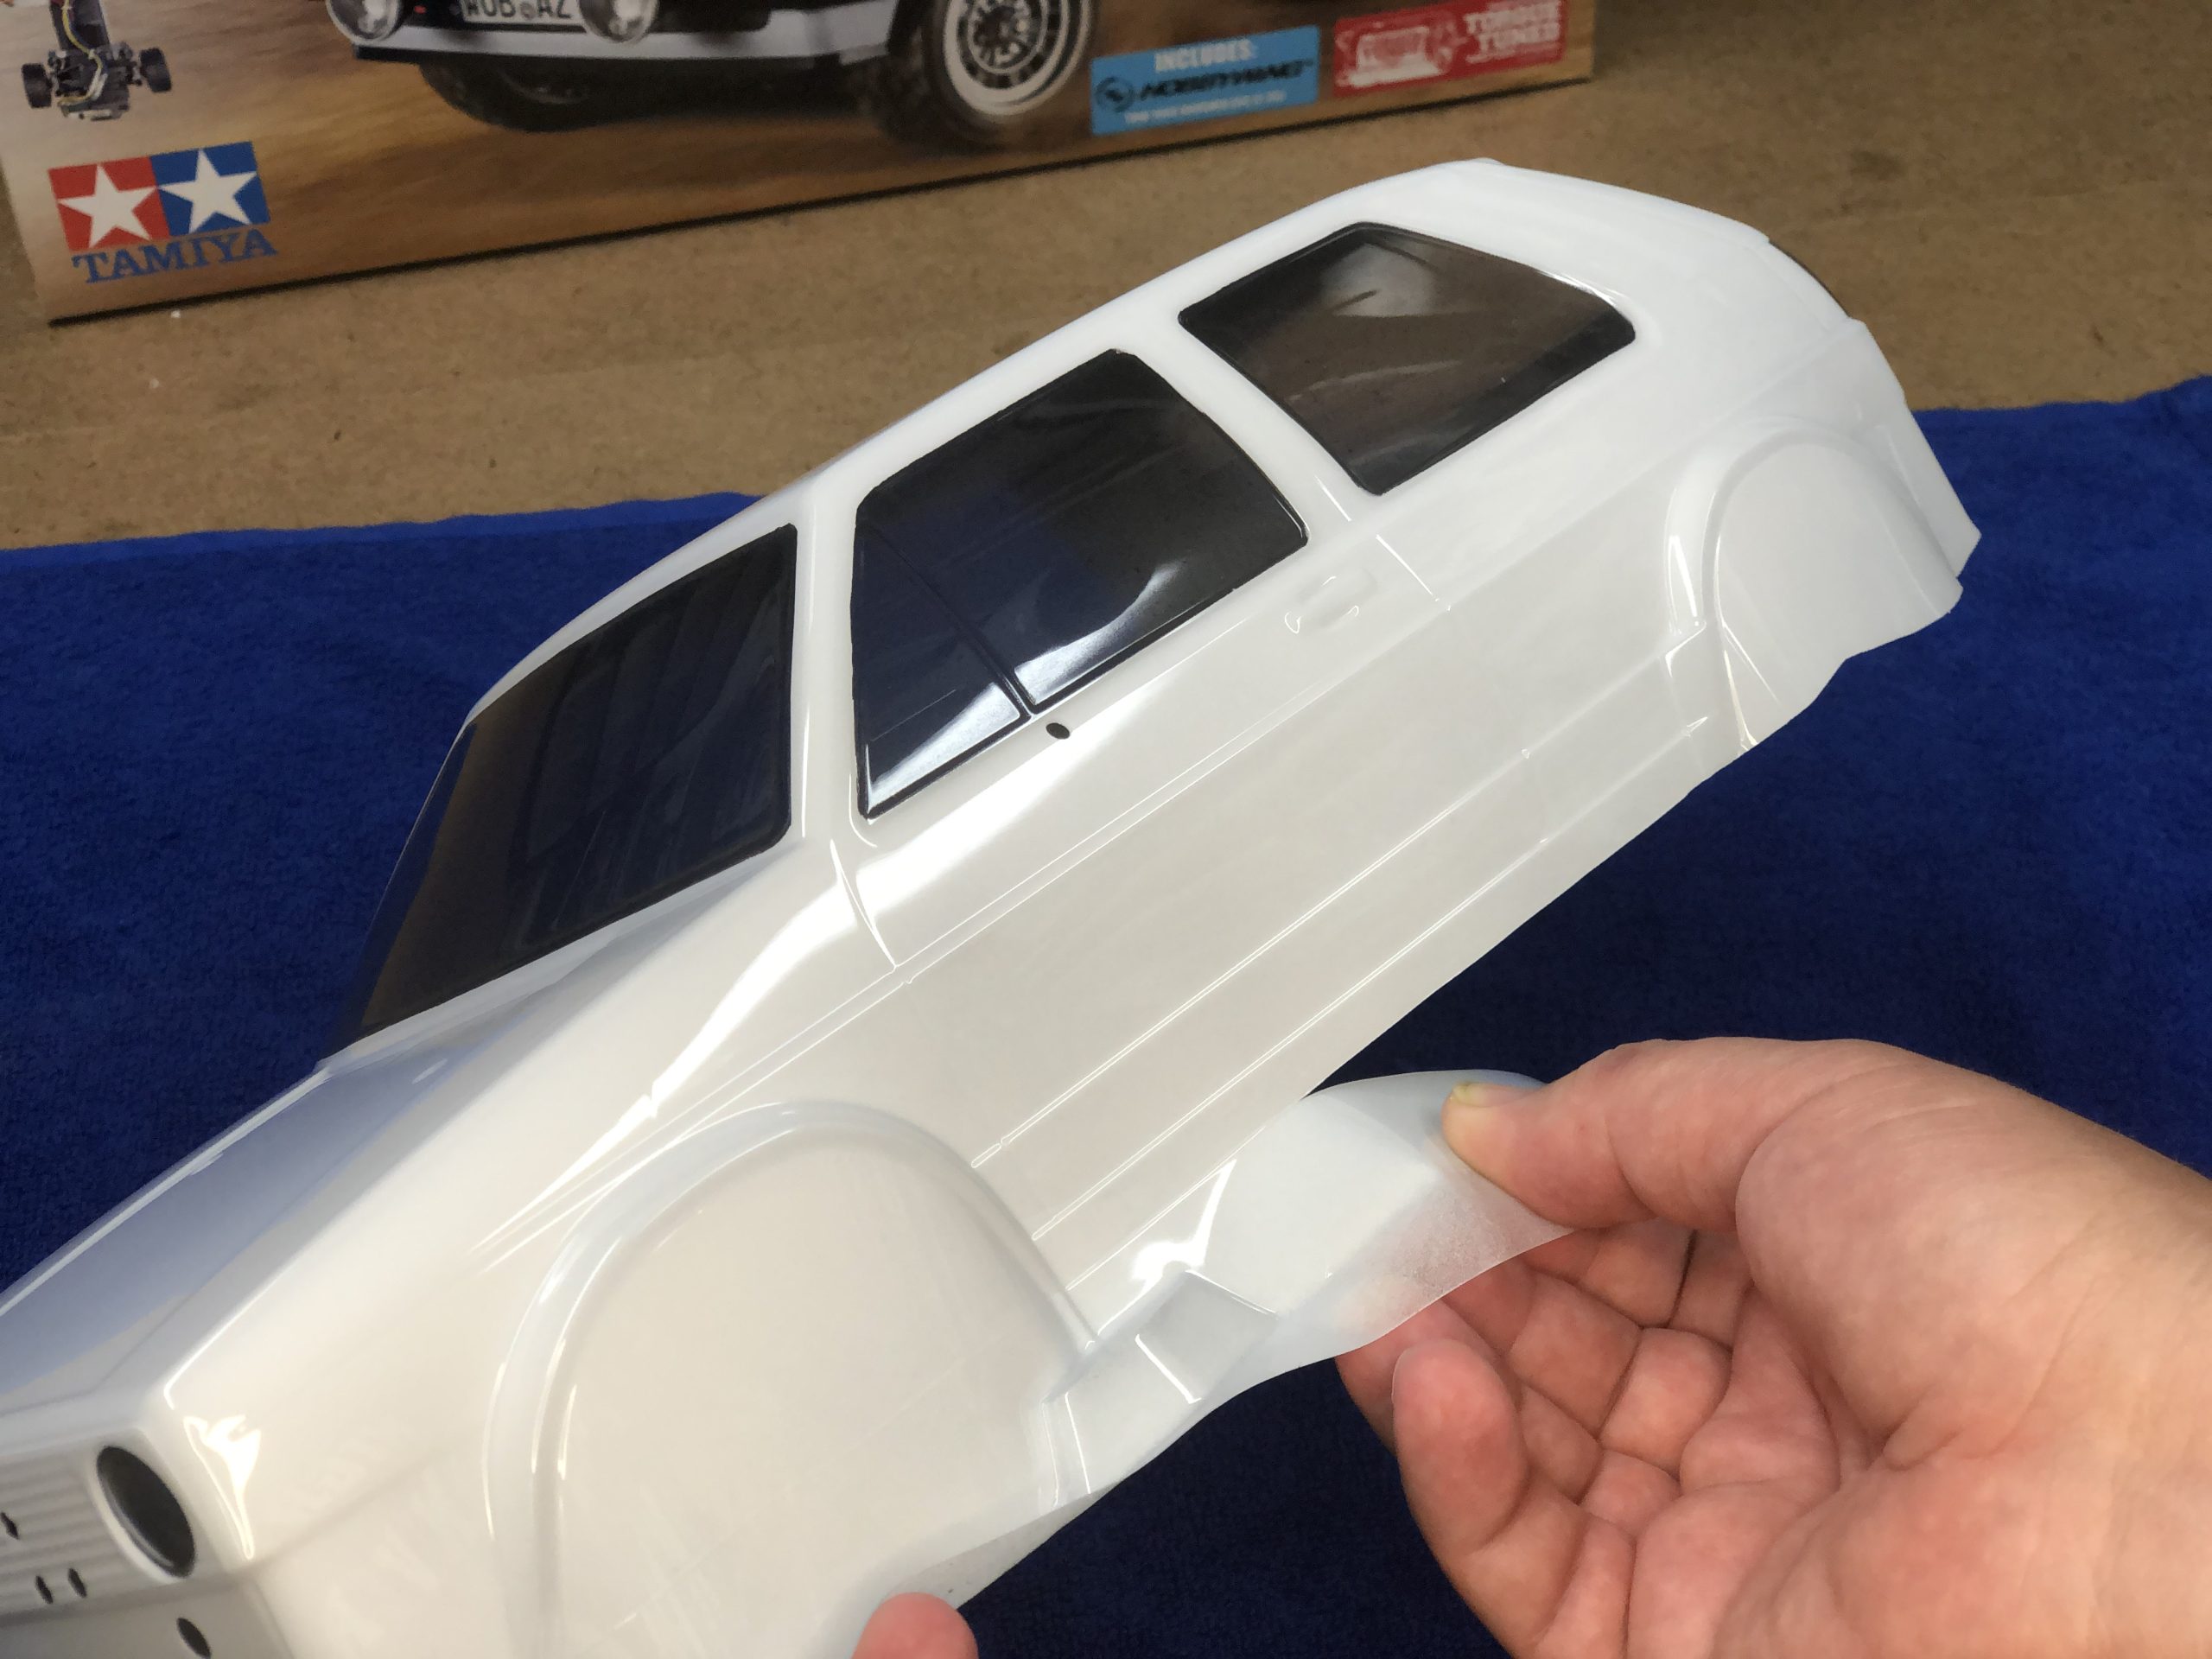
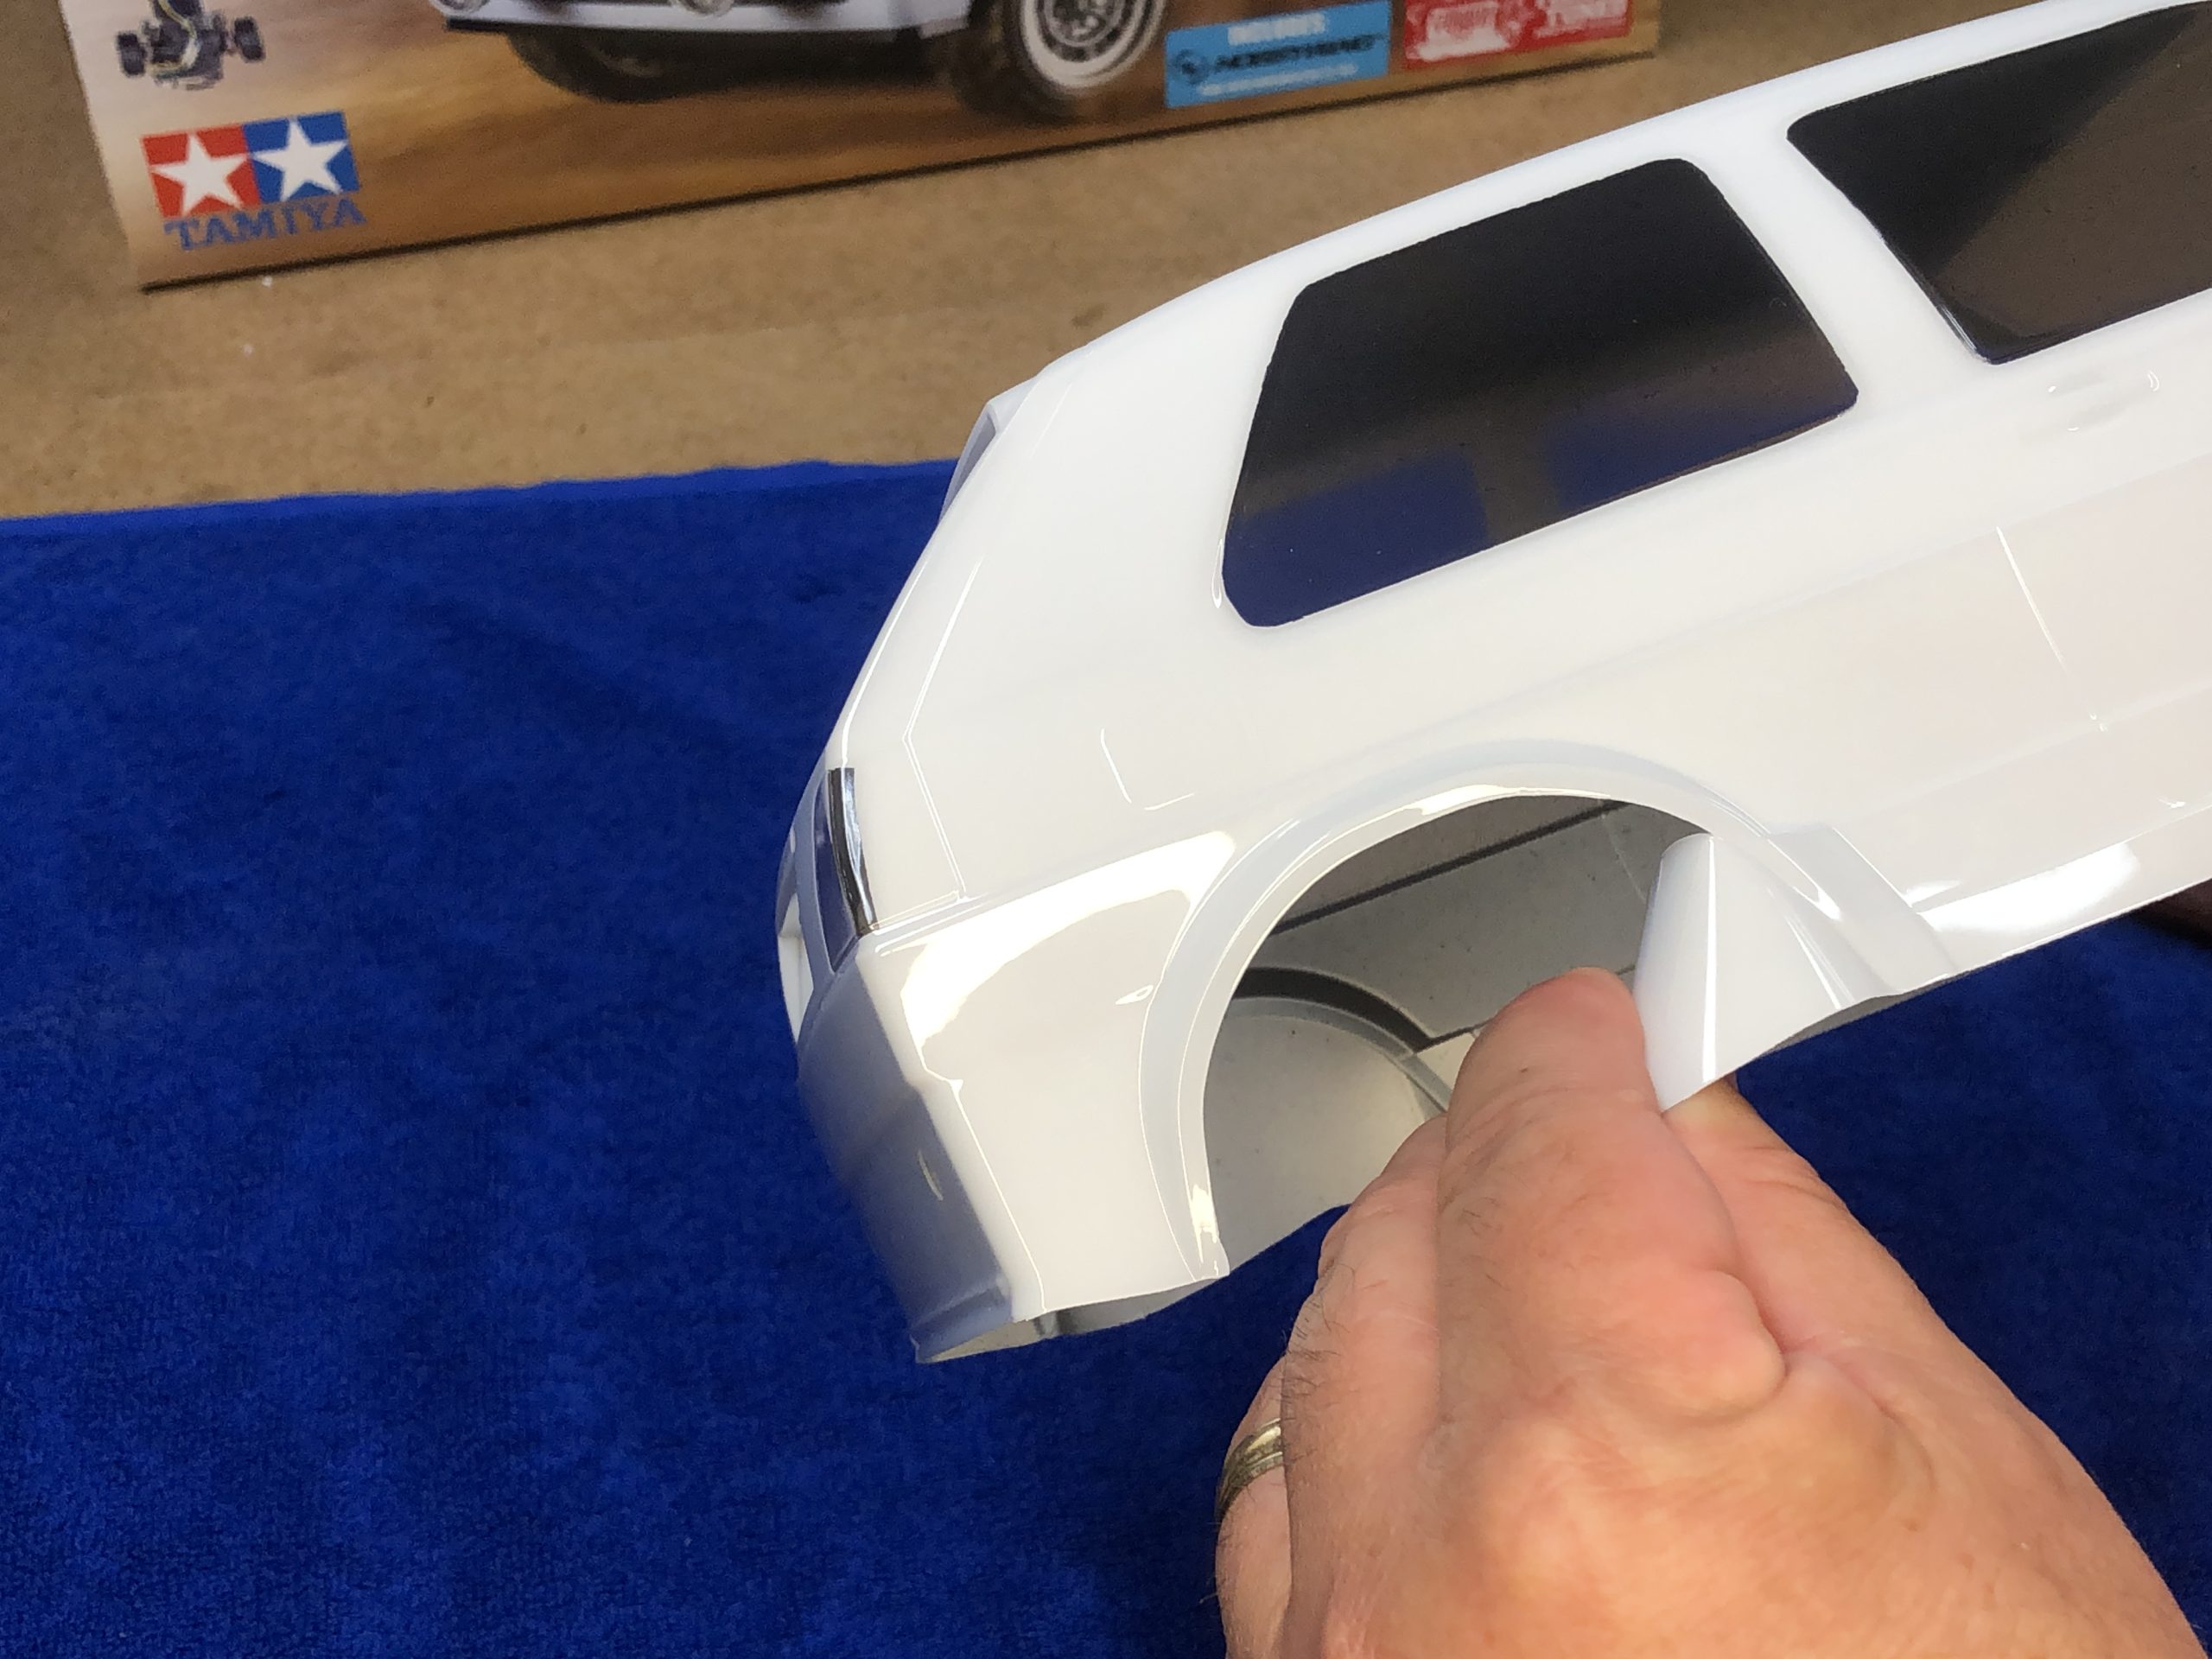
TRIM EXCESS POLYCABONATE FROM BODY
Tamiya instructions actually guide you to trim out the entire Golf II GTI body including all the mounting holes in the very first step. We like to take care of those tasks after the body is painted. One reason is the fully intact body, as it comes out of the box, is more rigid and easier to handle during the painting process. There is also less chance of having the overspray film from pulling up around the edges and allowing paint on the outside surface if you wait on the trimming. As for all the mounting holes, they can be done after painting as well thanks to the molded locating dimples in the body.
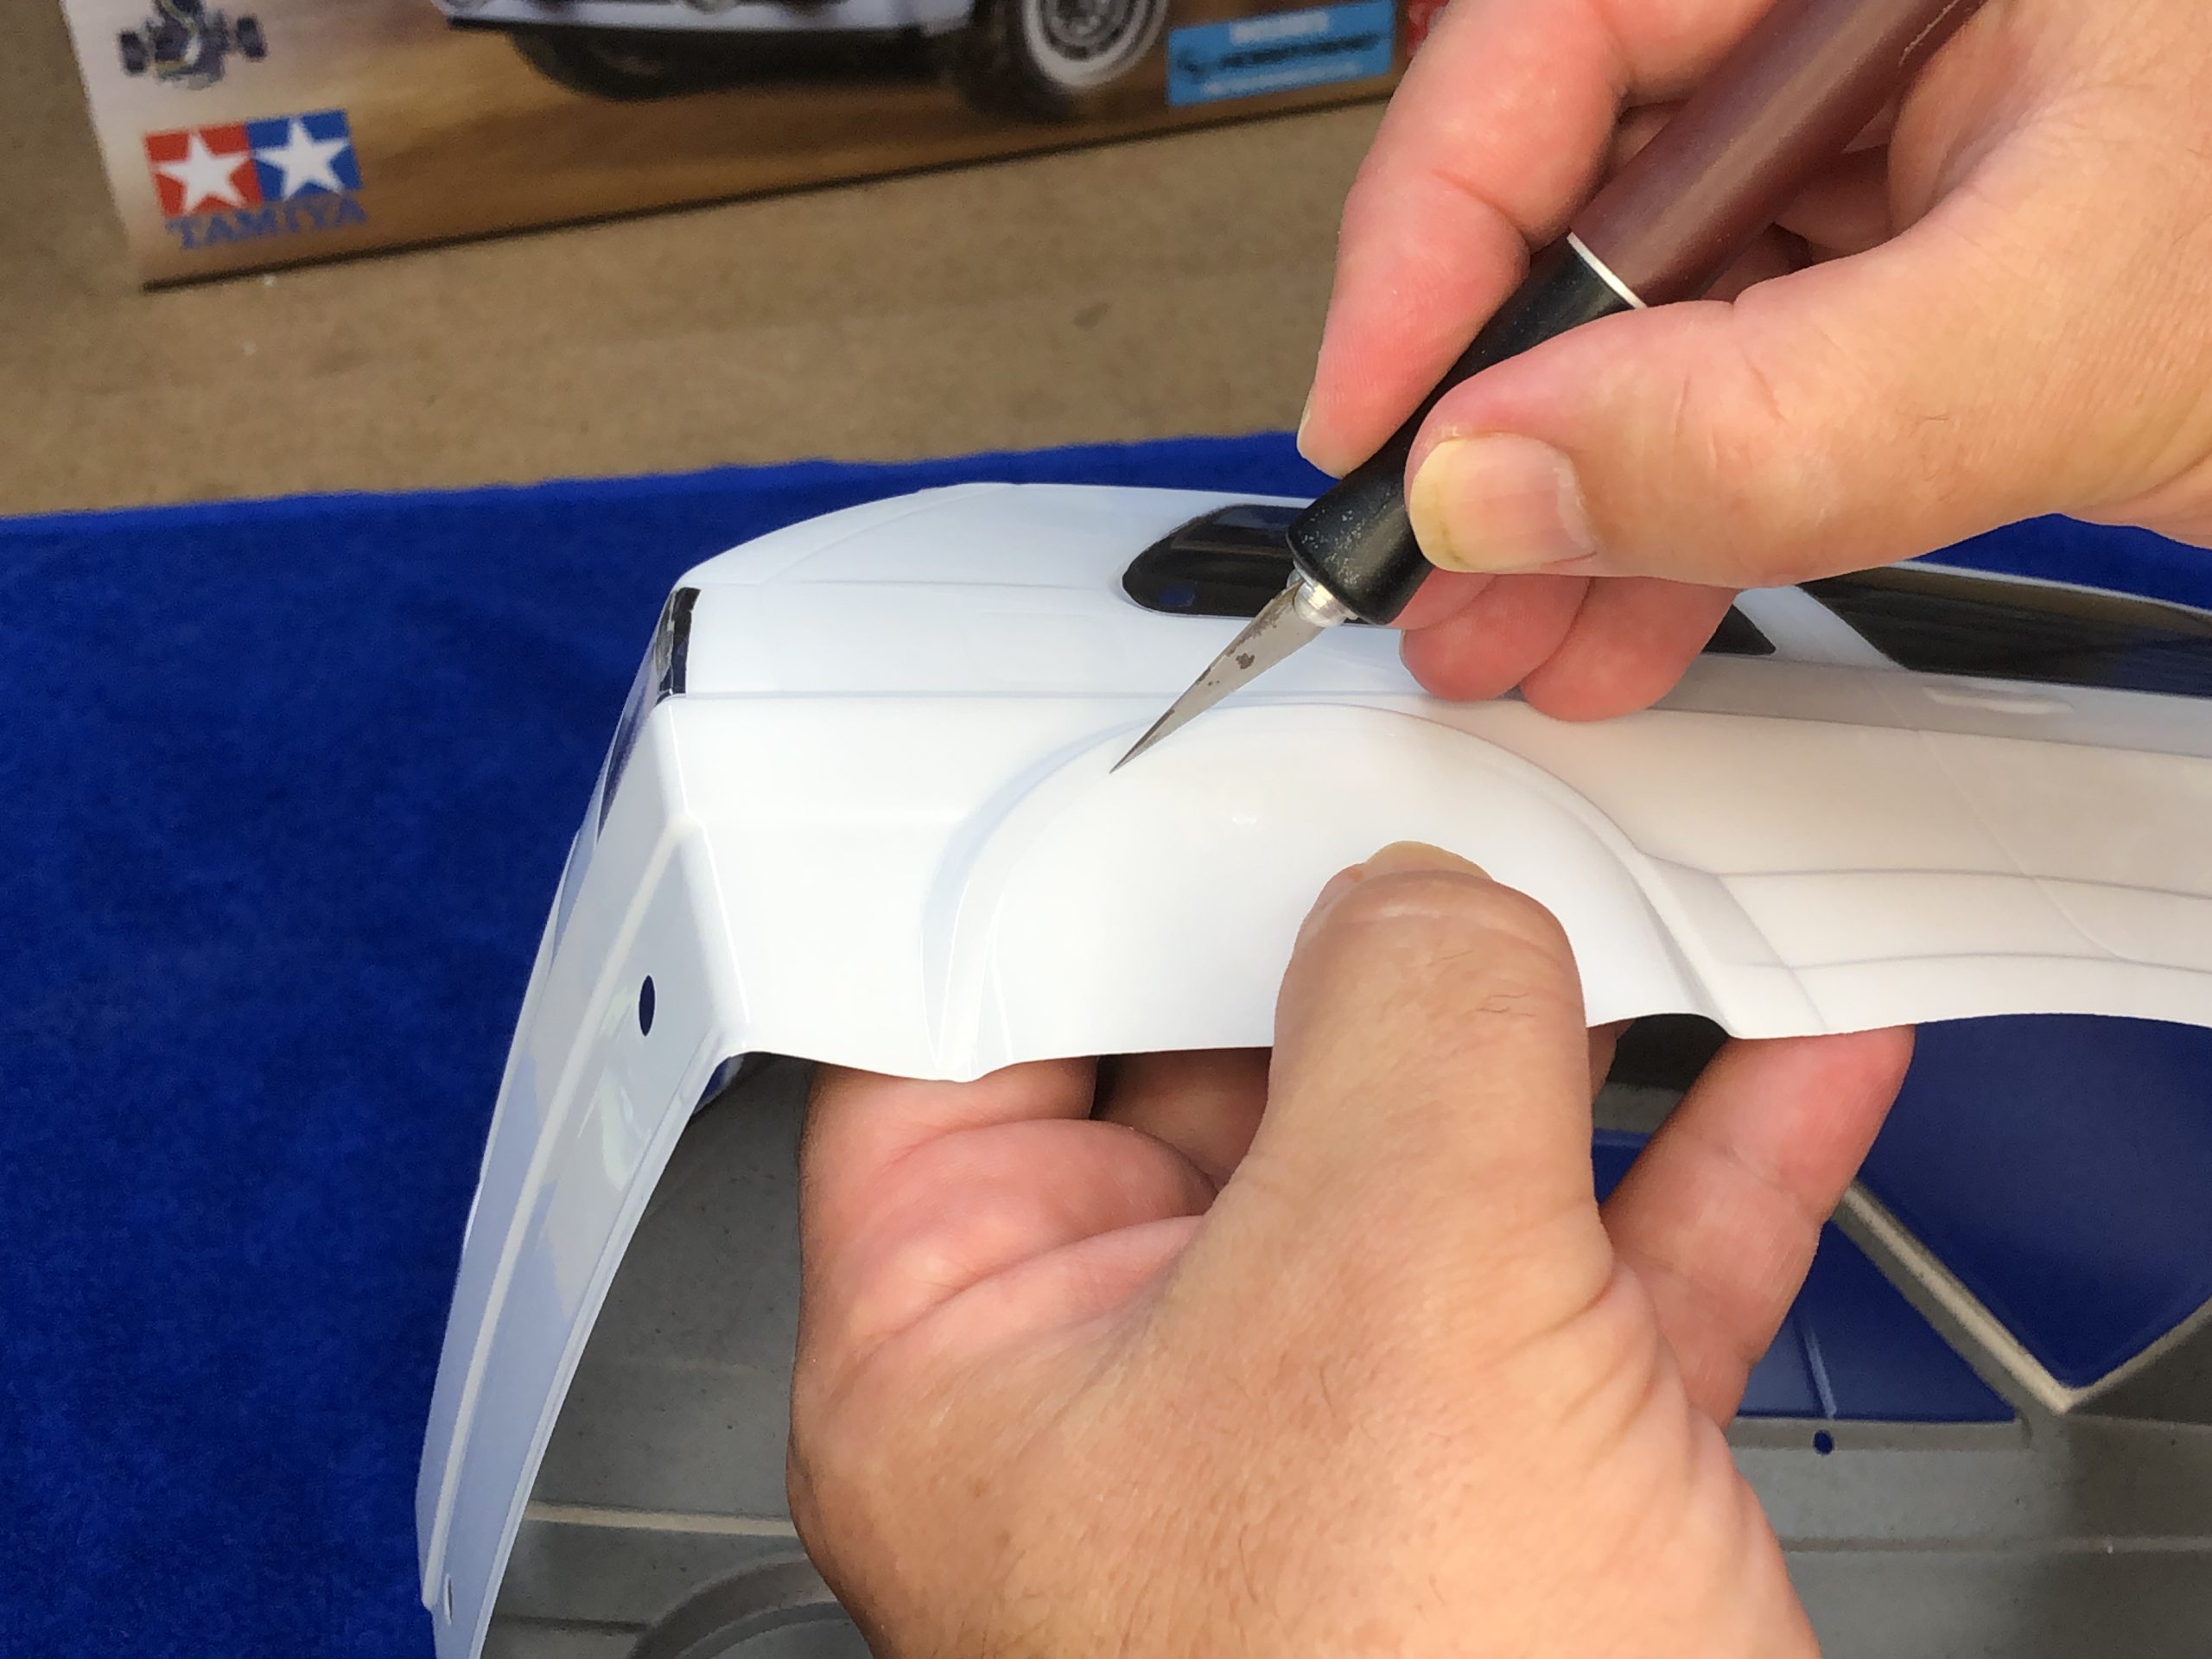
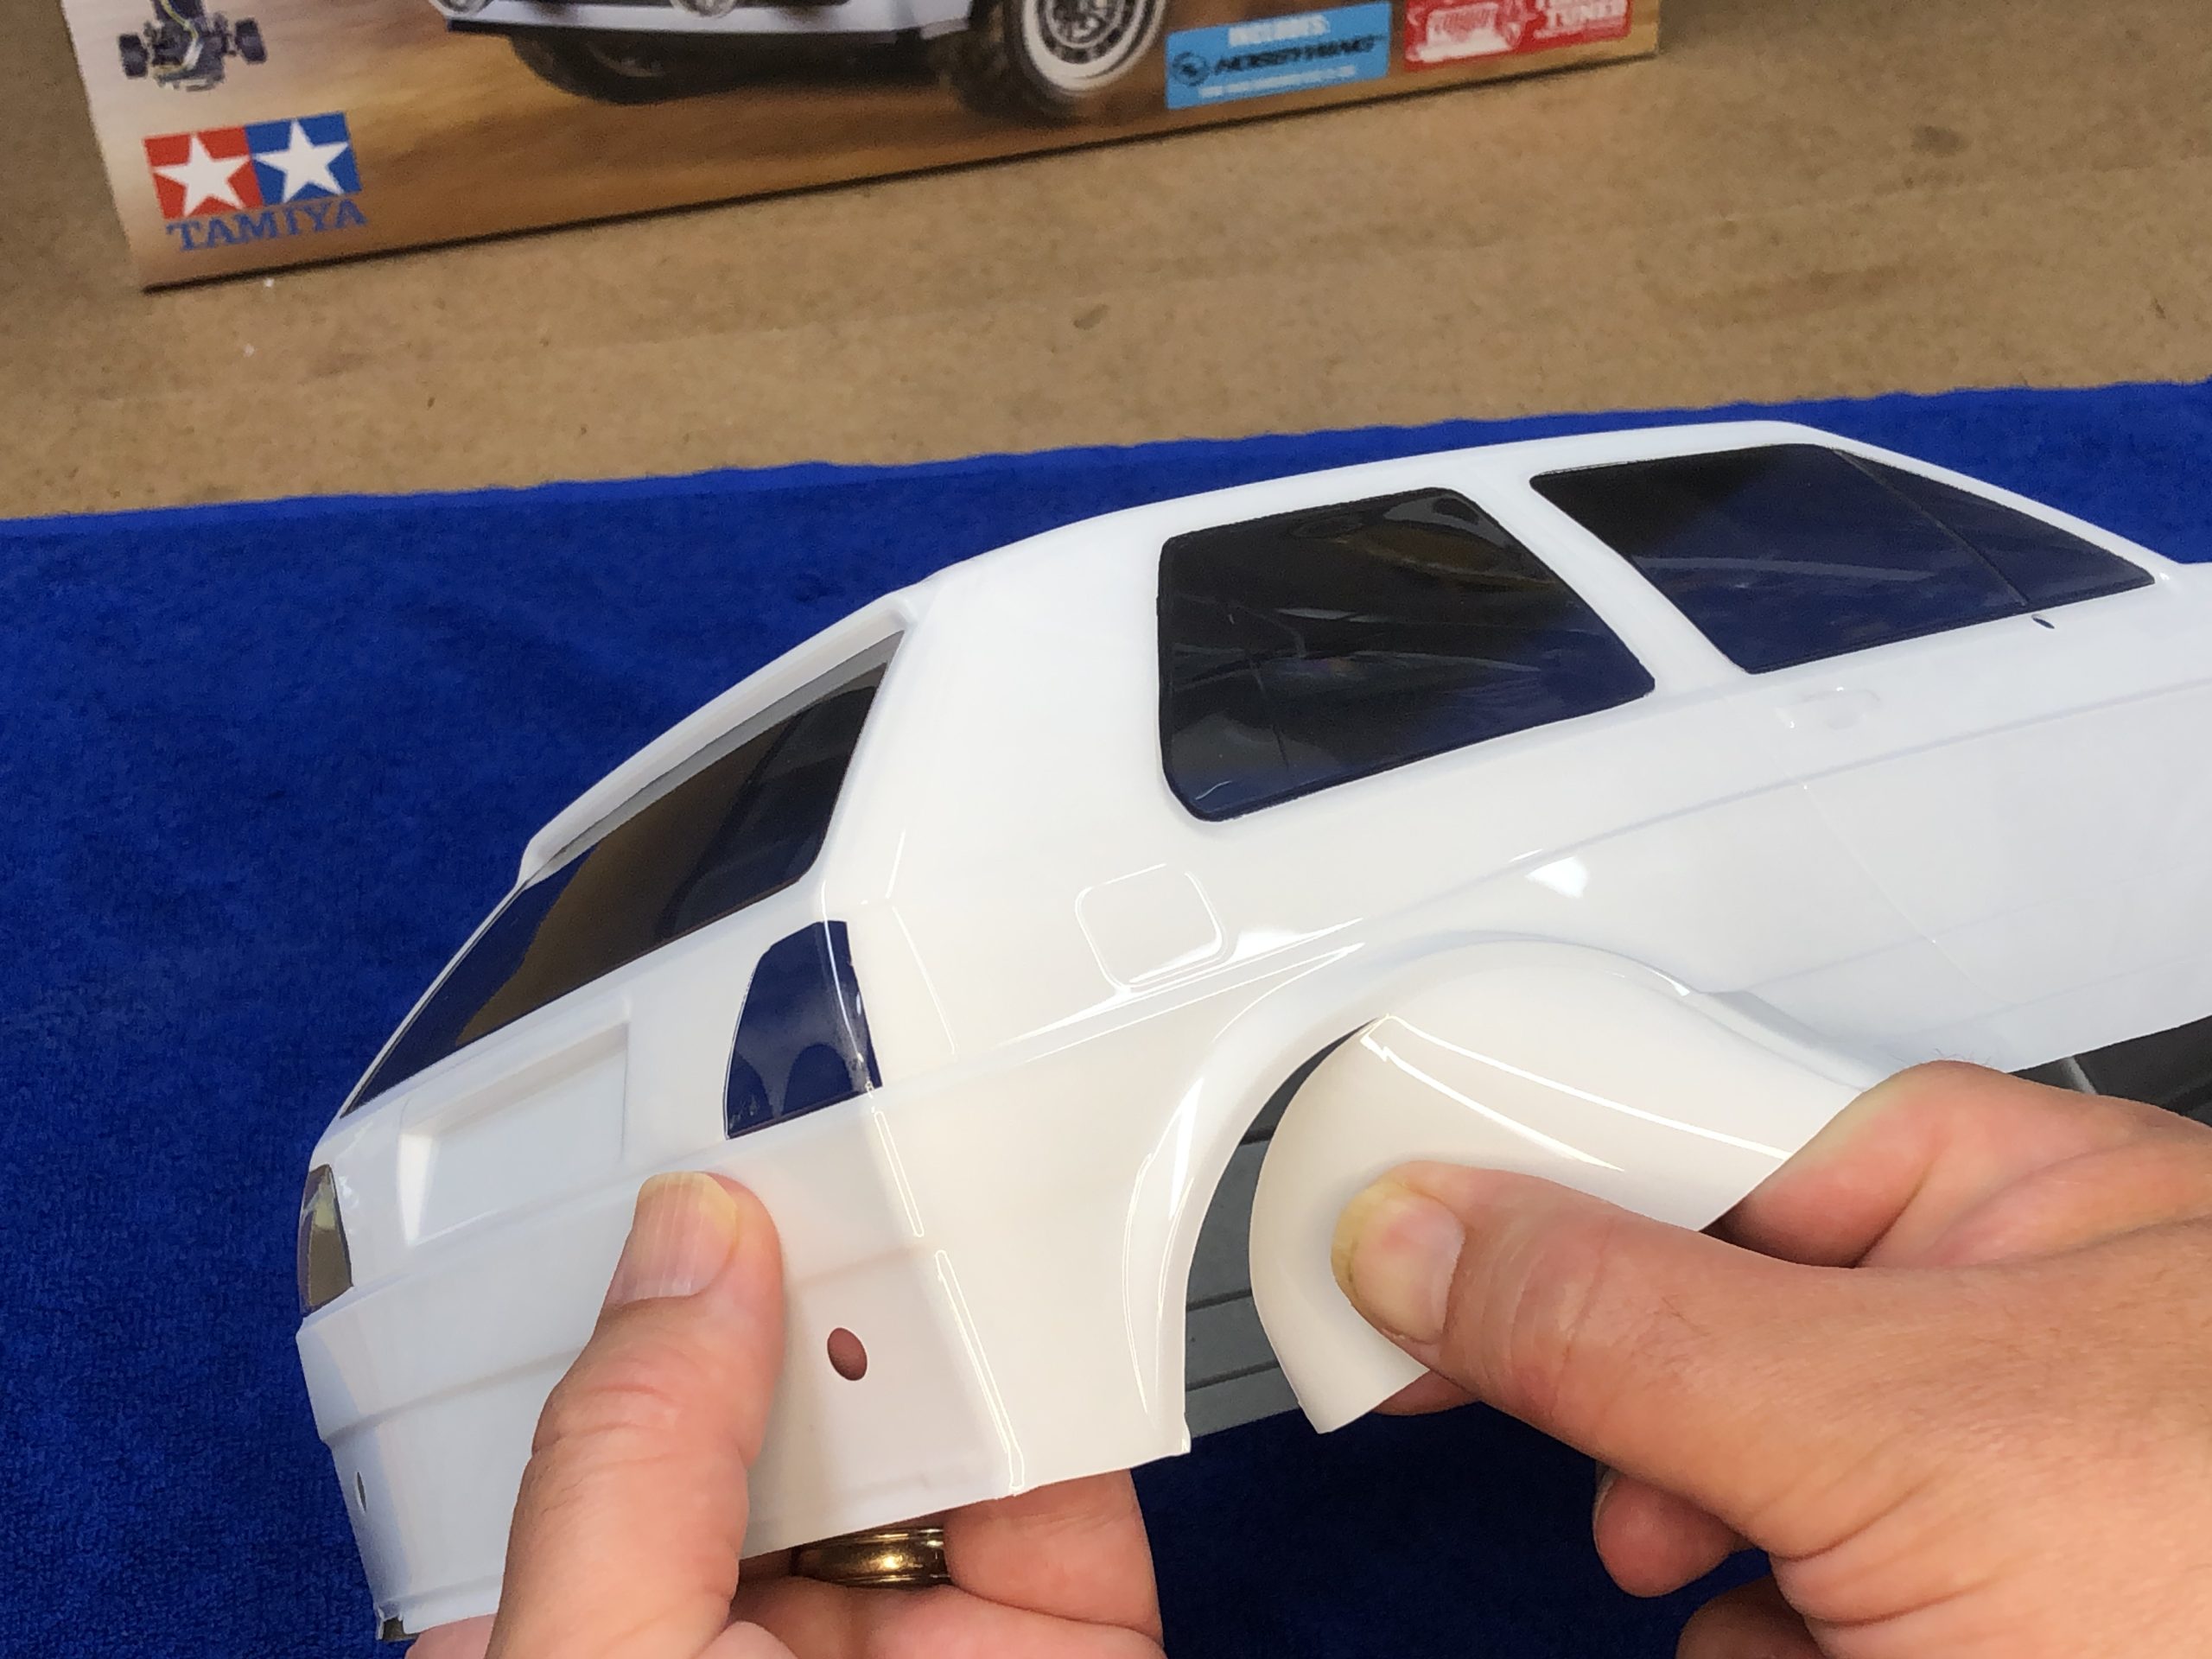
There are two main methods to trimming the excess polycarbonate from the body. One is with curved body scissors and the other is with a hobby knife. We prefer the hobby knife method because with some practice it is much faster and will create a smooth trim line for areas like the curved wheel wells. Depending on the body, you may need to use a combination of the hobby knife with the curved body scissors. On the Golf II Rally, we were able to completely trim it out using only a hobby knife.
The idea with using a hobby knife is that you are scoring the polycarbonate and not cutting through it. Once the polycarbonate is scored, bend it back and forth and it will snap off along the score line. For the areas on the body that makes it difficult to bend it back and forth, get a tear started on one end of the score line and the tear will follow that score line. The finished edge will be straight and smooth as long as the score line was straight.
The scoring method is ideal for the wheel wells. Be careful and take your time when you are scoring the curve of the wheel well. You want to avoid ever letting the knife stray off of the trim line because when you go to remove the unwanted polycarbonate, the tear will follow wherever the score line is. When done properly, you will end up with a smooth completed wheel well that will not need any additional attention.
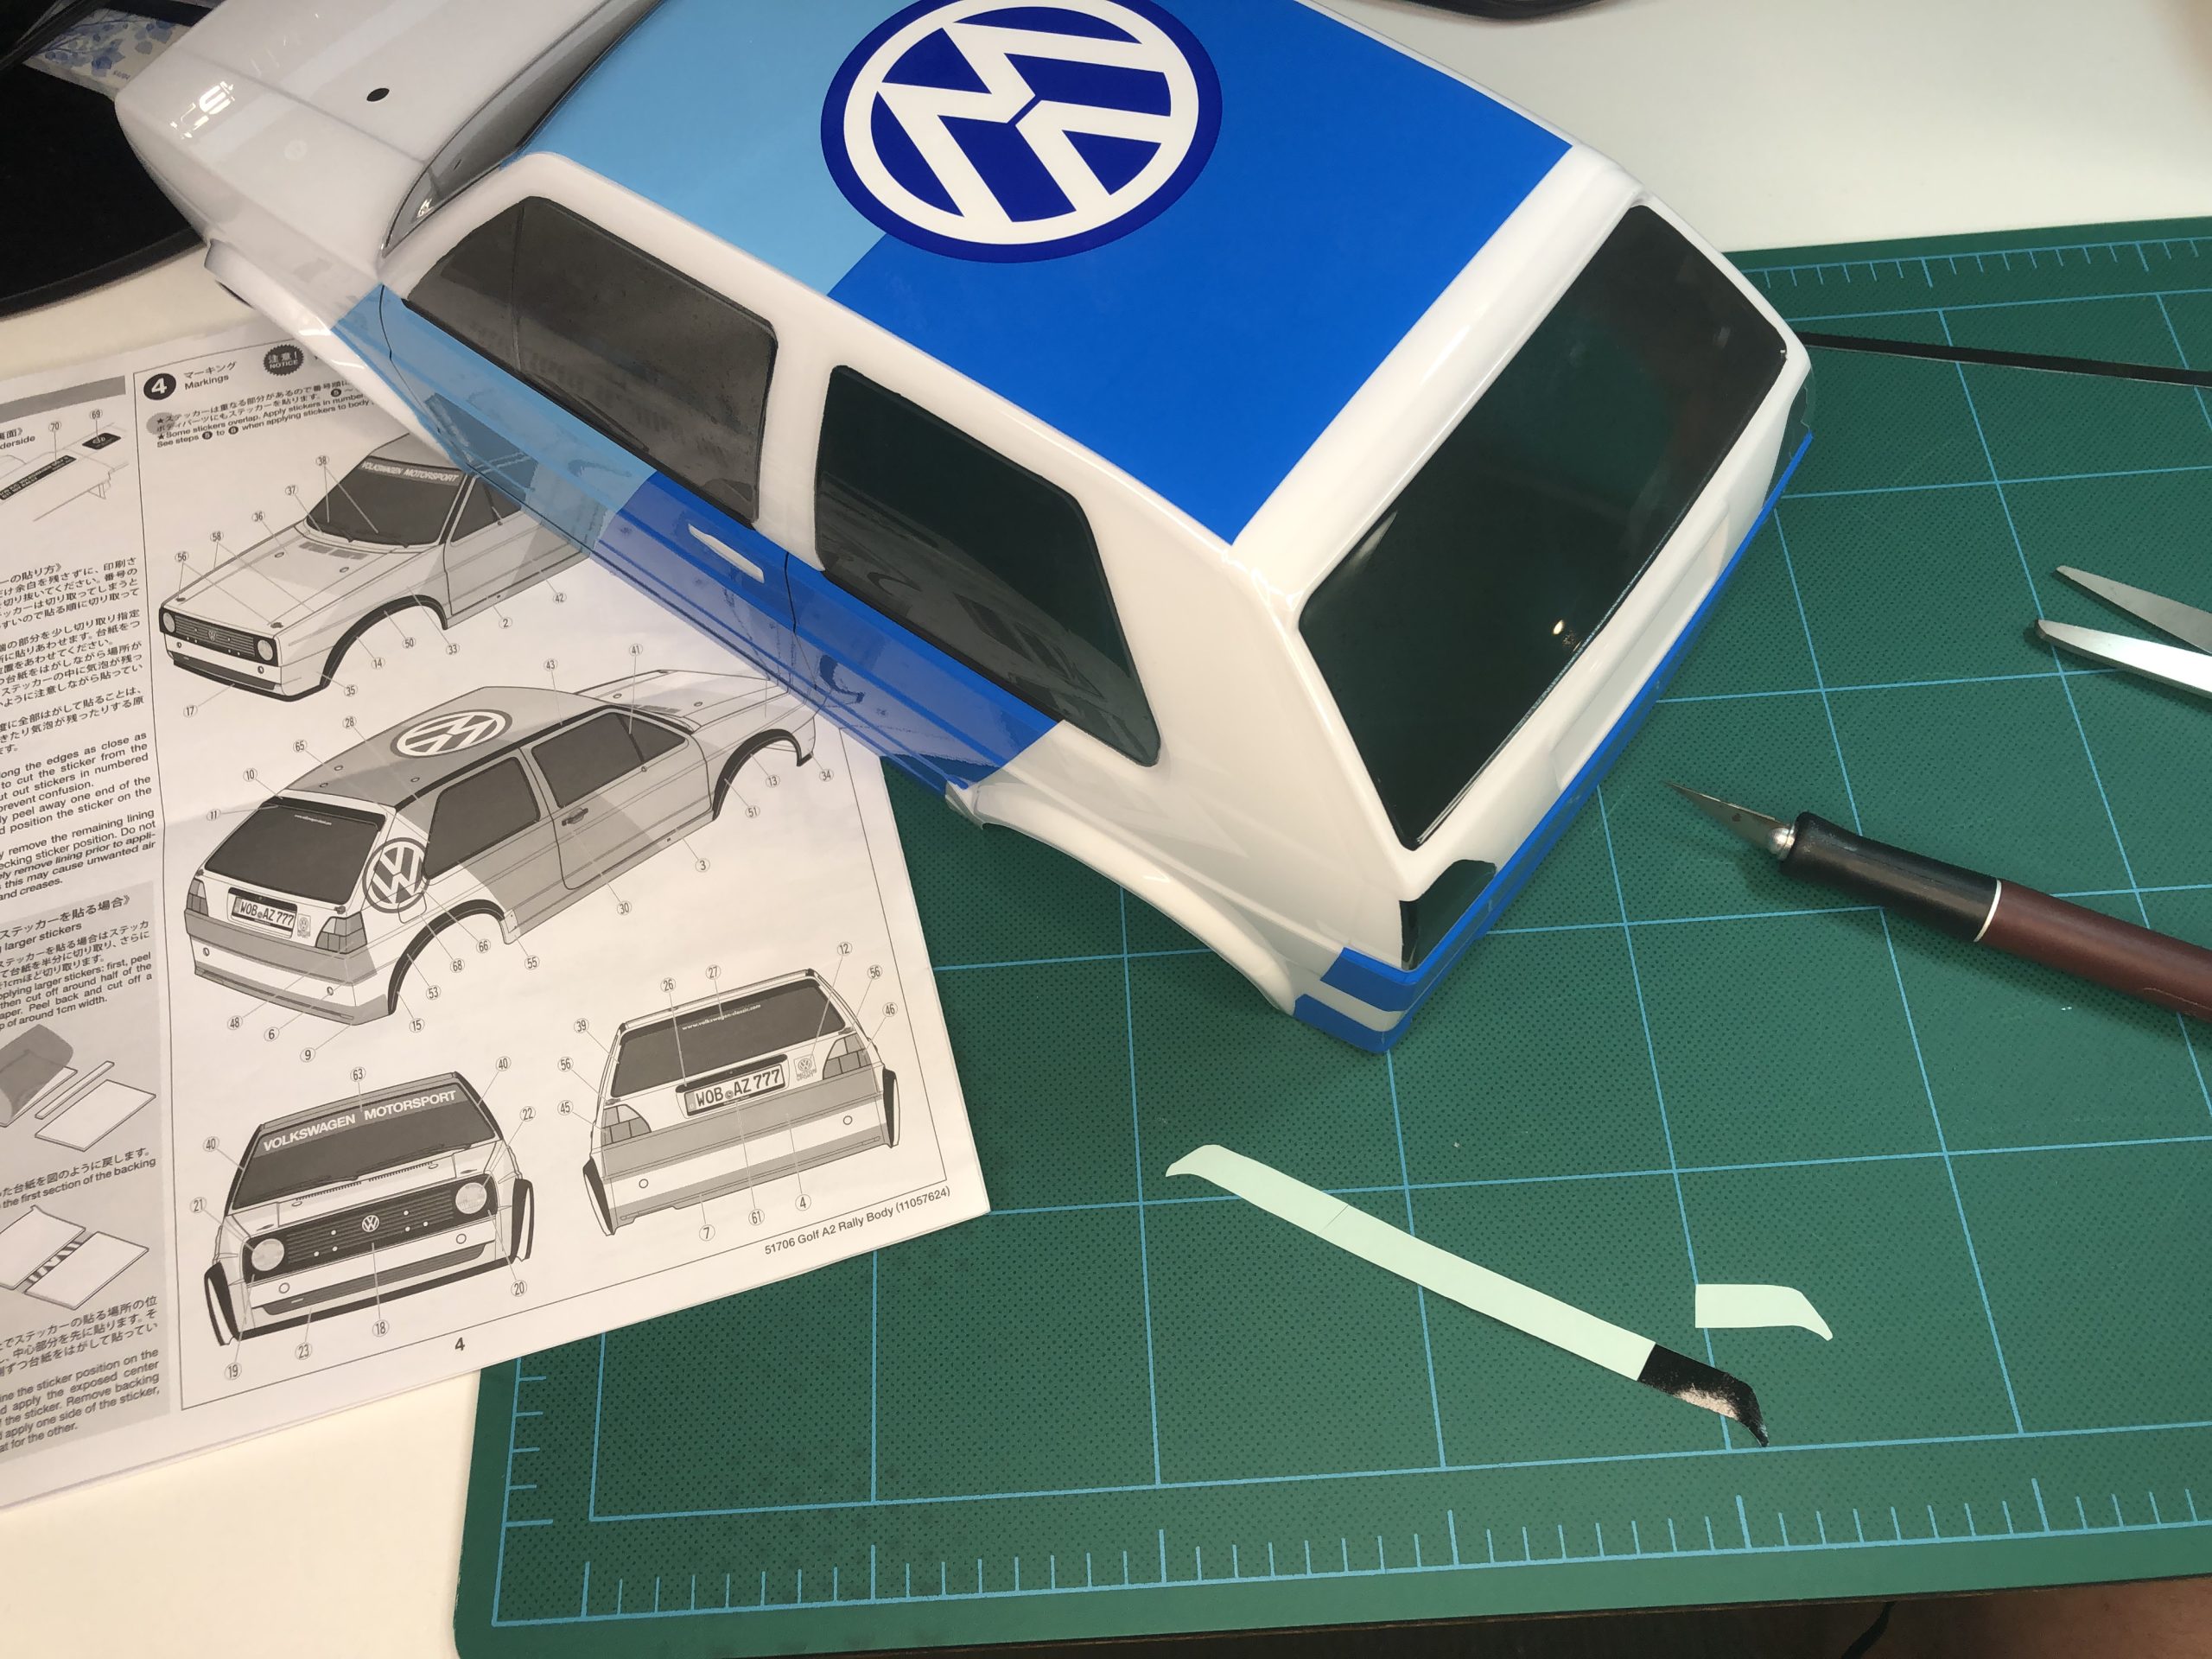
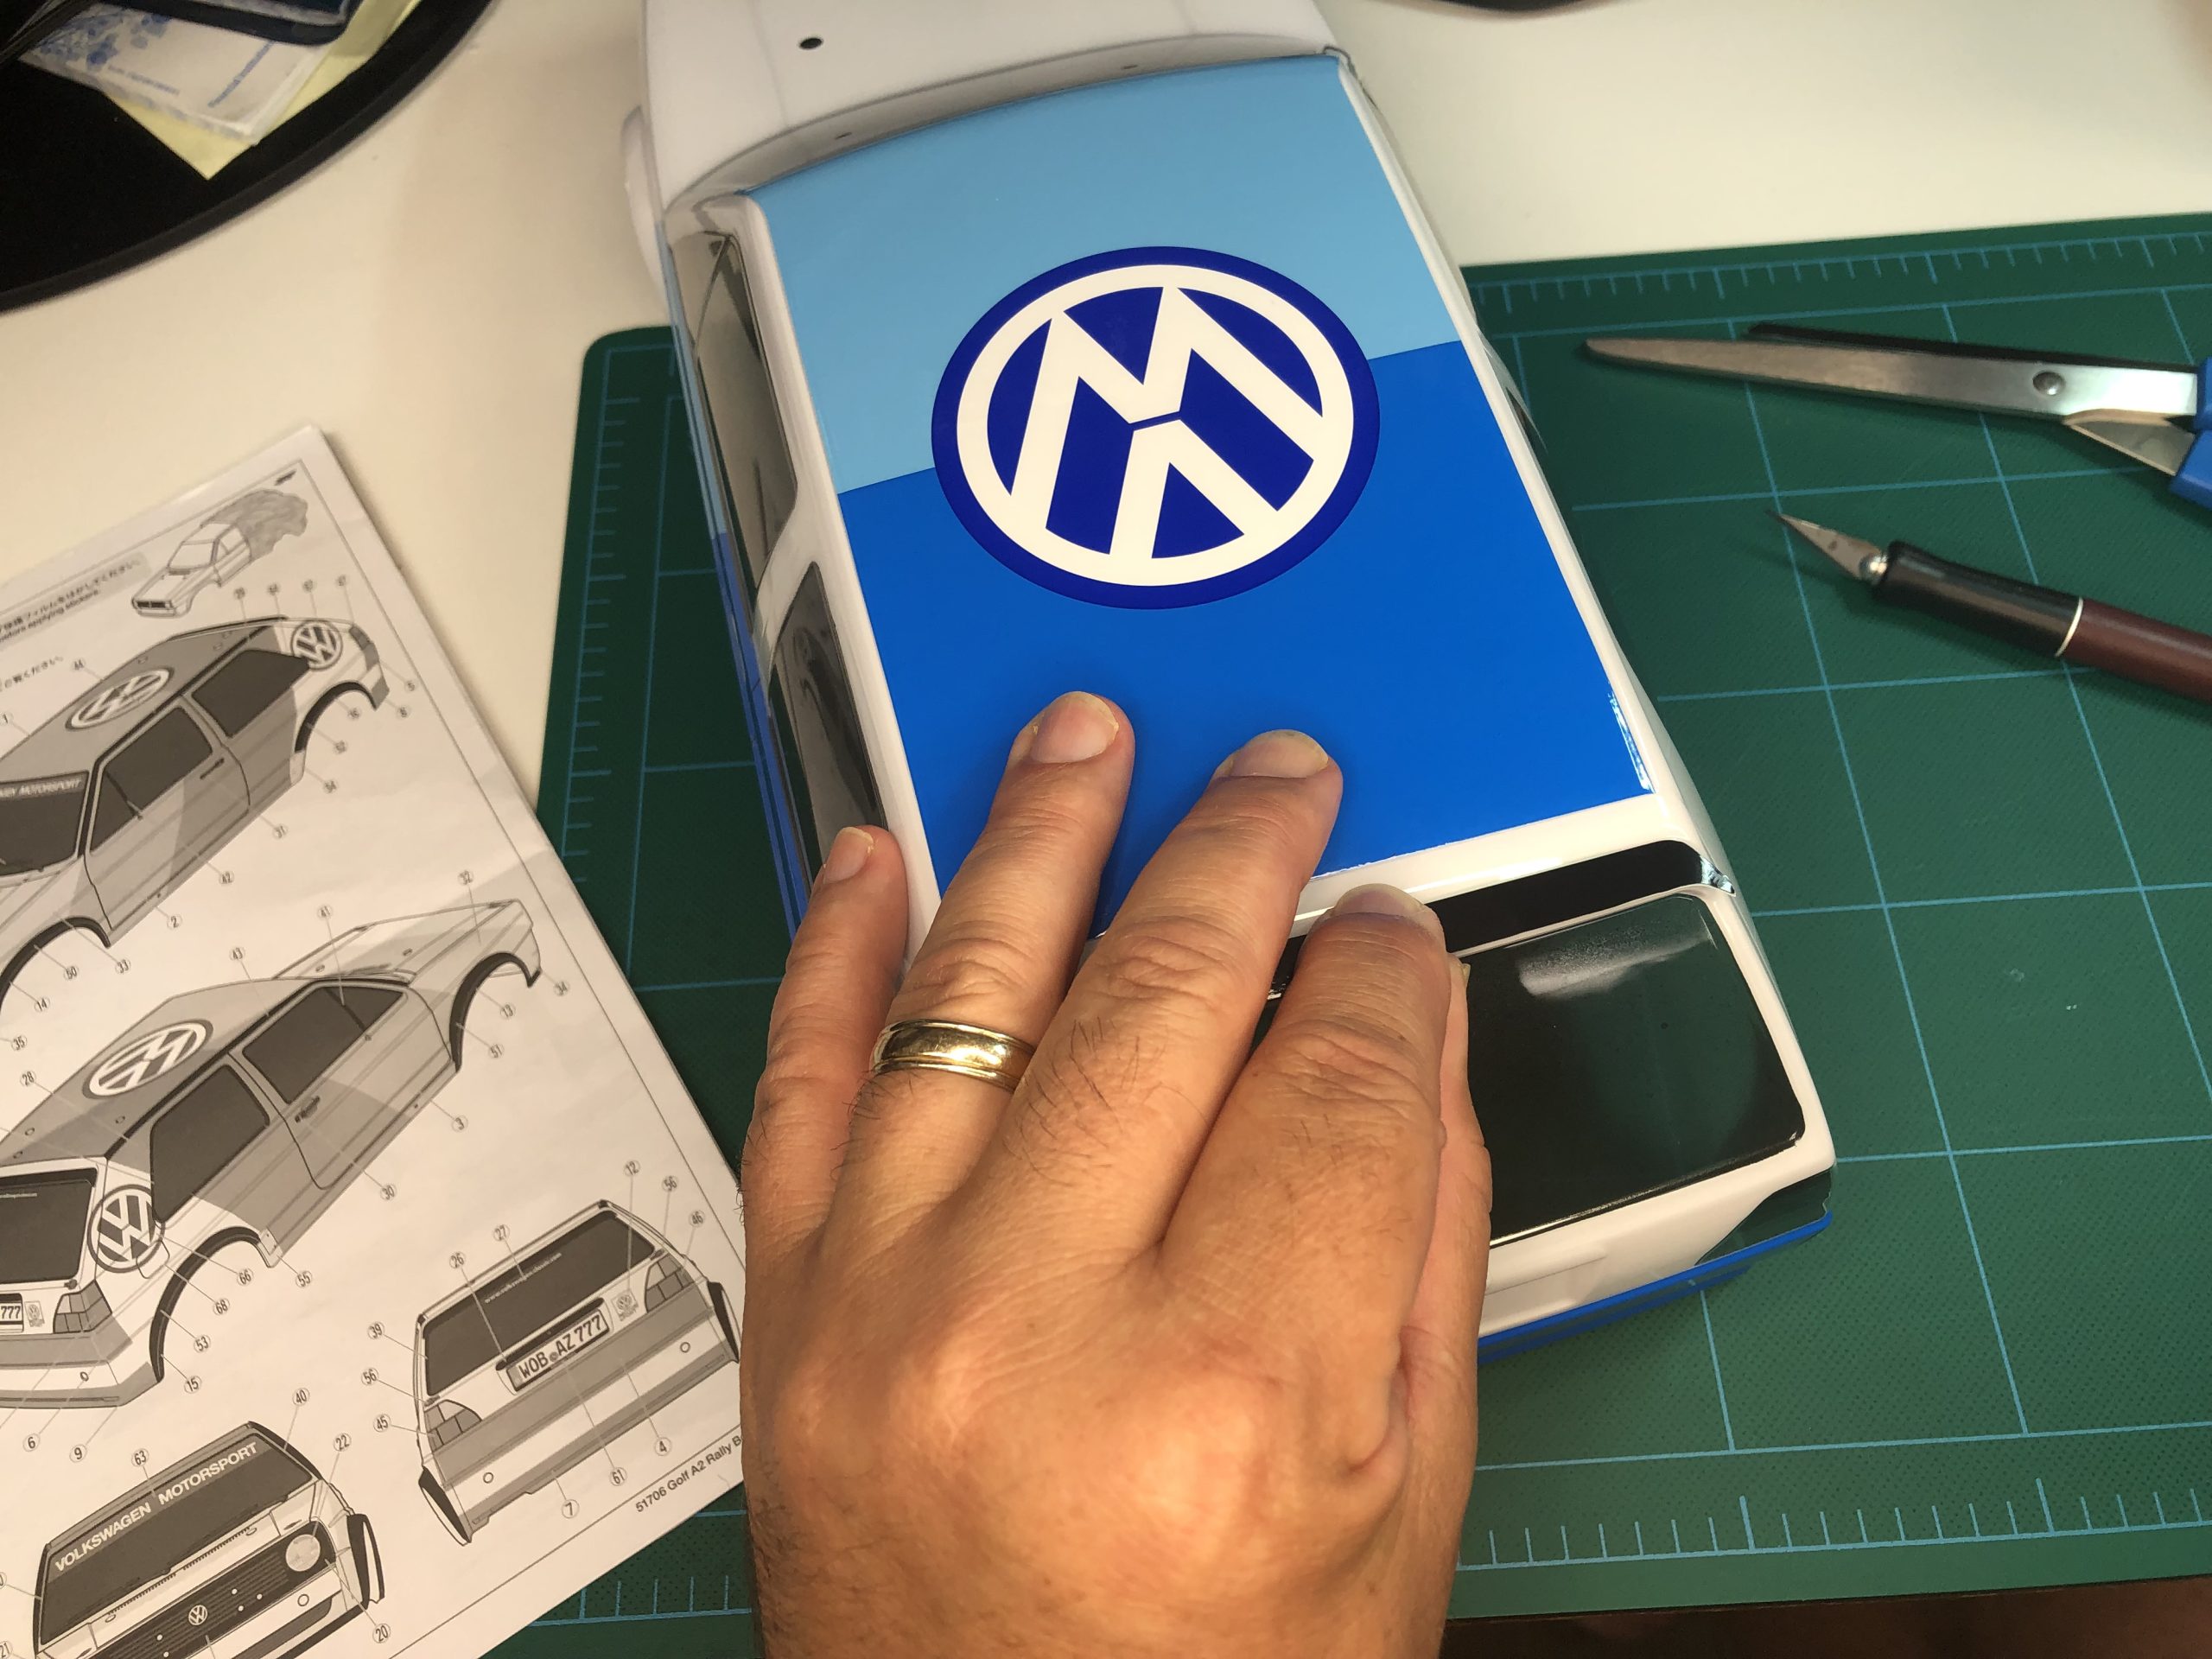
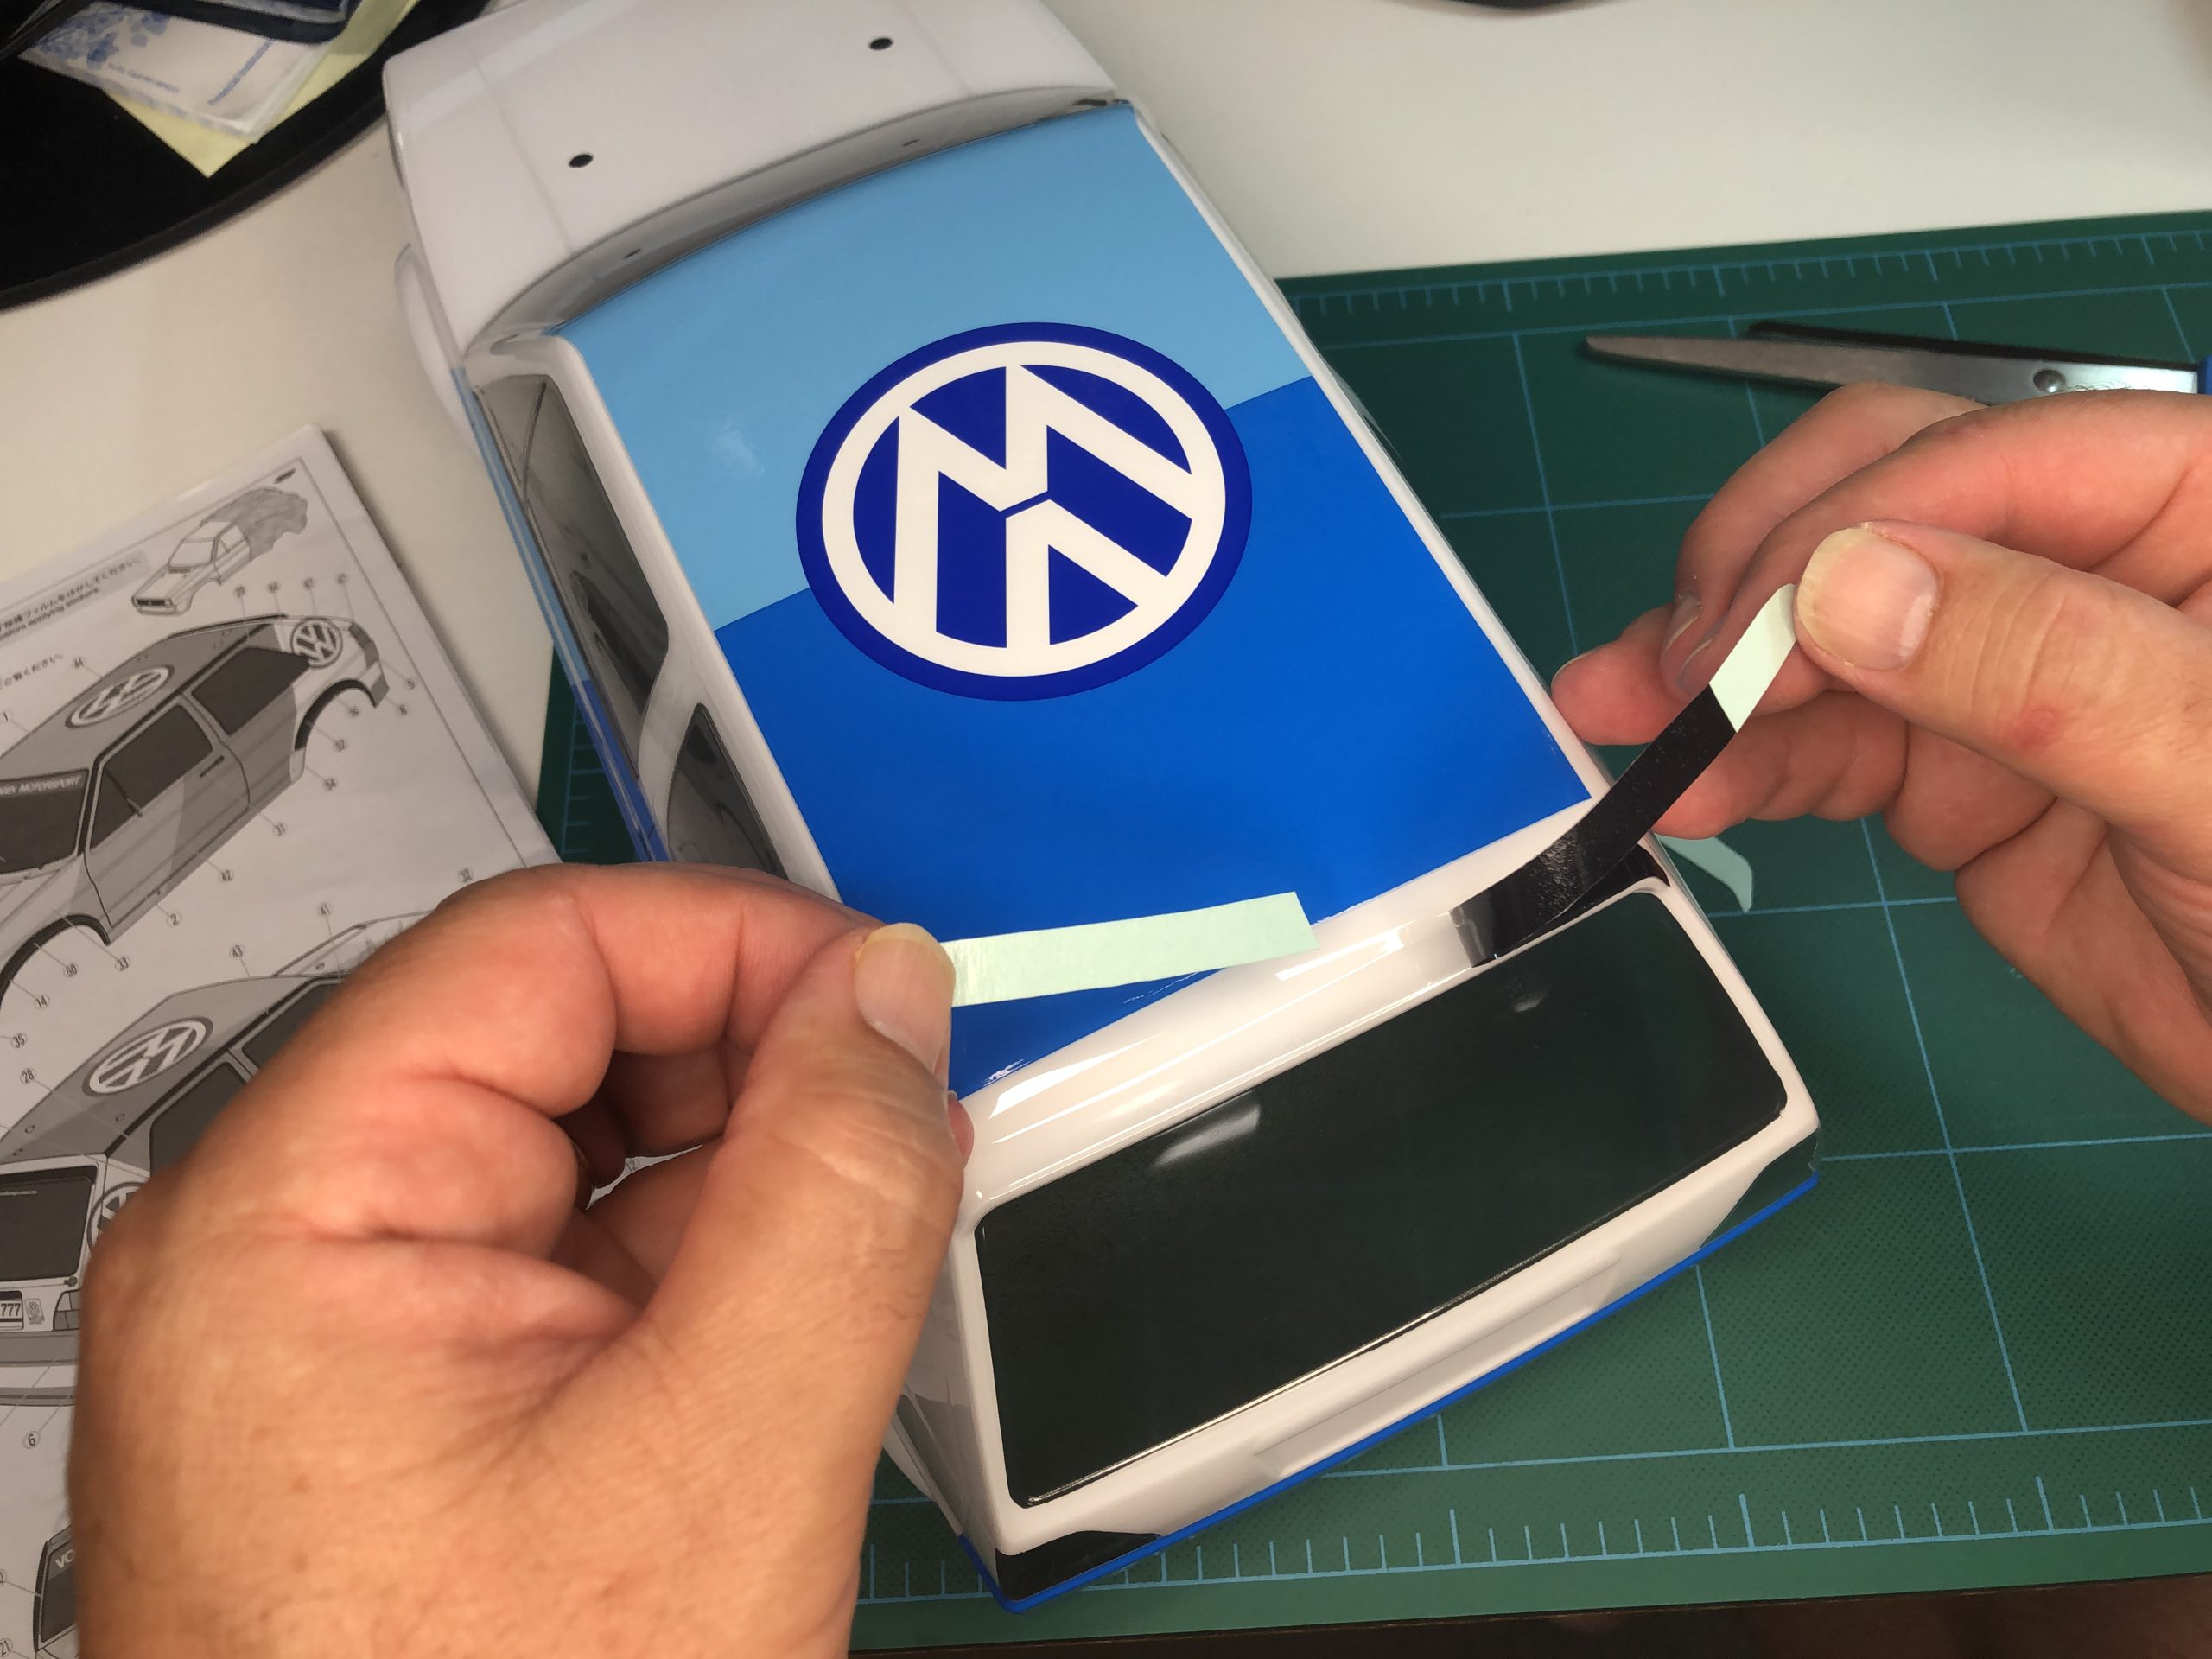
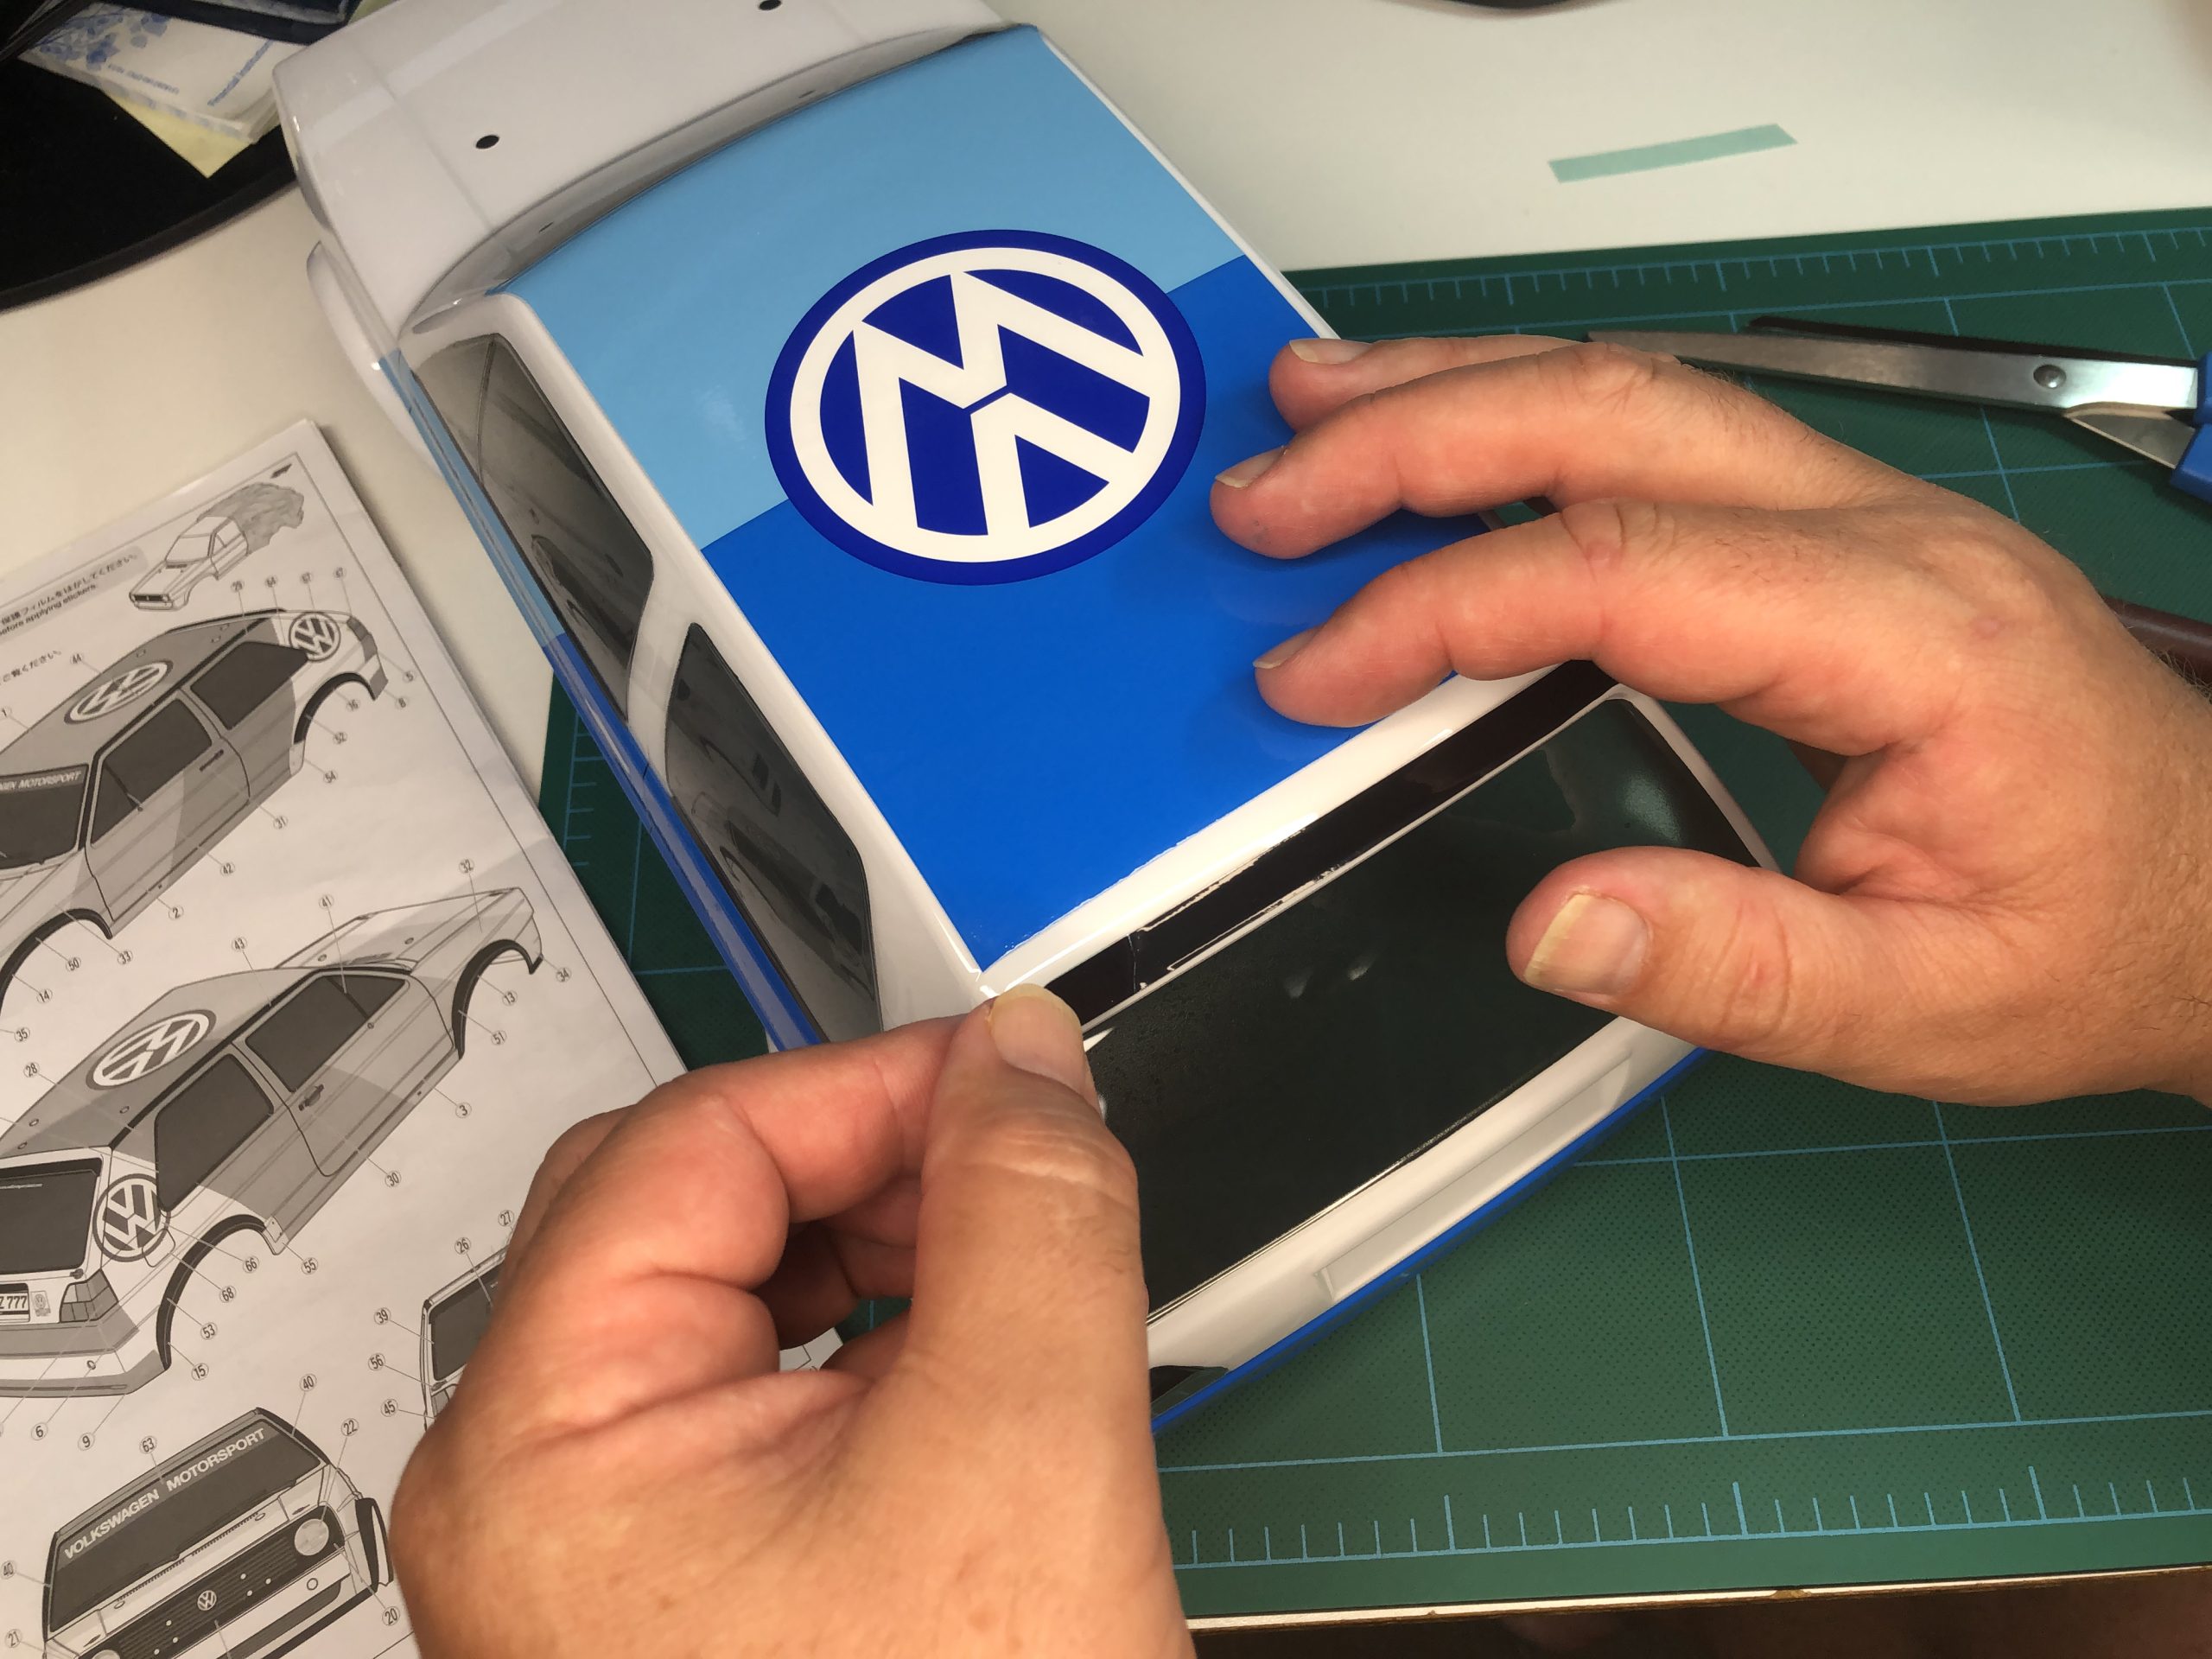
STICKER TIME
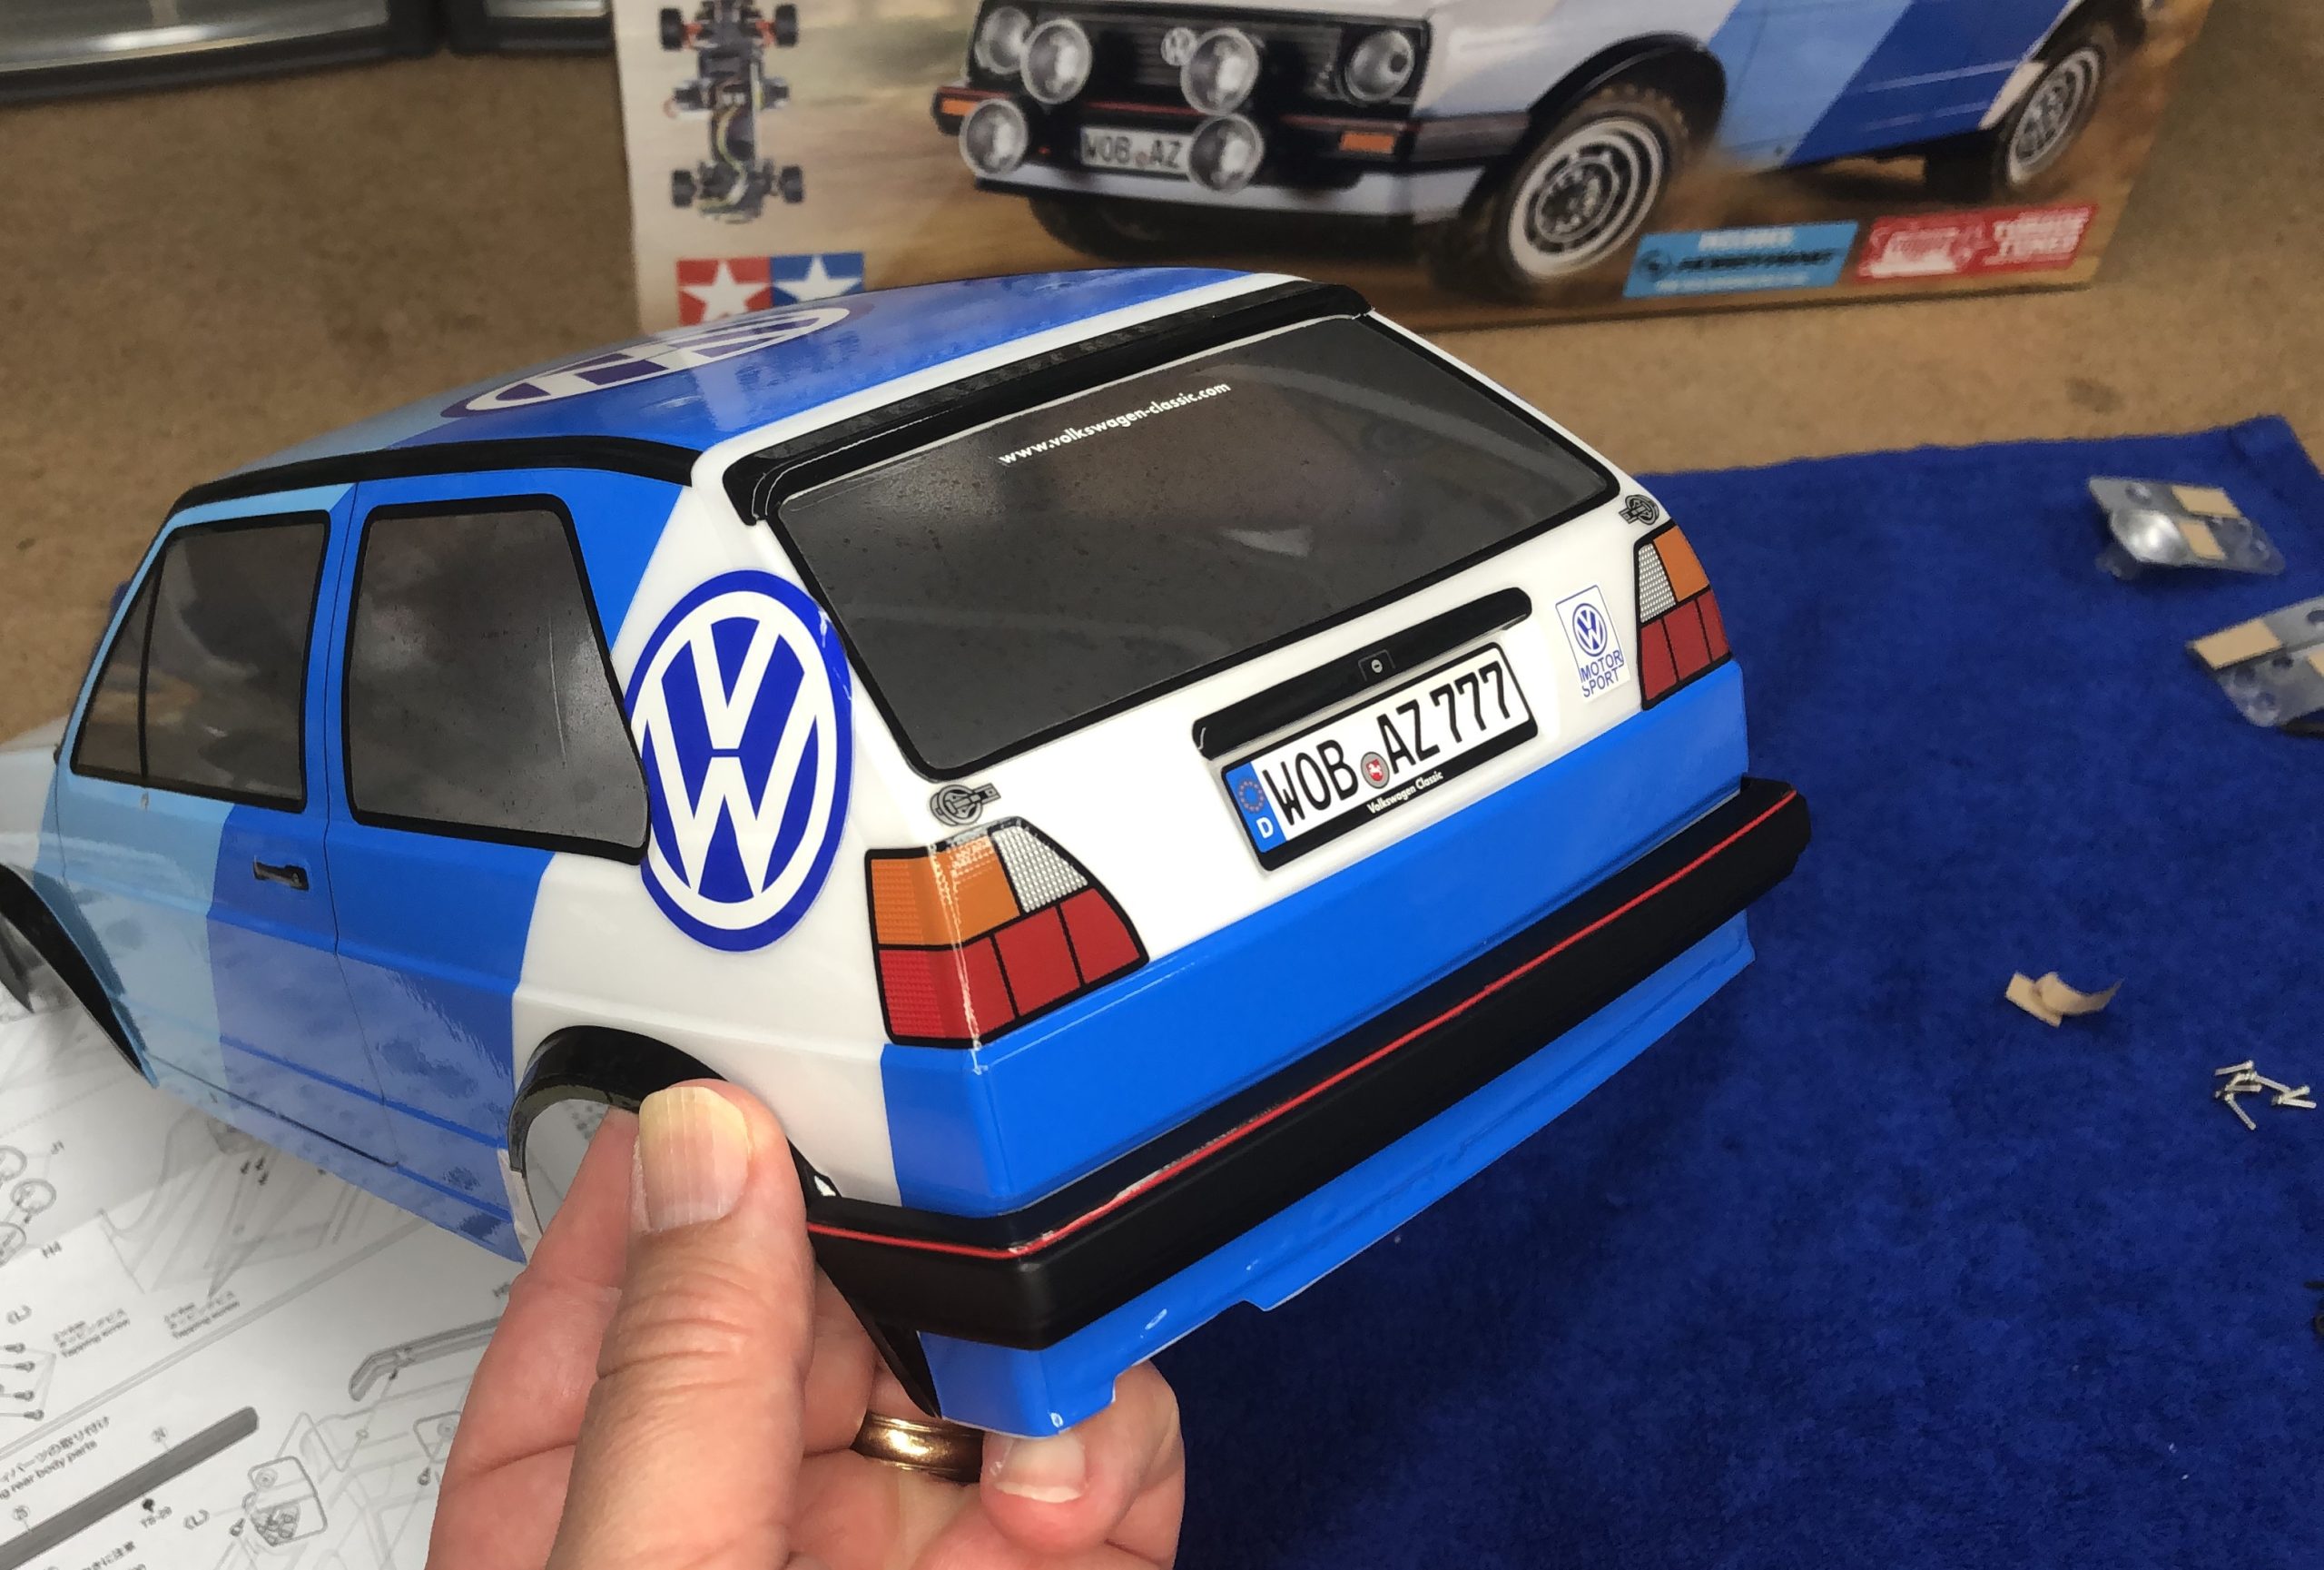
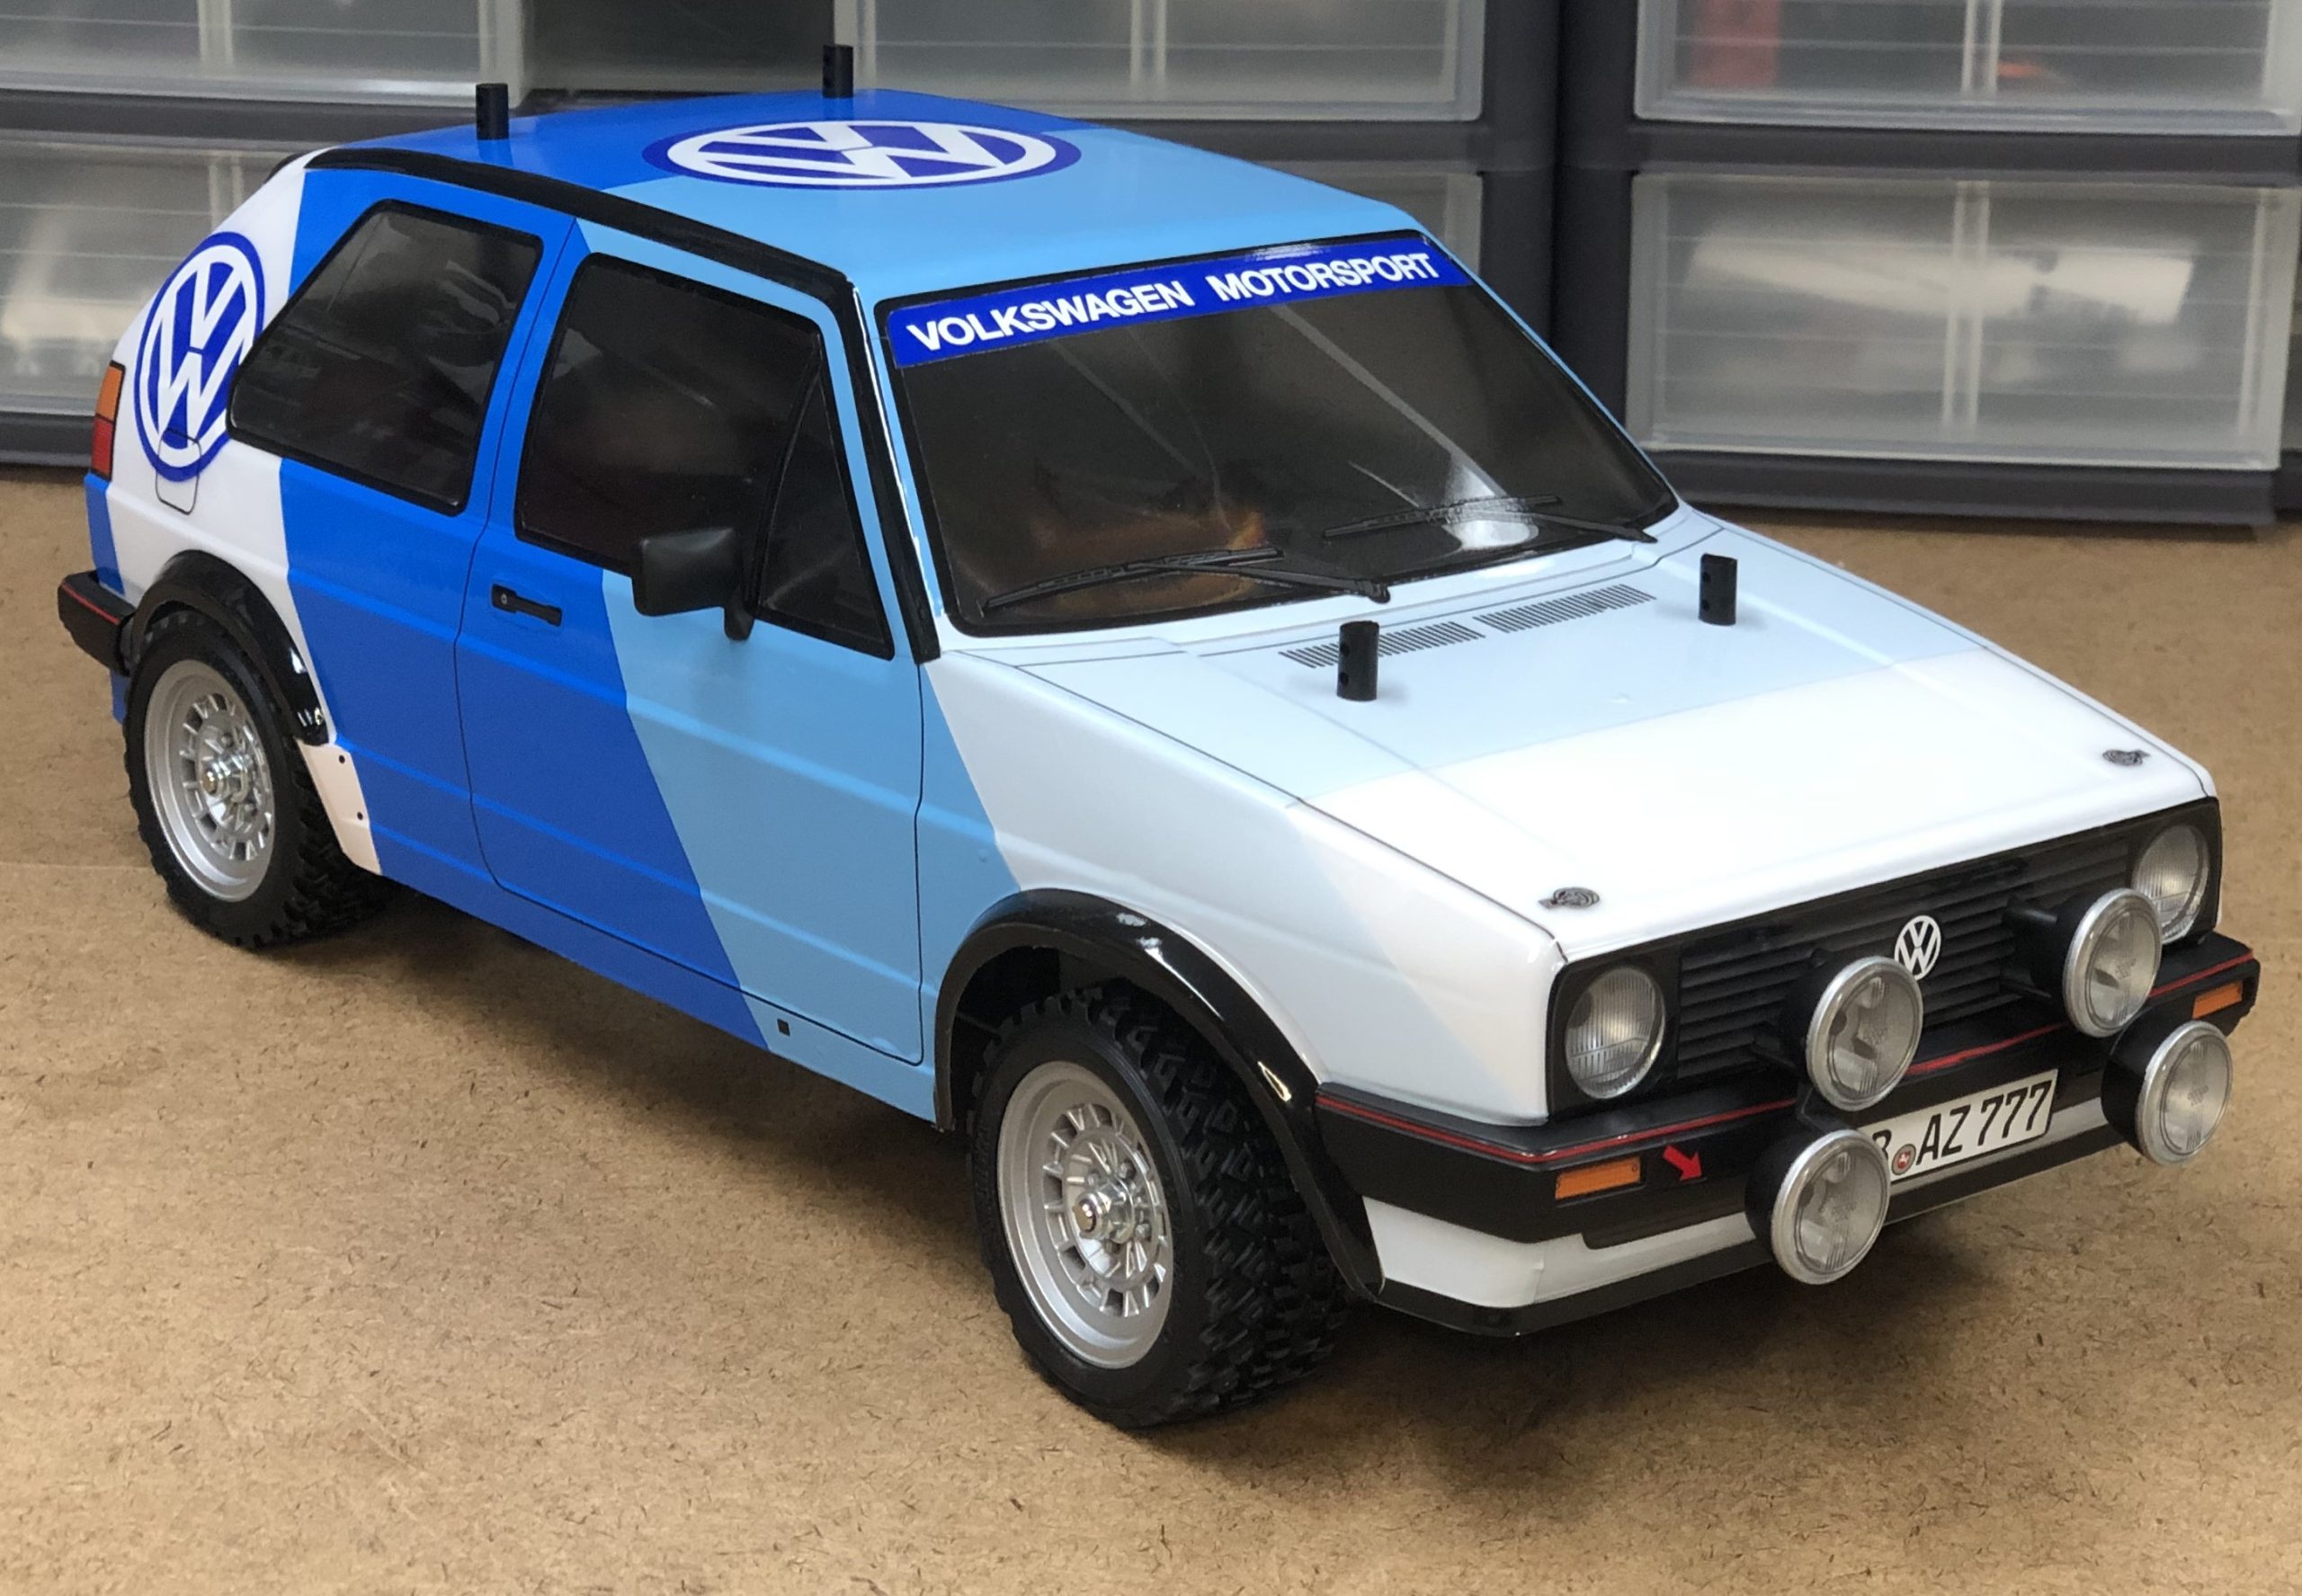
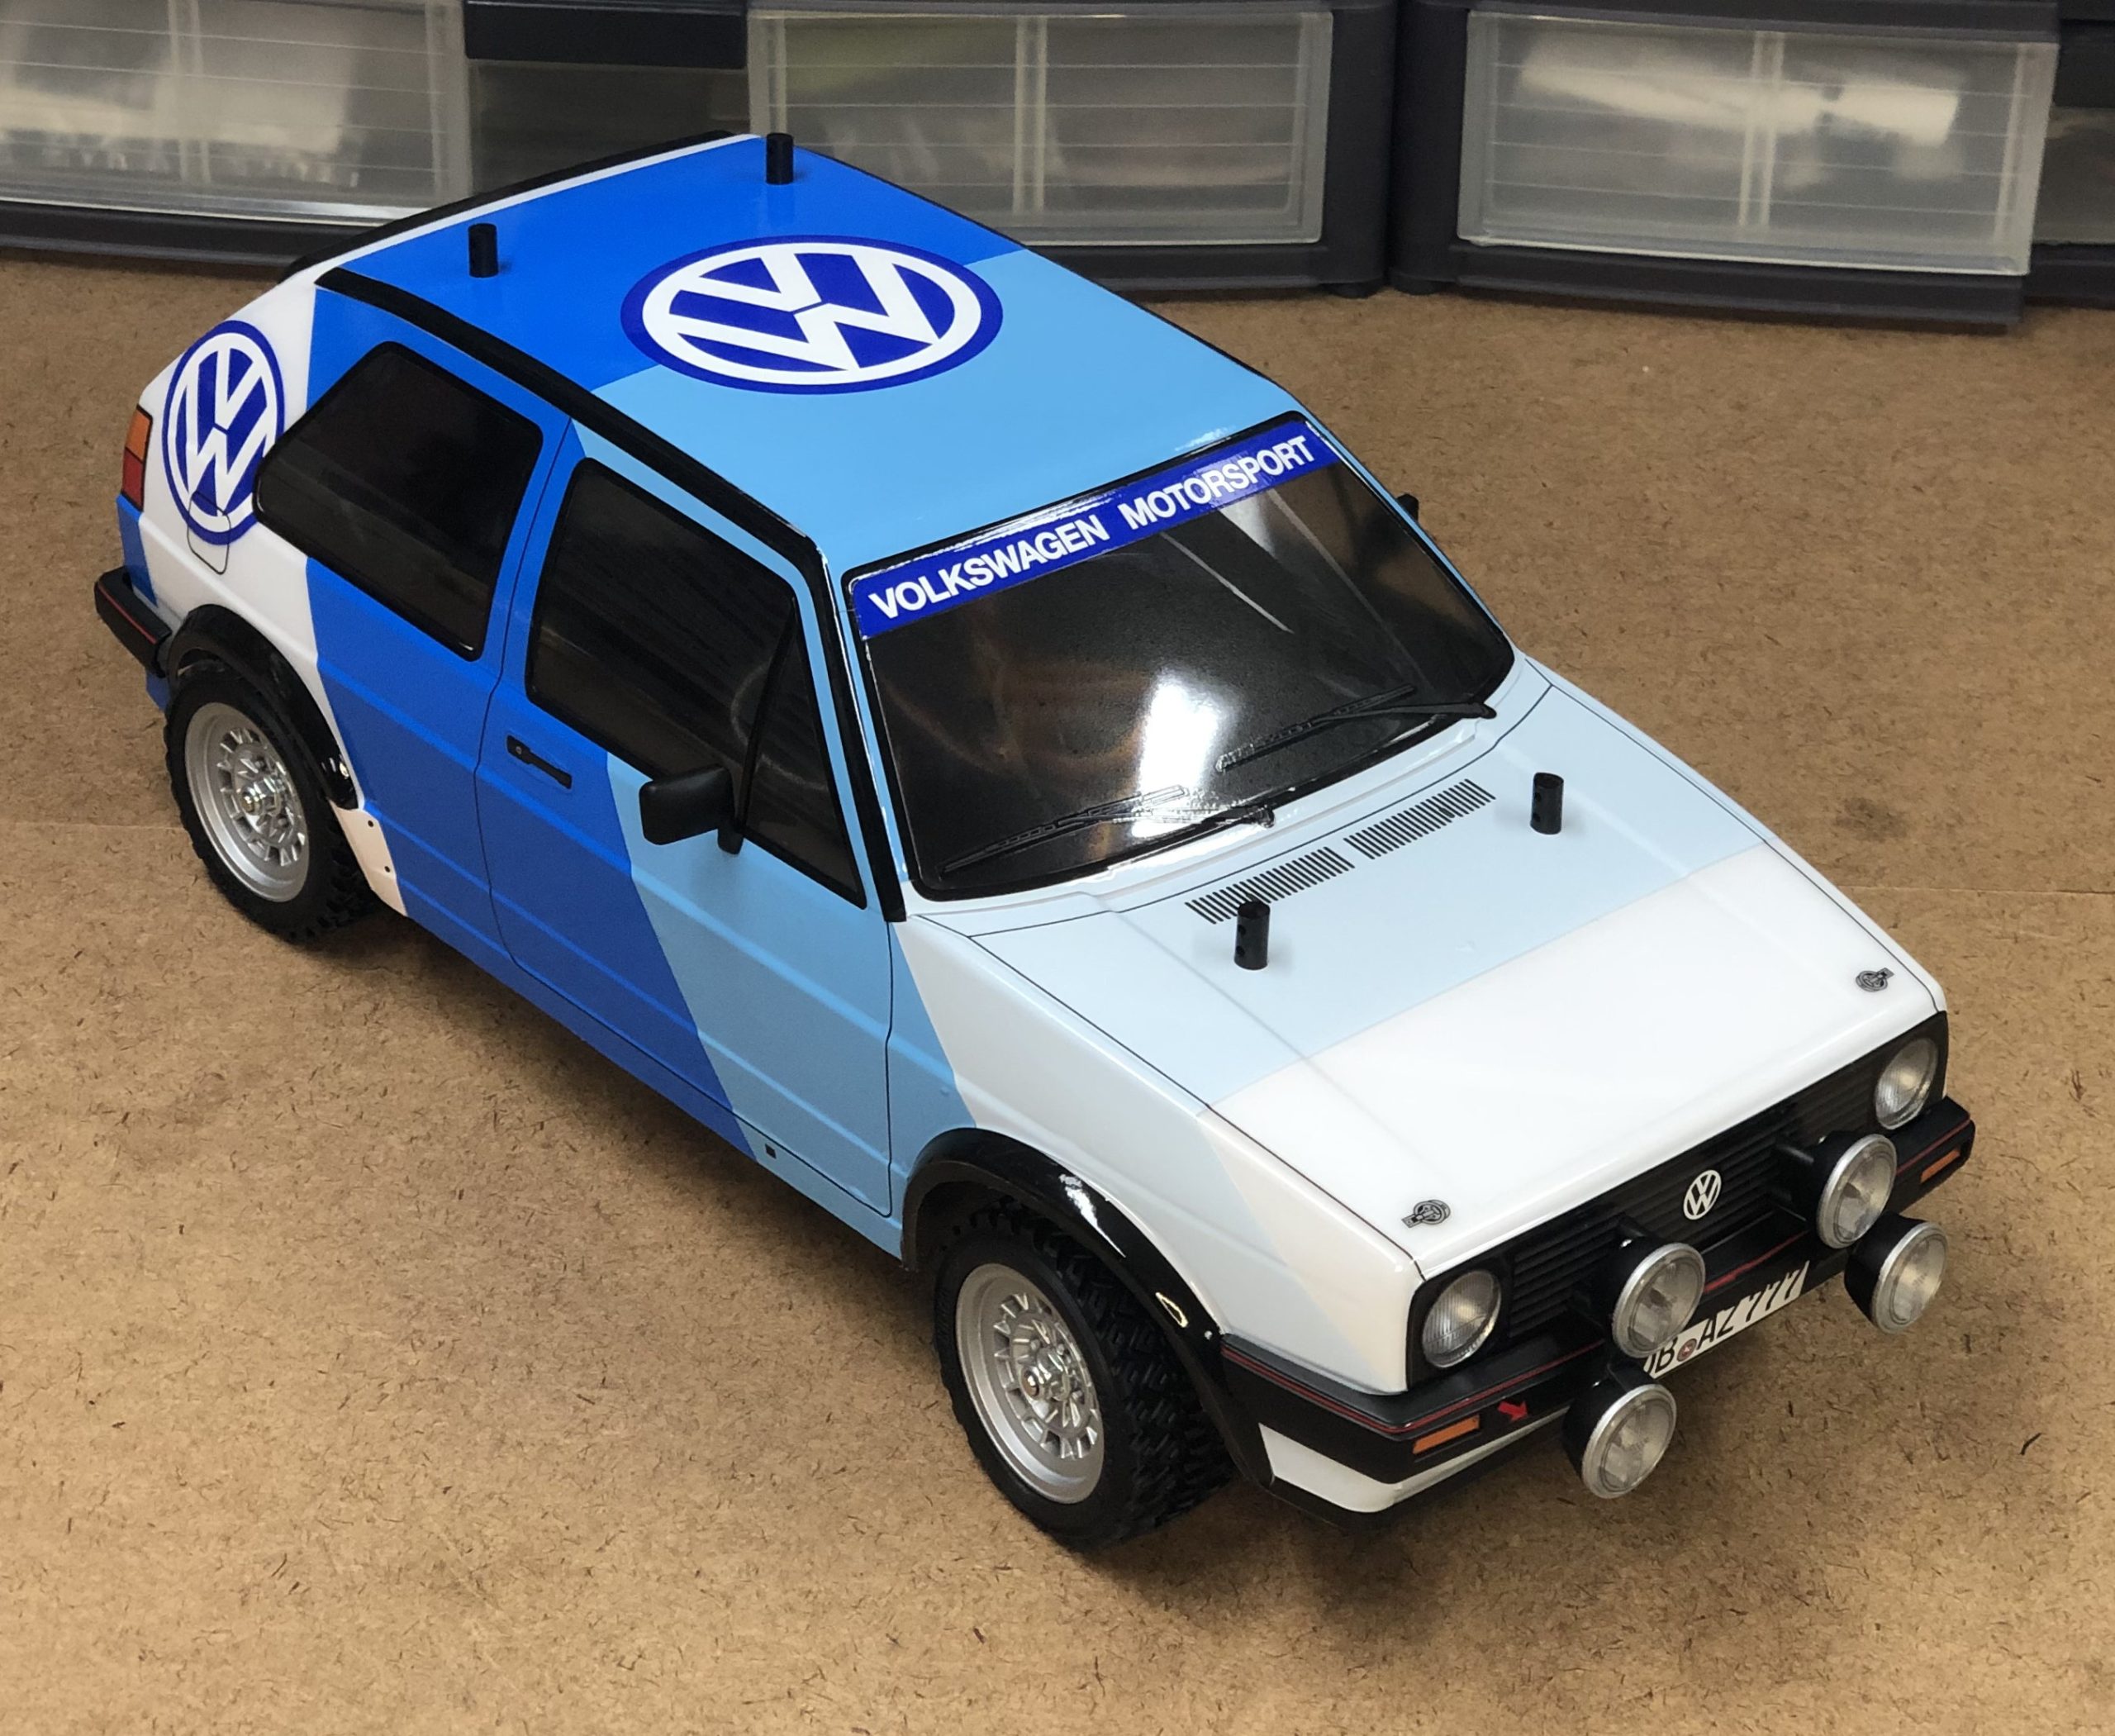
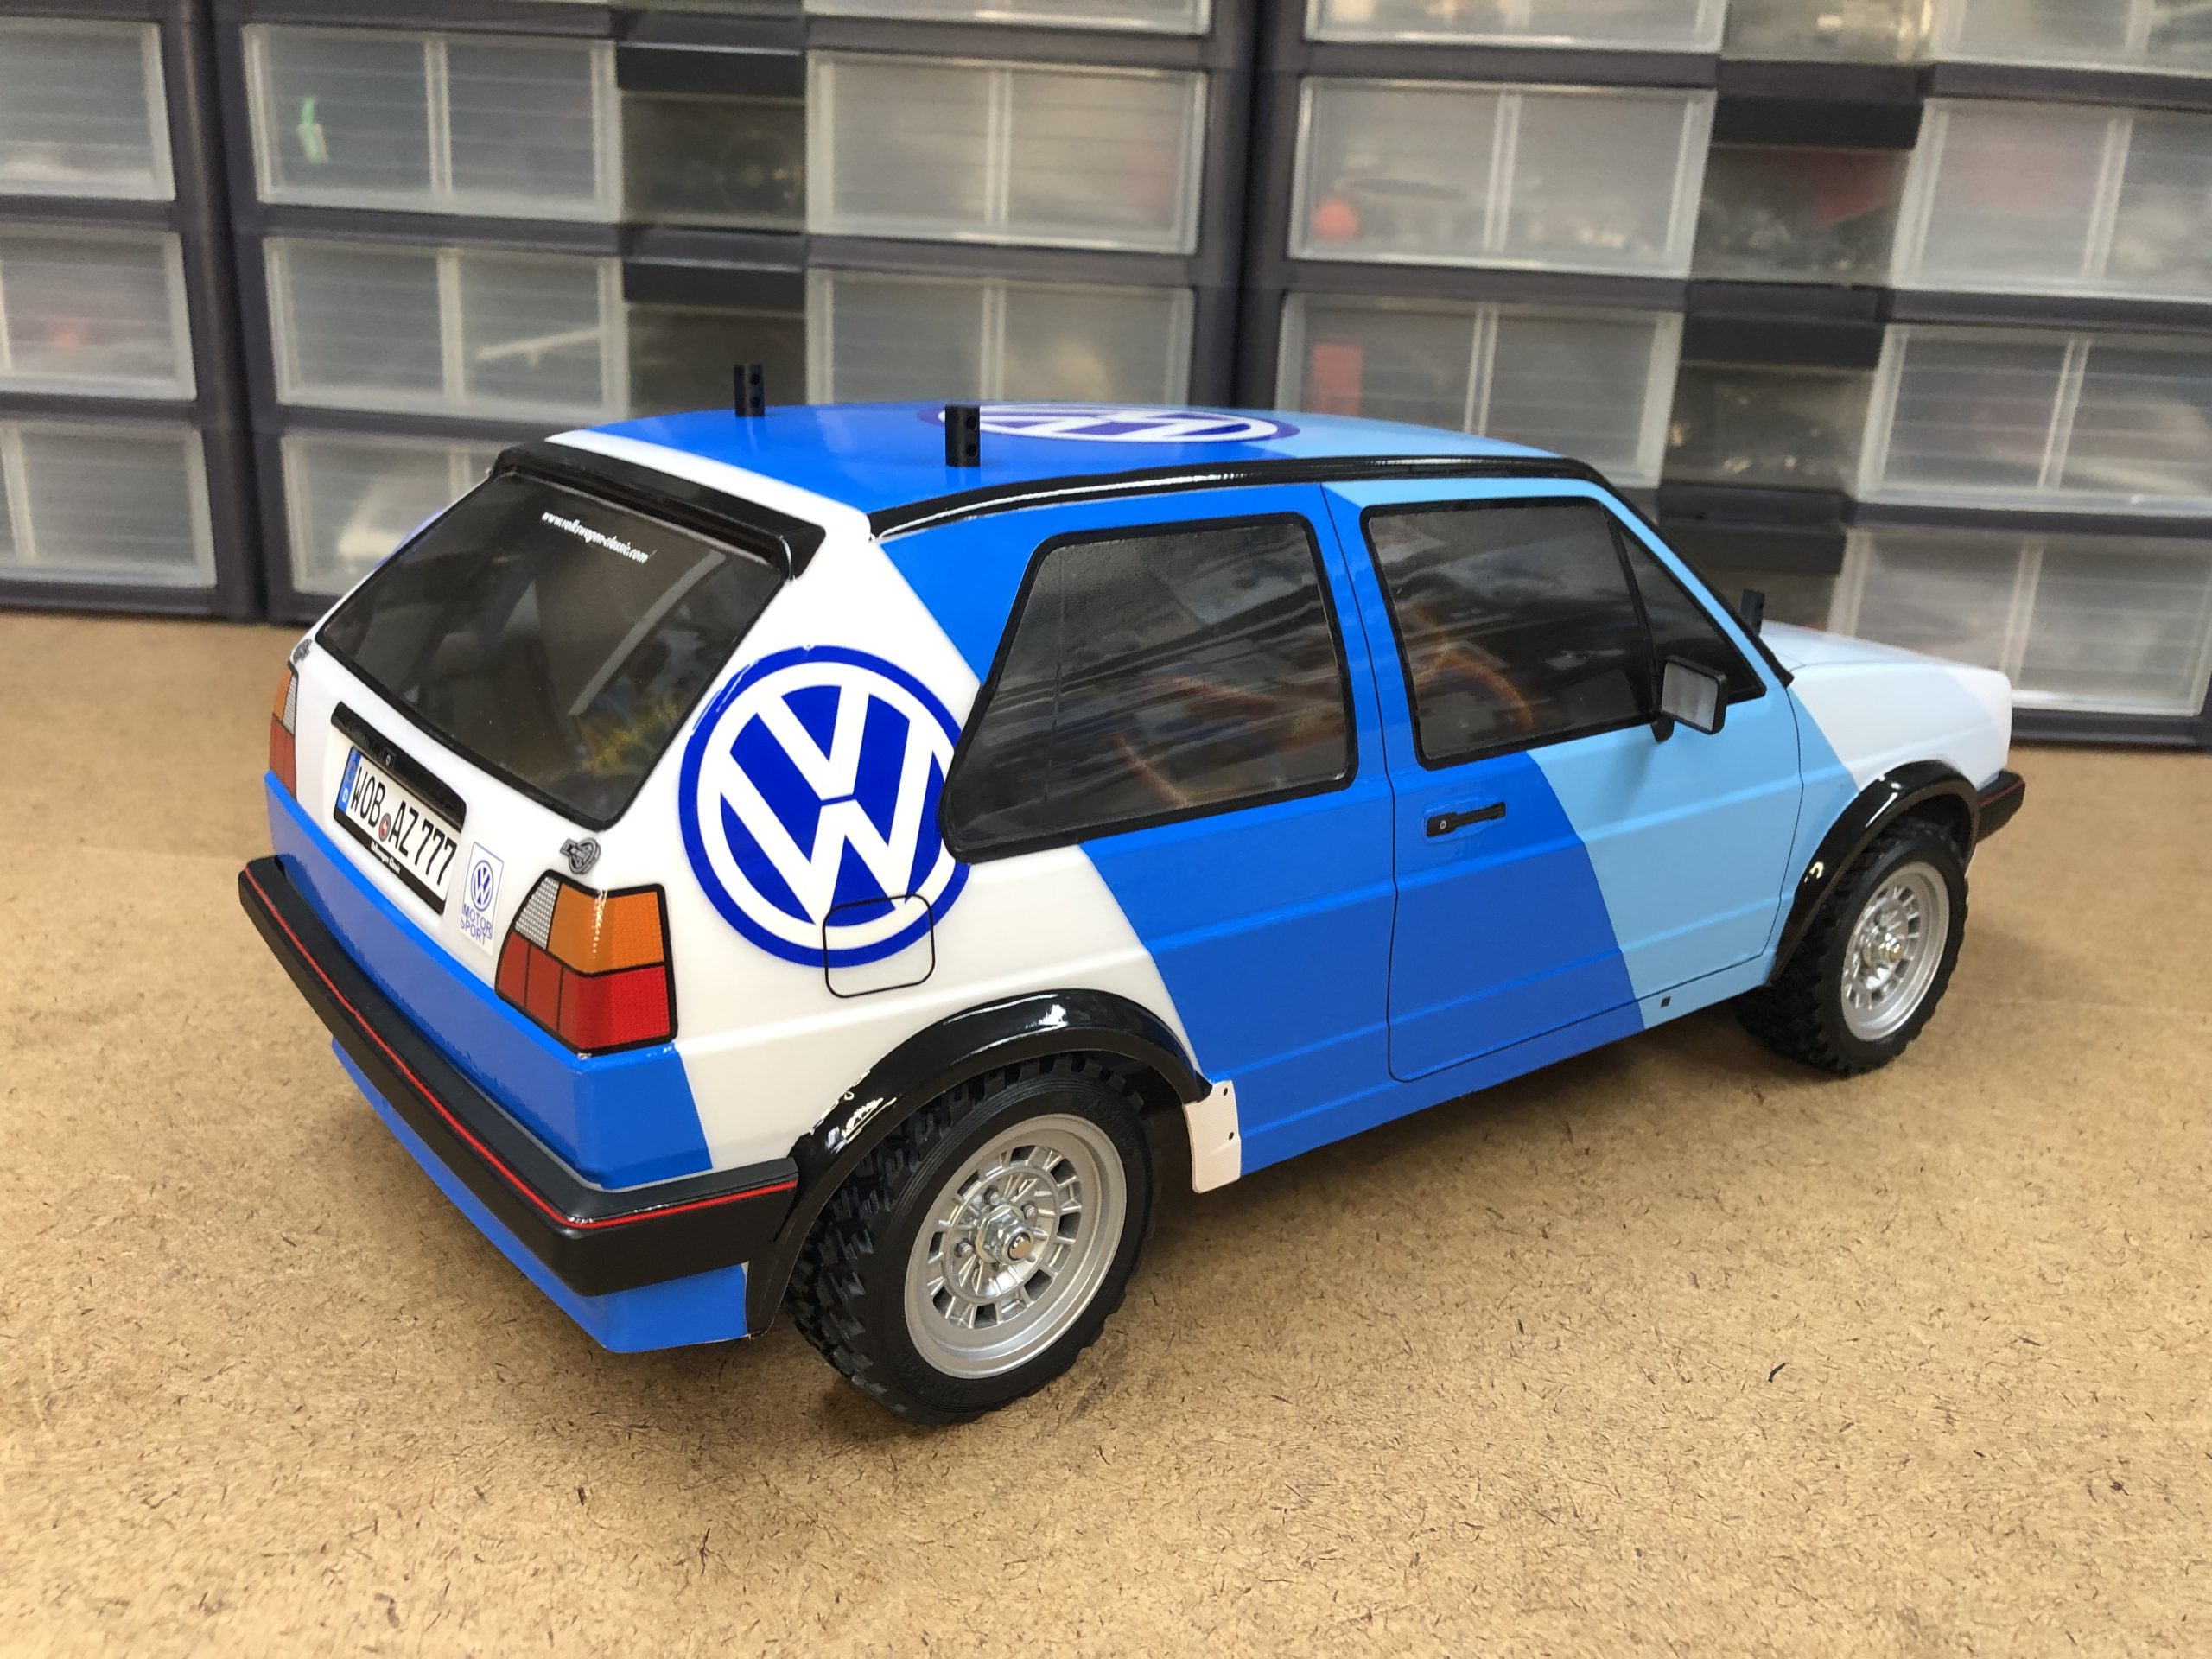
The Tamiya VW Golf II Rally kit comes with two large sheets of stickers so that you can recreate the box art. With so many stickers that need to be placed, it is crucial that you keep the surface of the body as clean and lint free as possible. Avoid handling the body more than you need to because the oils from your fingers can hinder good adhesion for the stickers. We like to use some rubbing alcohol on a paper towel to wipe down the area on the body we are about to work on as an extra step to guarantee the body is truly clean.
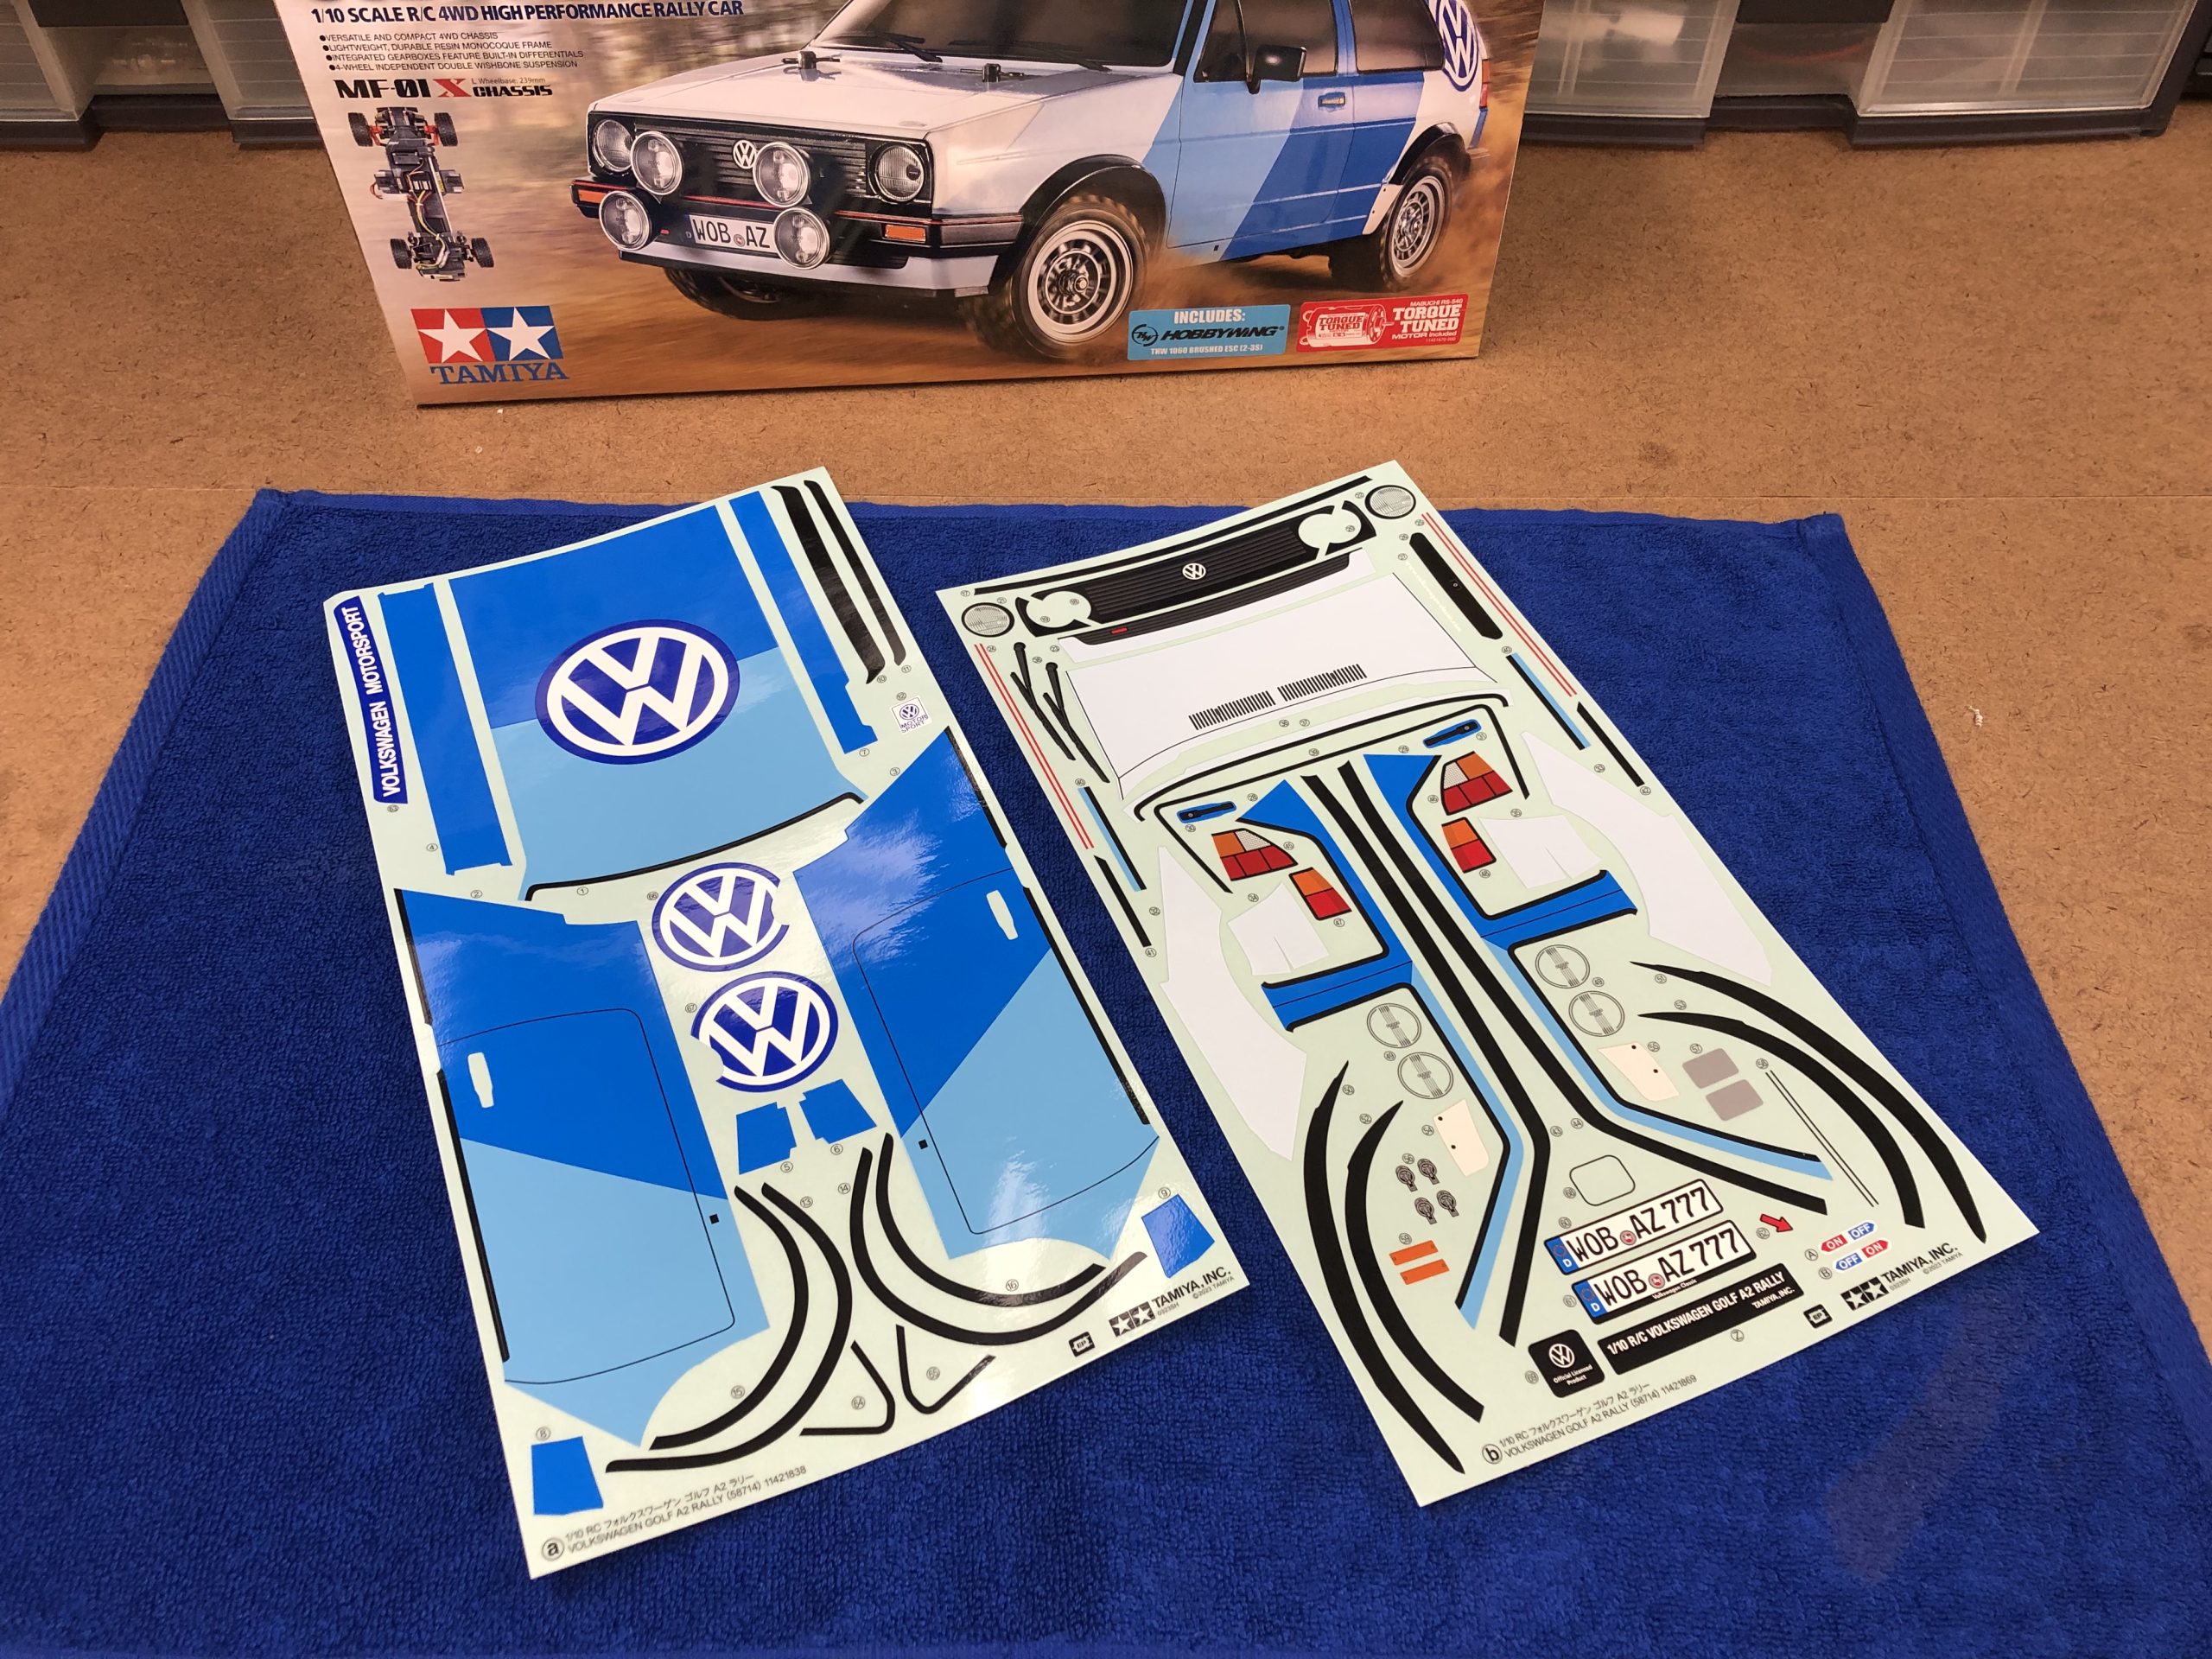
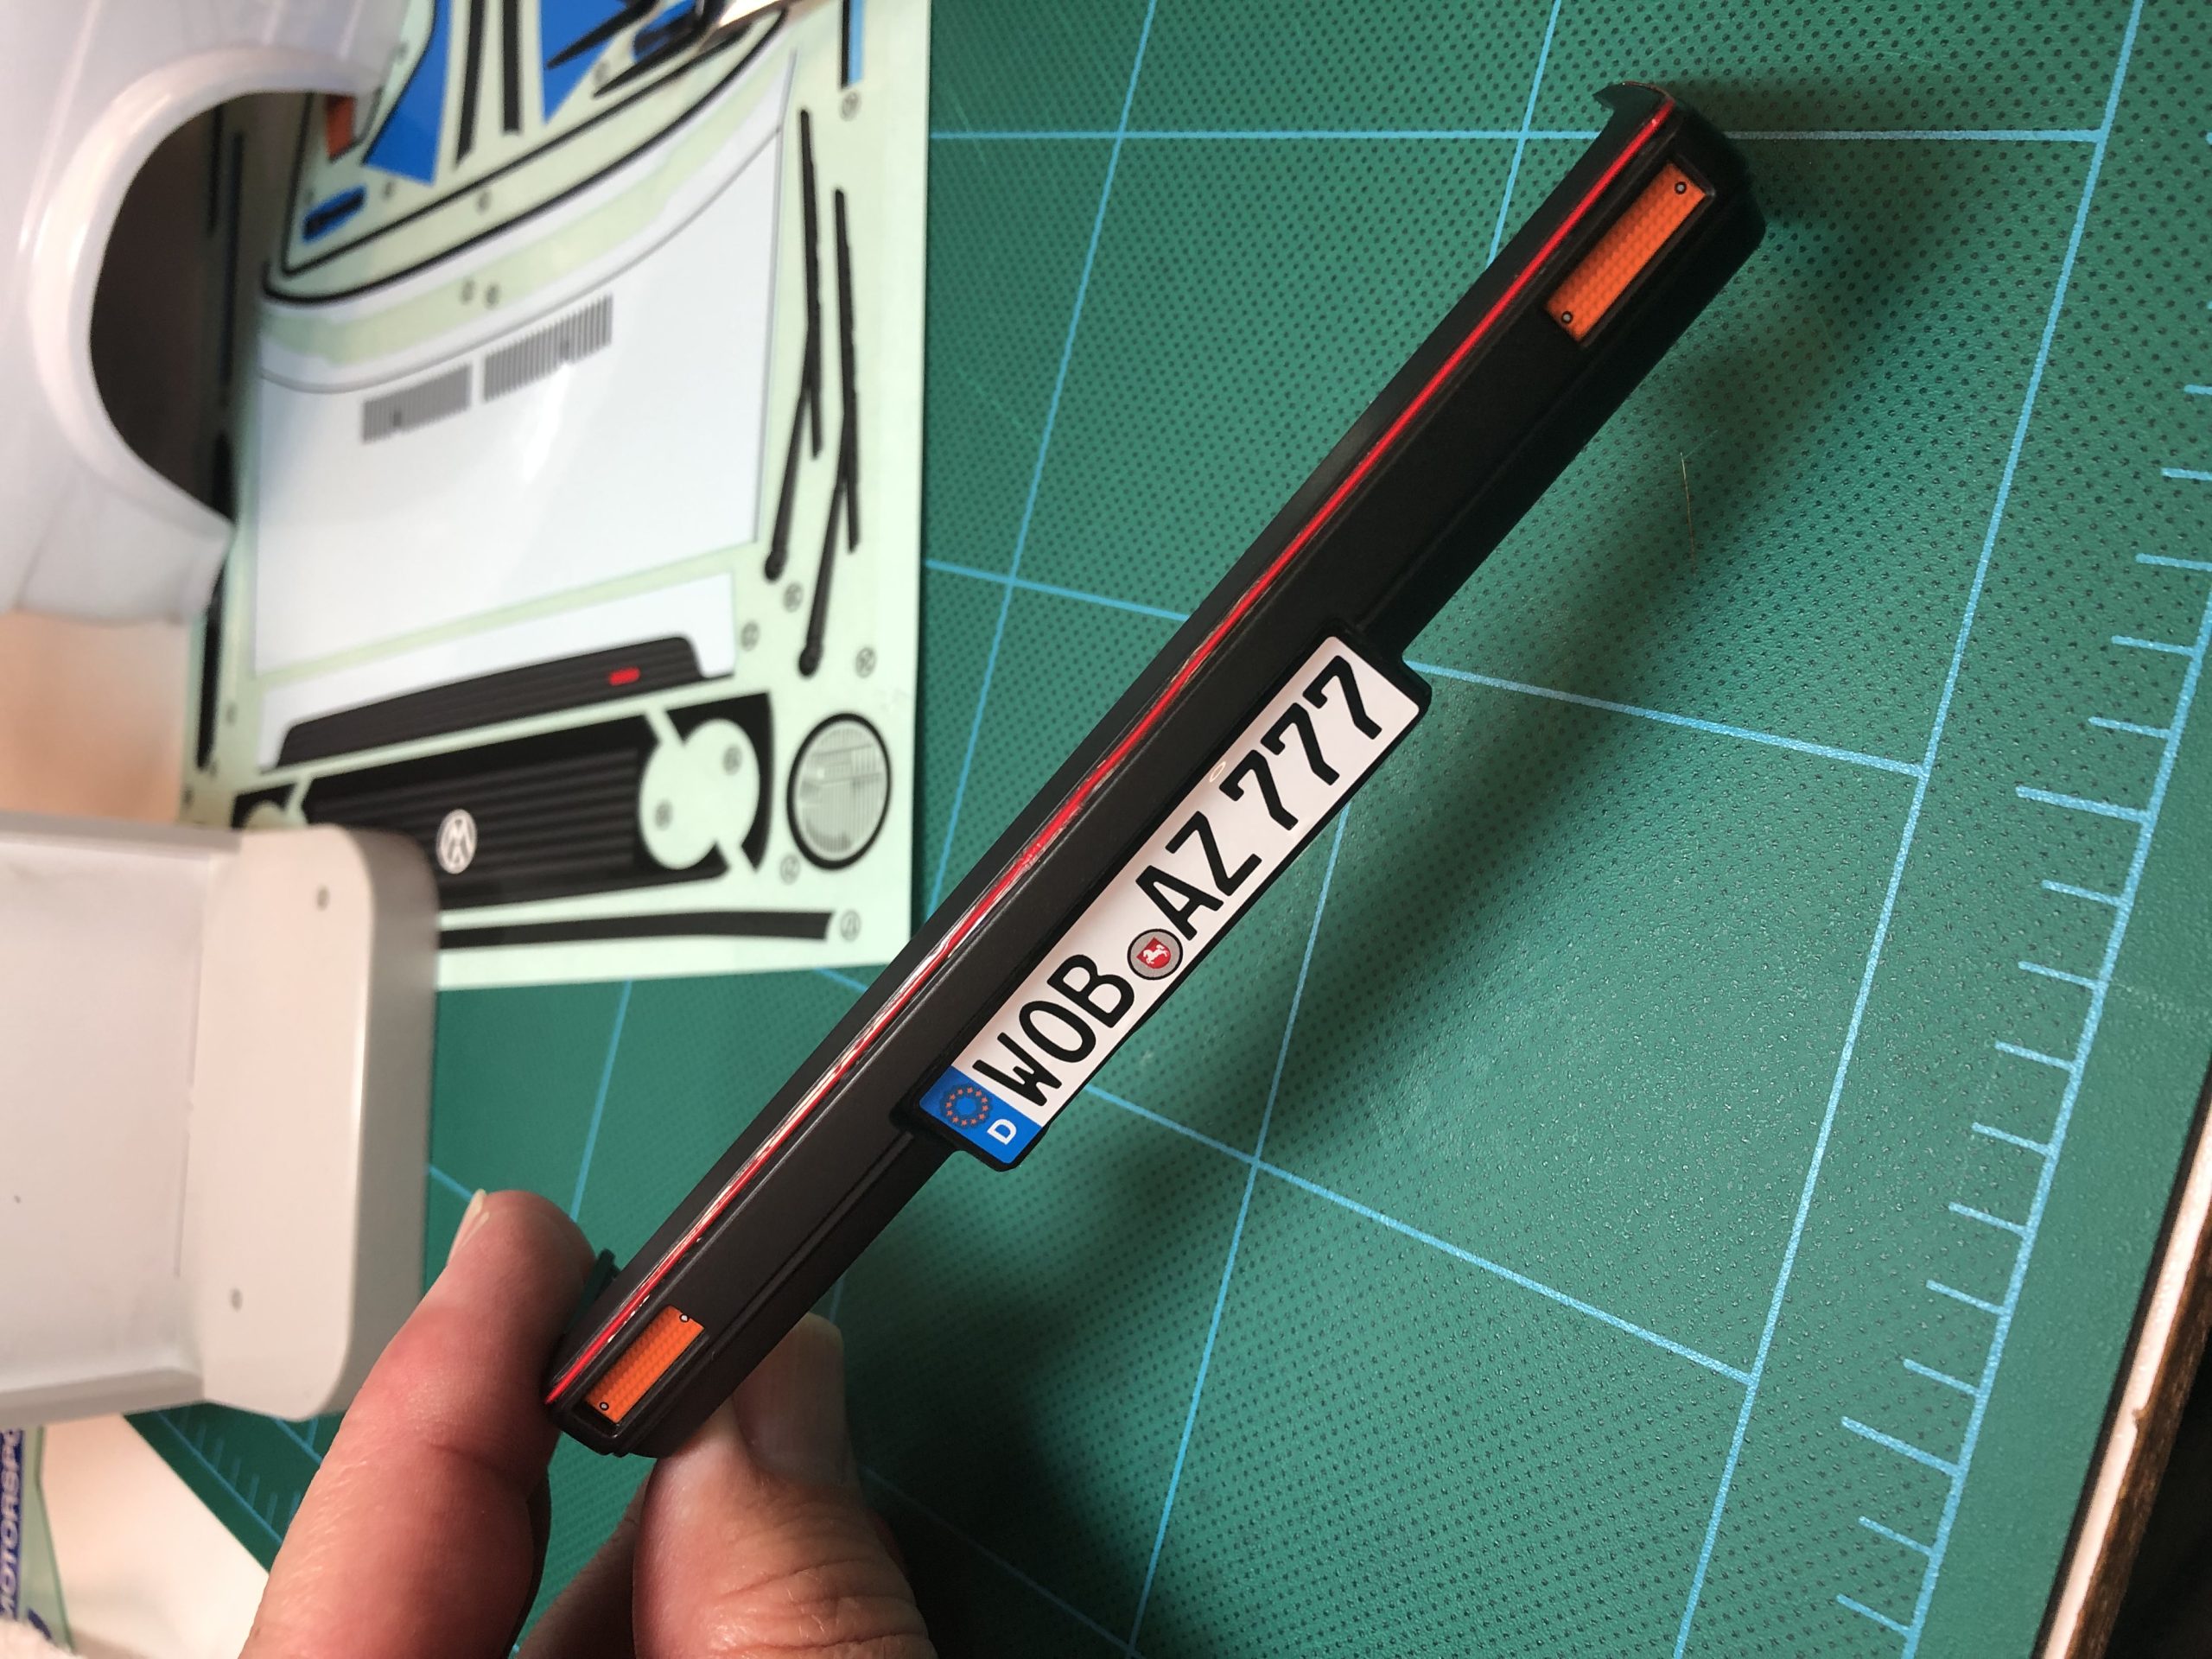
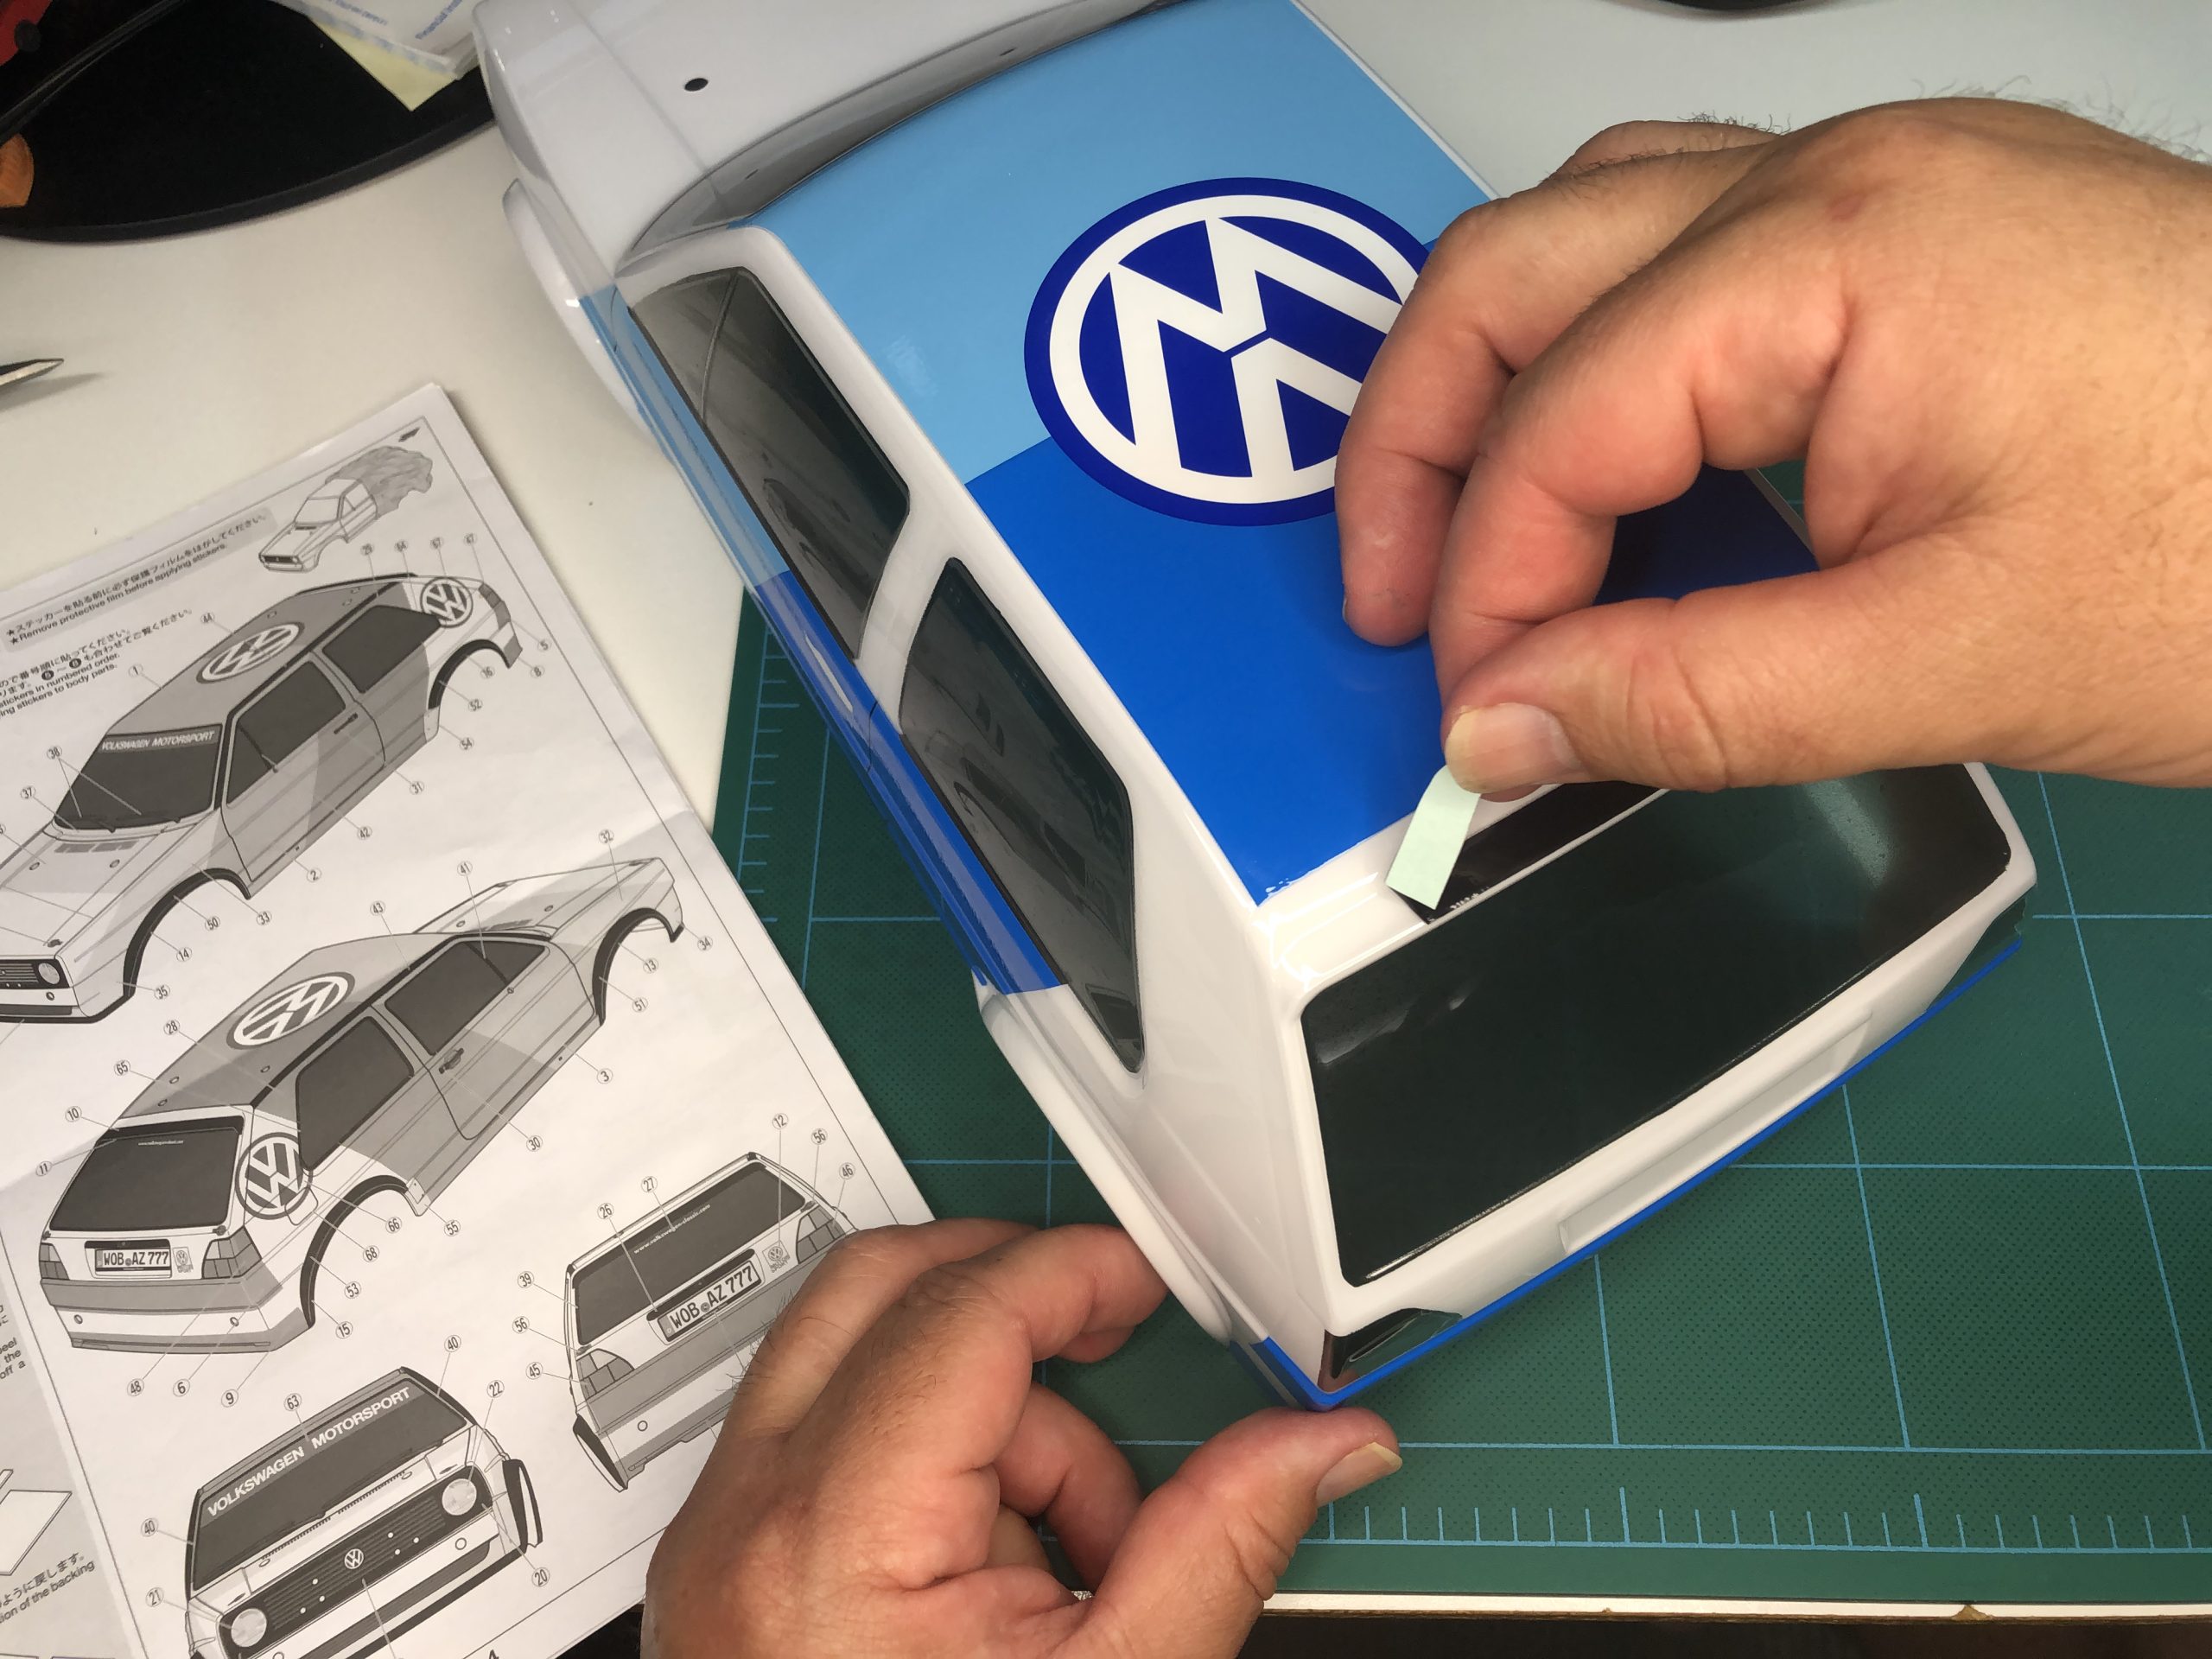
When trimming out each sticker, cut exactly along the edge so that you eliminate any clear sticker material. The clear portion of the sticker will be visible once adhered to the body even though it is clear. This is especially true for parts like the front bumper where the sticker needs to sit perfectly inside of a recess like the license plate and marker lights.

Clean off the section of the body you are about to put stickers on with a paper towel moistened with rubbing alcohol.
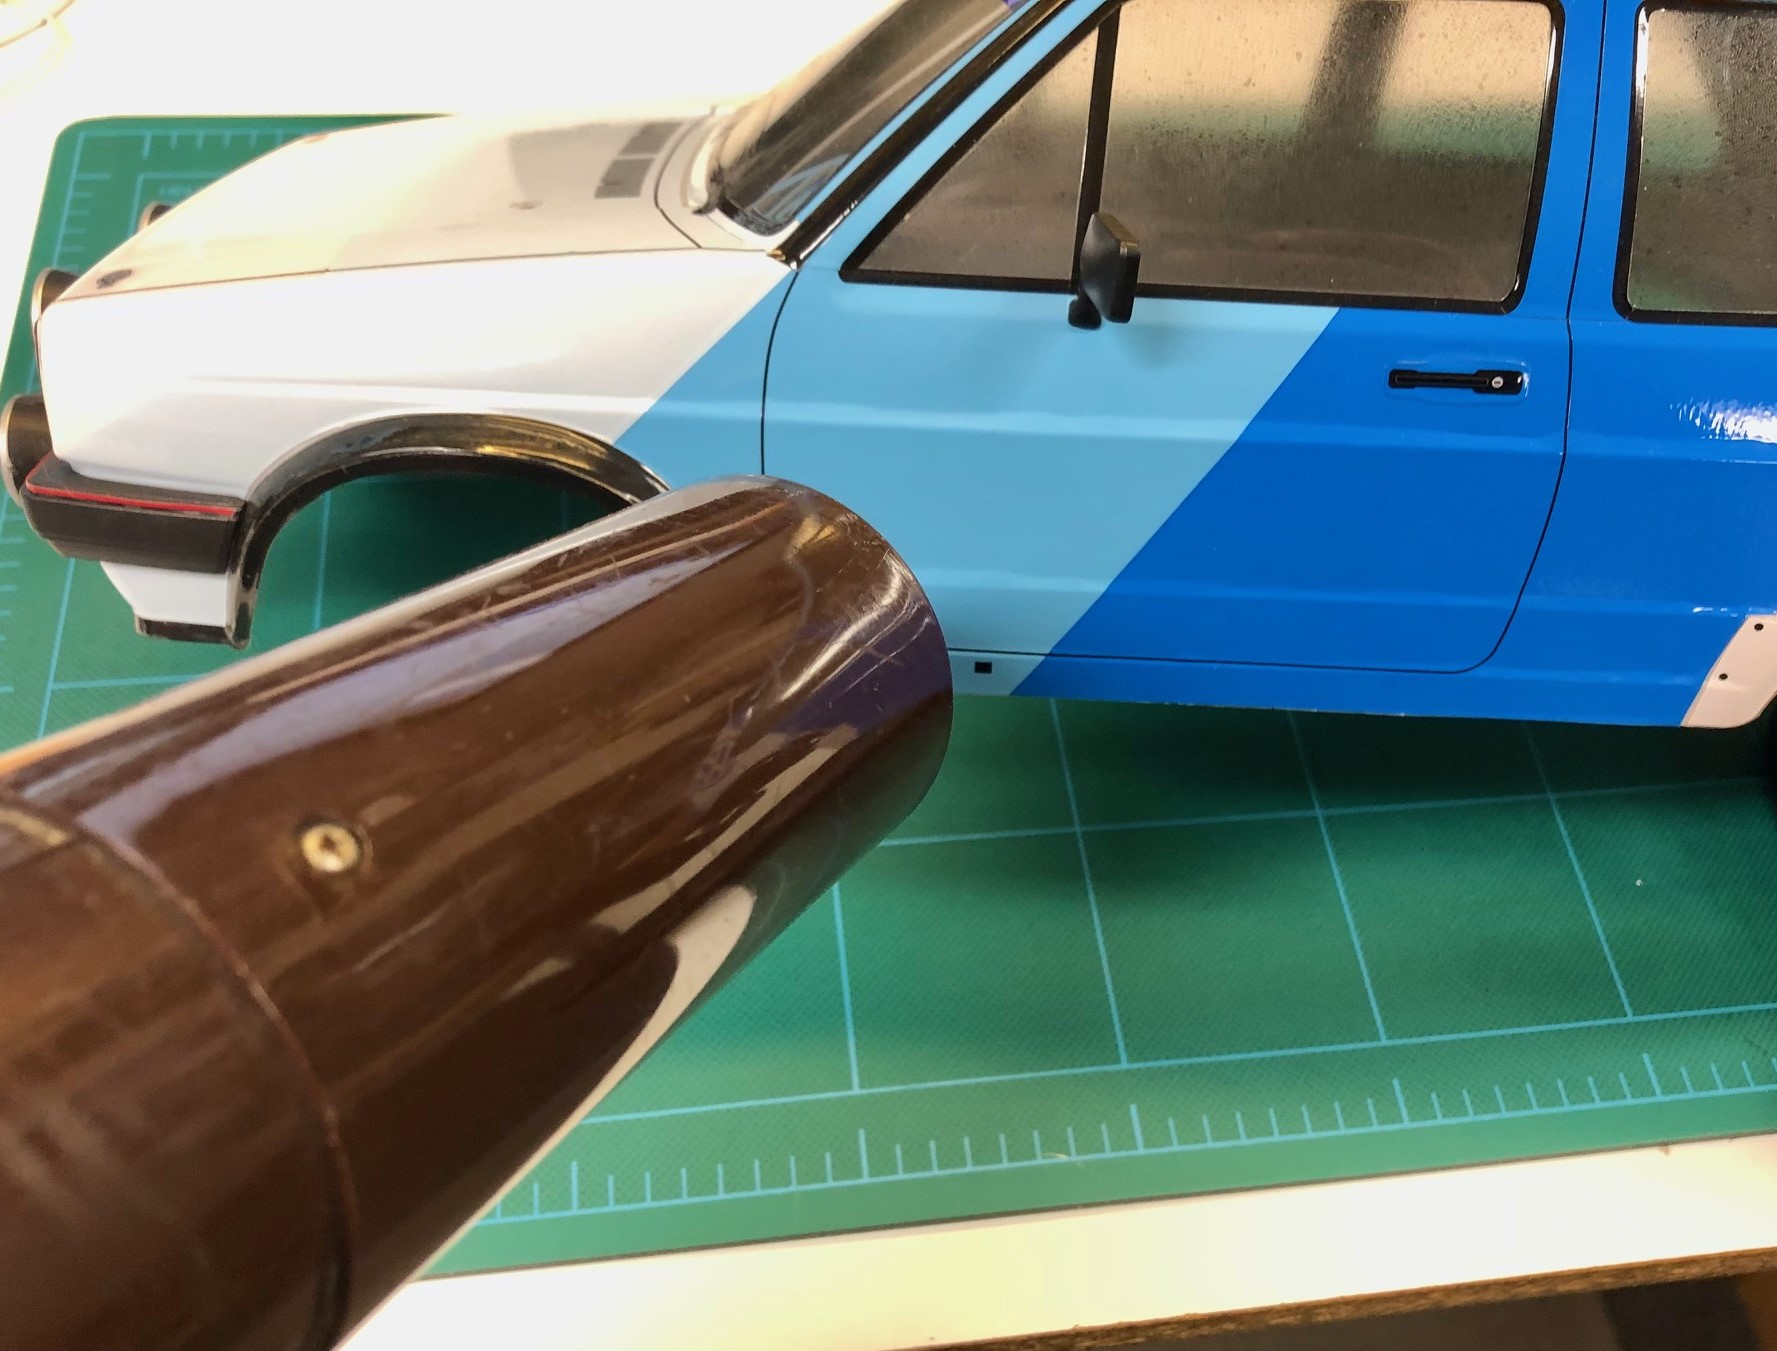
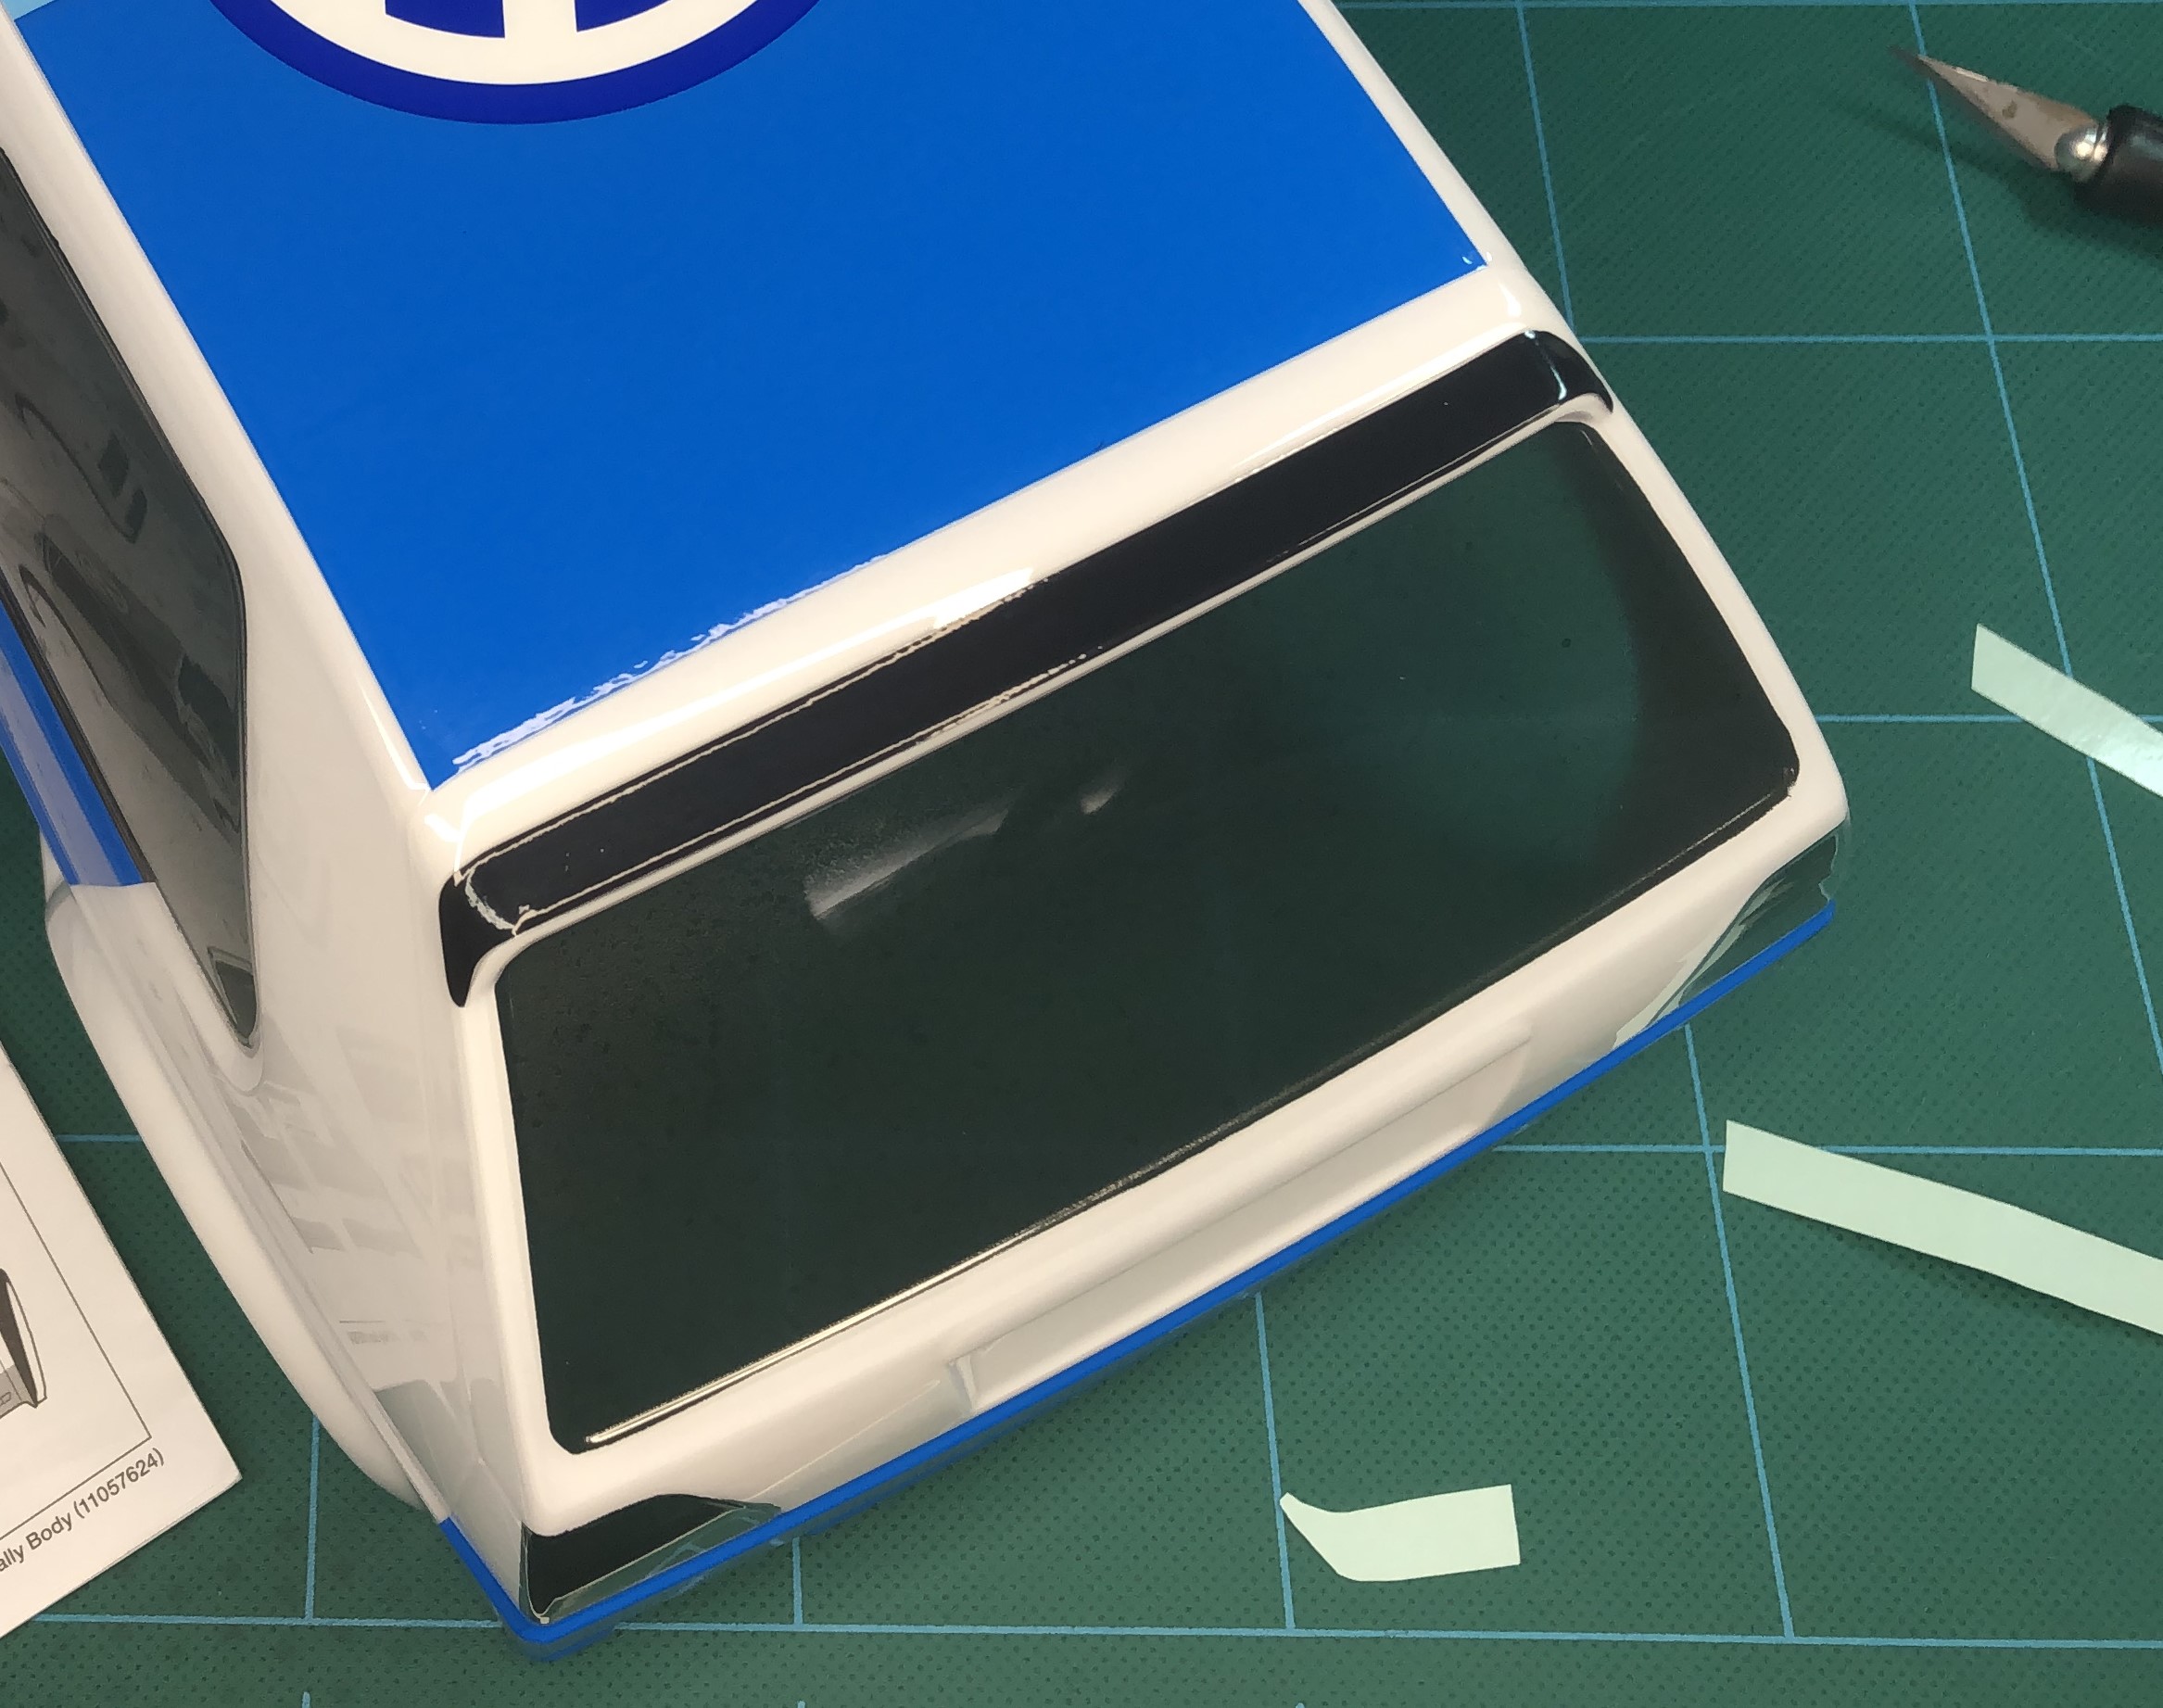
USE A HAIR DRYER
If you run into any areas where there are compound curves on the body and/or spots where the sticker is not laying flat against the body or it is wrinkled, use a hairdryer to warm up the sticker. This will make the sticker more pliable and will help activate the adhesive to ensure a secure bond.
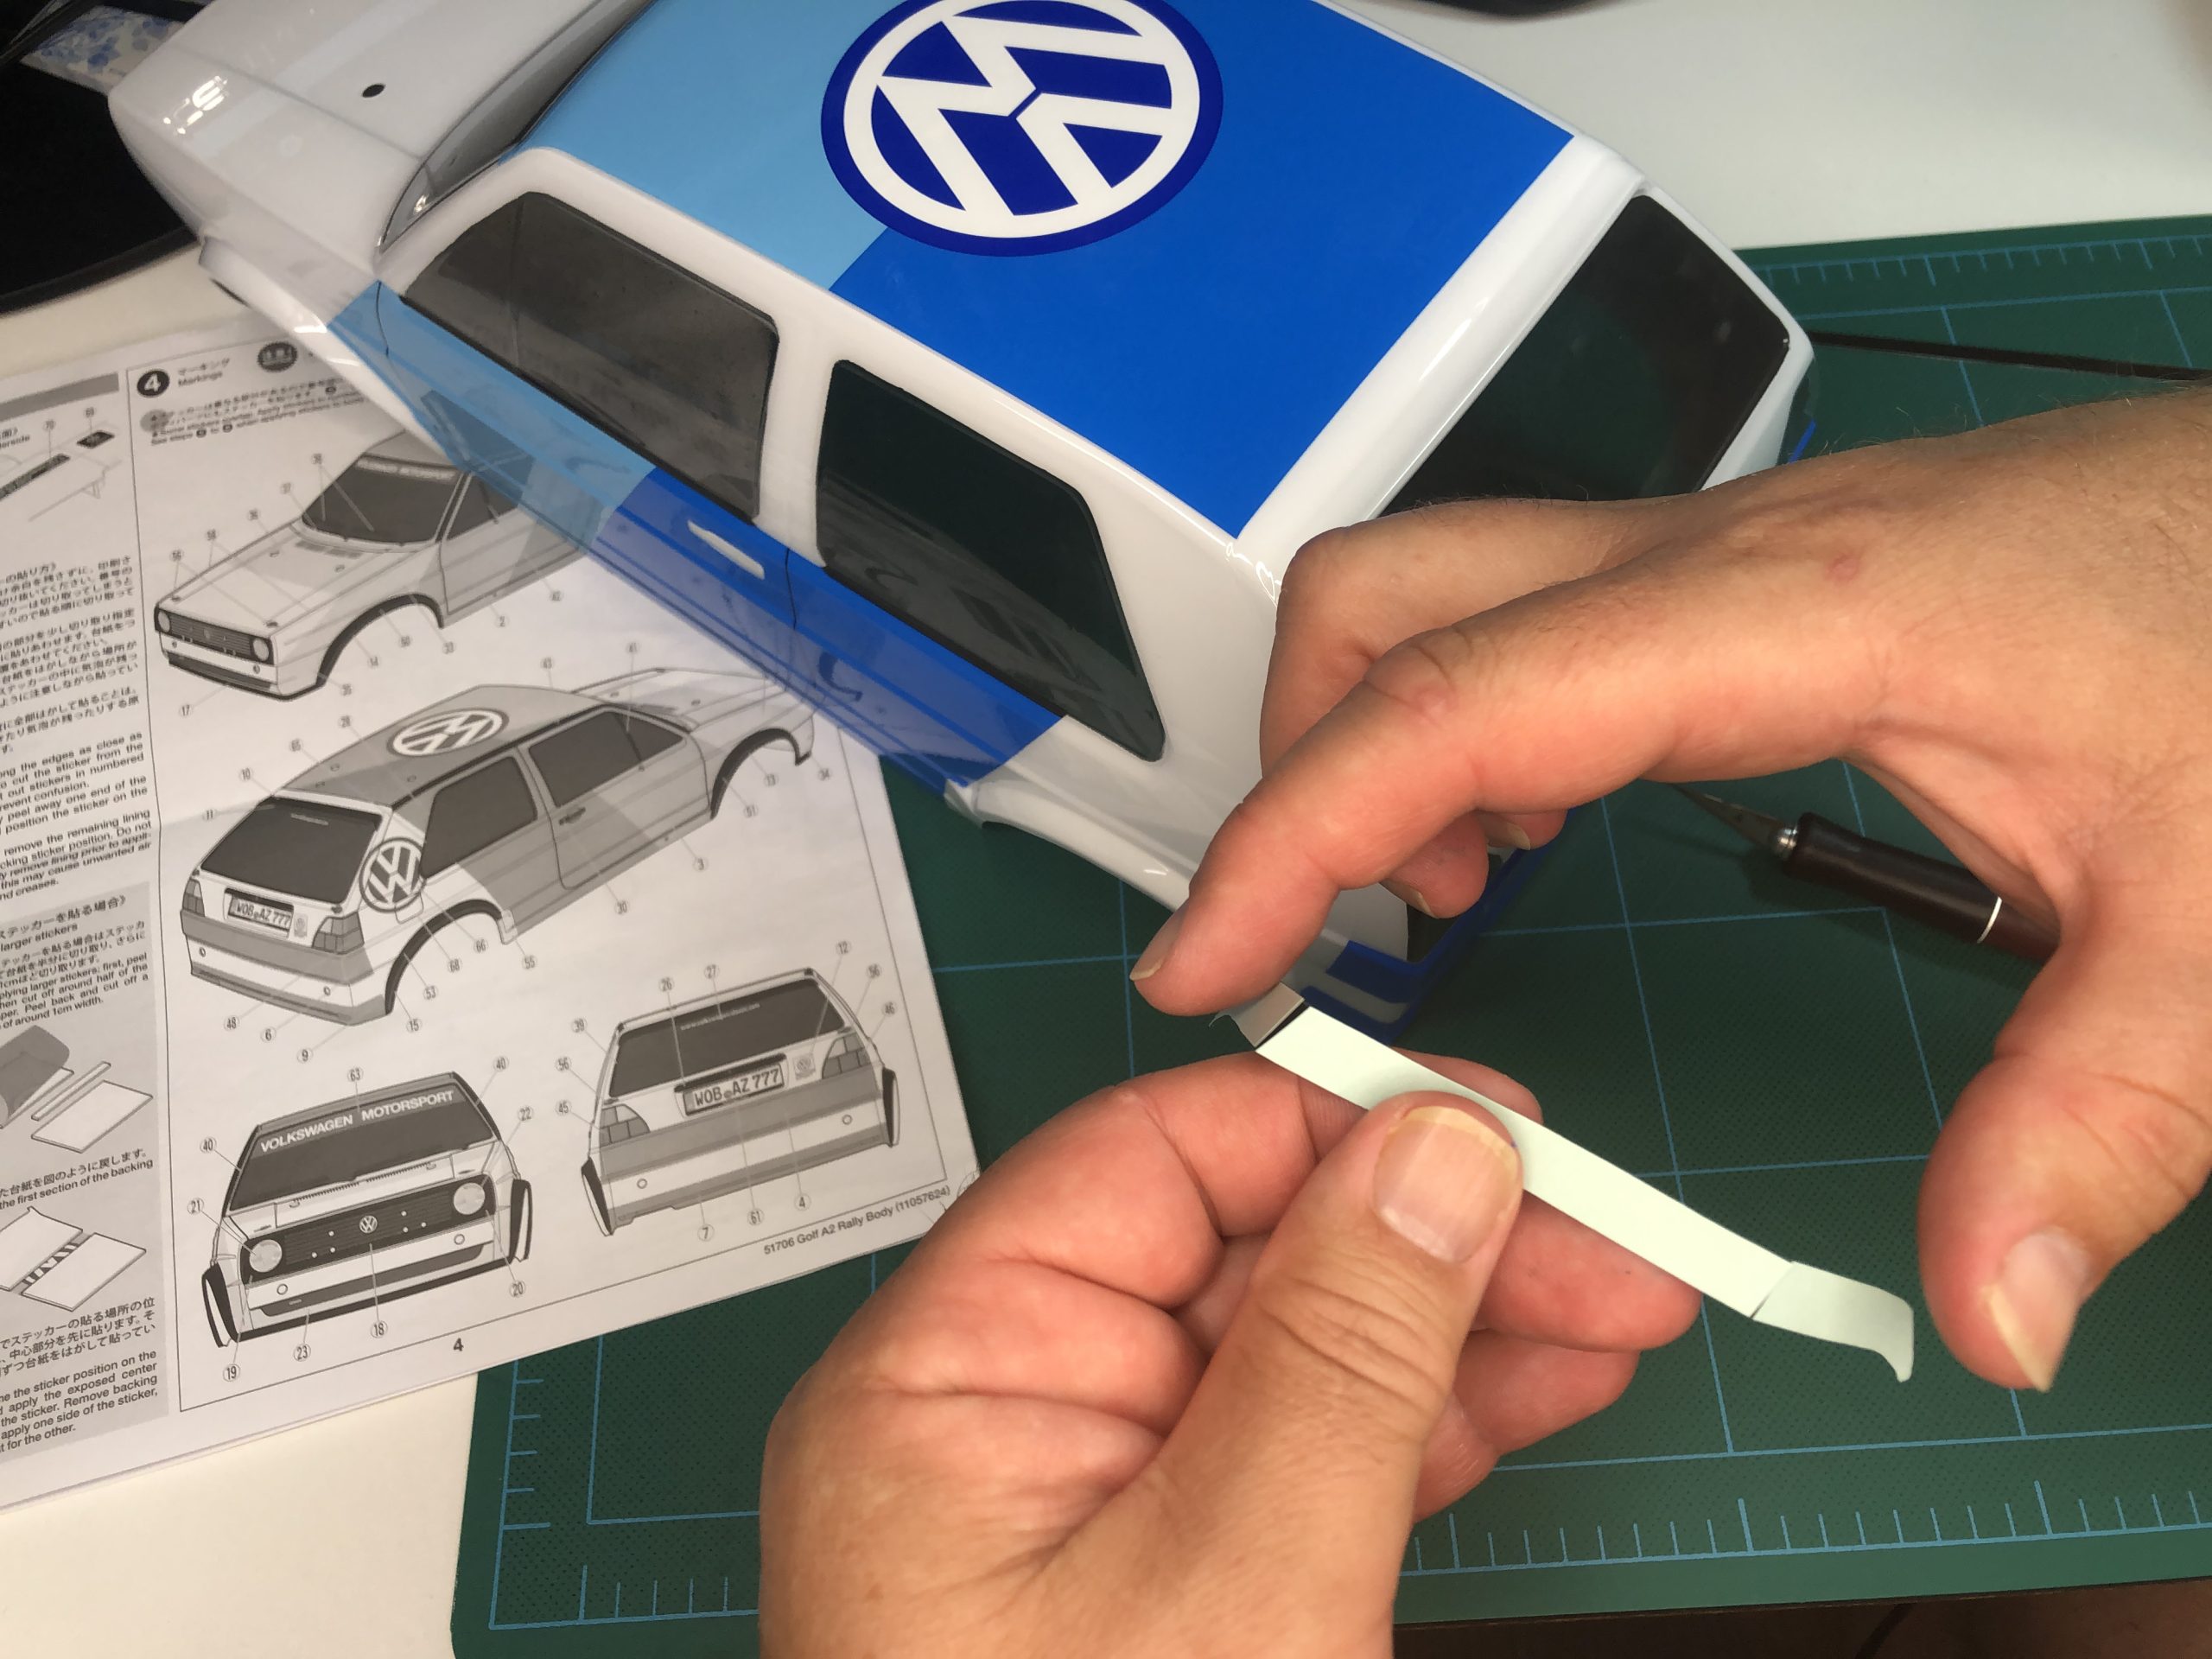
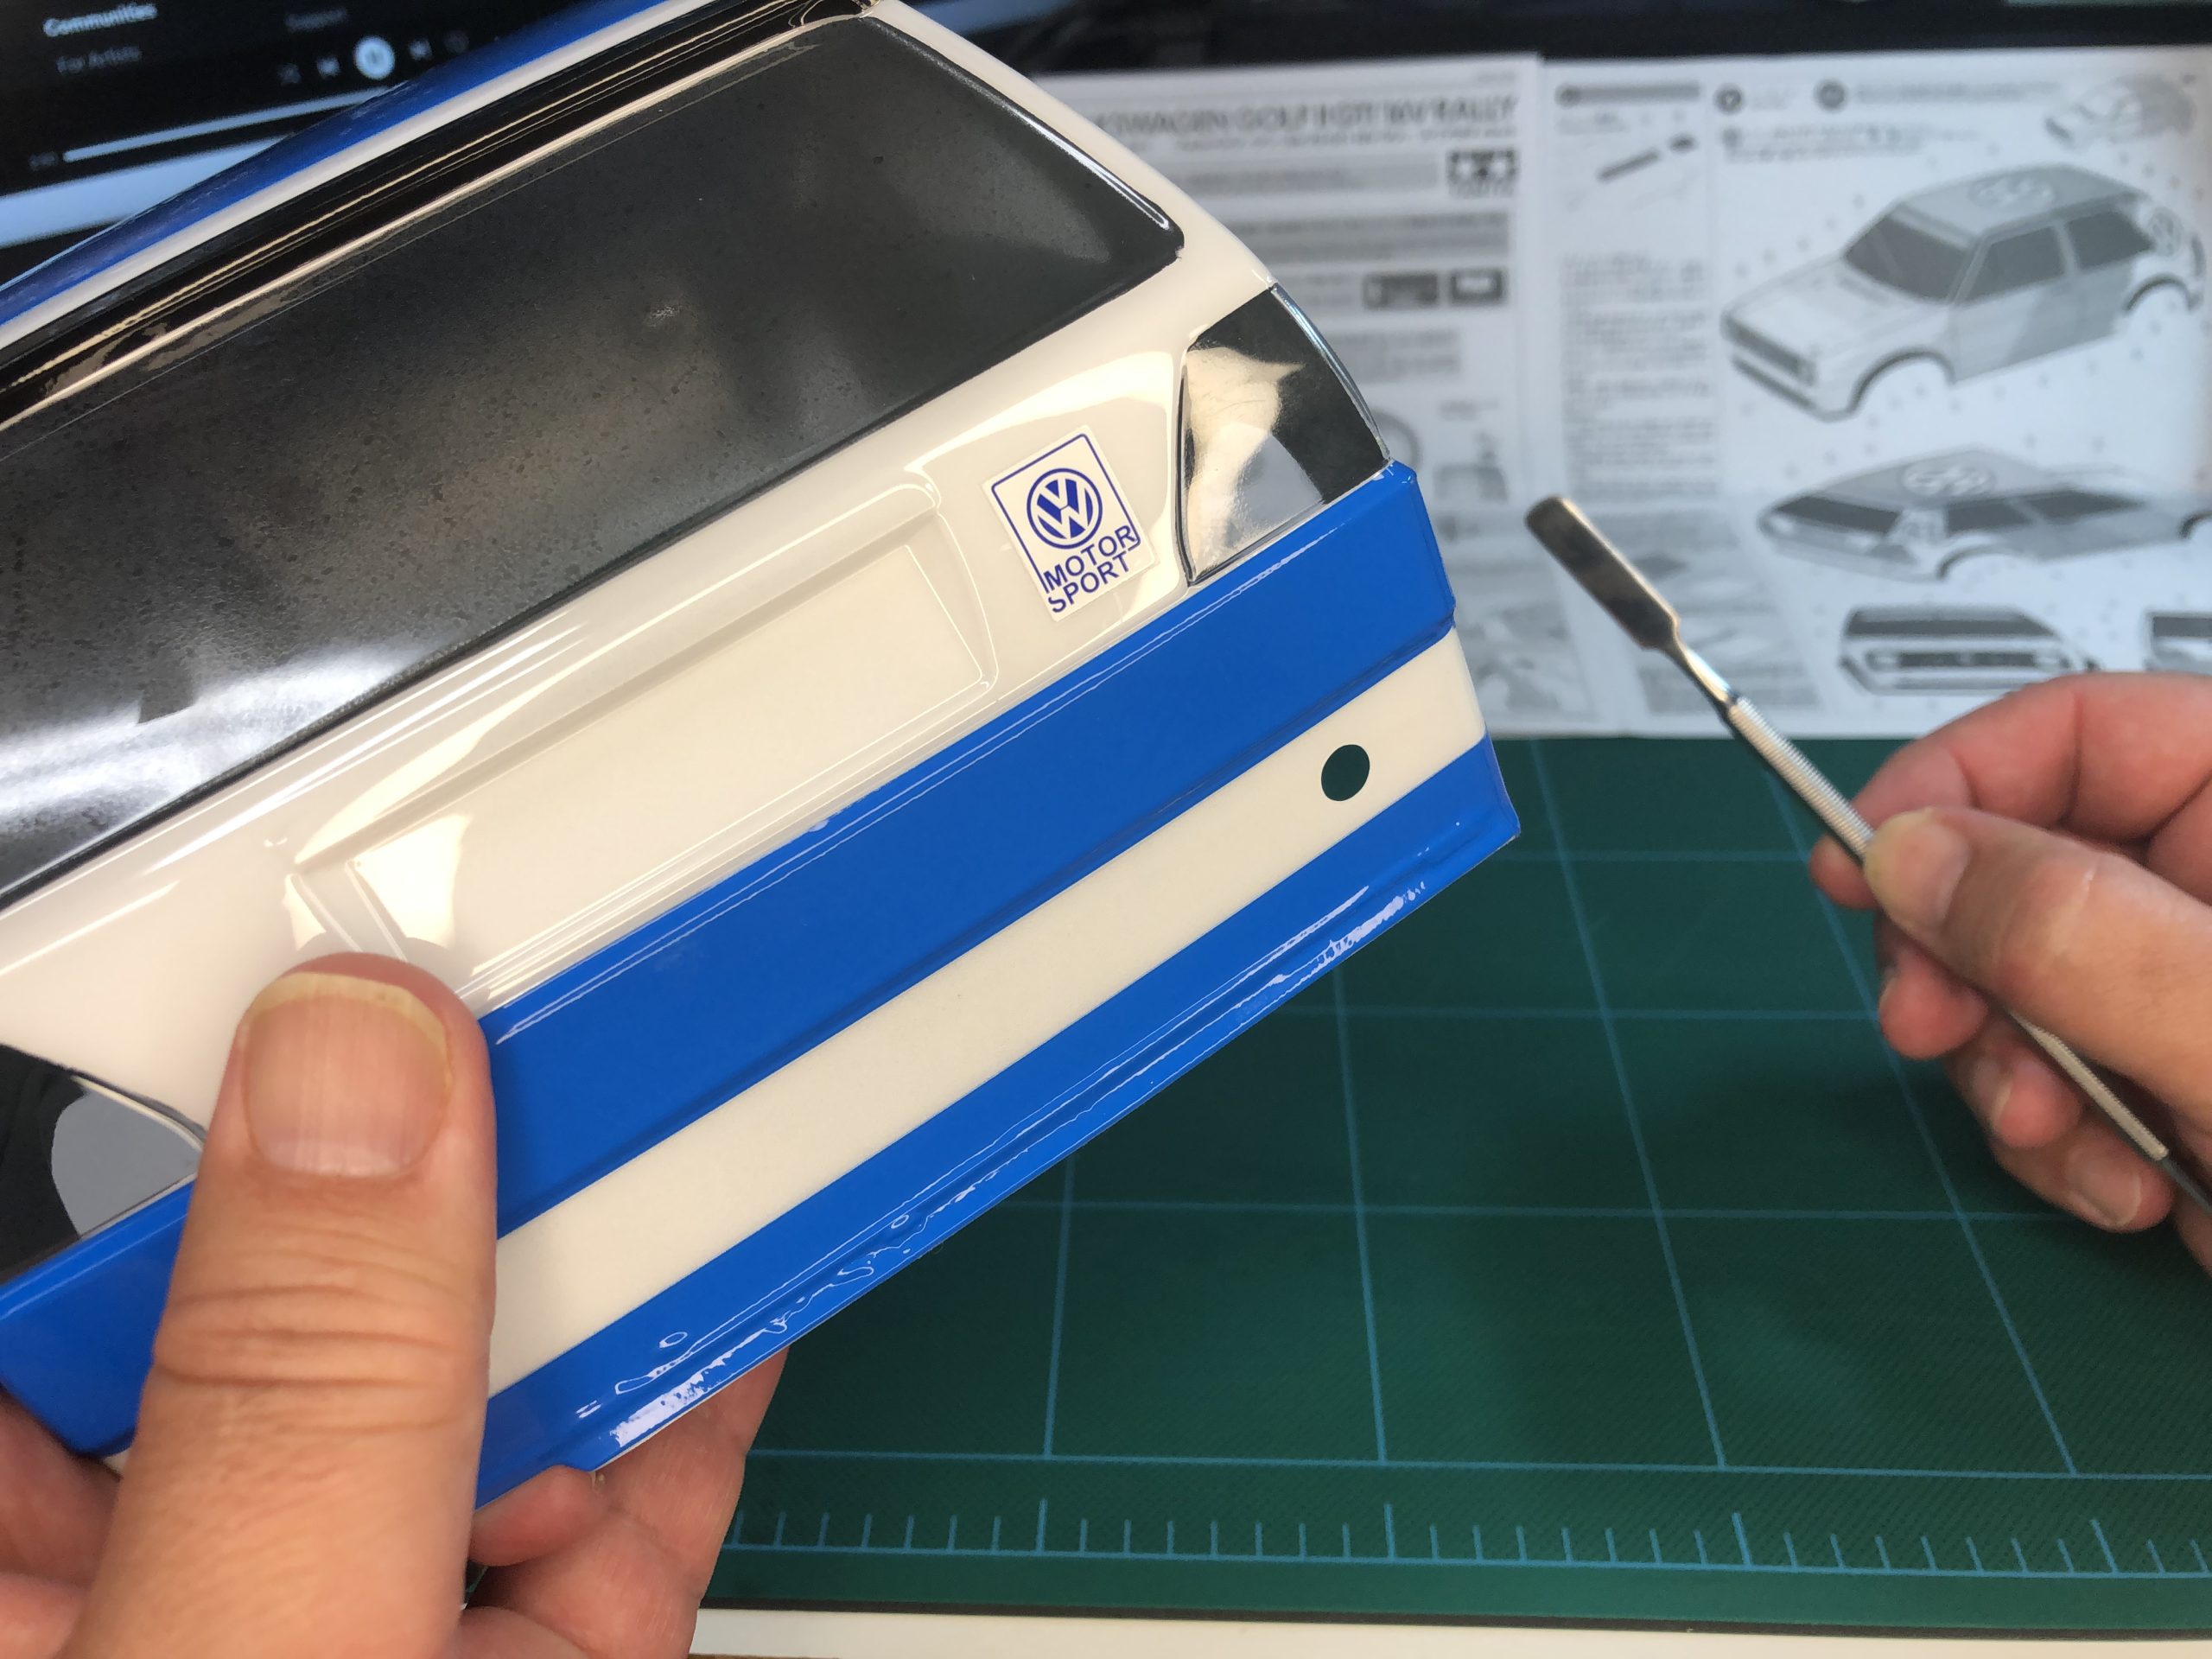
HOW TO ACHIEVE EXACT PLACEMENT WITHOUT DAMAGING STICKER
Obviously there is more than one method to place stickers on a body and we want to share one that we rely on for achieving exact sticker placement while virtually eliminating the chance of ruining the sticker. This process is a bit more time consuming yet the finished product is well worth the time. Below we will show you how we placed the rear spoiler sticker.
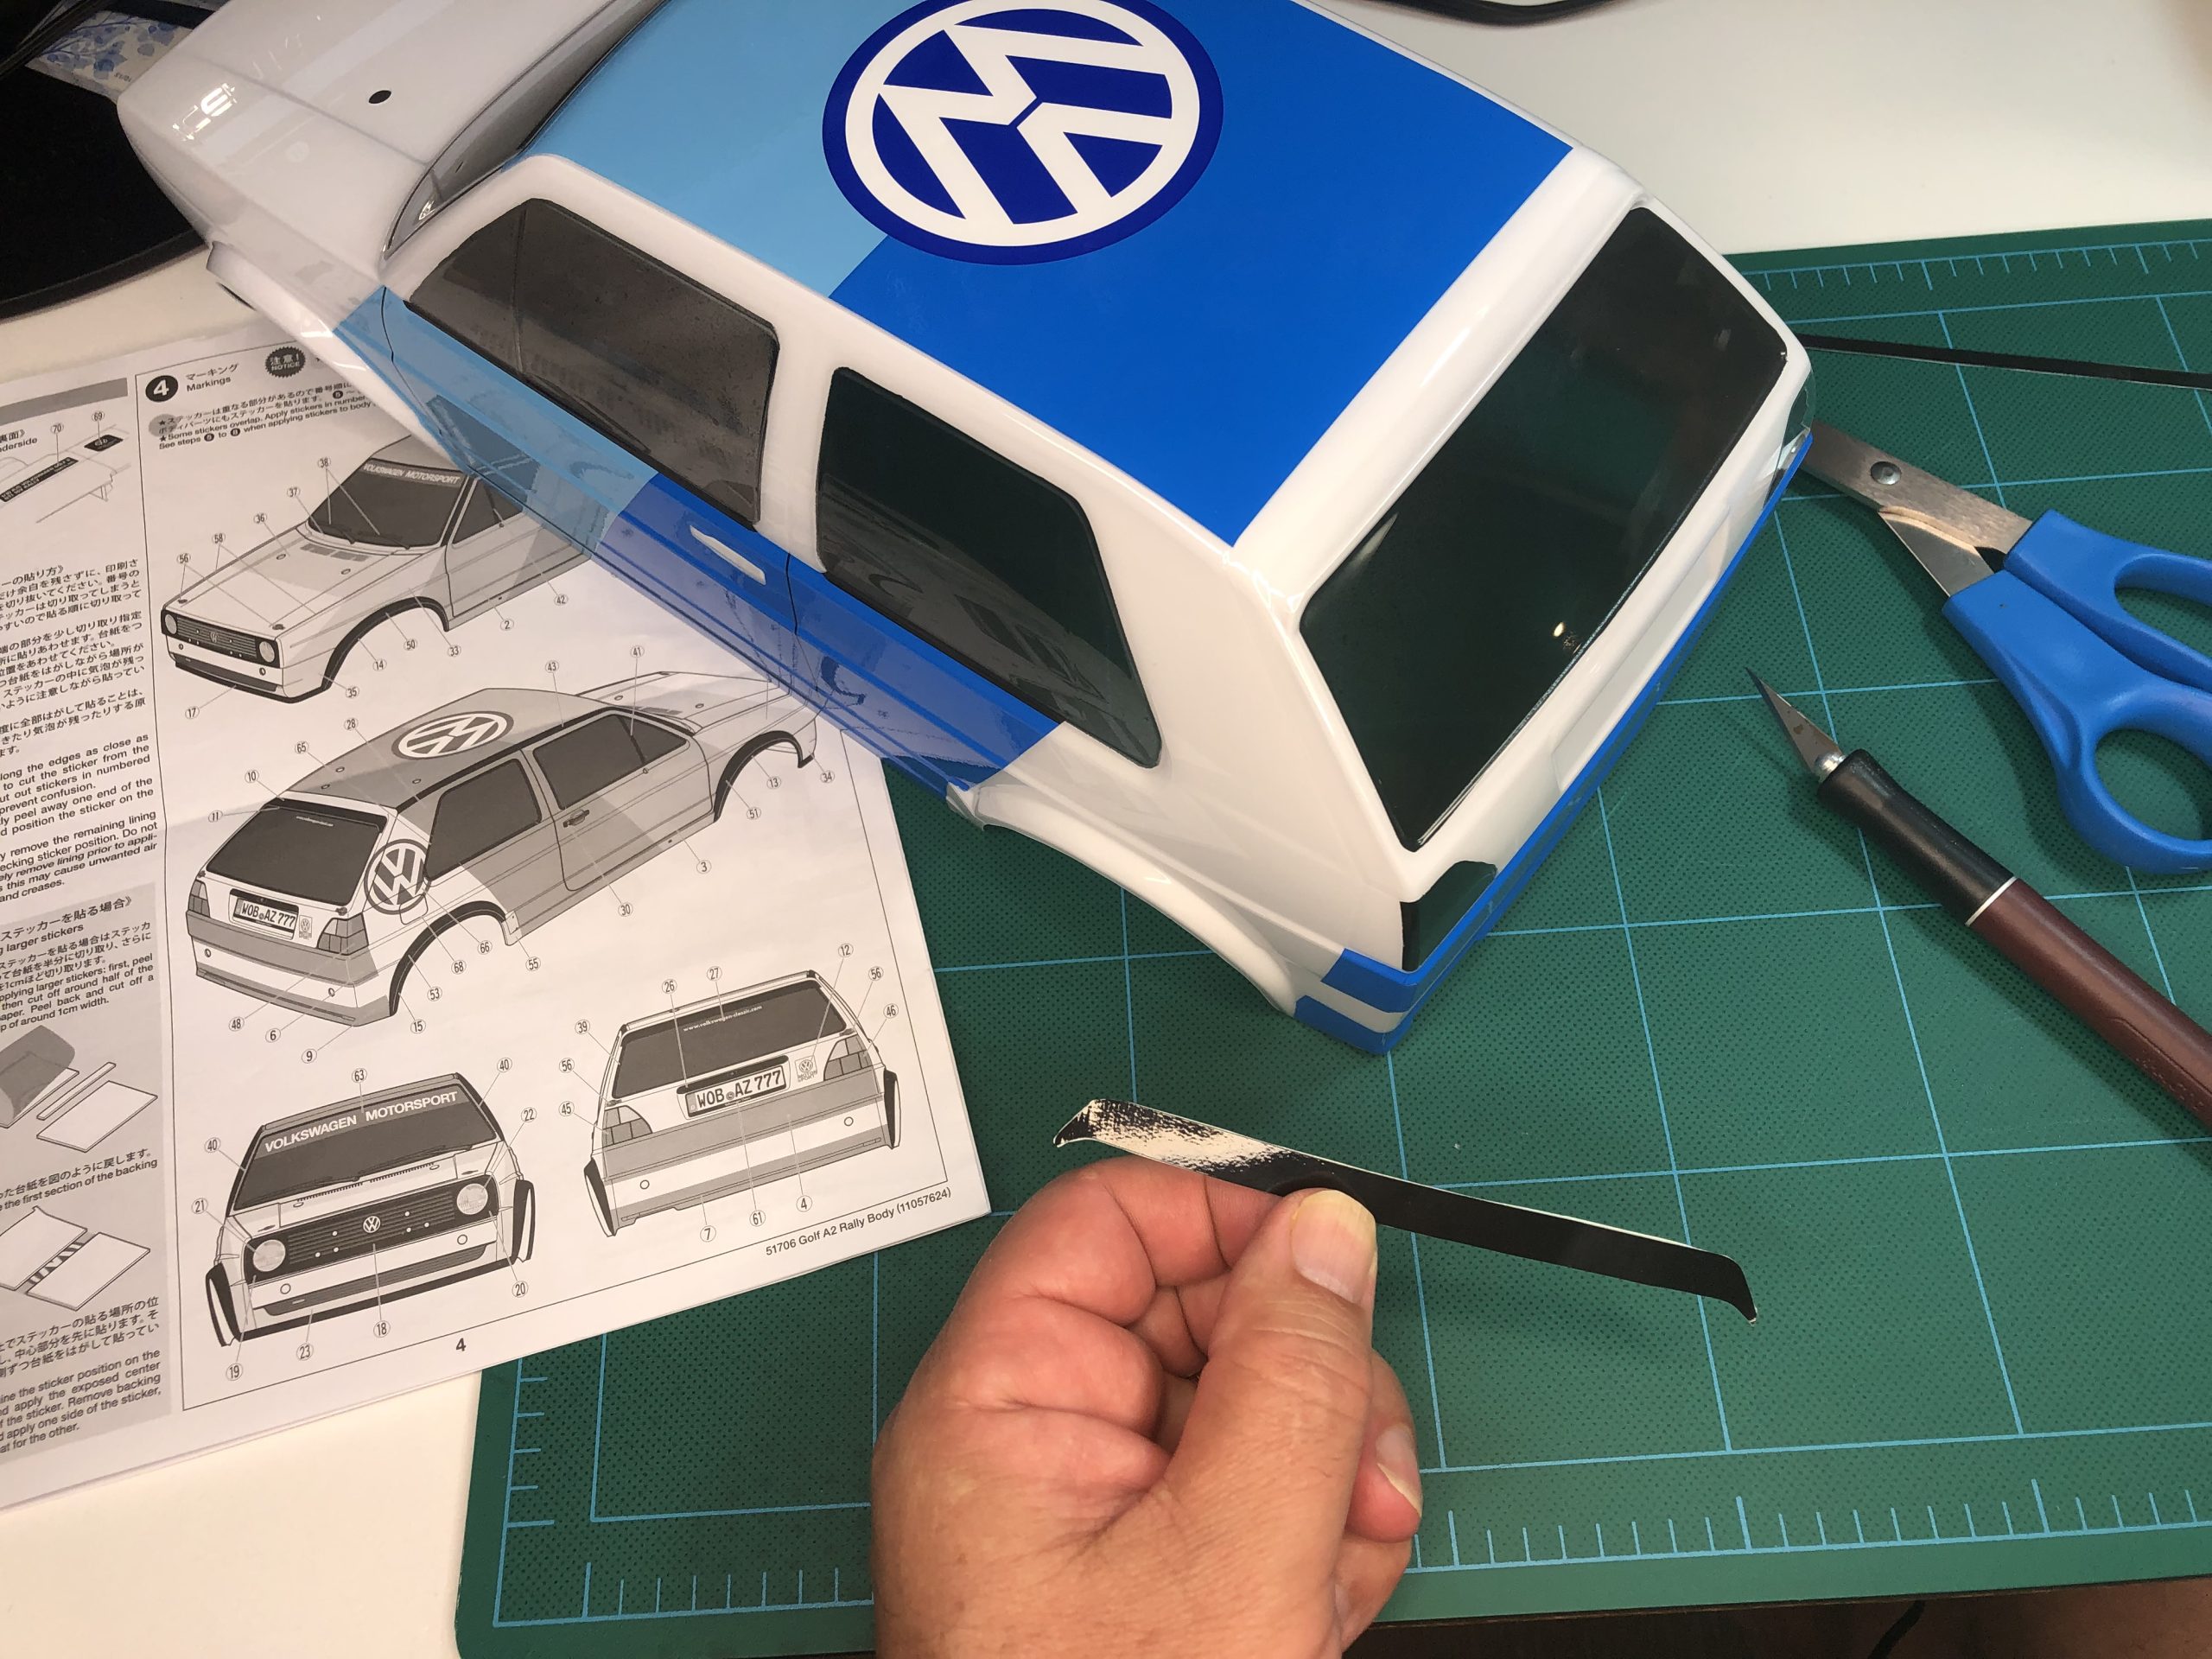
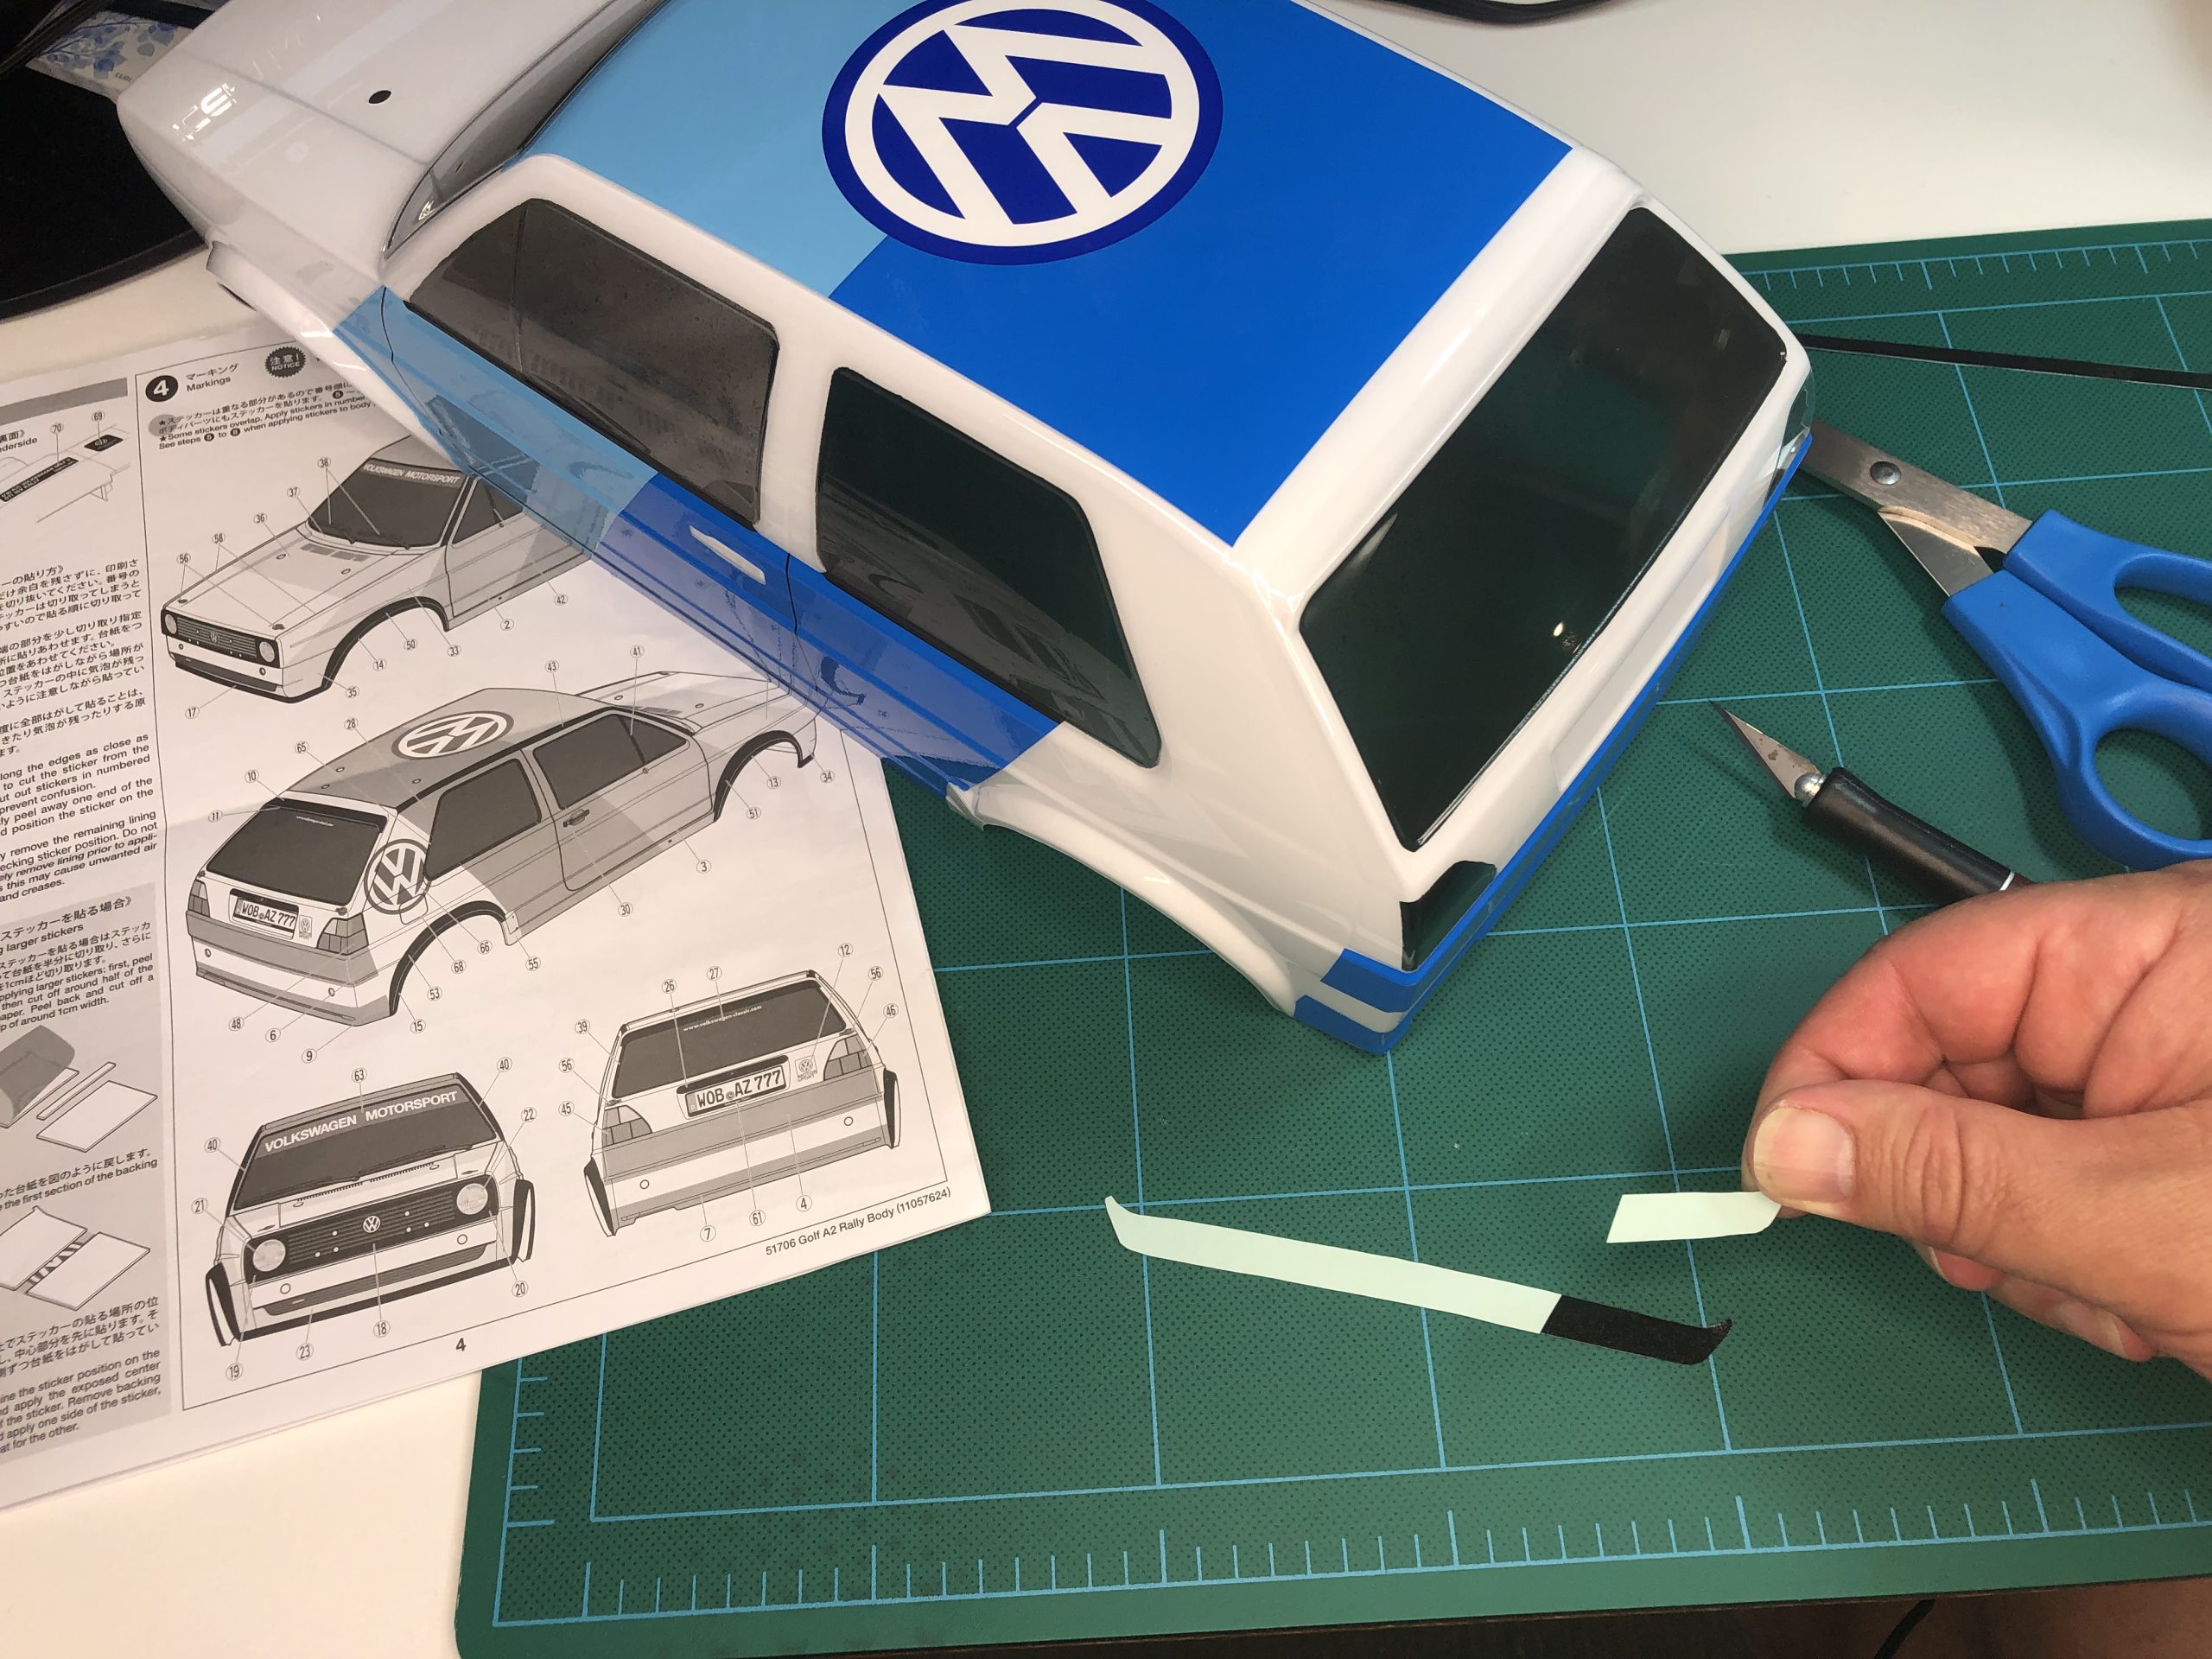
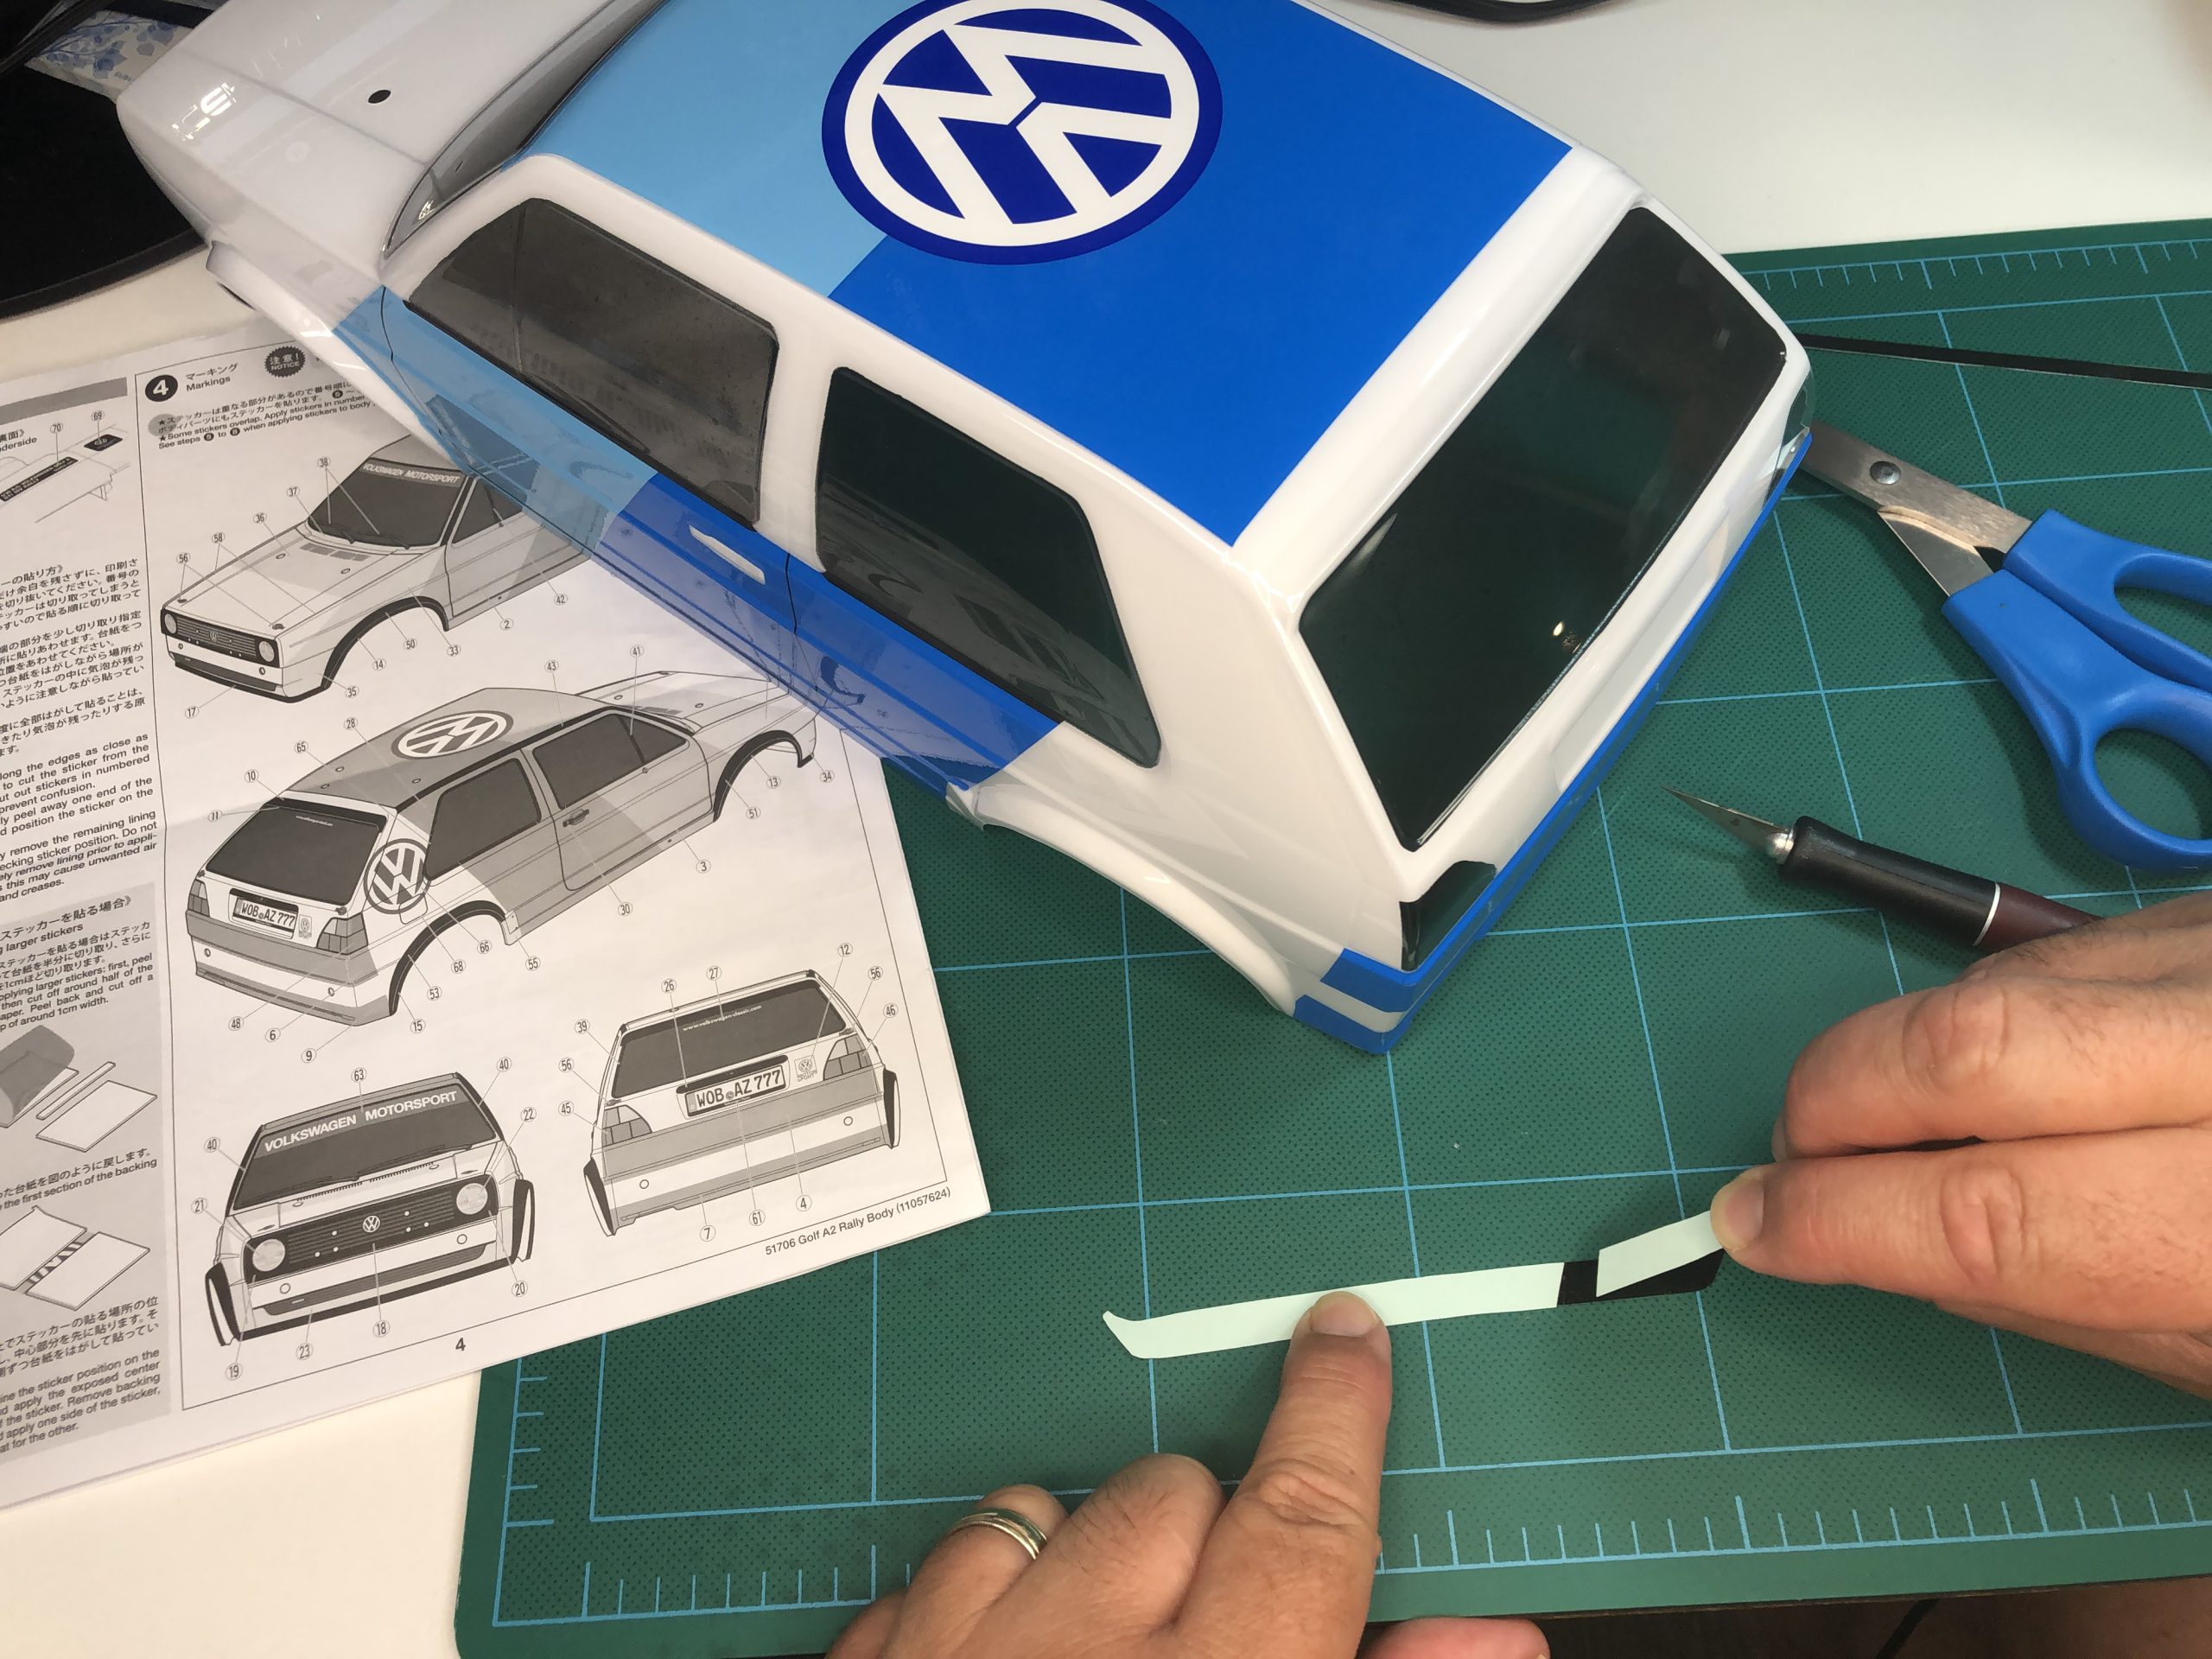
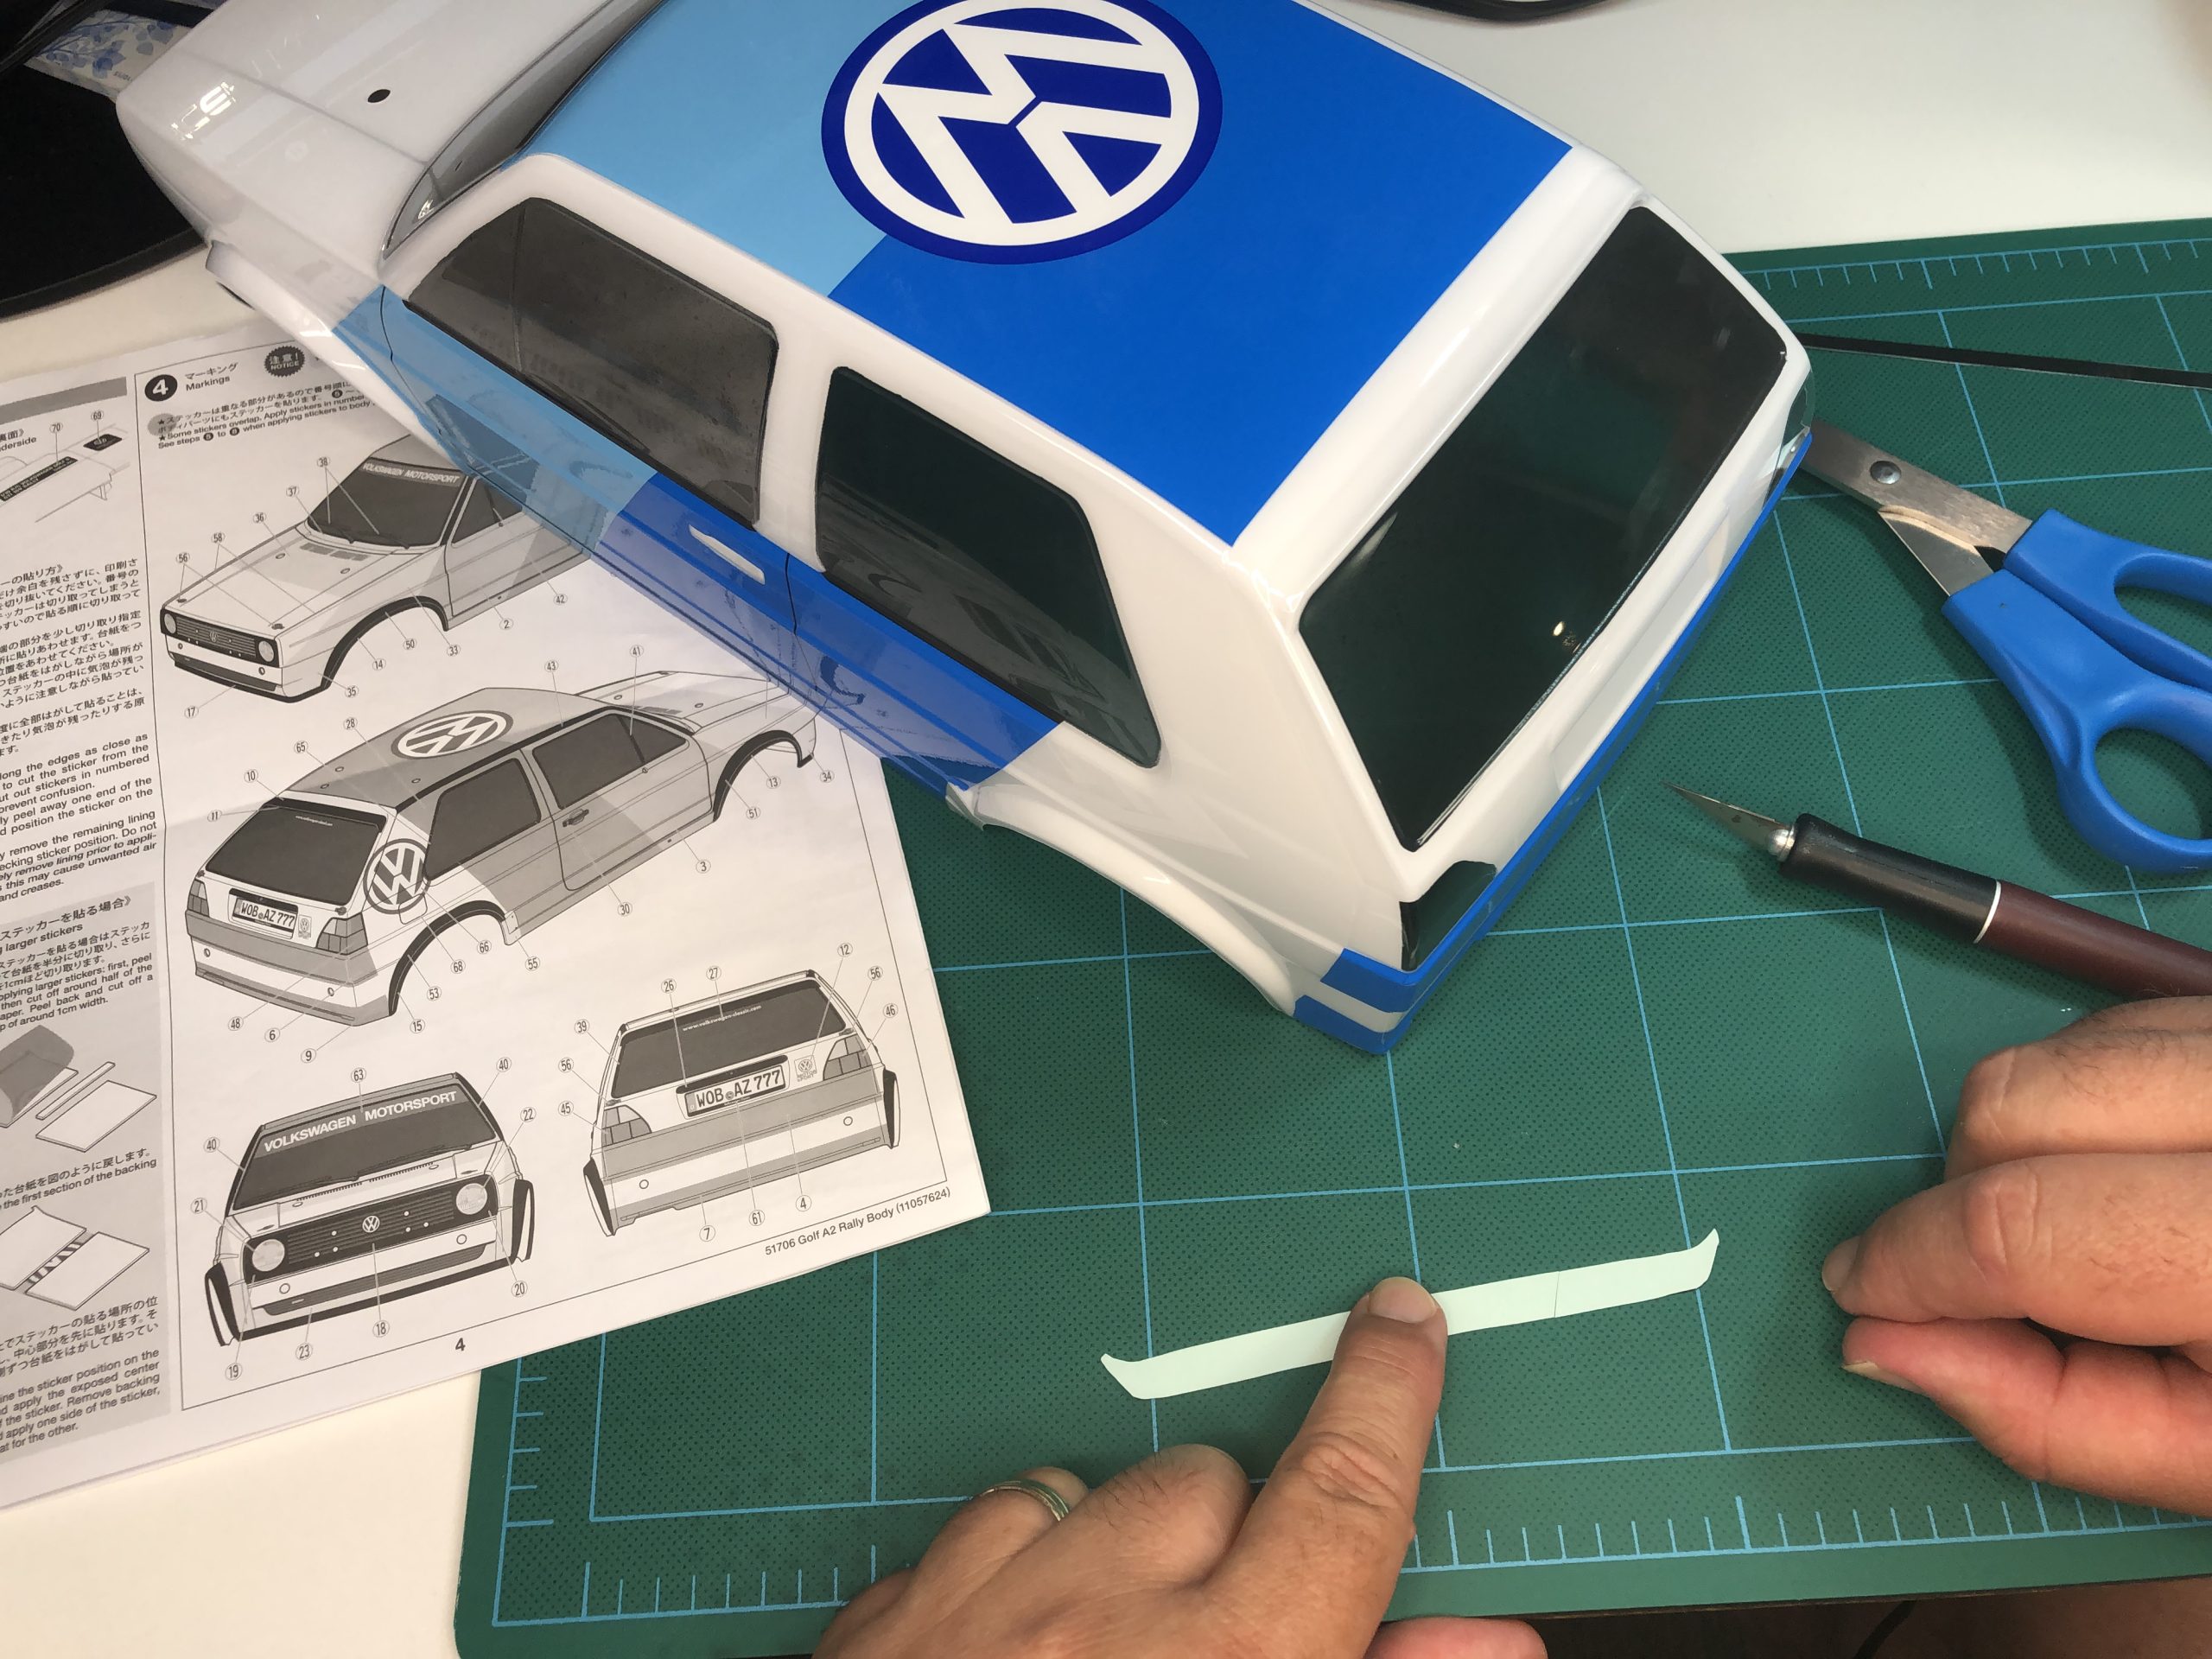

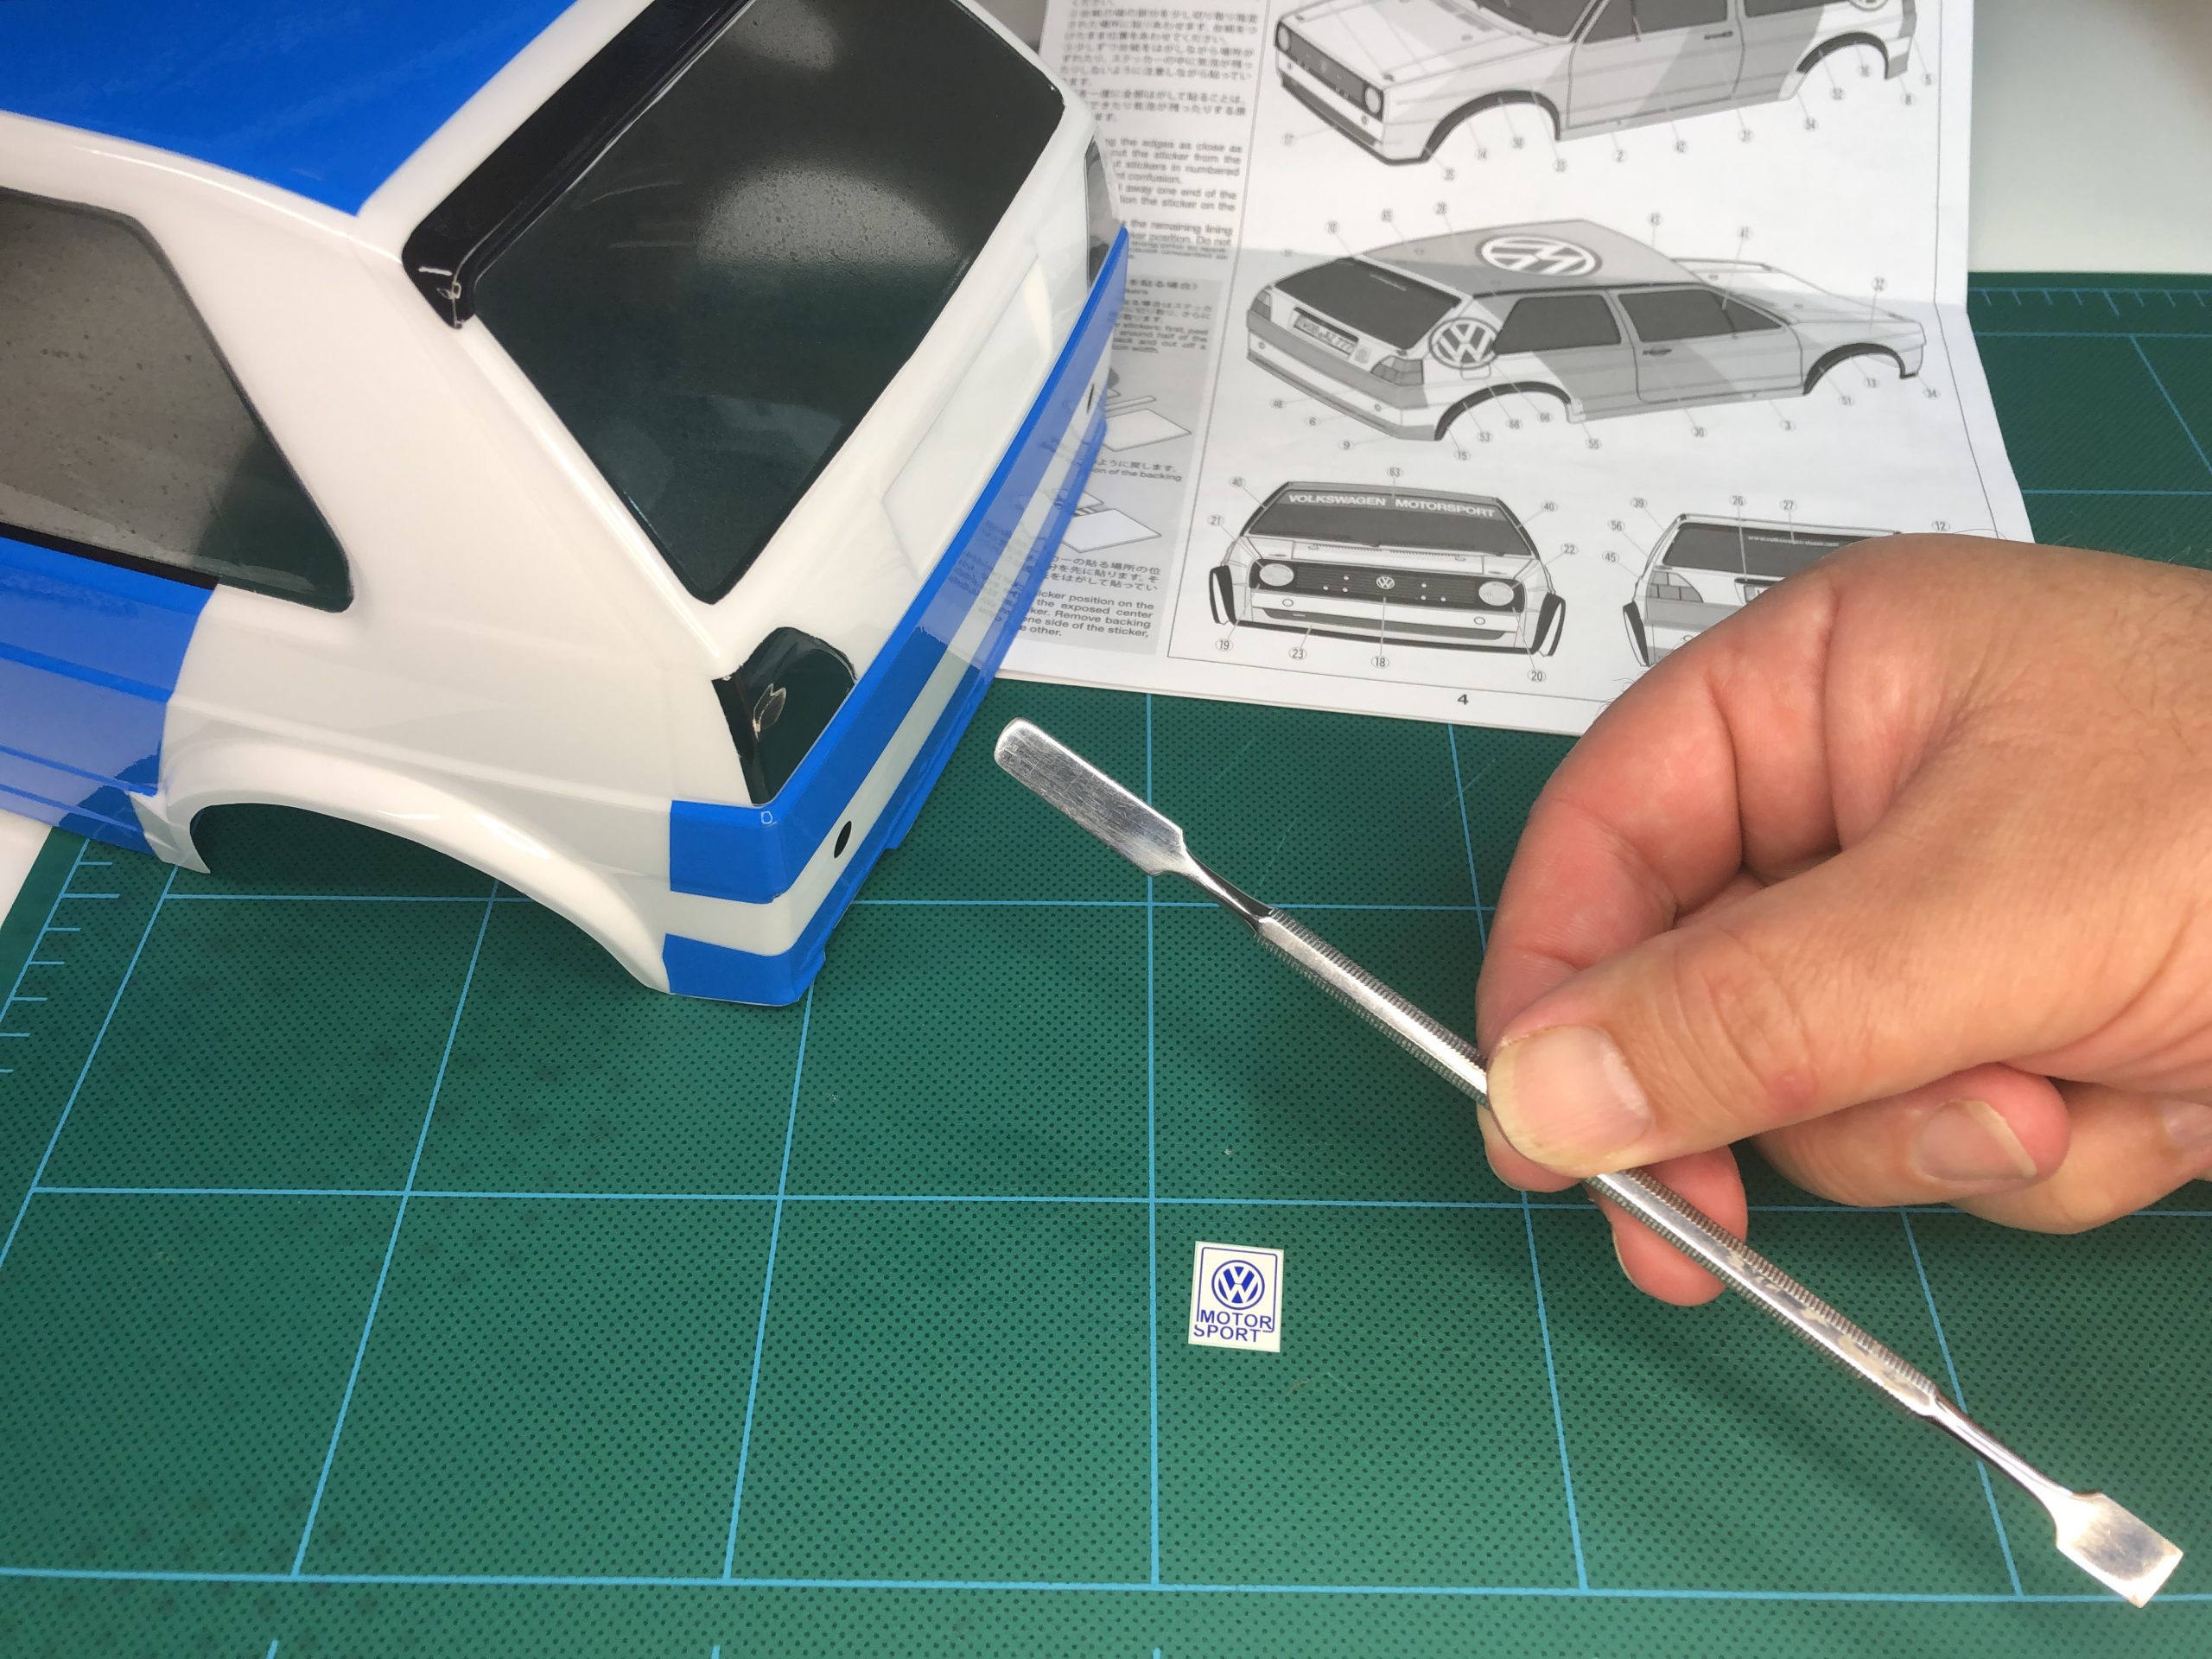
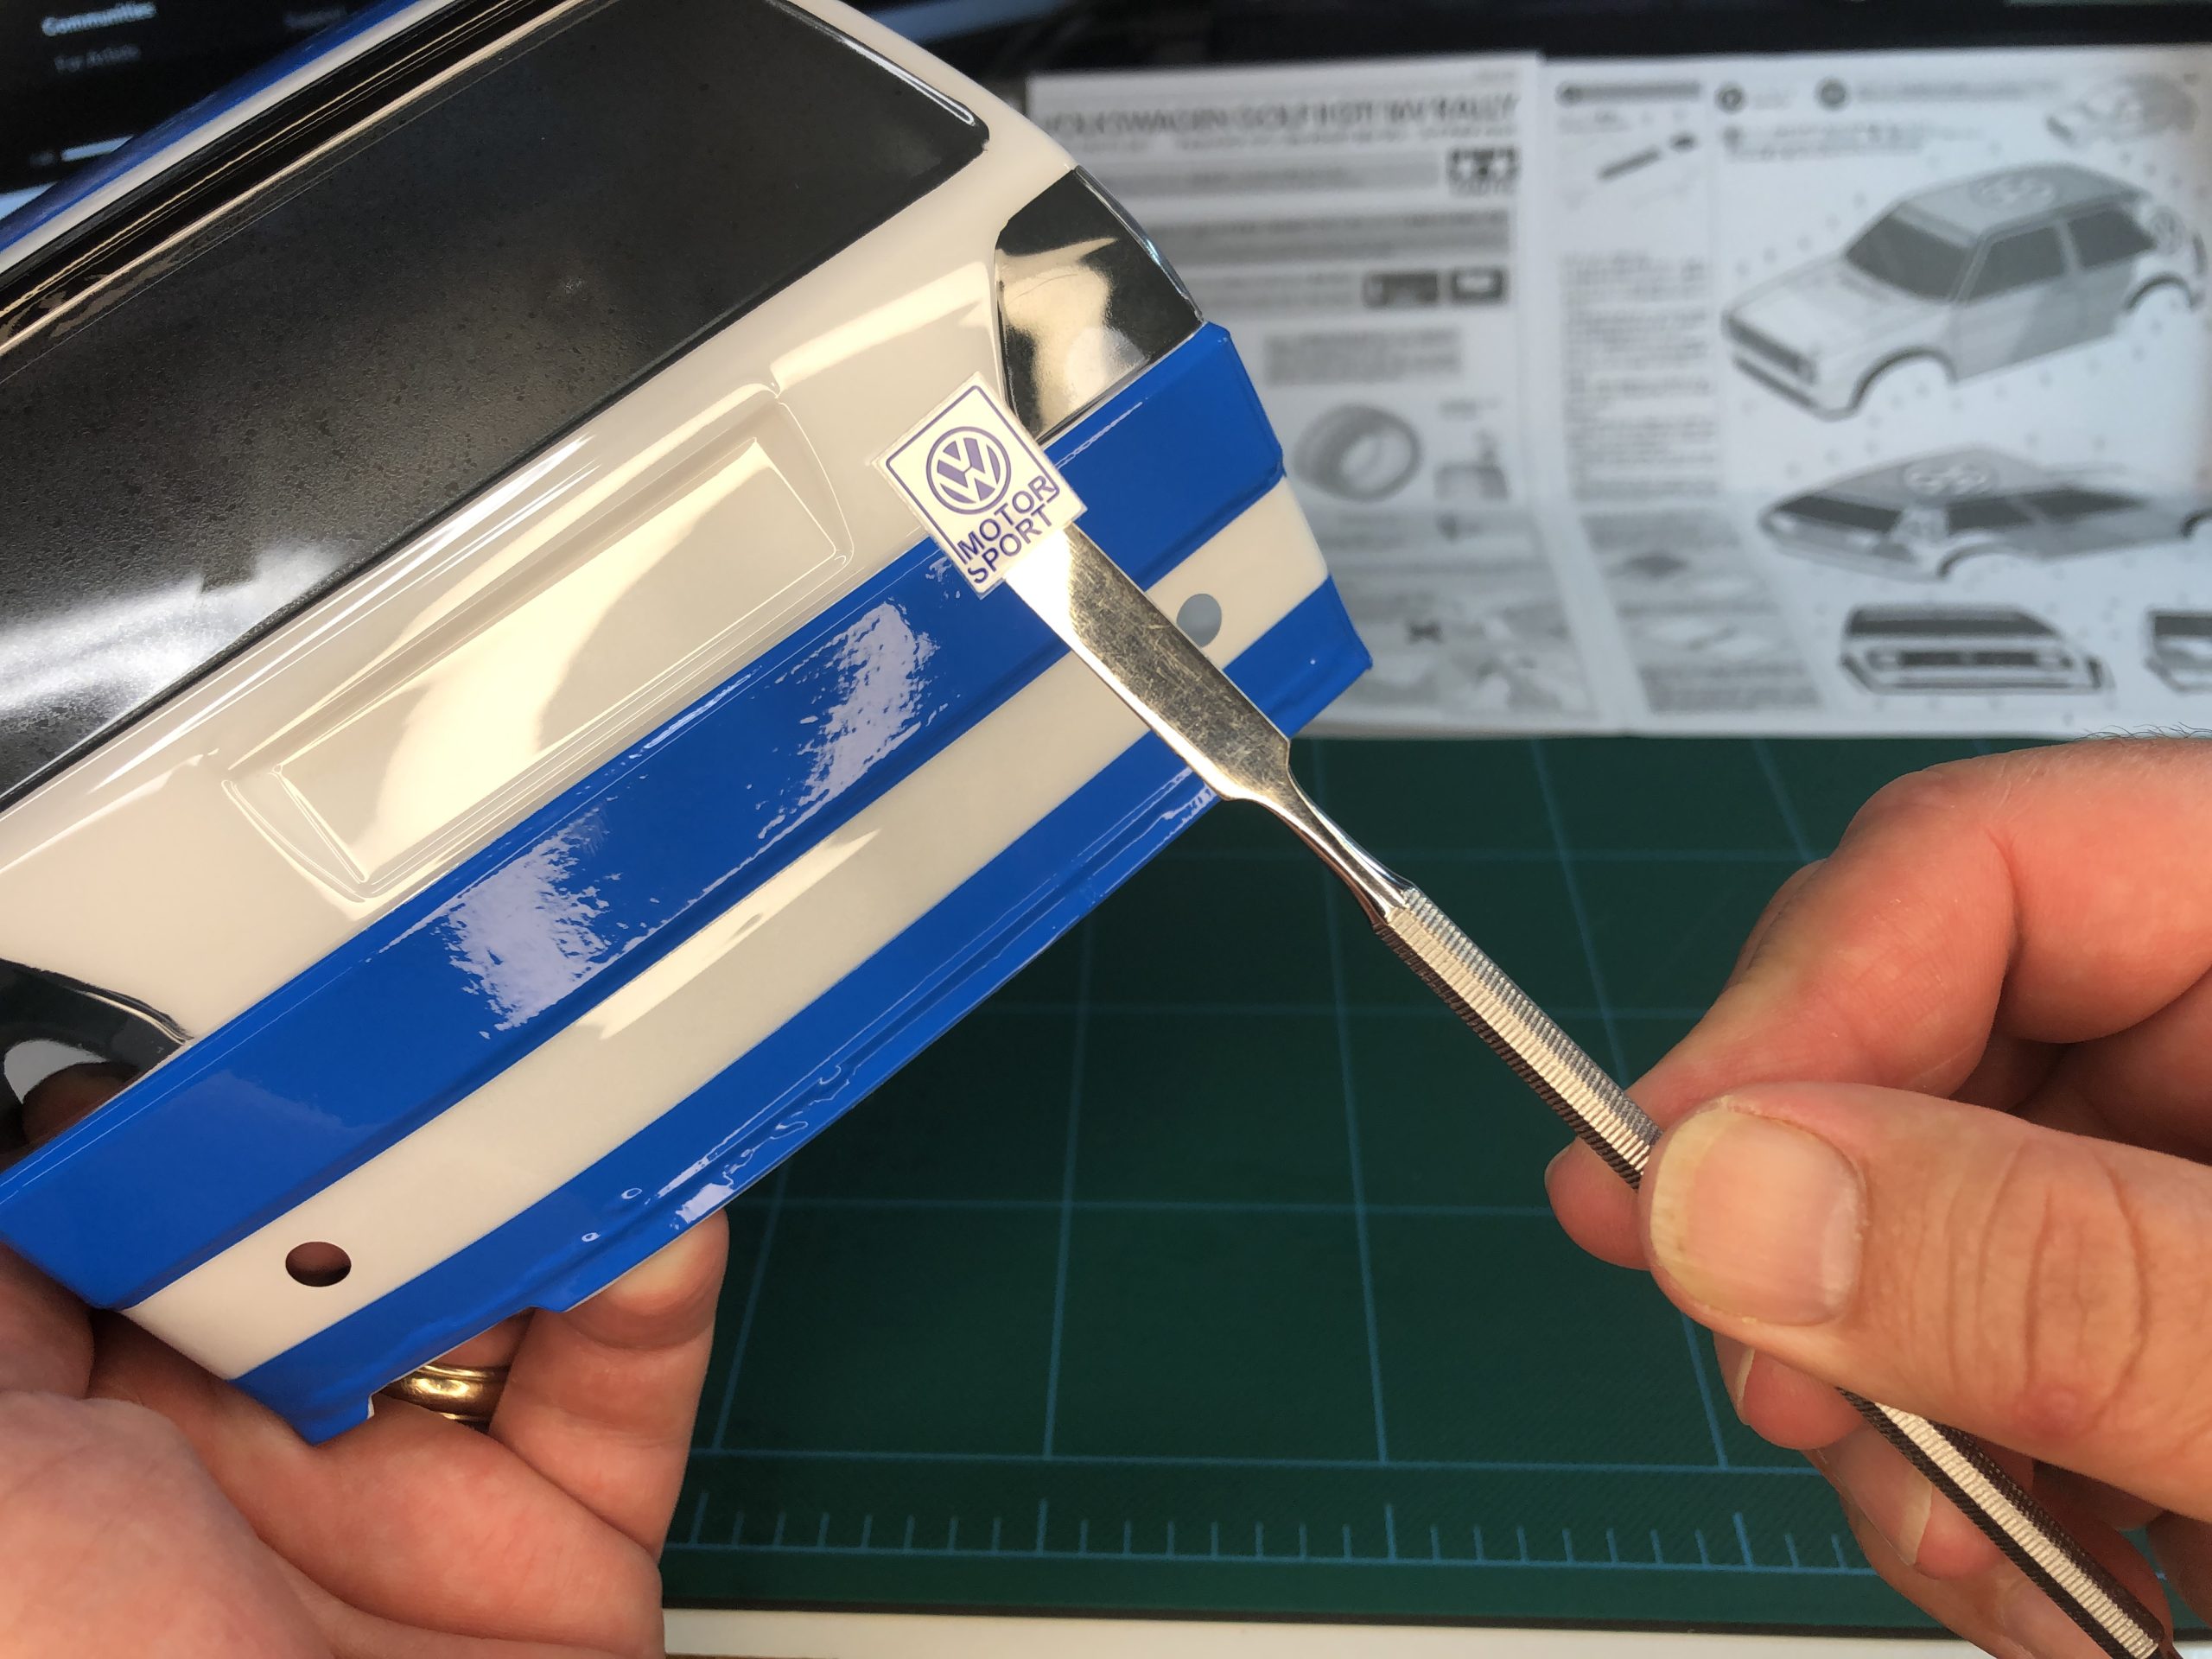
PLACING TINY STICKERS
We can’t stress enough the importance of not touching the back of the stickers. Where this can become trickier is with the tiny stickers. Our tip is to use a small tool to hold and to place the sticker onto the body. We use a dental spatula specifically for this task.
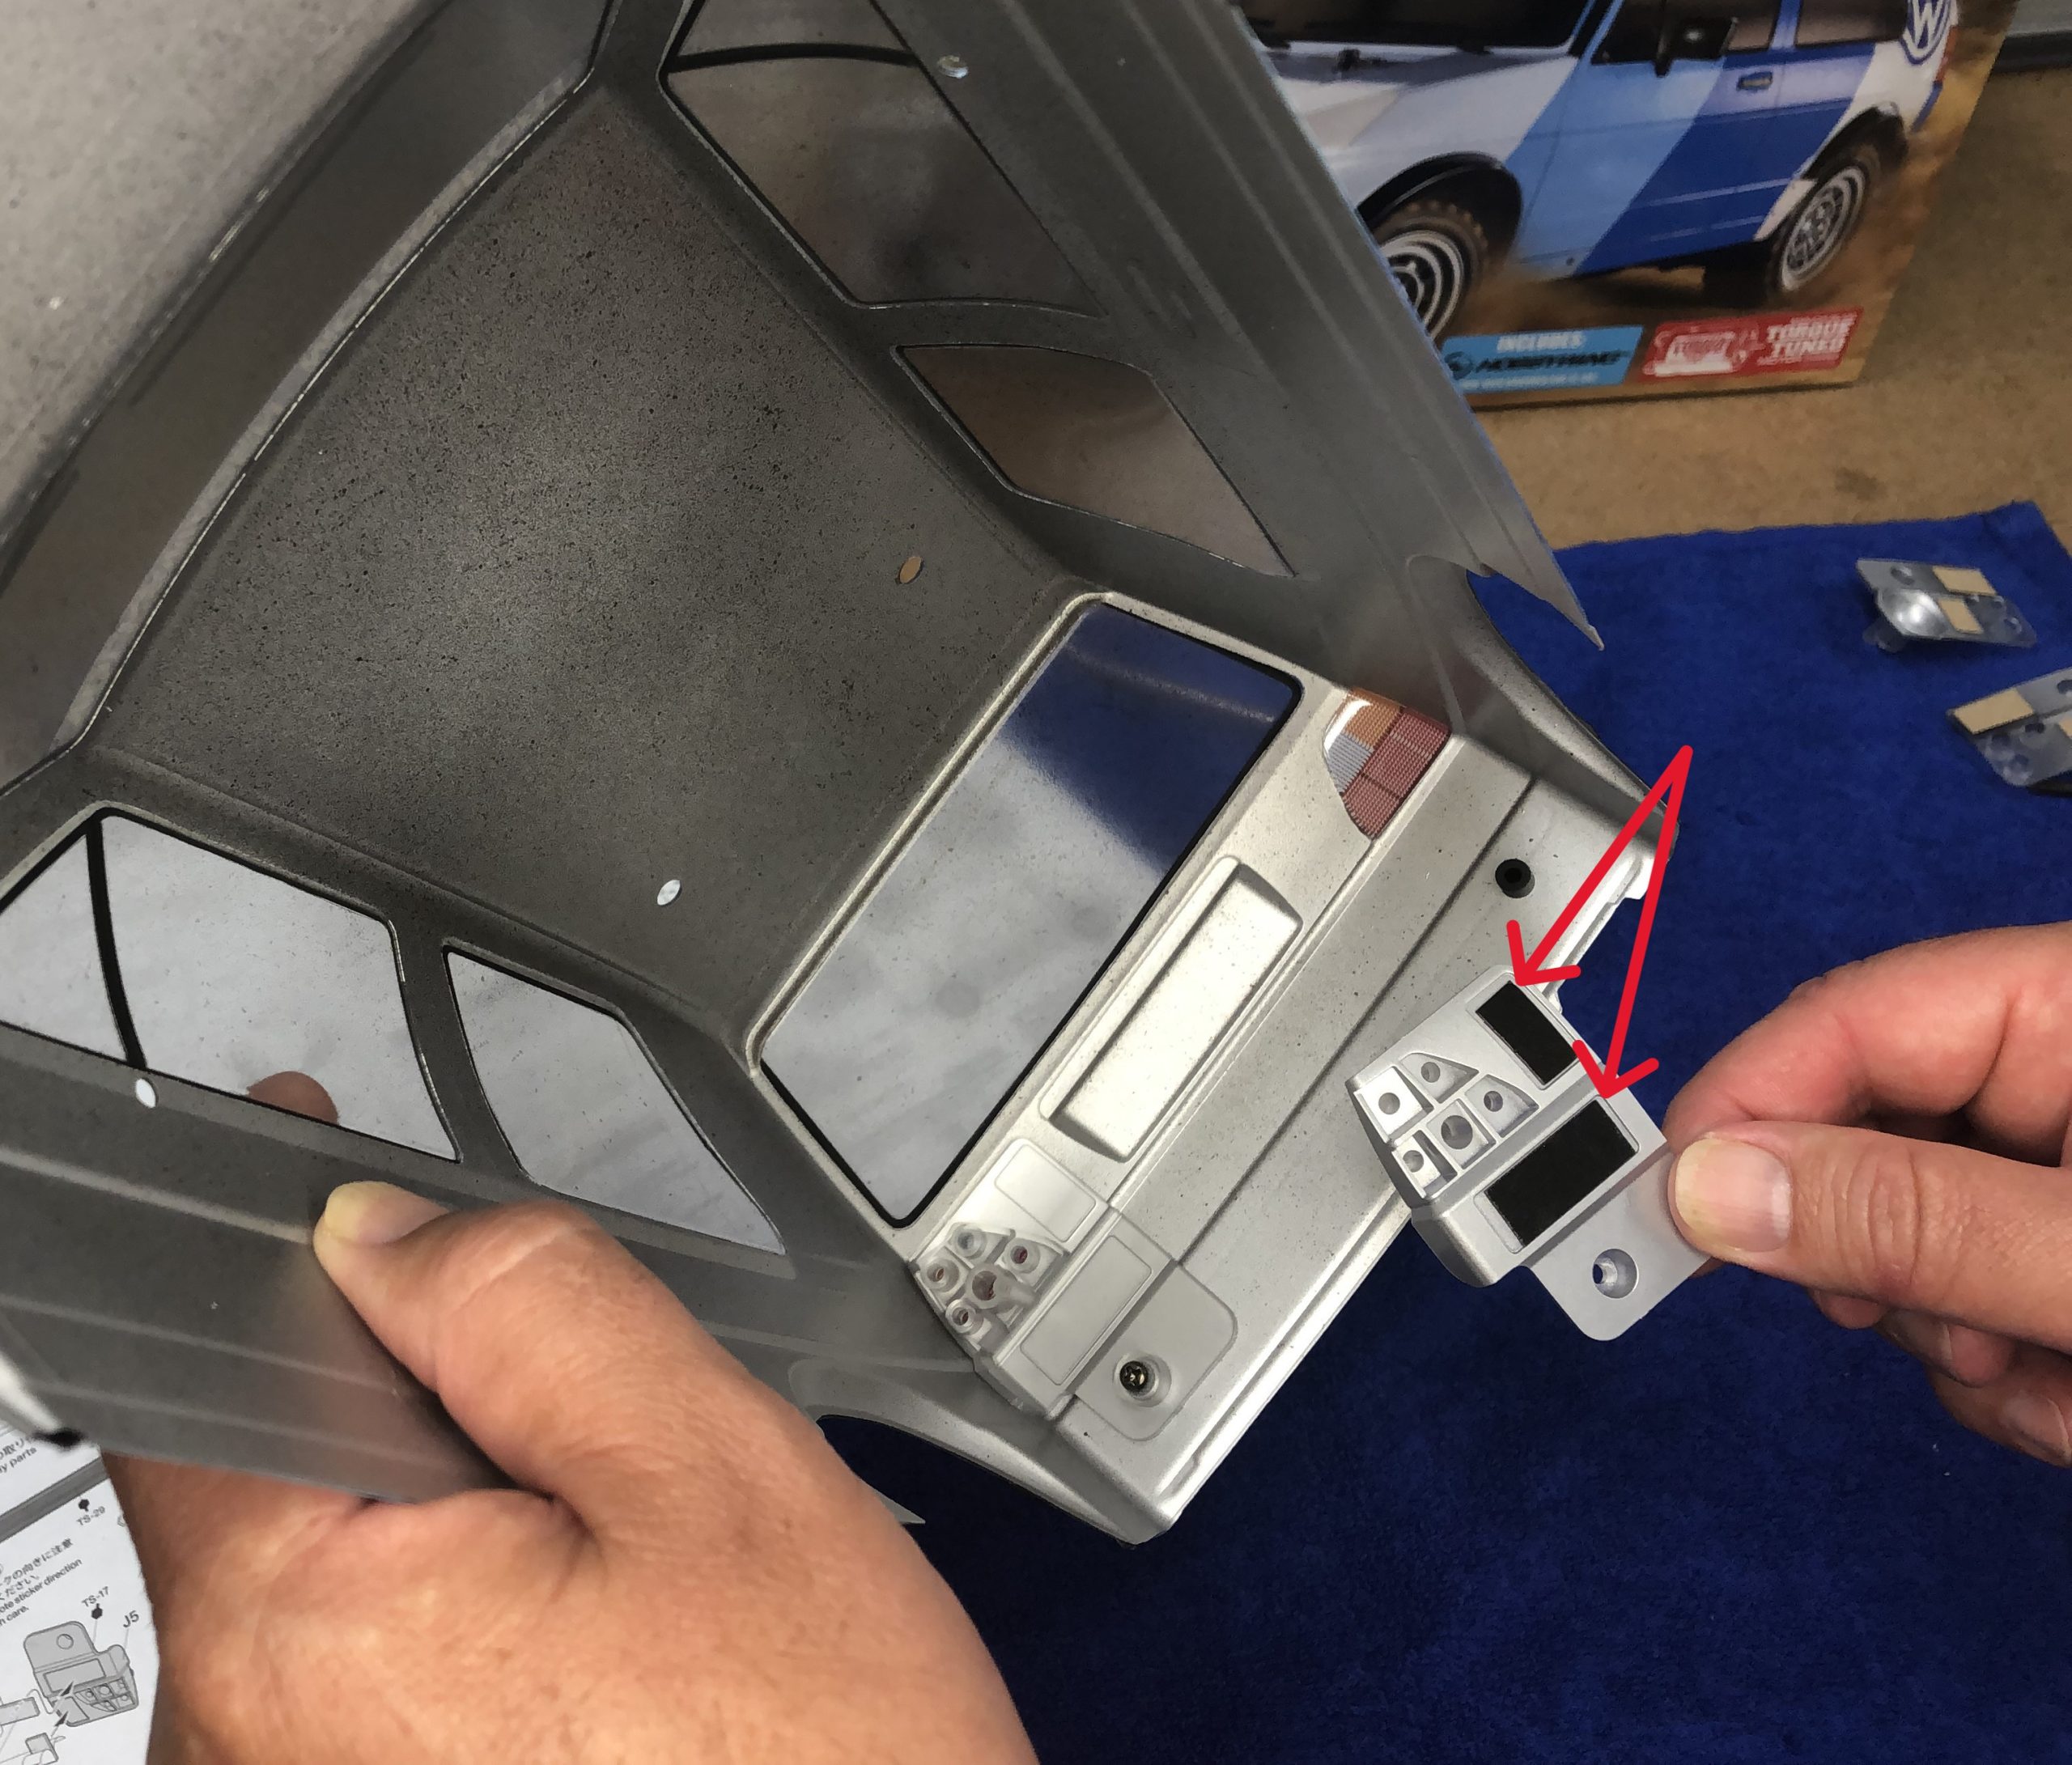
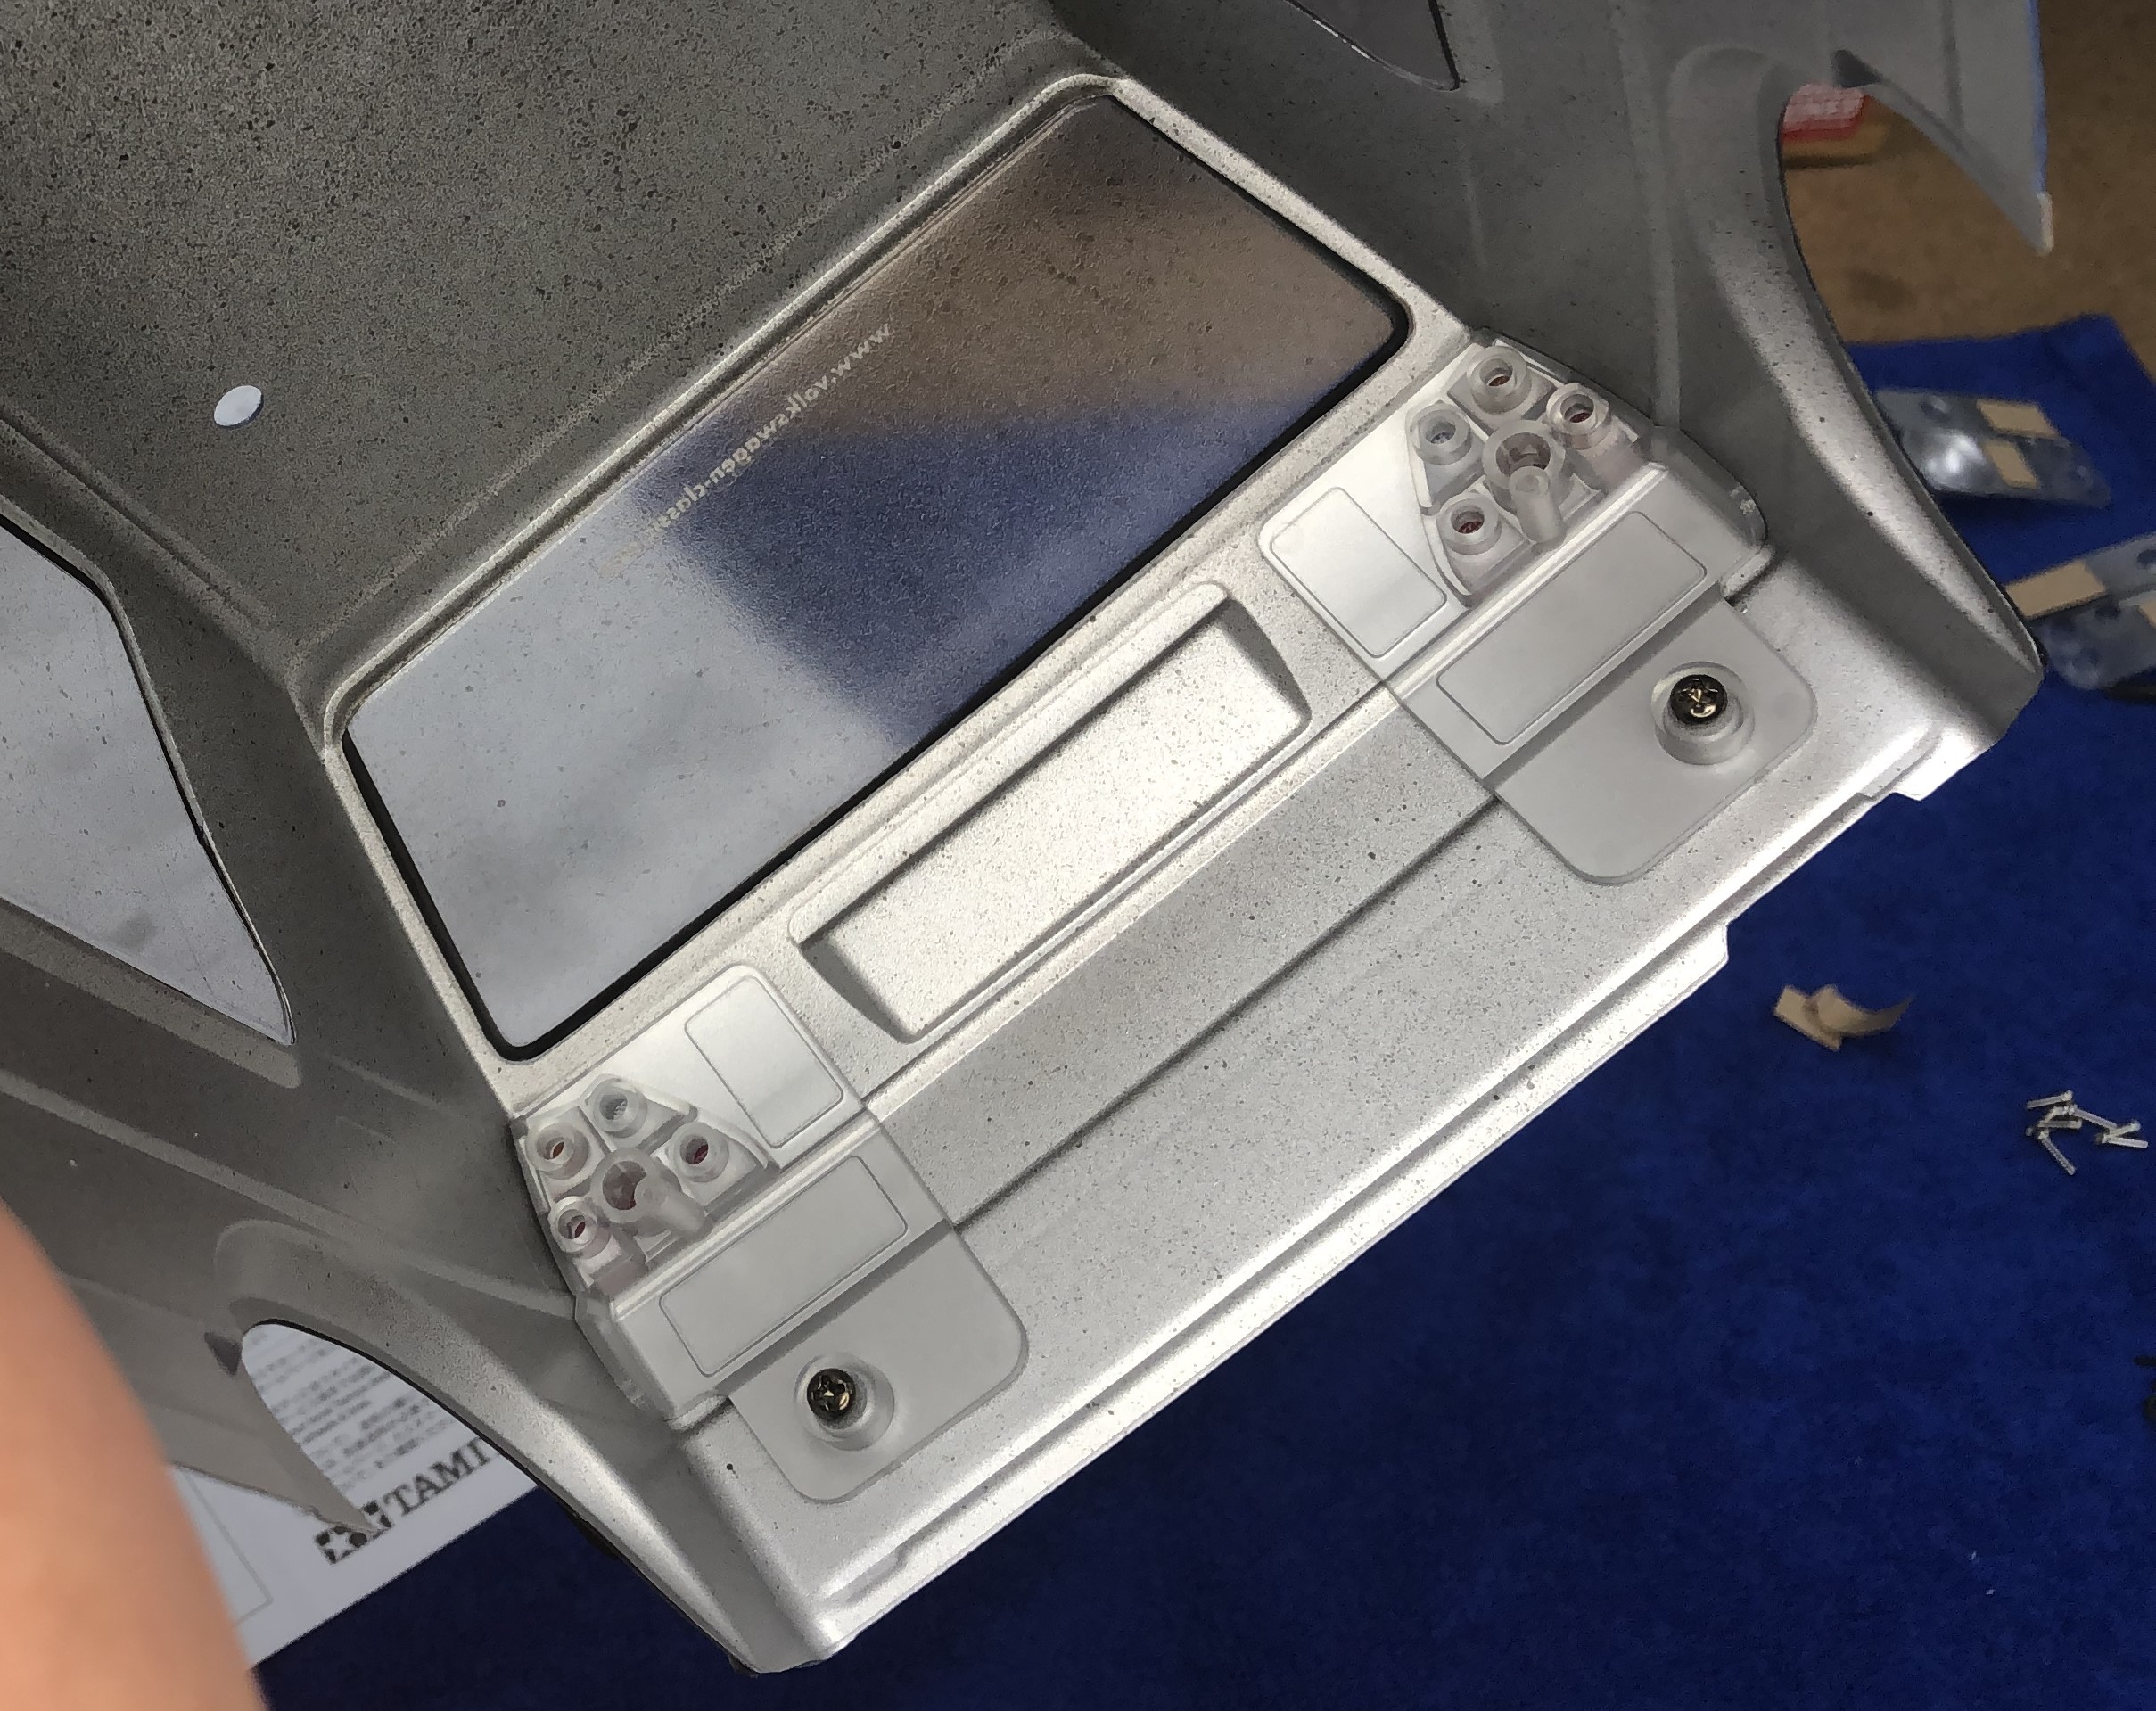
ATTACHING ABS PARTS
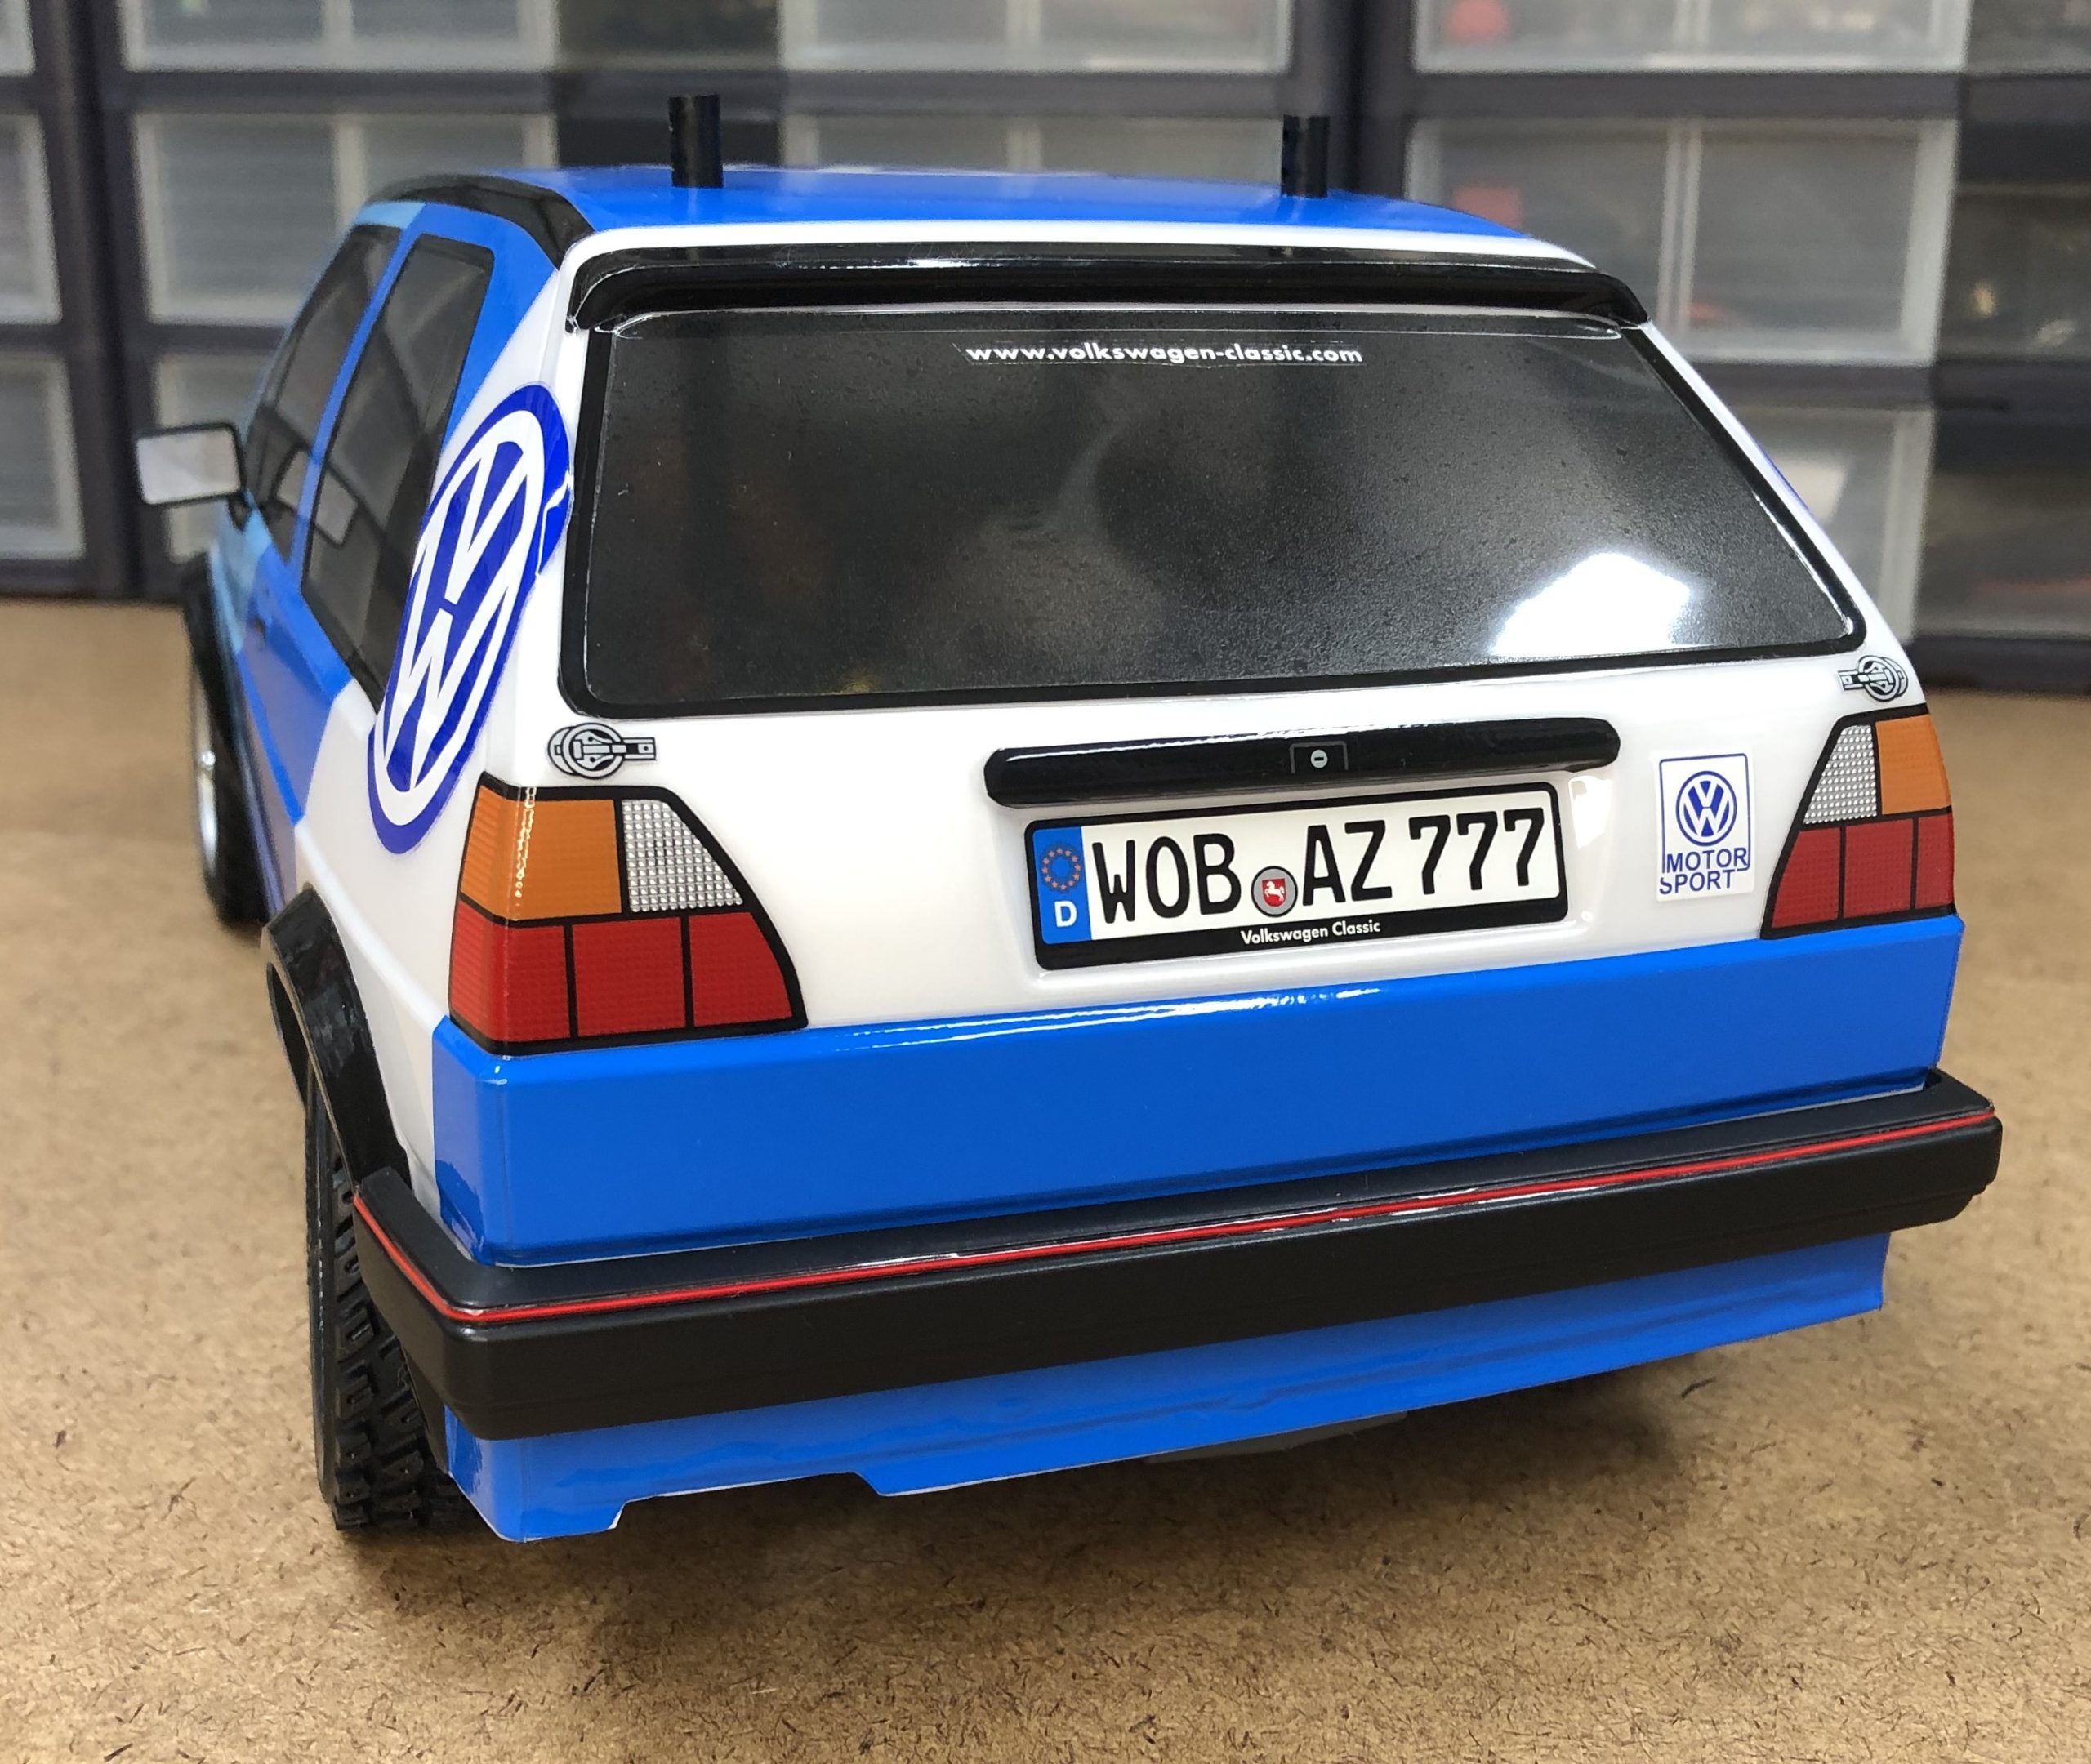
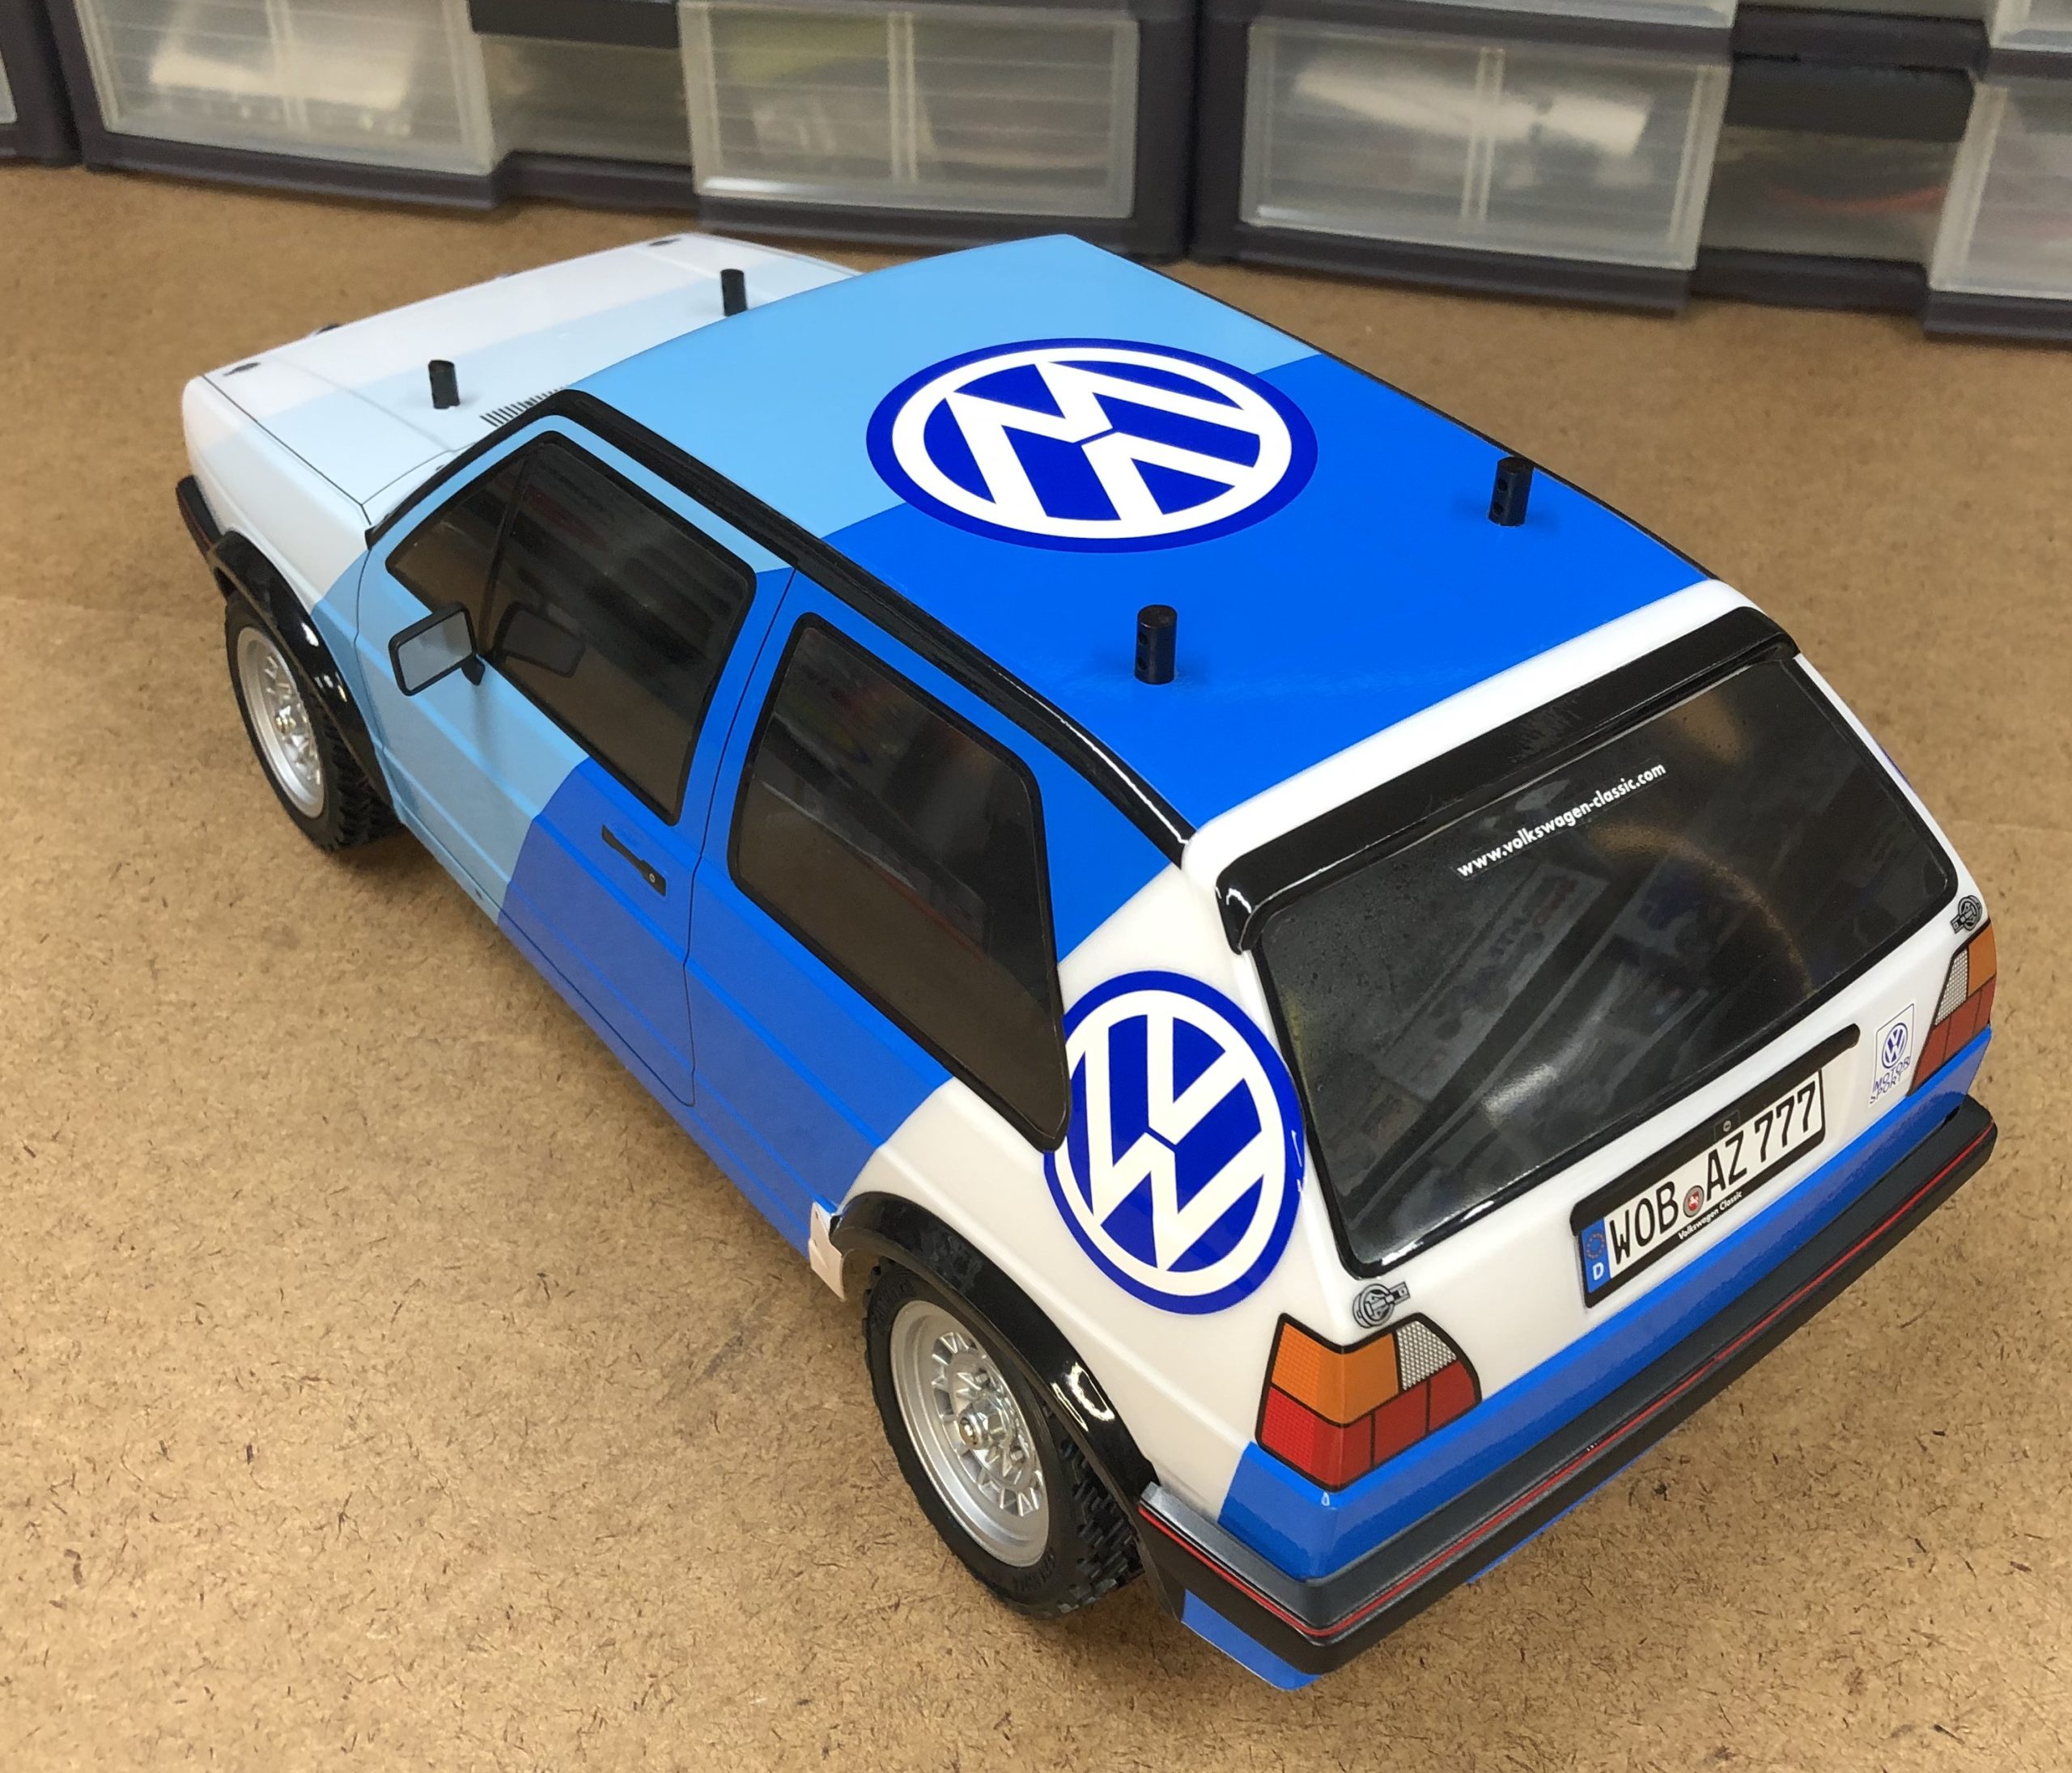
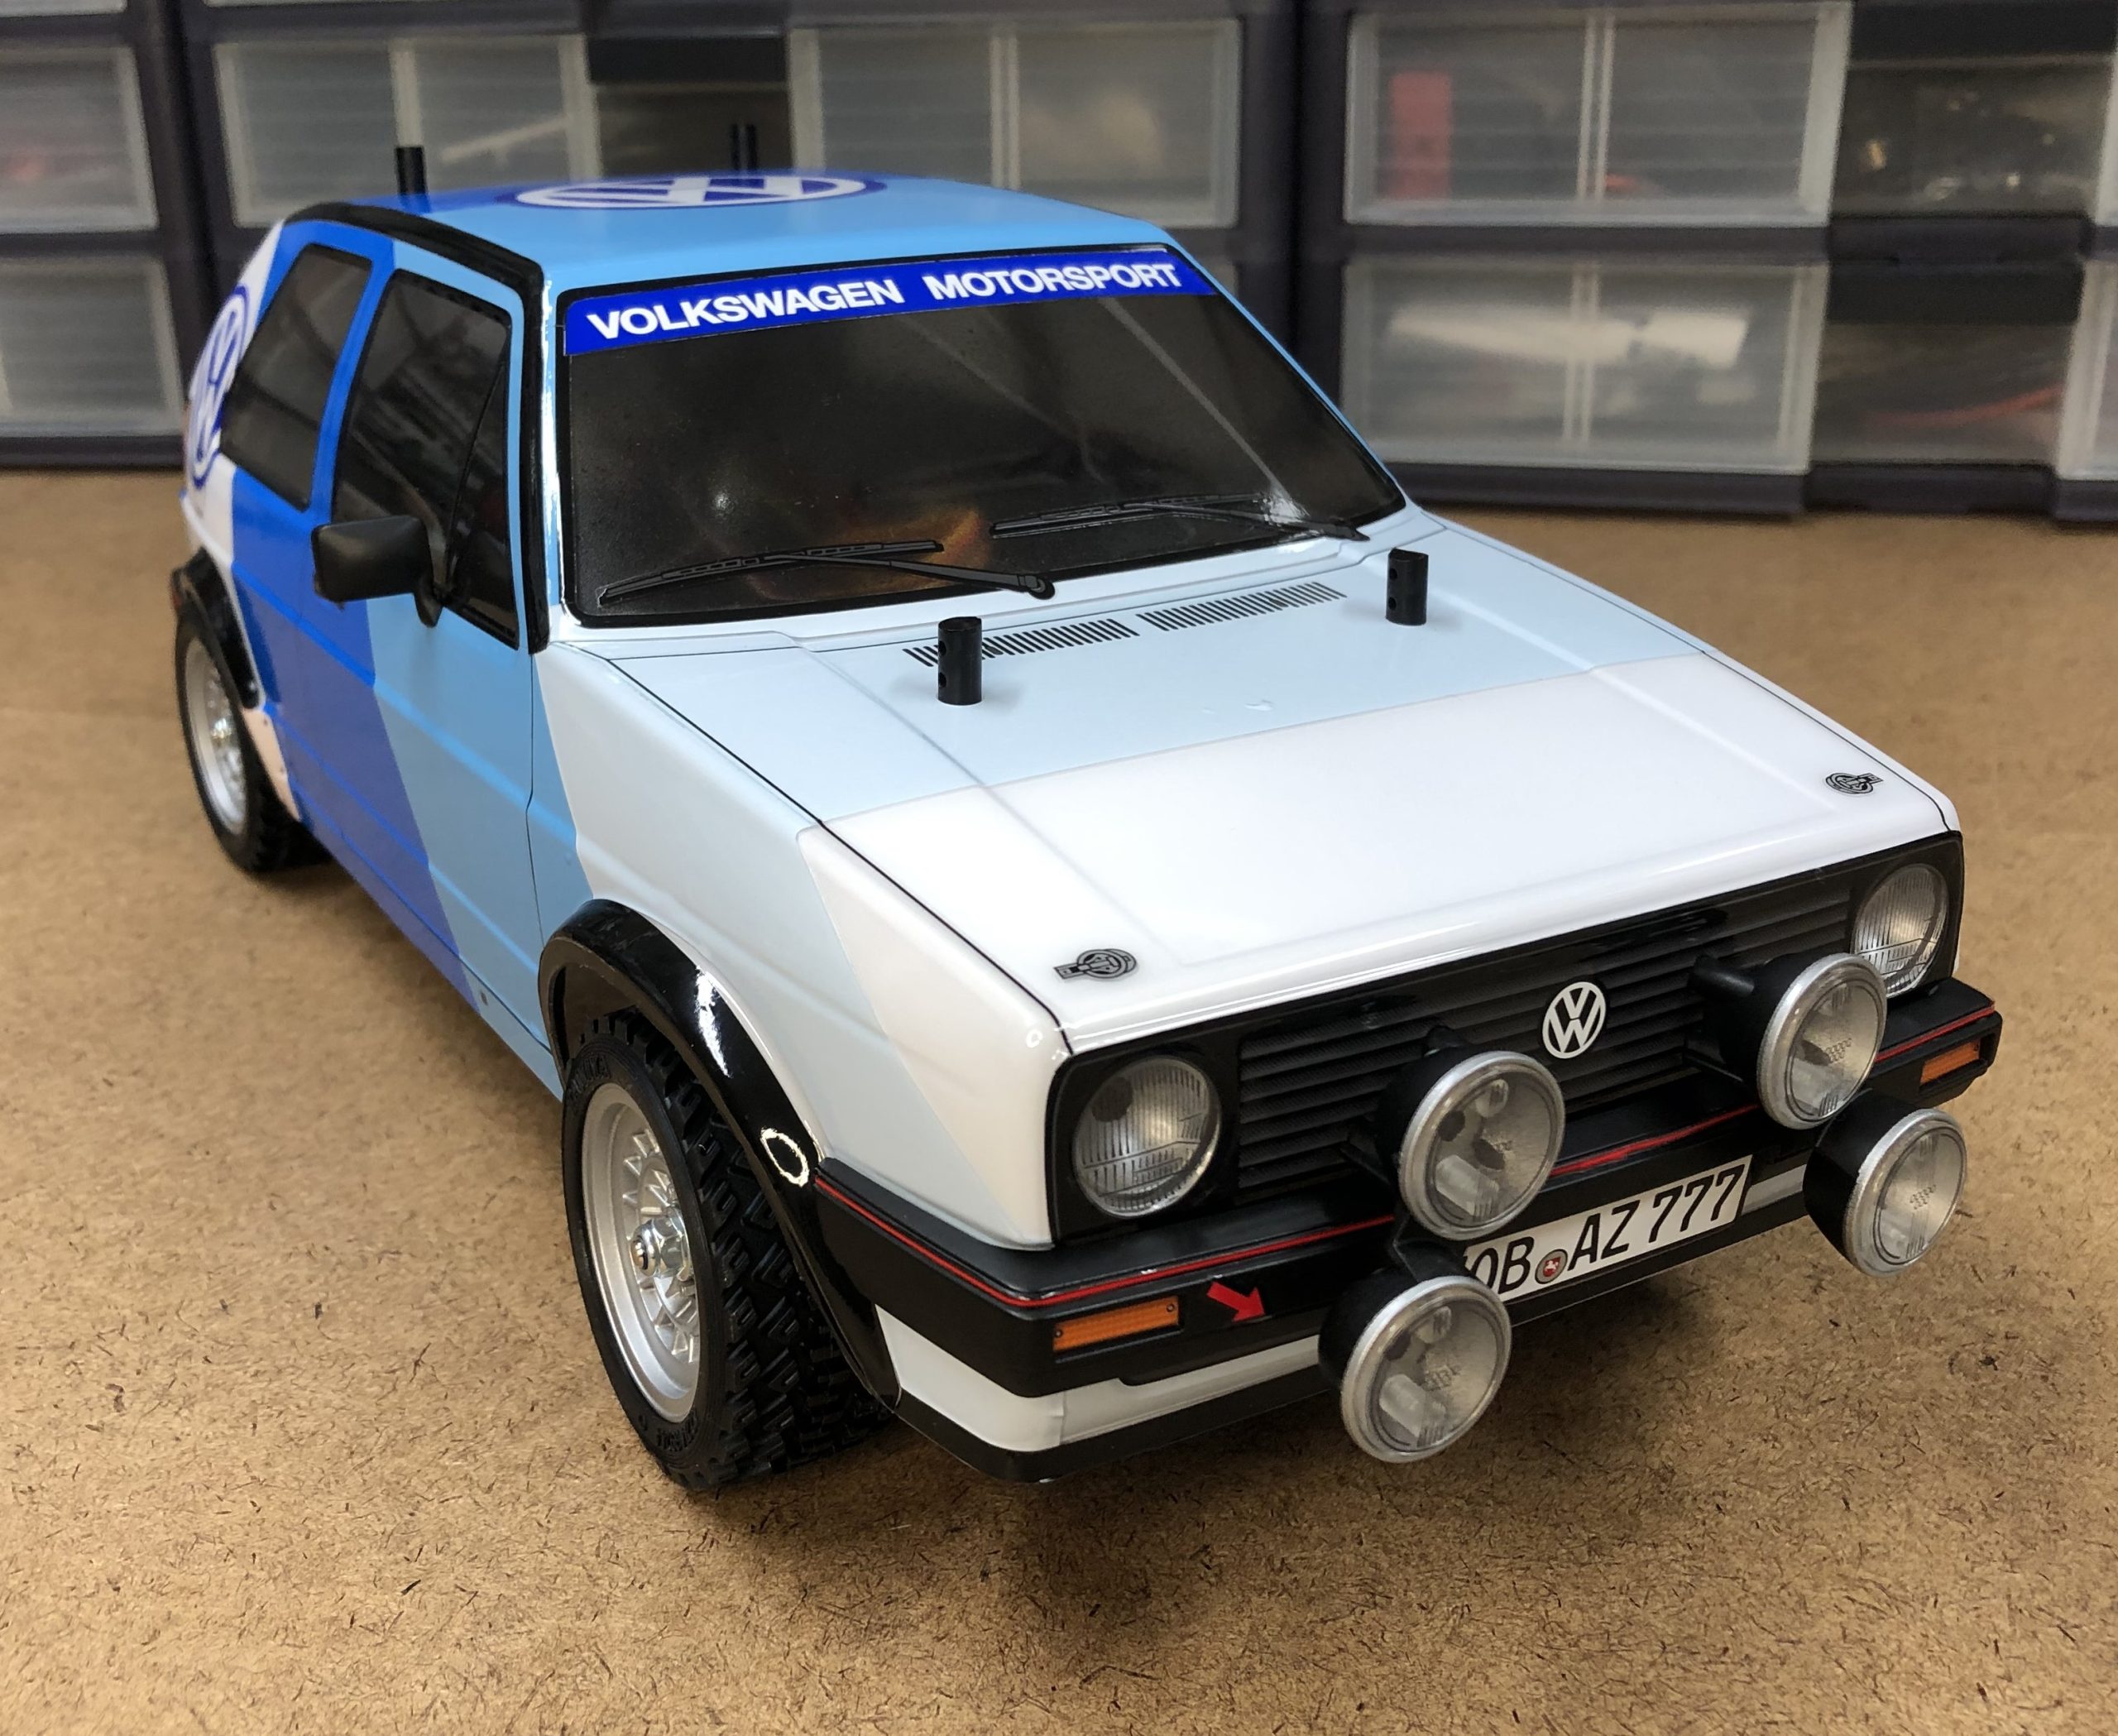
The last step to complete the Tamiya VW Golf II Rally body is to attach all of the ABS plastic parts including the bumpers, side view mirrors, rally lights and light buckets.
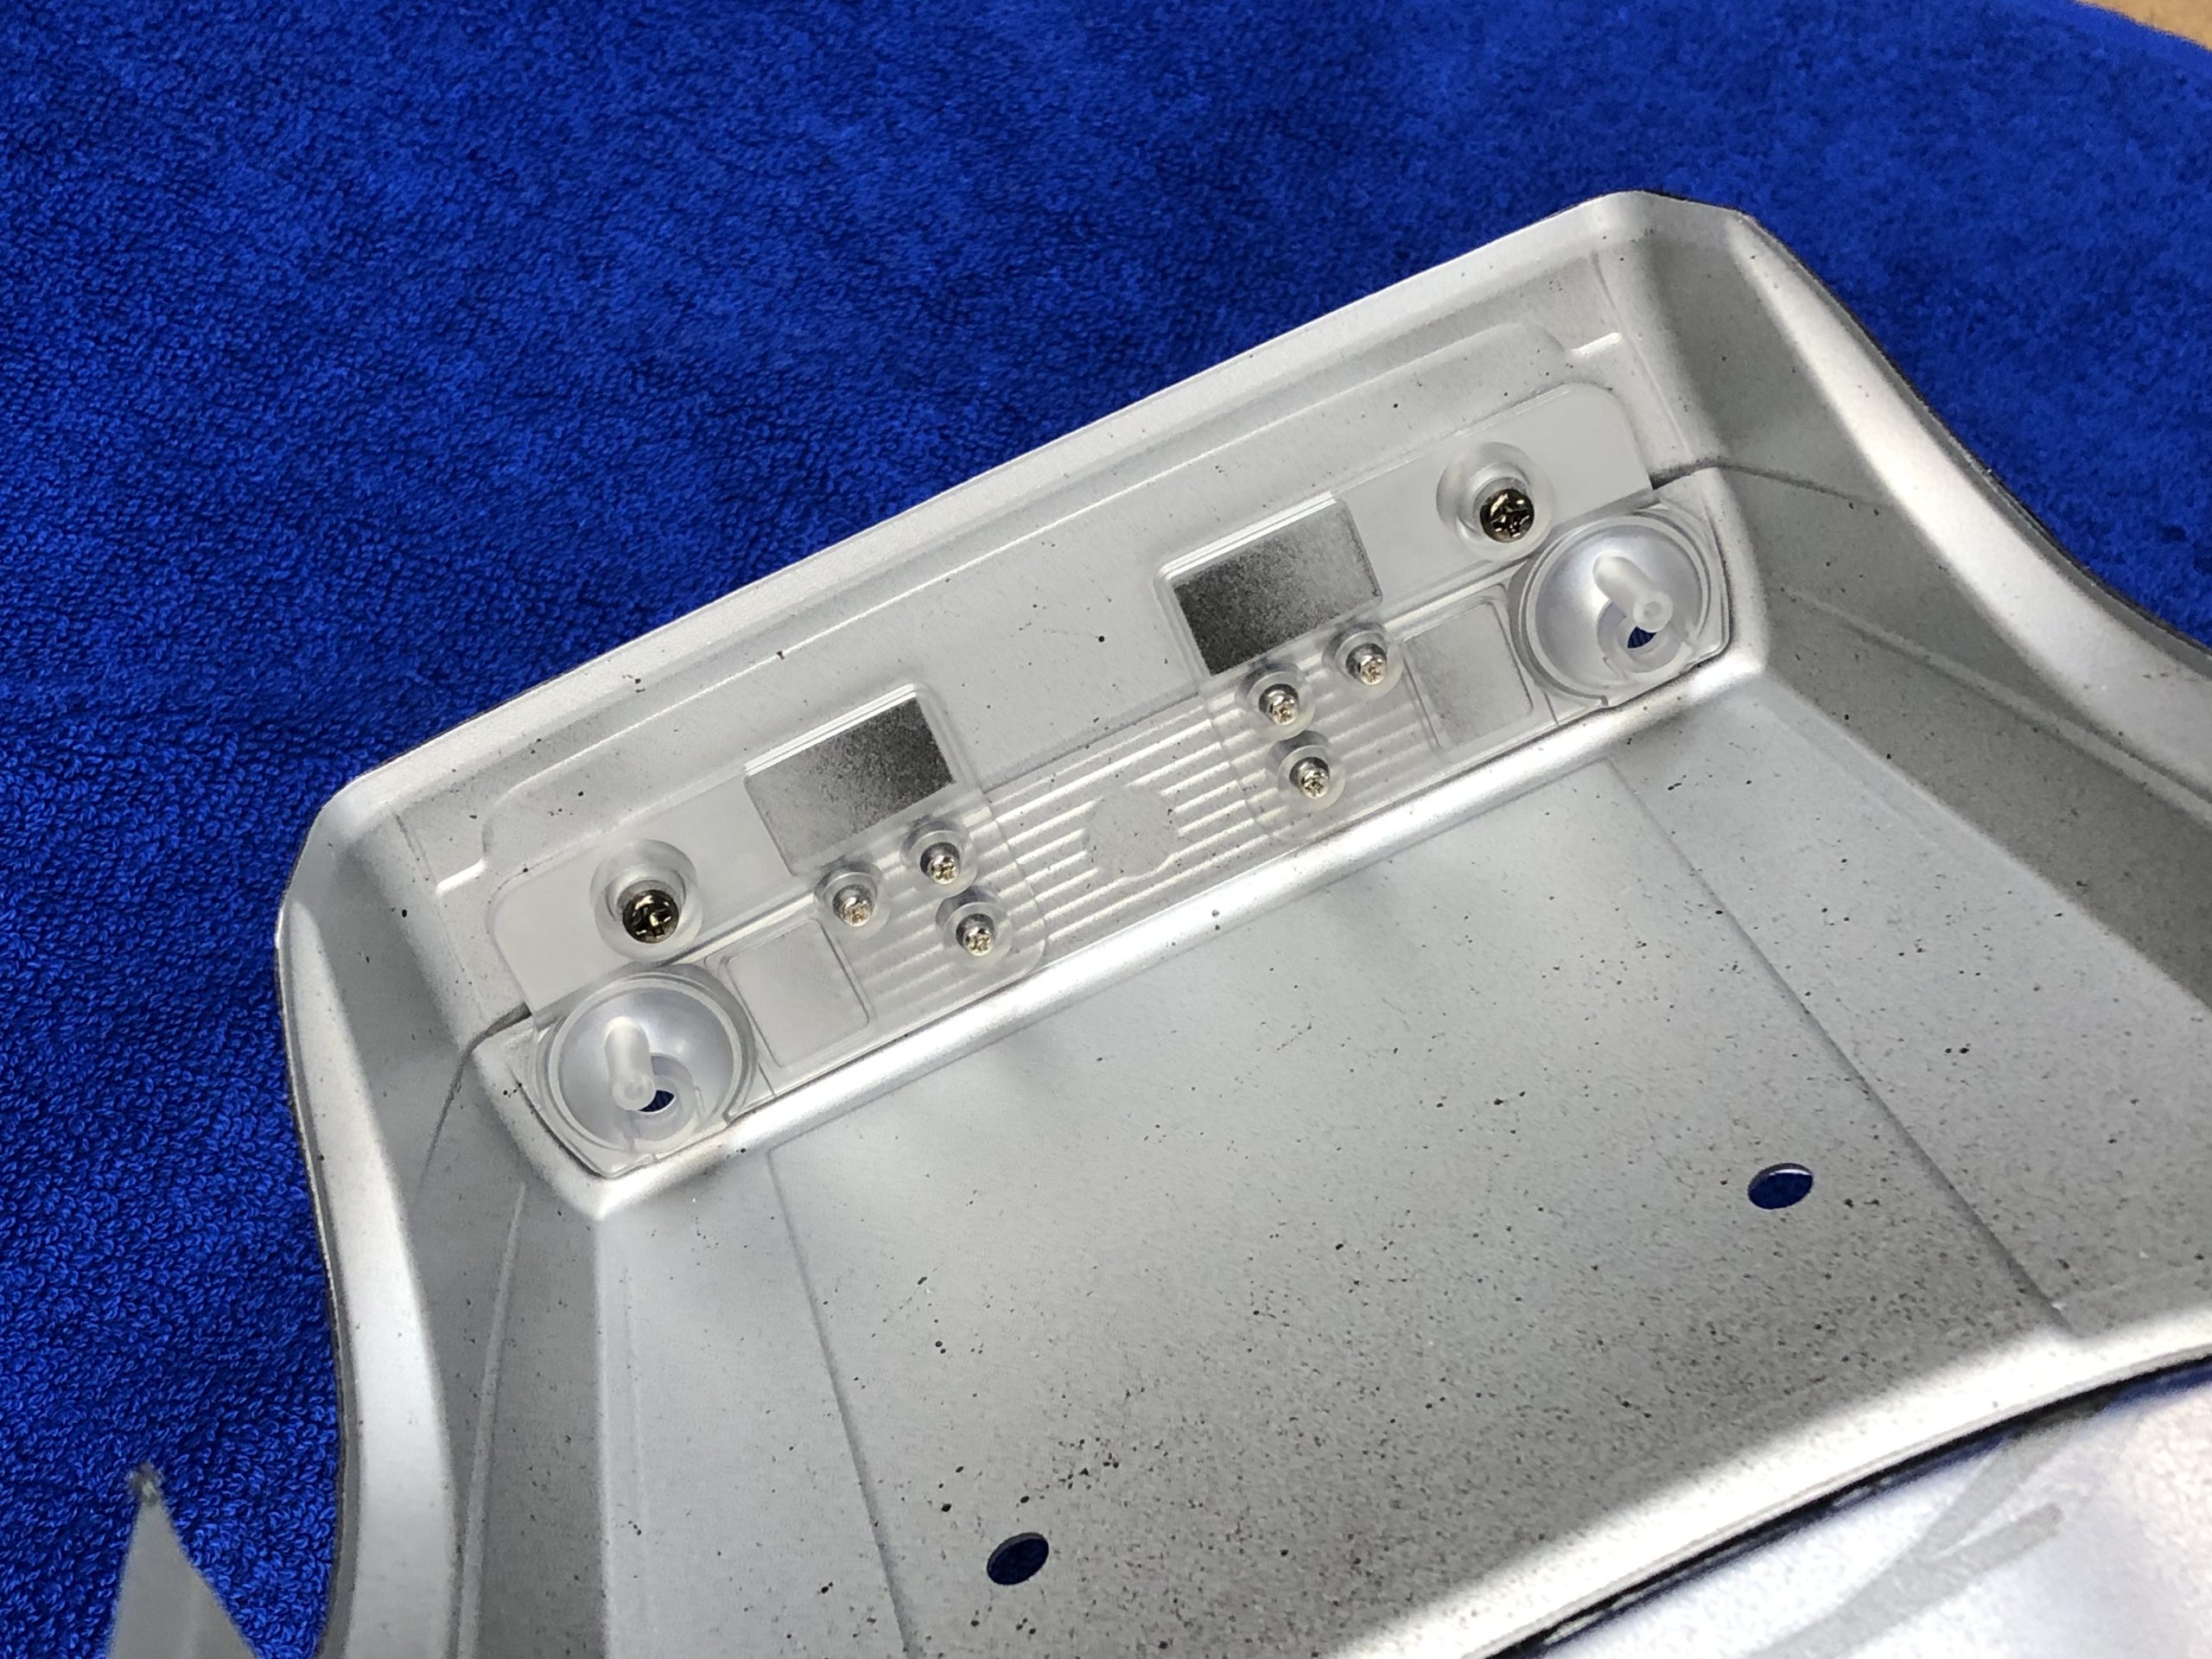
The front and rear each use two light buckets that are installed on the inside of the body. These light buckets are used for when you want to add the optional LED light set. The LEDs are held by the internal light buckets. Additionally, these parts provide a more secure method for attaching the bumpers not to mention the dual rally lights.
THE COMPLETED TAMIYA VW GOLF II RALLY BODY
For more information about Tamiya products, visit: TAMIYA
SPONSORED ARTICLE


