 RC Driver The Best In RC Car & Truck News, Reviews & Video


Items Used:
PARMA
RTB GBS body #10224
Faslucent Green #40305
Fasflourescent Green #40107
Faslucent Orange #40309
Faslucent Red #40307
Fastint Black #40191
FasKrome #40300
FasBlack #40001
Faspearl Silver #40050
Fasmask 4oz. bottle #40281
Faskolor F-1 airbrush #40260
Detail Pen #10400S
Tools Needed
Lexan scissors
Body reamer
Hobby knife
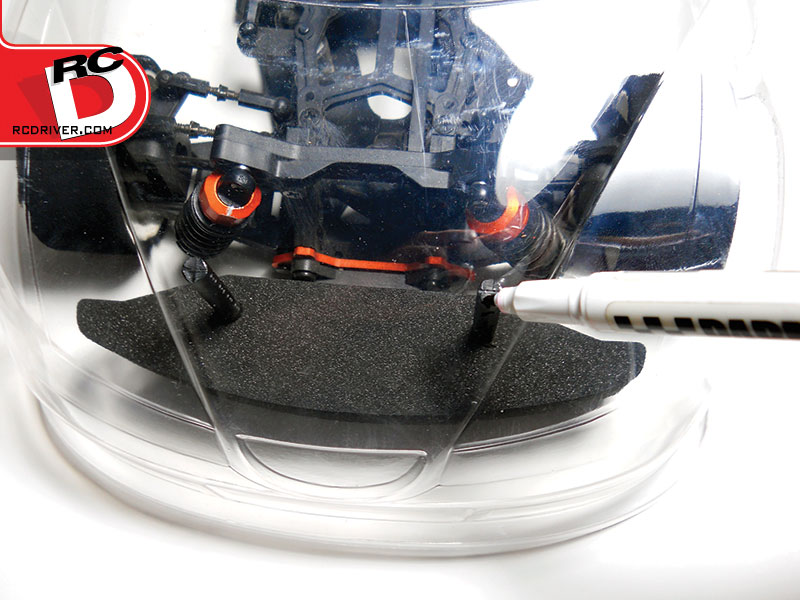
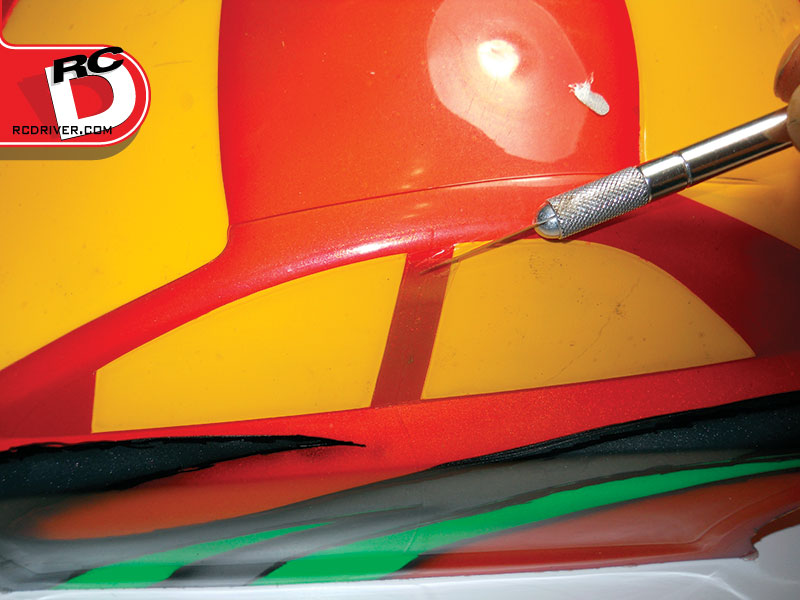
I mounted the Parma RTB body on HPI’s Sprint 2 chassis, but the mounting process should be the same for any touring car chassis. After trimming the body with my Lexan scissors, I lined up the front wheel wells, making sure the wheels were pointed straight. Then I marked the holes on the outside before making my mounting holes.
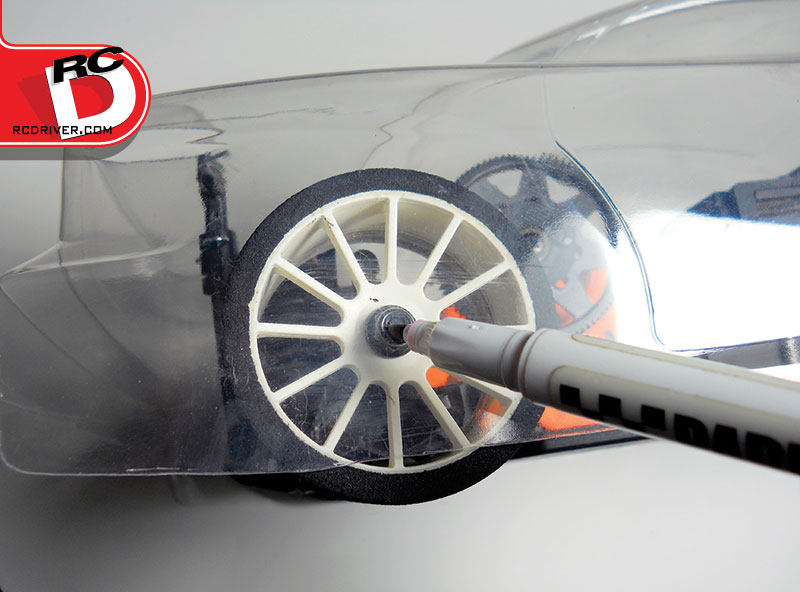
The rear wheel wells have not been marked in order to accommodate chassis of different lengths. To mark the wheel wells, I adjusted the body height to where I wanted it, and then I marked where the axle was located. Then I took one of my wheels, lined the center hole with my mark, and then traced around it. I then finished by cutting out the wheel well with my Lexan scissors
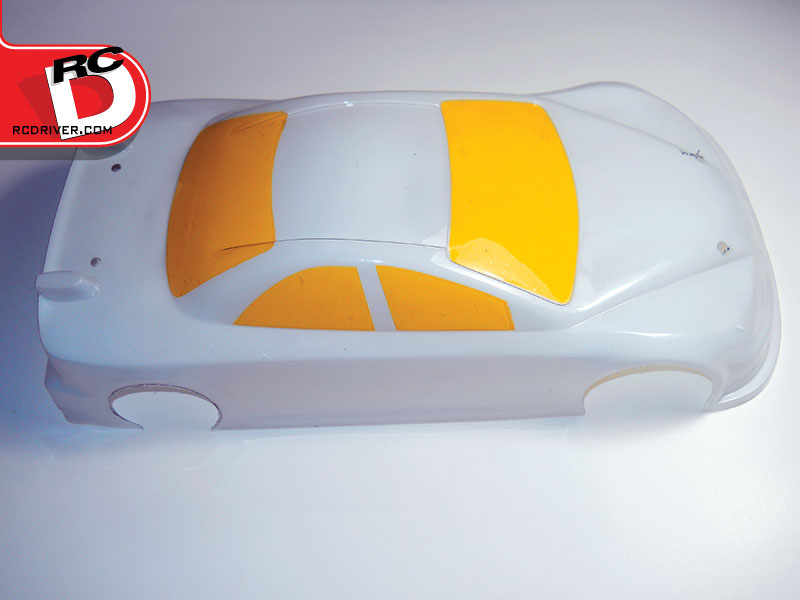
I started masking by applying the included window mask. I just lined them up with the lines marked in the body and made sure the edges were sealed down tightly. For this paint job I decided to go with Fasmask liquid mask. The Fasmask can be easily brushed on with a foam brush but I prefer to spray it on with my airbrush for even coverage and faster drying. I thinned it with a couple of teaspoons of water per four-ounce bottle and then laid down three good heavy coats.
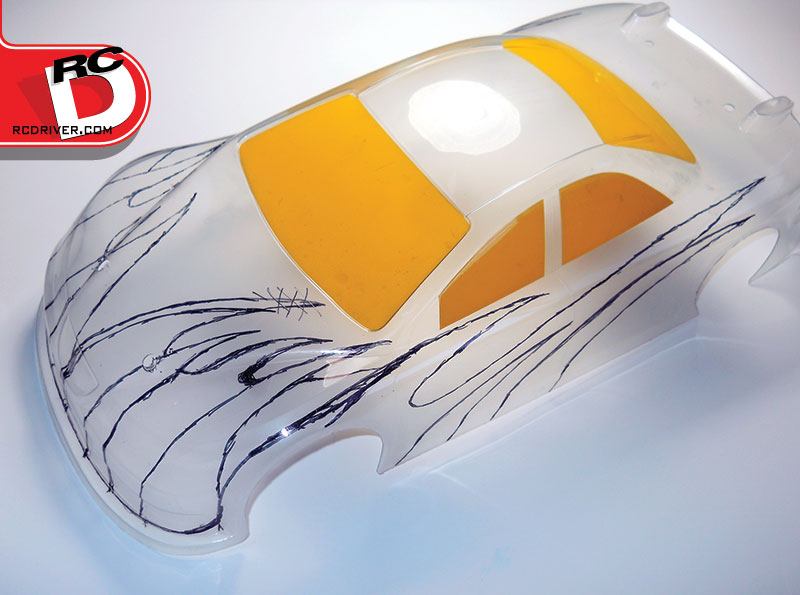
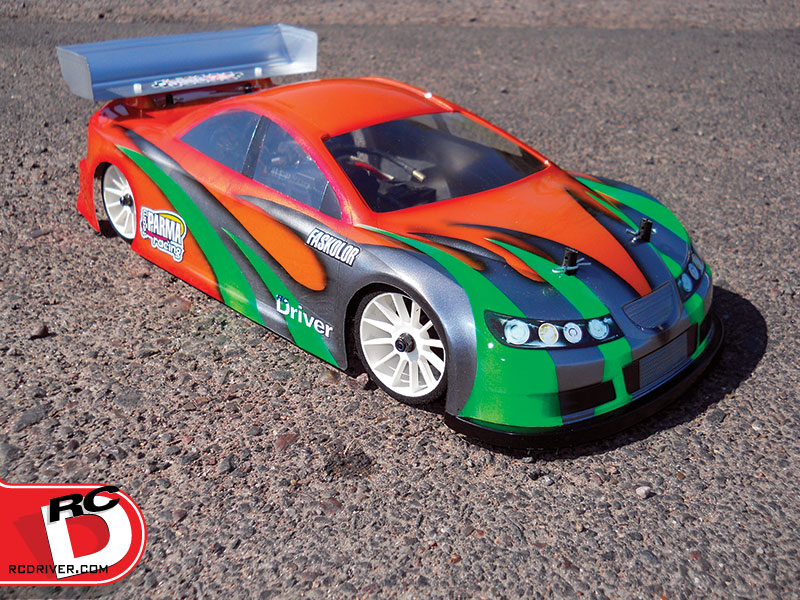
Normally I draw my graphics on paper and then transfer them to the body. For this one I challenged myself by drawing them straight on the body. I started with the swoosh in front of the rear wheel well and built out from there. I sketched my lines starting from one end and when I found myself getting lost, I pulled the line in from the other end, meeting somewhere in the middle. Then I pushed some areas out to smooth the curves. If you mess up, you can wipe the line right off with some alcohol, but I just had one spot and I crossed it out so I wouldn’t accidentally cut it later.
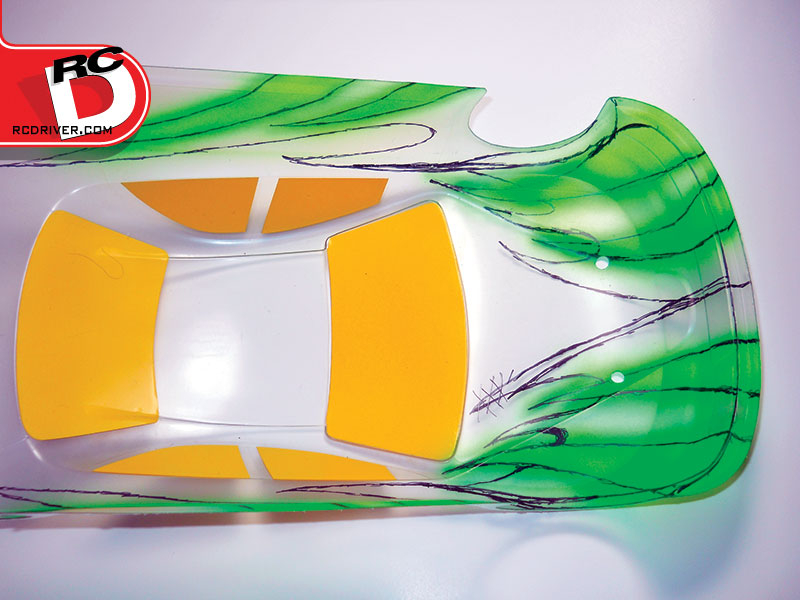
I started by cutting the graphics with the swooshes in the foreground. It just requires a light touch to cut the liquid mask. Be careful not to score the body. I used the tip of my knife to start getting the mask off, and pulled the rest off with my fingernails. To give them a little character, I shaded some Faslucent Green around the edges, and then I filled it in with Fasflourescent Green. Since both colors are semi-transparent, I back them up with Faswhite to give them opacity and make them really pop.
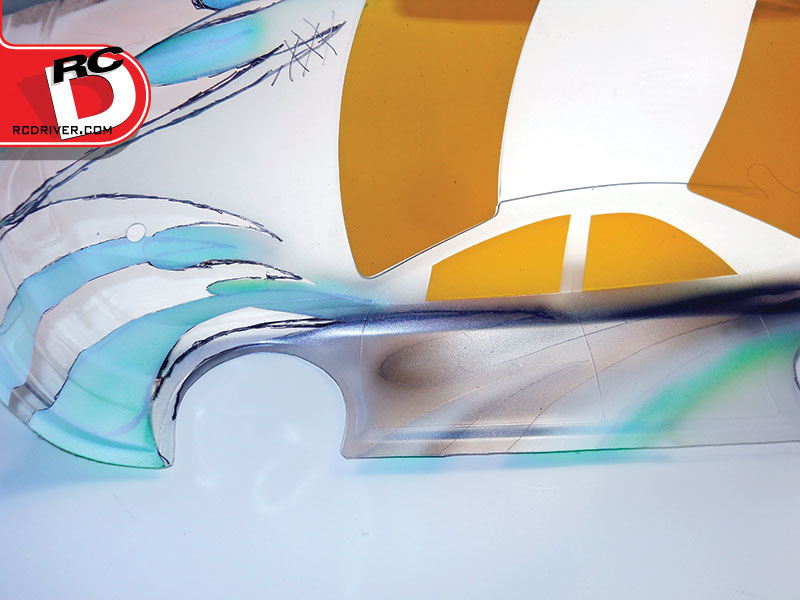
After laying the foreground graphics, I cut the background graphics. I wanted some separation from the hood and sides, so I cut the sides first. I started laying paint by fading some Fastint around the edges. I also used the Fastint to drop shadow the foreground graphics that lay inside the background graphics. I wanted the silver to be more of a grayish color, so I just laid one light coat of Faspearl Silver and backed it with FasBlack. Then I peeled away the graphics on the hood and repeated the process.
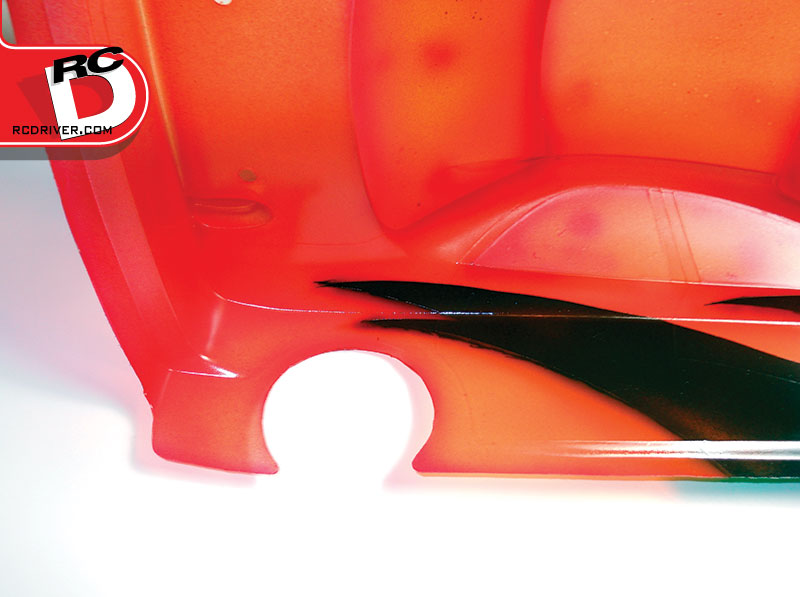
Now it was time to lay the background color. I peeled away the remaining Fasmask and started by fading in some Faslucent Red. Then I faded the red around the body edges and the edges of the windows. Next I filled the whole area with Faslucent Orange before finishing with FasKrome. While I had my airbrush loaded up with the FasKrome, I sprayed the wing. I wanted to spray it from the bottom, so I peeled off the overspray film first.
I like to do trim pieces from the outside to give them more of a matte look. So I cut away the widow pillars, the piece at the front of the window and the front air dam. Then I laid a coat of FasBlack. While I was at it I gave the whole inside of the body a coat of the FasBlack. This made it really opaque, and I think it looks cleaner.
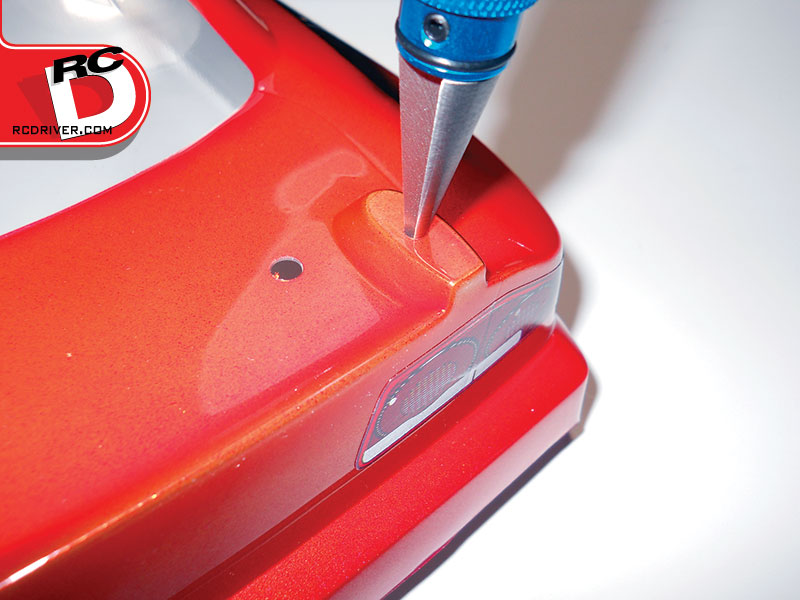
After giving the paint some time to dry, I used a blow dryer between coats to save me some time. The next step is to peel away the overspray film and mount the wing. Open up the pre-marked holes and attach it with the included nylon screws. Finally, apply the headlight, taillight, and grill decals. Finish by removing the window mask, and it’s done!
Wrap Up
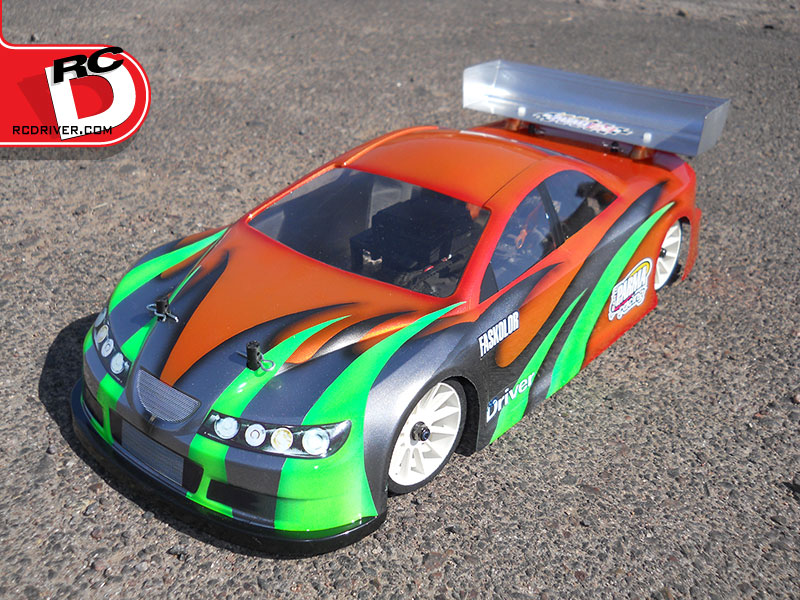
While this paint job wasn’t particularly difficult, I am used to the smaller curves of flames and making larger curves like this look smooth was a real challenge for me. It was also challenging to lay the graphics directly on the body. I feel the finished body looks really good but I see room for improvement and plan to keep practicing this style. Normally I say pictures don’t do my paint jobs justice, but this one really came to life in photos!
WORDS & PHOTOS: David Harrington
LINKS
Parma, parmapse.com
HPI, hpiracing.com


