By: David Harrington
From RC Driver Issue: 135
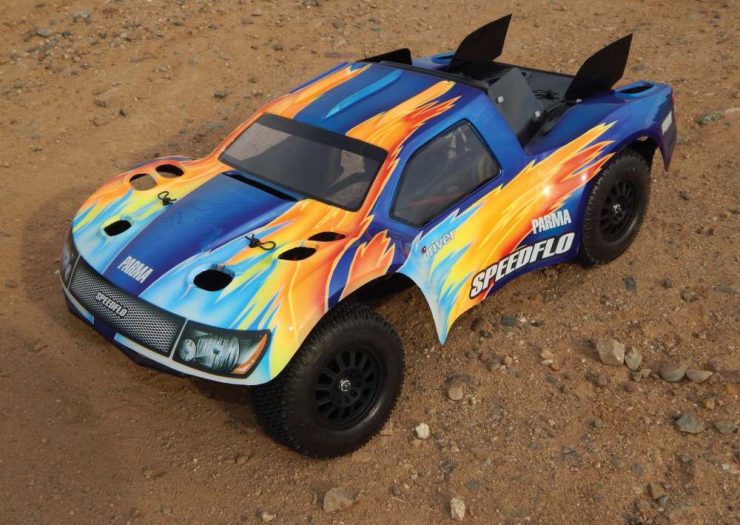
Short course trucks were an immediate hit because of their larger, more scale bodies, but as soon as people started racing them they realized those cool looking bodies also messed with the handling and caused a parachute effect over jumps. It wasn’t long before the serious racer’s bodies looked like Swiss cheese from all the holes they made trying to improve the handling.
When Parma released the Speedflo body I loved it because it has numerous vent holes strategically placed to improve handling and help prevent parachuting over jumps. And it still looks good, not like a piece of cheese. I have been using Speedflo bodies with excellent results so when I heard the Speedflo 2.0 had been released I was excited to see what they did to improve an already good design.
The shape of the body doesn’t seem to have changed much, but the roof does seem to have more of a rake for more downforce. The biggest change you will notice is that the cut- out holes are oval in shape which should greatly increase the durability, as square holes tend to crack in the corners. The holes are also larger which will improve air flow and are also large enough that you can get your rotary tool’s sanding barrel in there to clean them up. People like to see a roll cage, but I have found that many of my bodies crack right on the crease of the cage. I noticed this body doesn’t have a roll cage molded in. I assume this is also to improve durability. The 2.0 is also available in a thinner, lightweight version, as well as the standard thickness. This should improve handling but I personally feel thinner bodies actually tend to be more durable because they bend more before they crack.
Now I have one of the lightweight versions and I just need to slap a paint job in it so I can see how it drives!
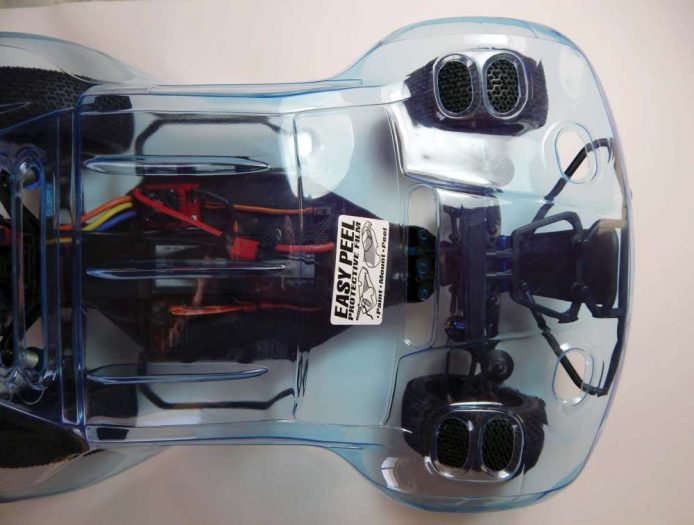
1 To start, you will need to trim the body out with a pair of Lexan scis- sort. Be careful not to discard the number plates and fins. I found the easiest way for me to cut out the vent holes is to score the Lexan on the line several times, then push the piece back and forth until it pops out. You do not need to trim out all the holes. You can just do certain holes to customize your handling to your desire. The front holes and the ones behind the cab will improve stability and minimize the parachute effect. The ones in the rear will help on large jumps and large tracks. Since this body is designed to be a general purpose fit for most short course trucks, there are no markings for the holes. You will have to set the body on your chassis and mark the tops of the body post with a permanent marker. I was able to drop this body right on the SC10 with no additional trimming.
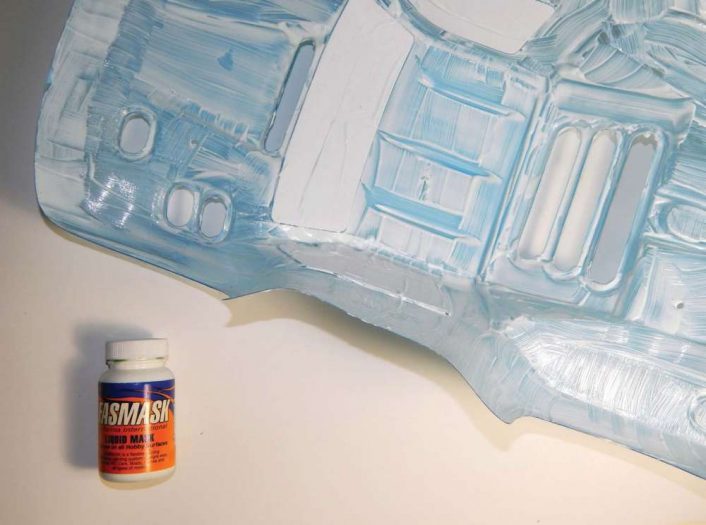
2 After you’ve trimmed and test-fitted the body, it is time to prep it for paint. The body must be scrubbed out with warm water and some dish soap to remove any residual oils that can mess up your paint. Then I apply the included precut window mask. There are numerous techniques you can use to mask your paint job, but liquid mask has become my go-to method. To apply the Fasmask I just pour a little bit into the roof, then use a foam brush to start spreading it. I do two or three good thick coats, allowing a couple of hours drying time between coats and preferably overnight after the last coat.
3
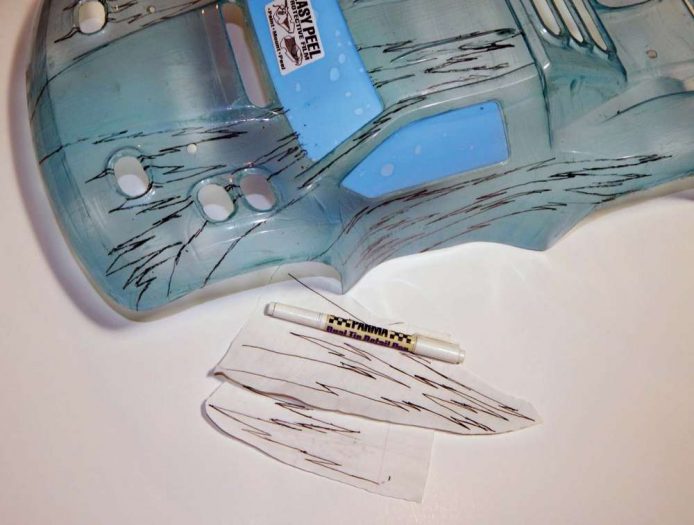
For this paint job I wanted to create a graphic that looked like an explosion bursting off the front of the truck in layers of colors. I first sketched out my idea on a piece of notebook paper. After I had my idea roughed out, I traced it over with my detail pen to create a reverse image on the back for the other side of the truck. I then held my drawing on the inside of the body while I traced it on the outside. You can use any permanent marker, but I like to use my Parma Detail Pen.
4
I start by cutting out the graphics in the front first. Make sure you start with a brand new, sharp blade in your hobby knife and then lightly cut the liquid mask, being careful not to score the body. On pointy graphics like this, be very careful to cut the tips all the way or you will have problems when you
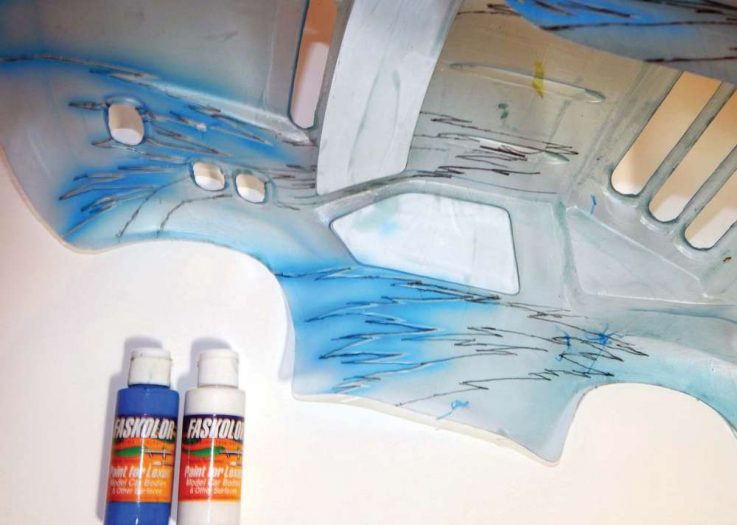
remove it. I want my graphics to be very bright so I have better orientation when I’m up on the driver’s stand, so I shaded Fasfluorescent Blue around the edges. Then I cut a thin outline around the graphics. I filled in the graphic with Faswhite, which will make the fluorescent color pop. I also filled the outline at the same time.
5
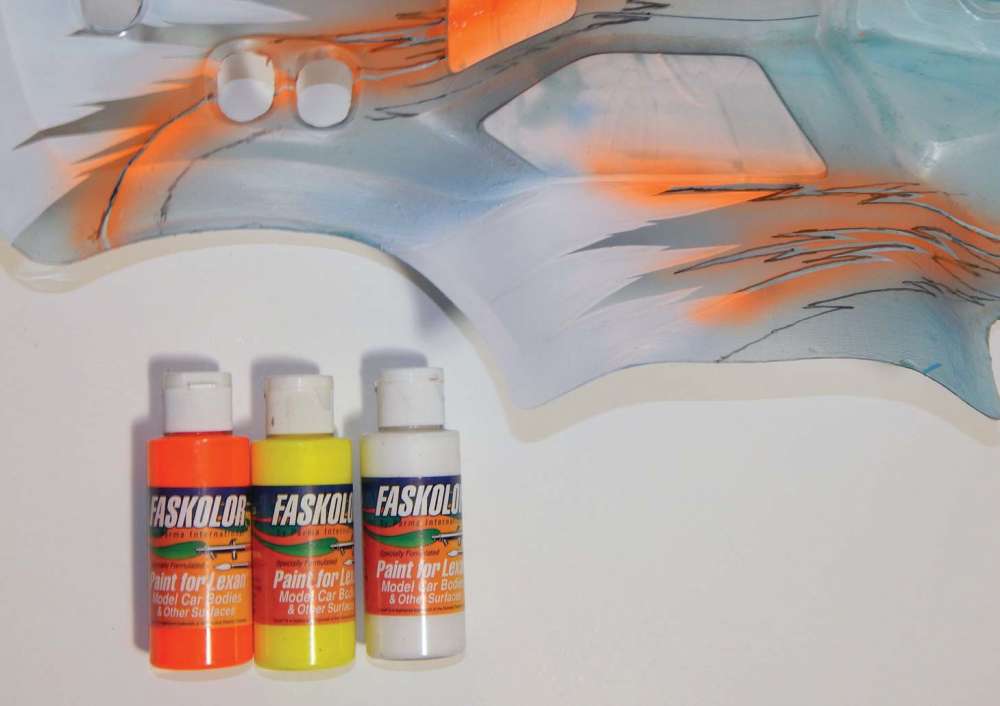
Now I’m going to cut my next set of graphics, just like I did the first, but this time I shaded FasFluorescent Orange around the edge before cutting the outline. Then I filled the whole area with FasFluorescent Yellow before backing it with FasWhite. This will not only make the color pop, but also prevents the following layers from showing through.
6
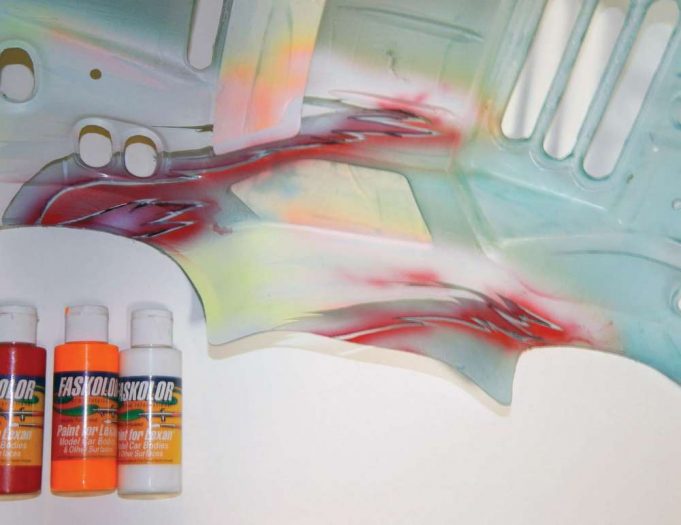
I meant to use FasFluorescent Red but I accidentally grabbed the bottle of FasRed next to it. I think the brighter color would have looked better but this is fine. So, anyway, I shaded the FasRed around the edges before cutting the outline and filling with FasFluorescent Flaming Orange and backing with FasWhite.
7
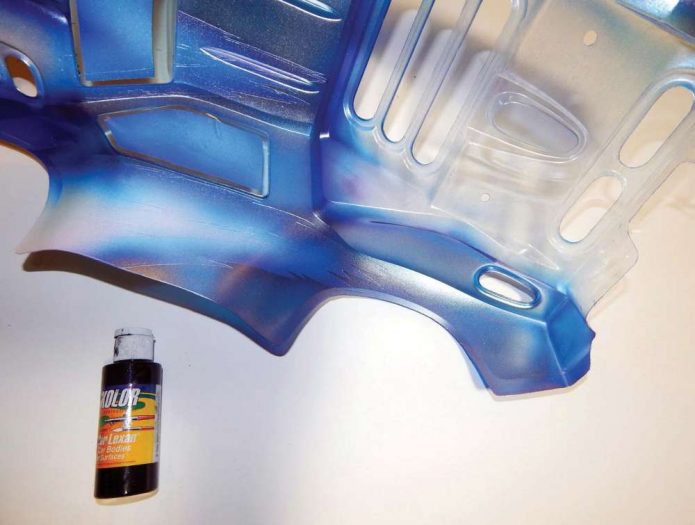
After I’ve done the final layer of graphics, I remove the remaining liquid mask. Before laying the background color, I shade Faslucent Purple around the edges of the body and graphic so the solid color will have a little more depth. Then I fill the remaining area with Faspearl Blue. The pearl color will need a backing color and FasKrome will also help it sparkle.
8
To finish I cut and remove trim from the windows and I also cut away the overspray film covering the bed area because I like to paint the bed from the outside for a flatter finish. I back the entire inside with FasBlack for a uniform look. Then I spray the bed area, number plates and fins. You should give the finished paint job some time to dry before removing the window mask and overspray film. Then you just need to apply the decals and mount the number plates and fins.
WRAP UP
I haven’t run a stock body on my short course trucks since I can’t remember when. When I get a new RC the first thing I change is the right tires for my track, and then comes the Parma SpeedFlo body. I haven’t had a chance to get the 2.0 version on the track, but I don’t see how it can’t be better. I can’t wait to try it! Come on weekend, hurry up and get here! LINKS
Parma parmapse.com, 440-237-8650
Yeah Racing distributed by rcmart.com, yeahracing.com
 RC Driver The Best In RC Car & Truck News, Reviews & Video