 RC Driver The Best In RC Car & Truck News, Reviews & Video


Words: David Harrington
Photos: David Harrington
I don’t know what’s wrong with me. I just keep buying RC cars. I didn’t need the Losi Ten SCTE because I already had two 4WD short course trucks, but I couldn’t pass up a deal. Could I? I’m always so busy going to the track, maintaining my fleet of RCs, painting for friends, etc., I just didn’t have time to tune it in, and so I shelved it while I continued to run my other cars. Recently I finally pulled it down and started getting it dialed in. First with the shock and diff oils, and then when I threw the Proline Bow Fighter tires on, it was dialed. Now I needed to get it looking good, but again with that time issue thing. When I had seen that Proline released a precut version of the FloTek body I was excited, not only for the time savings, but to save my wrist too. The only way I could think of saving any more time was Parma’s precut graphics. How could this get any easier?! Whoa, slow down there partner. It still takes a little time and patience, so let me go over how I put this paint job together.
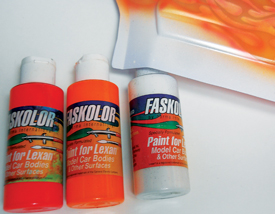
ITEMS USED
Parma
• Tribal Flames paint mask #10835
• FasWhite #40000
• FasKrome #40300
• FasBlack #40001
• Fasfl uorescent Red #40105
• Fasfl uorescent Flaming Orange #40304
• Faspearl White #40051
• Faslucent Blue #40306 Pro-Line
• Precut Flotek Body PRO3355-17
Step 1

To mount this on the SCTE, you will need to cut a chunk out of the rear to clear center brace of the bumper. There is a pre-marked area, but I had to cut about a quarter-inch to either side of the marked lines to clear the bumper. Then I was able to set the body on the chassis to confi rm I was using the right set of pre-marked holes, as there are several marked for other bodies. I made the holes with a body reamer, and it was mounted and ready for to be masked off.
Step 2
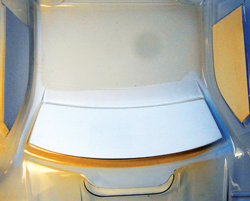
After test-fitting, I scrubbed the body out with dish soap and warm water to remove any leftover mold release and oils from my fingers. Then I dried it with a lint-free towel. I started masking by applying the window masks that are included with the body. I applied them by lining up and tacking down the corner, and then pulled a long edge across, keeping it off the surface. When it is lined up, I start from one edge, and work my way back and forth pushing it down.
Step 3
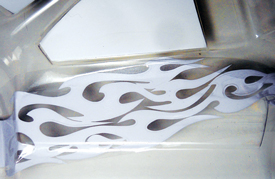
Now I am going to apply the Parma graphics. First I remove the excess material from the masking sheet. I give it a second look-over to make sure I got all the in-between pieces. When I am sure all the pieces of excess mask are gone, I cover a section with the included lift off tape. When pulling the mask off the backing sheet, be extra cautious to make sure all the mask is pulling off. Sometimes folding the paper back helps it left off. Then I transfer the mask to the body similar to how I applied the window mask. When you remove the lift off tape, be very careful not to pull the mask up with it. In some tight areas I had to make some relief cuts to get the mask to form around the body shapes. Then I warmed it with a hair dryer to help it stretch into crevices.
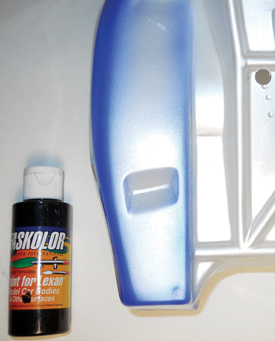
Step 4
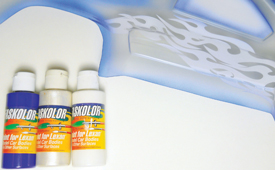
I start laying paint by filling in the background. To give the paint job some character, I shaded some Faslucent Blue around the edges and body lines. Then I filled it in with Faspearl White. Normally I would back pearl colors with FasKrome, to make them sparkle, but in this case I find it makes the white too silvery, so to make the pearl color opaque, and whiter, I backed it with FasWhite.
Step 5
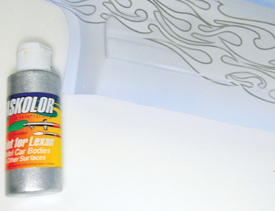
After giving the heavier coats a little time to dry in front of the fan, I removed the outlining from the graphics. I find it helps to use a hobby knife to start the end up then once you get it started, it pulls right off. I filled the outline area in with FasKrome.
Step 6
After I’m done filling in the outline, I removed the mask from the flame area. I shaded around the edges with Fasfluorescent Red. Then I filled in the remaining areas with Fasfluorescent Flaming Orange. The fluorescent colors will dry semi-transparent, so they will need to be backed with FasWhite to make them opaque.
Step 7
To give the bed area some texture I like to paint it from the outside with FasBlack. I cut the overspray film from the areas I want to paint, leaving the roll bars covered. After the paint dries and when you remove the overspray film, the roll bar will become exposed, looking cooler than leaving the bed plain.
Step 8
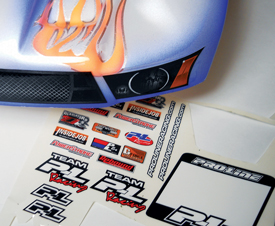
After all the paint has had time to dry, I finish up by removing the window mask and overspray film. Then I give it the finishing touch by applying the decals that come with the body. You can cut them out with your hobby knife or scissors. I used scissors here. Then I apply them to the body where the lines are marked in the body, being careful to work out the bubbles as I go. Trapped bubbles can be removed by piercing them with your hobby knife.
WRAP UP
Those who follow this column know that I like to share some self-criticism. I feel it helps you grow to become a better painter by criticizing your own work. On this one, I originally planned to outline the flames in black, but at the last minute I became afraid it might show through the white, so I went with the FasKrome. Now I wish I went with the black, as I feel it would have provided the necessary contrast, but that’s on me. I think the Parma graphics look great. The only thing I hate about precut graphics is when I get compliments; I can’t take credit for drawing them!
LINKS
Parma parmapse.com, 440-237-8650


