The Build – Part 2
Now that we have the differentials built, we’ll work on getting them mounted in the gearboxes. There are a few tricky steps here and patience is key.
Team Associated B44.3 Buggy Build Step 18
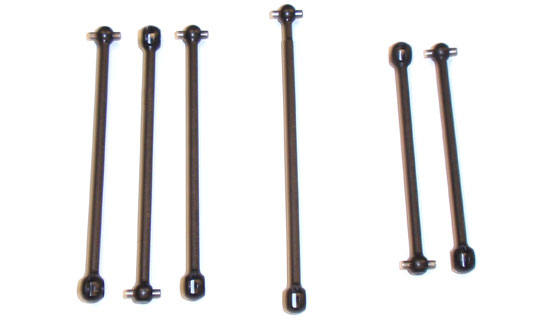
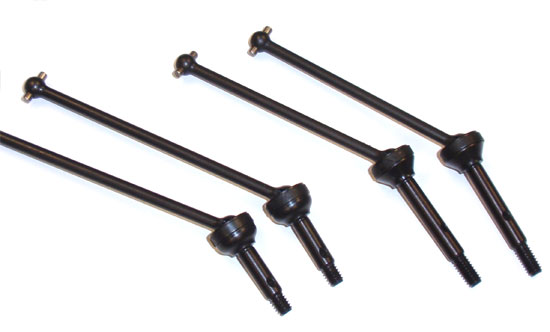
The B44.3 uses 3 different lengths of CVA bones. The 3 to the left are the front drivebones (x2) and a front-center CVA bone (x1), the long, center one is used for the center-rear CVA and the shorter 2 on the right are for the rear drive axles.
Team Associated B44.3 Buggy Build Step 19
The front and rear axles are different as well. The longer 2 on the left are for the rear; the shorter 2 on the right are for the front.
Team Associated B44.3 Buggy Build Step 20
Start by sliding the CVA barrel into place and adding some black grease for lubrication.
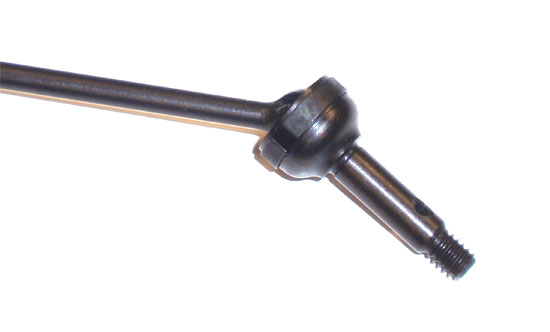
Team Associated B44.3 Buggy Build Step 21
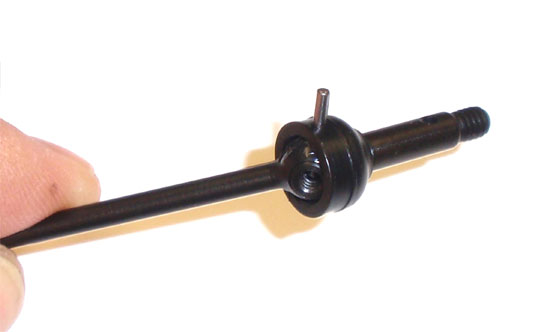
Set the axle over the CVA ball and, while aligning the holes in the axle and barrel, slide the pin through.
Team Associated B44.3 Buggy Build Step 22
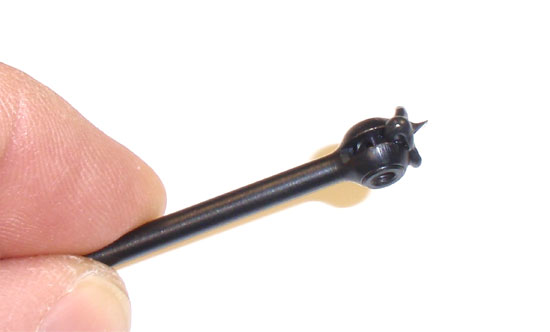
Slide the CVA pin retainer band over the axle and into the groove at the end. Make sure the gap in the band is not hovering over the pin; rotate it if necessary.
Team Associated B44.3 Buggy Build Step 23
Build all 4 axles (2 front, 2 rear). This is how the completed set should look.
Team Associated B44.3 Buggy Build Step 24
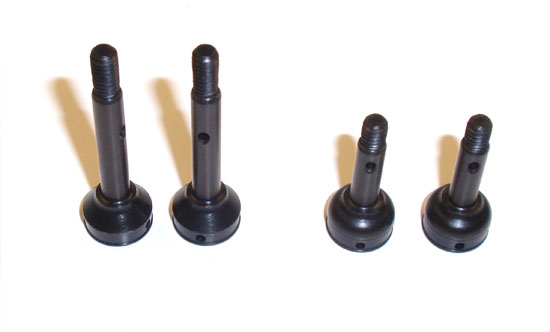
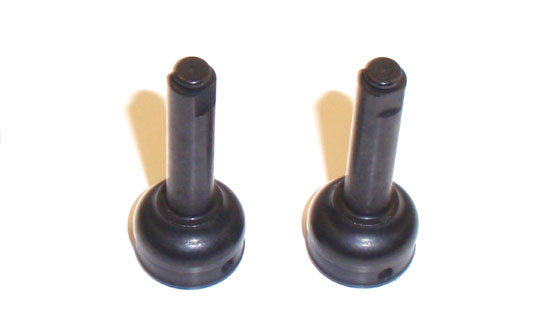
There are 2 more axles to deal with, but these do not have threads on them. These will be for the center CVA bones. They are both the same.
Team Associated B44.3 Buggy Build Step 25
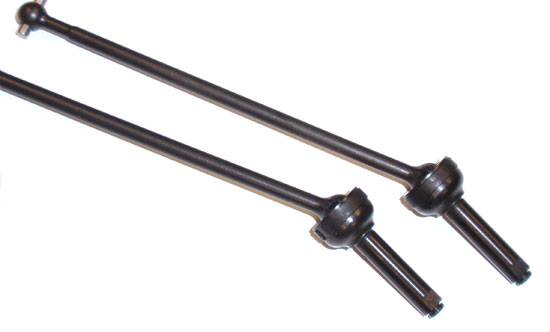
Following the above procedure, build 2 center drive axles.
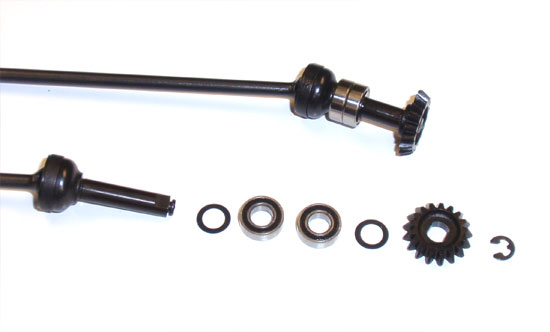
Team Associated B44.3 Buggy Build Step 26
Now for the fun part. Both of the center CVA drive axles will build the same way so attach the parts in this order: shim, bearing, bearing, shim, sun gear, e-clip. The e-clip is extremely difficult to get on so I would suggest having a few spares around just in case. I went through 7 e-clips during this step.
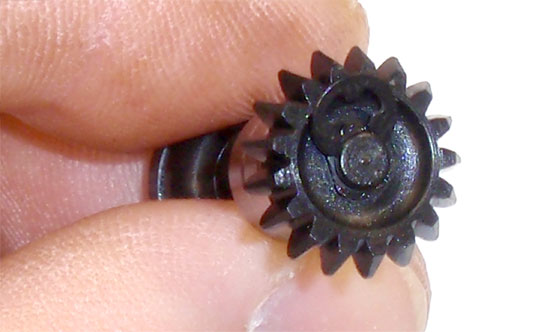
Team Associated B44.3 Buggy Build Step 27
Here is how you’ll need to get the e-clip on. As you can see, it doesn’t sit in the groove; you have to force it in there. Not fun. Oh ya, you’ll need to build 2 of these.
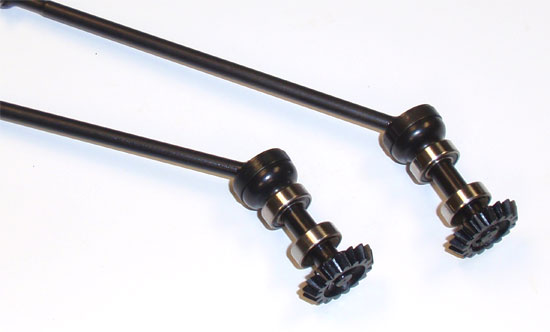
Team Associated B44.3 Buggy Build Step 28
If both of your center CVA assemblies look like this, pat yourself on the back. Oh, and treat yourself to pizza and beer (beer only if you’re over 21).
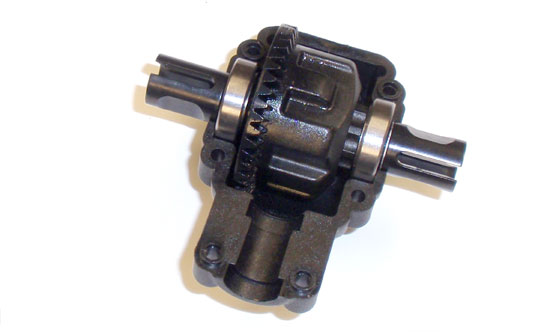
Team Associated B44.3 Buggy Build Step 29
At this point, you need to know if you’re building the B44.3 in saddle-pack or shorty-pack configuration. I’m building it in shorty-pack but, if you’re building in saddle-pack, you’ll need to follow the instructions in the manual. Start by dropping the diff in the lower gearbox case.
Team Associated B44.3 Buggy Build Step 30
Apply some black grease to the sun gear on the center CVA assembly and set that in position. Screw to upper gearbox case into position. Now rotate the center CVA to check the friction level. If it spins smoothly, you’re in luck. If not, you’ll need to dissemble the gearbox and remove a shim from the differential (behind the bearings). You’ll need to experiment with the shimming here; remove one from the gear side to loosen the gear mesh (but still free up the movement); remove one from the opposite-gear-side to keep the mesh tight (but still free up movement).
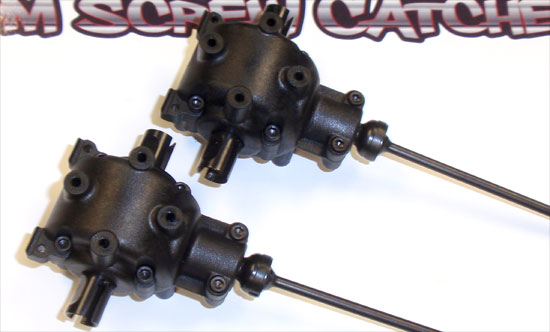
Team Associated B44.3 Buggy Build Step 31
Look at that; 2 completed gearboxes. Hopefully you’re still excited about this build even after the e-clip incident. On to the next step.
 RC Driver The Best In RC Car & Truck News, Reviews & Video