 RC Driver The Best In RC Car & Truck News, Reviews & Video


Update your Helion Dominus 10SC with RPM’s New Replacement Control Arms
Text and photos by Mark Houlahan
Not everyone can afford to drop $800-$1,000 into a custom rig with unobtanium everything these days. Budgets are tight, yet people still want to get out and enjoy some fun in the dirt or on the track (besides, when that much money is poured into a machine it usually ends up being a shelf queen in our experience!). Budget friendly vehicles are available in just about every genre of R/C. One of the popular budget rigs in R/C short course is the Helion Dominus 10SC. The Helion provides a lot of fun in a sub-200 dollar package, but like any vehicle, no matter the entry price, there’s always room for improvement. A popular upgrade for many off-road R/C vehicles is a stout set of control arms from RPM R/C Products.
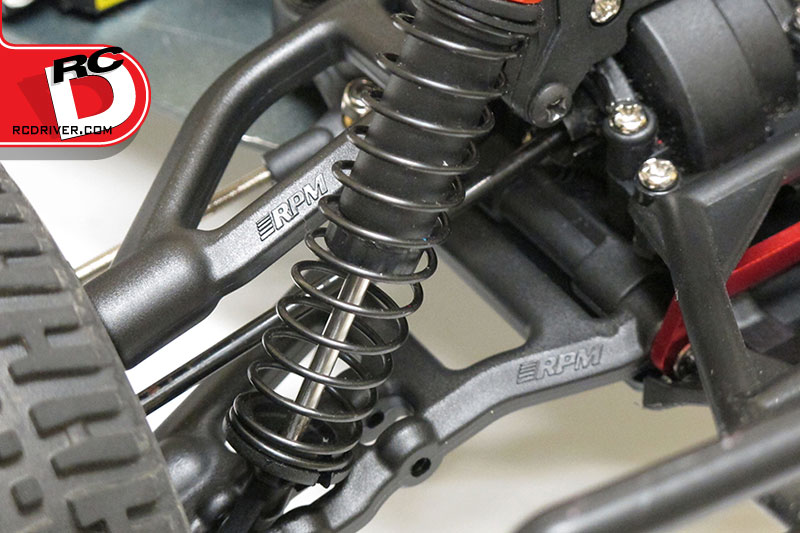
RPM’s proprietary nylon injection molded control arms are legendary for their strength and smart design features. Improvements in strength, precision fit (which reduces camber and caster setting changes), mounting boss size, and more mean these are most likely the last control arm upgrade you’ll ever do to your vehicle; and if you should ever have an arm fail RPM’s warranty on molded arm breakage is the best in the business.
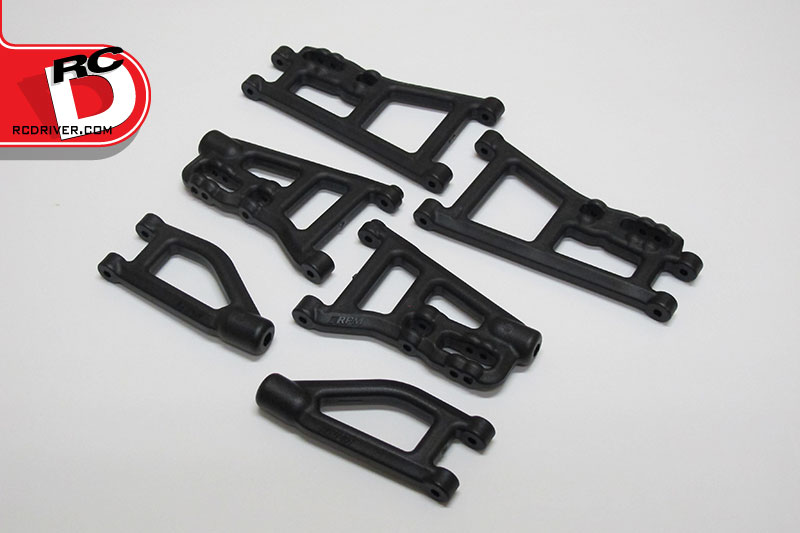
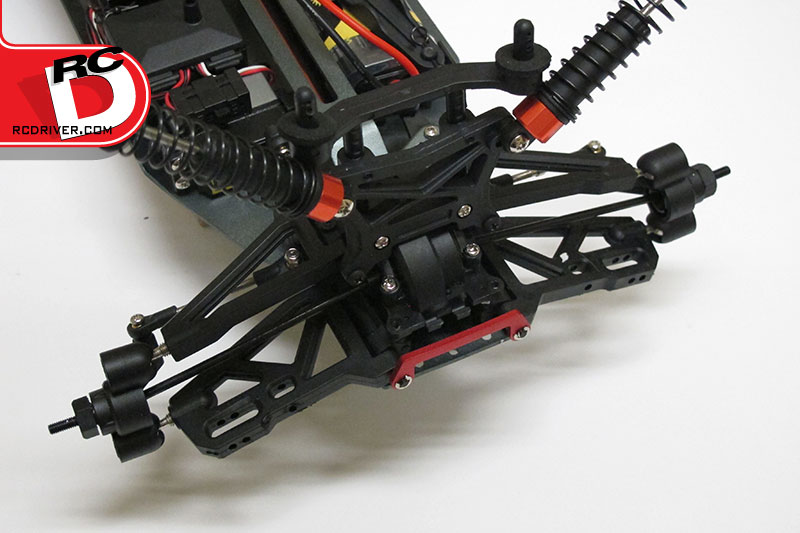
Recently released for the Helion Dominus 10SC, Dominus SCv2, and Dominus 10TR, RPM’s direct replacement front and rear control arm kits are a great low-buck upgrade that will reduce down time and breakage when you’re out running your Dominus. The new front control arms, PN 70632, are sold as a set of one upper and one lower control arm per package. Thus, you’ll need to order two of the PN 70632 packages per truck. At the rear, RPM’s PN 70872 control arms get the job done. Since the Dominus uses a lower arm only in the rear with an adjustable camber link one package will suffice to upgrade your rear control arms.
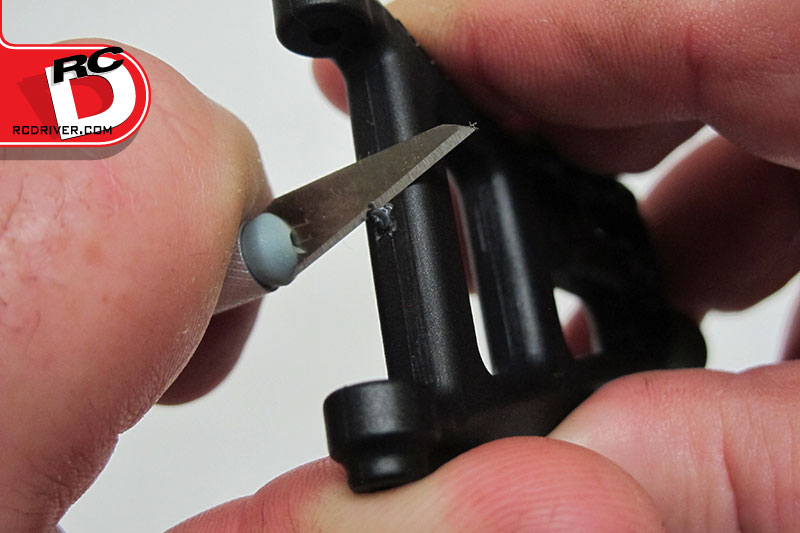
The front control arms are connected to each other via a small parts mold sprue. After separating the arms use a hobby knife to remove any excess mold flash.
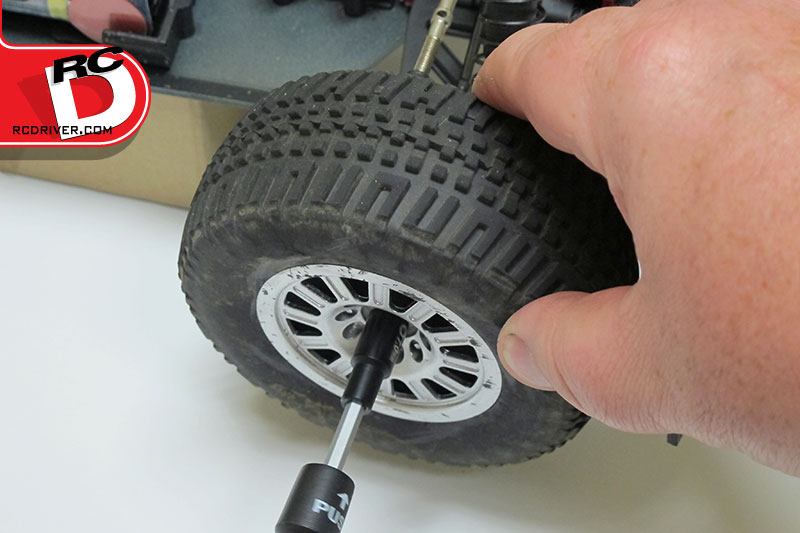
Using a chassis stand, boxes, or other means to support the chassis off of your work surface, remove the four wheels from your truck. The wheels are the same front and rear, so no need to worry about keeping them separate.
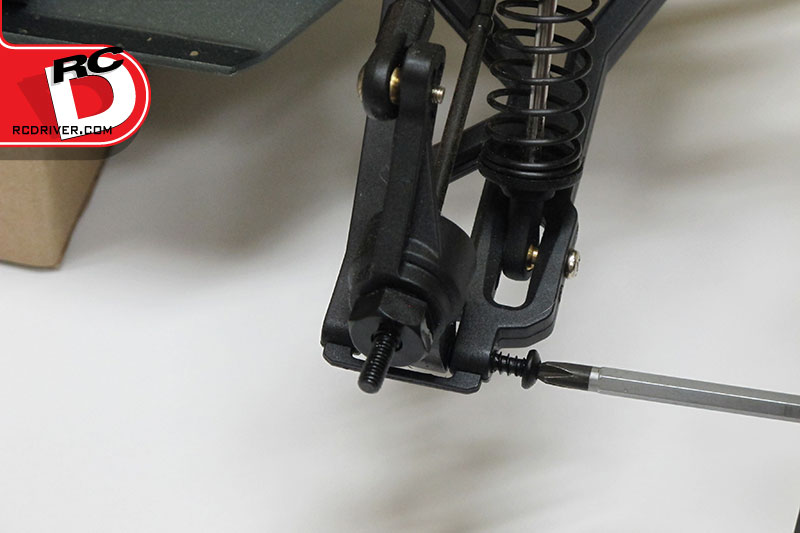
We’re starting with the rear arms, as it is the easier end to upgrade. Remove the rear hub lower hinge pin screws and swing the hubs and upper camber links out of the way.
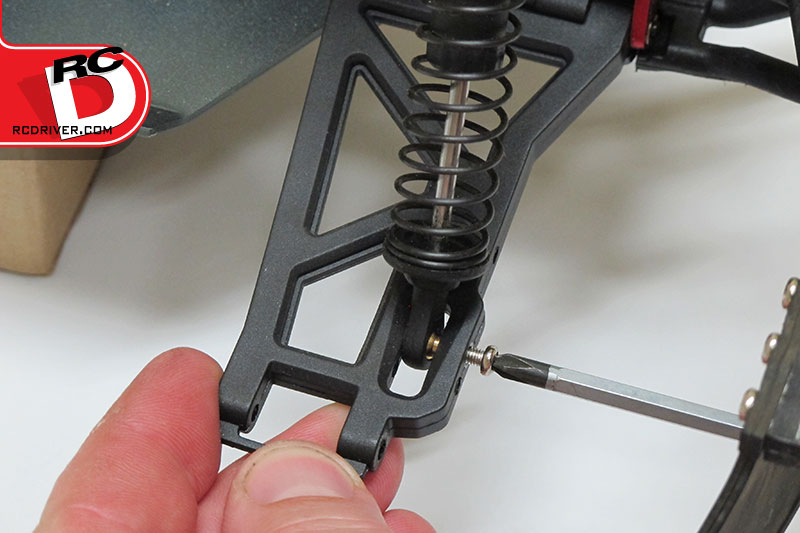
There’s no need to completely remove the shock assemblies. Instead, just remove the Phillips head screws securing the shocks to the lower arms, pivot the shocks up out of the way and gently tighten the upper shock mounting screws to hold the shocks up.
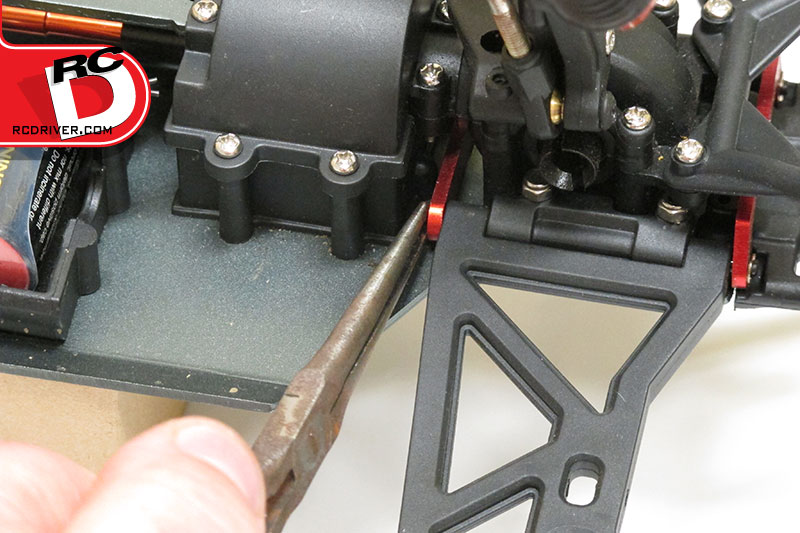
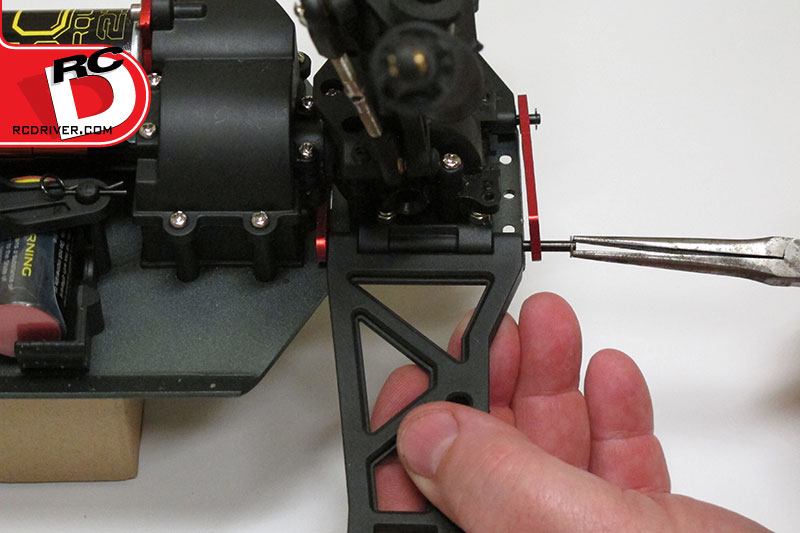
With everything up out of the way the stock rear Helion control arms are plainly visible and the last item securing the arms to the chassis are the hinge pins. Using a small pair of needle-nose pliers, carefully push the E-clips off of the inner end of the hinge pins. Don’t lose the E-clips in the chassis.
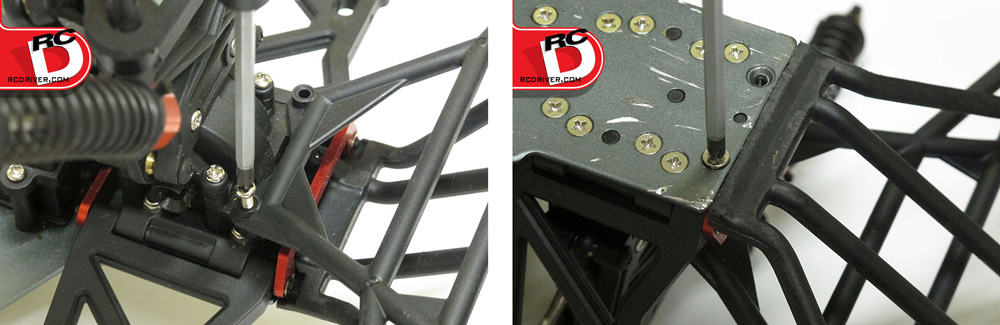
To be able to remove the hinge pins and thus the stock rear control arms the rear bumper assembly needs to be removed to access the hinge pins. Remove the two Phillips head screws on top and two from the chassis to remove the bumper assembly. The bumper has a locating pin on it, which makes removal a bit of a struggle, but a gentle pull/twist motion will set it free.
Once the rear bumper assembly is on the bench the rear hinge pins can be carefully pulled free of the hinge pin braces and control arms using needle-nose pliers, as shown here. Install the new RPM rear control arms in place of the stockers and reverse the removal procedures to reinstall all removed parts. Don’t forget to loosen the upper shock screws to allow freedom of movement once you’re done too.
To upgrade the front control arms on the Dominus platform we start by removing the front bumper assembly and unbolting the shocks from the lower arms and pivoting them out of the way, just like we did with our rear control arm upgrade.
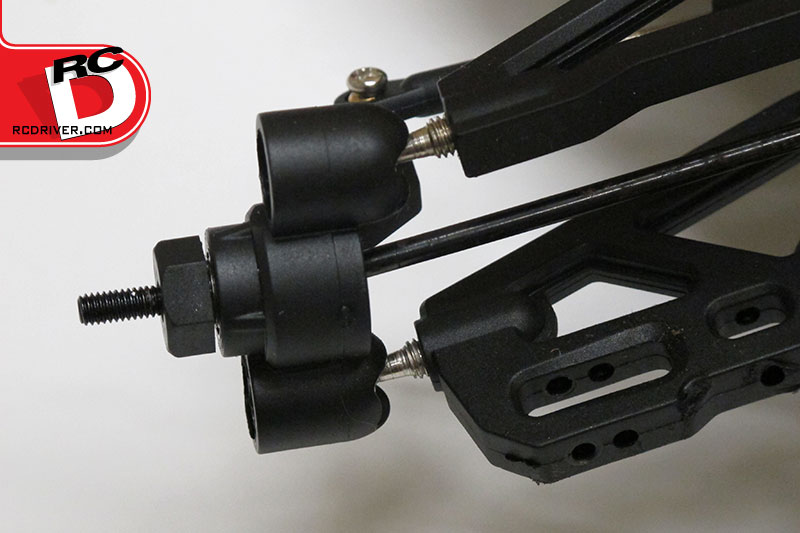
The front suspension uses a pillow ball setup with the front hubs. Note the screw-in pillow ball adjusters and how many threads are visible in each arm. This will give you a ball-park starting point for reassembly.
Beginning with the upper arms, remove the threaded hinge pins, being cognizant of the upper arm spacers. These go towards the rear of the bulkhead assembly and just slip over the hinge pins. Once the threaded hinge pins are removed there will be enough slack in the suspension to remove the front dog bones as well.
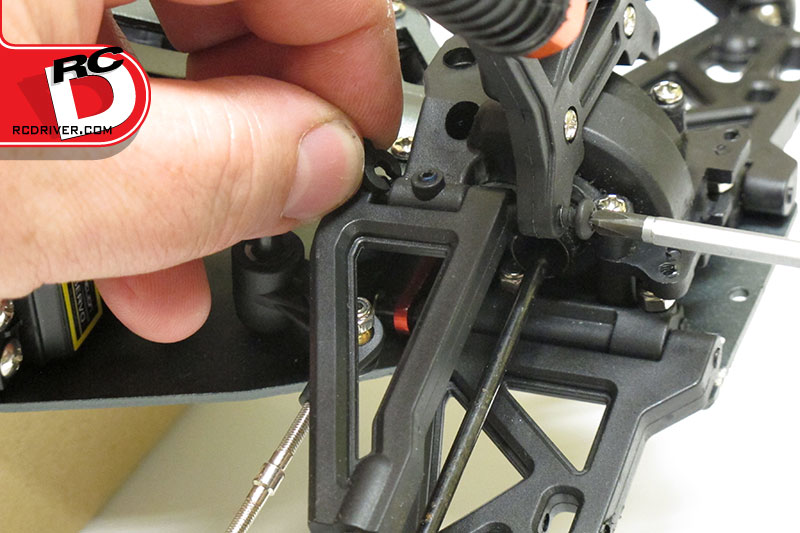
Using a hex driver, unthread the pillow ball adjuster from the upper control arms to remove the control arms. Counting the number of turns for removal and noting said number of turns will help when installing the new RPM upper control arms.
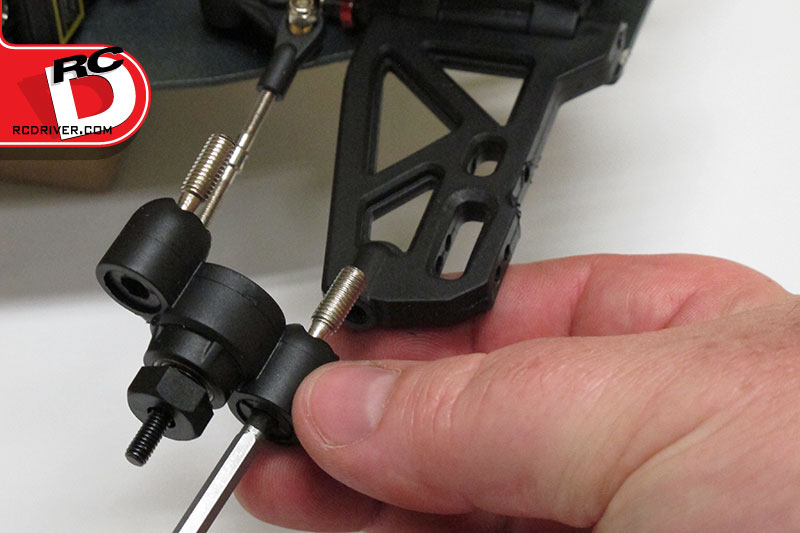
Do the same for the lower pillow ball adjusters and lower control arms as well. Again, counting the number of turns for removal will help with installing the new RPM arms. The front steering hubs, with tie-rod ends still attached, can be swung out of the way to access the front lower control arms.

We thought we’d attempt to slide the hinge pins rearward to remove the lower control arms, and it did work for us. However, you will need to remove the two steering bell crank retaining screws from the bottom of the deck and loosen the four servo mounting screws enough to allow the hinge pins to slide back enough for arm removal. Alternatively, you could remove the E-clips from the rear of the hinge pins just like we did for the rear control arms and slide the hinge pins forward.

Set the new RPM lower arms into place and carefully slide the hinge pins back through the hinge pin braces and lower arm pivot holes to secure the new arms. Reinstall any hinge pin E-clips removed, reinstall the shock lower mounting screws as-well-as the lower pillow ball adjuster (counting the number of turns to match the number of turns to remove them), and the front dog bones.

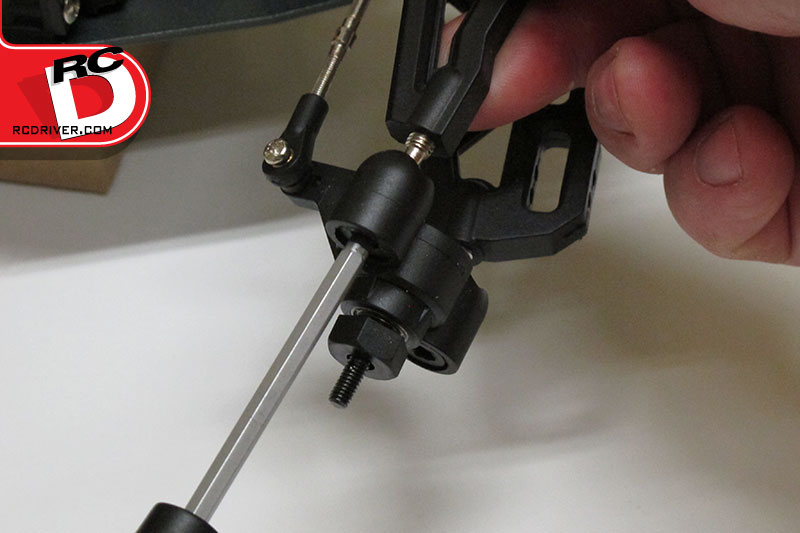
Install the new RPM upper arms by aligning them with the bulkhead and inserting the threaded hinge pins. Don’t forget the upper arm spacers removed previously. Thread the upper pillow ball adjusters into the new arms the same number of turns as when they were removed.
With everything reinstalled cycle the suspension and ensure there isn’t any binding. It’s OK if the suspension feels a little tighter, as the increased tolerances of the RPM arms takes a lot of the original suspensions slop away.
Our Helion Dominus 10SC is now ready to take on some big-boy jumps without fear of ripping control arms off of the chassis. The beefier mounting points around the hinge pins, shocks, and hubs means these arms will take a beating. Before hitting the dirt we do recommend setting camber and toe using RPM’s Precision Camber Gauge, PN 70992, Toe-In Gauge, PN 70492.These two tools will get your camber and toe settings spot on and are an essential part of any R/C tool box.
Source:
RPM R/C Products, rpmrcproducts.com, 909-393-0366


