 RC Driver The Best In RC Car & Truck News, Reviews & Video


Words: David Harrington
Photos: David Harrington
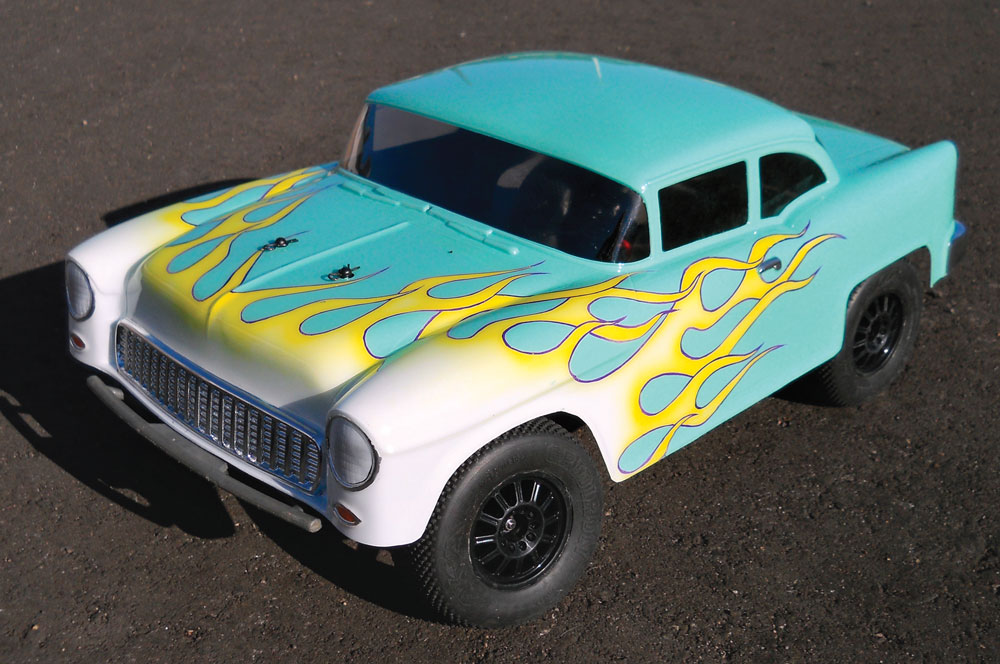
Parma always comes up with interesting bodies that fill a niche market, and I always happen to be in that market. I loved that they made a dune buggy body for a short course chassis, and now they have come up with this, a classic car desert racer! I have seen pictures of these cars off road, and the little angel on one shoulder tells me I should stick to the theme of a classic Baja racer, but when I look at this body, the little devil on the other shoulder says, “Hot rod flames!” He is a persuasive little guy, so hot rod flames it is! I wanted a period correct color and red or back would be too common. I thought about turquoise, but then someone suggested it, so “sea foam” green it is! There are dozens of variations of that color, and I wanted to keep it period correct, so I found a Chevy color chart from 1955, and mixed up a custom color matched to a shade they called Sea Mist Green.
ITEMS USED
Spaz Stix
• Ultimate Mirror Chrome #10000
• Ultimate Surface Prep #90059
Parma
• Fifty Five body
• FasMask liquid mask
• FasBlack #40001
• Faswhite #40000
• FasSky Blue #40012
• Faslucent Yellow #40310
• Faslucent Red #40307
• Faslucent Orange #40309
• Fasescent Purple #40152
• 3” body post
Step 1
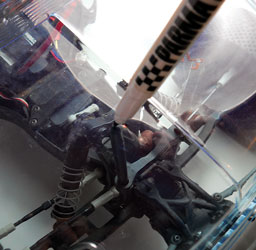
The front hood line is really high on this body, so you’ll probably have to install longer posts. Just to make sure they were long enough, I started with Parma’s three-inch posts. To fit them to the Blitz body mount holders, I first snipped the larger part off the bottom with wire snips so the posts would drop into the holes. Then I held the post at the height I wanted while I marked where the hole for the pin would be with my body reamer. I started the hole with the reamer and then finished with a hand drill. Once the posts were in place, I lined up my body and marked my holes with a detail pen.
Step 2
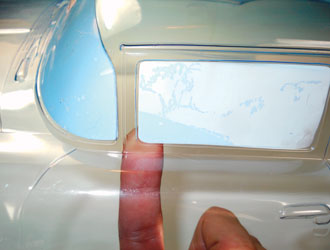
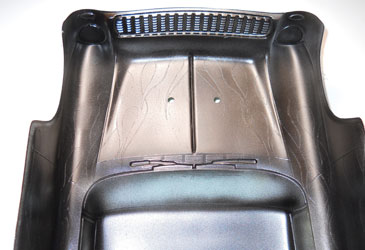
Once the body was mounted, I wiped out the dust and shavings and gave it a shot of Spaz Stix Ultimate Surface Prep. I then applied the window mask. I started by lining up one corner, sealing down an edge, and then working my way back and forth, working out bubbles as I go. The front and rear windows have kind of a deep contour, so you may need to warm those masks with a blow dryer after they’ve been applied to work them into the contours and smooth out any wrinkles.
Step 3
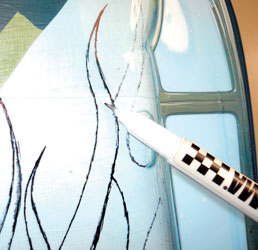
I covered the inside of the body with liquid mask, using a foam brush to apply three coats, and then let it dry overnight. I find it easier to draw graphics like flames on a flat surface so I sketched some flames on a piece of paper. Then I traced them over with a marker to create a reverse image. After tracing the flames on the doors, I flipped them over on the hood so it would look less like the same pattern.
Step 4
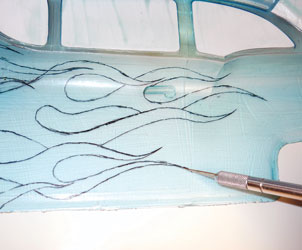
Once my graphics were laid out on the outside of the body, it was time to start cutting them out on the inside of the body. I cut them with my hobby knife, being careful not to cut too deeply and score the body. Try to cut the lines in a continuous motion, ending your lines on the tips of the flames and making sure your start and stop lines intersect.
Step 5

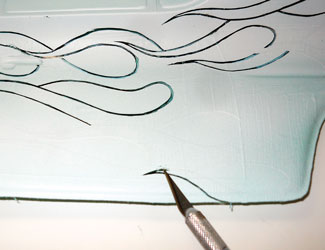
I usually like to remove the graphic and paint that first, but because I drew my flames with the licks overlapping, I had to remove the mask from the background first. Before doing so, I cut out the rear taillights and bumper so those would remain masked. I did this by first tracing them on the outside with my detail pen so I had a guideline to follow when I cut.
Step 6
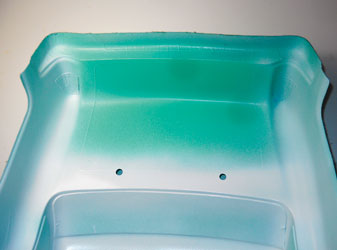
To mix up my Sea Mist Green, I started with FasSky and then I added just a tad of Faslucent Yellow, a couple of drops at a time, until I got the hue I was looking for. I felt it looked a little murky so I added a couple of drops of Faswhite. After laying three coats in the body, I backed it with a coat of Faswhite so the other colors would not bleed through.
Step 7
With the background in place, I cut the outline around the flames by cutting just inside my previous cut line. After removing the mask from the outline, I filled it with Fasescent Purple. I would normally fill the pearl colors with FasKrome to give them more sparkle, but in this case I used Faswhite as a backer to make the color pop.
Step 8
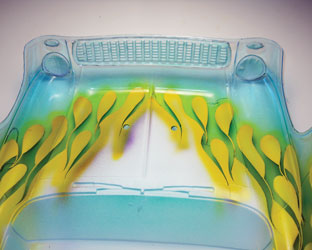
After the outline, it was time to remove the mask in the flames, but first I cut out the headlights, turn indicators, and grill, so those areas would remain masked. Then I sprayed Faslucent Yellow around the edges of the flames before filling in with Faswhite.
Step 9
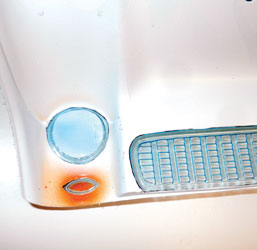
I wanted a chrome trim line around the lights so I cut my line, and then peeled out the center sections first. I filled the turn indicators with Faslucent Orange, the tail lights with Faslucent Red, and shaded some Faswhite around the edges of the headlights. Next, I removed the mask from the rear bumper and grill, and filled all areas with Ultimate Mirror Chrome, backing the Faslucent colors at the same time.
Step 10
I finished up by backing everything with FasBlack to make it good and opaque. All that was left was to remove the overspray film and window mask.
LINKS
Parma parmapse.com, (440) 237-8650
Spaz Stix spazstix.com, (800) 706-0690


