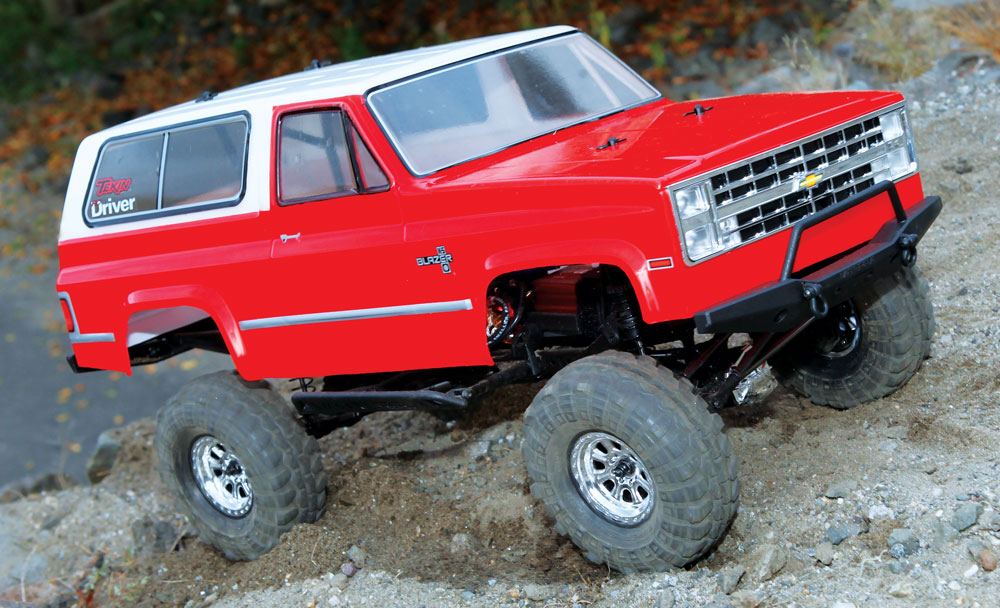
The Build – Part 2
Part 2 of our Vaterra K5 build has us assembling the front axle.
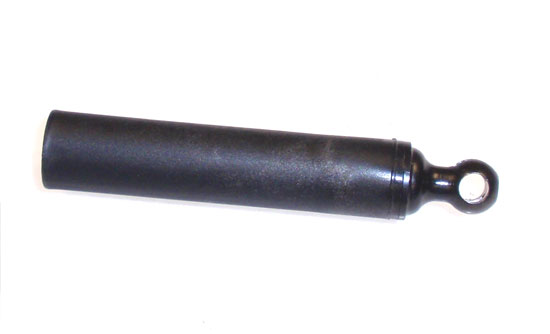
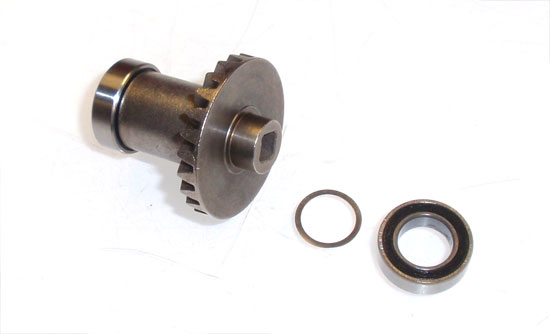
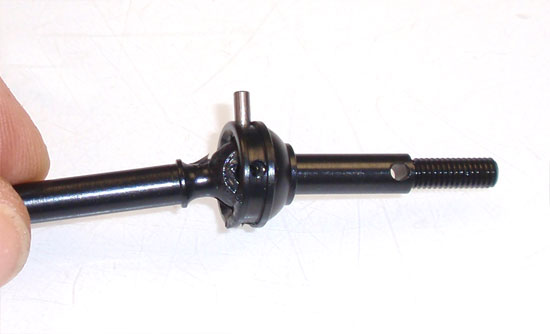
Vaterra Ascender K5 Build Step 31
The first step is the center driveshaft. Since you’ve already assembled shafts in Part 1 of this build we won’t go into great detail about it again.
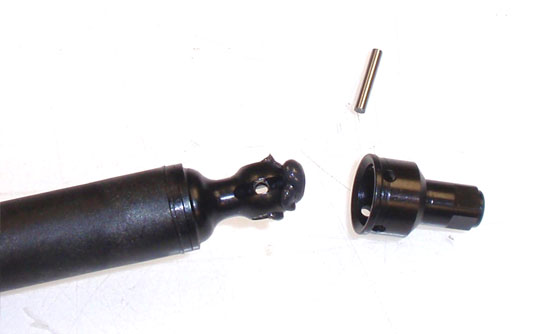
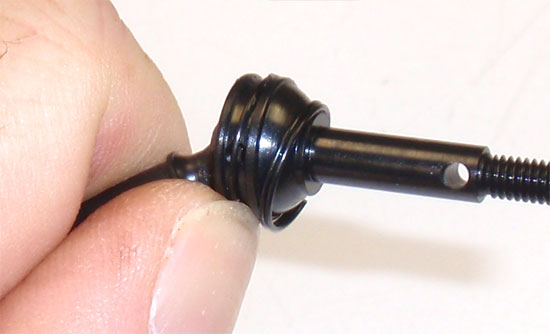
Vaterra Ascender K5 Build Step 32
Apply some black grease to the inner coupler, slide the out coupler over it and slide the axle pin through the holes.
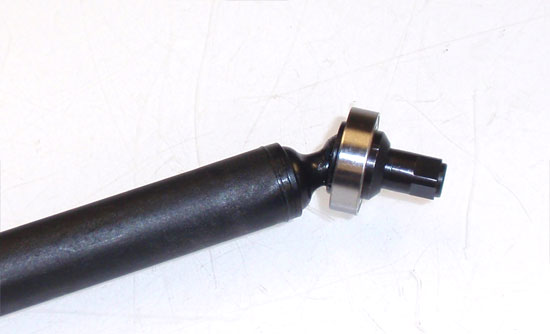
Vaterra Ascender K5 Build Step 33
Vaterra captures the axle pin with a bearing instead of using a setscrew to secure it. Much better design in my opinion.
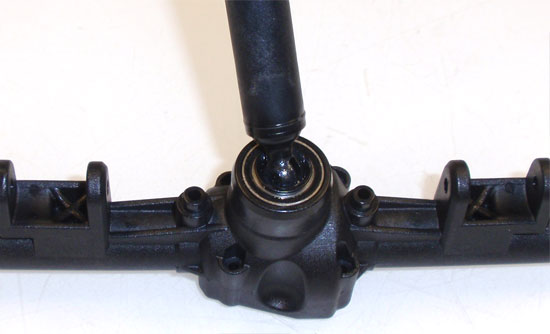
Vaterra Ascender K5 Build Step 34
Press the axle assembly into place as shown, making sure the bearing is fully seated into the axle housing.
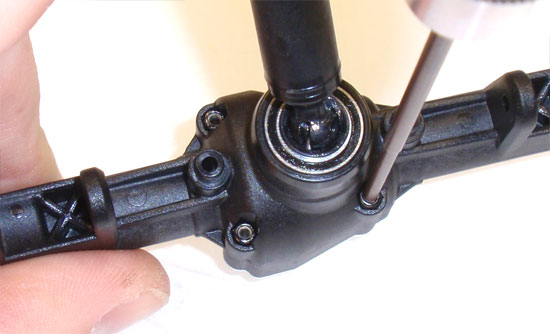
Vaterra Ascender K5 Build Step 39
Press the 4 locknuts into place in the axle housing. Yes, this is out of step according to the manual but I found it easier during final assembly to already have these installed.
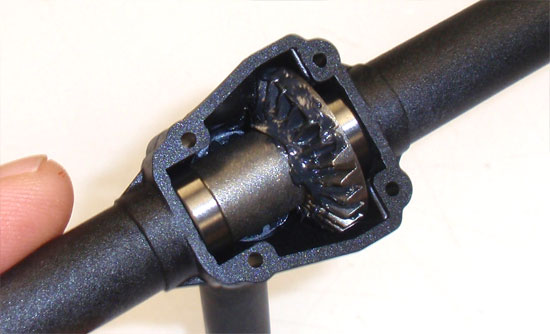
Vaterra Ascender K5 Build Step 35
Flip the axle around and press a second bearing into place. Follow that up with the sun gear. Make sure the gear is seated all the way down on the shaft.
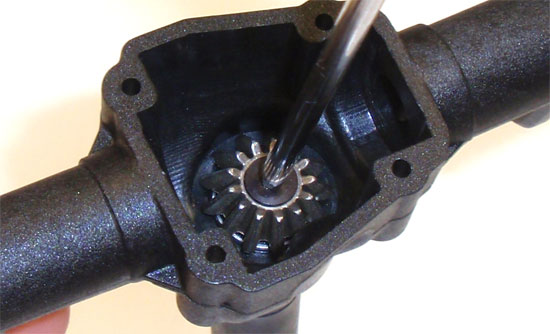
Vaterra Ascender K5 Build Step 36
Apply a bit of threadlocking compound onto the retaining screw and secure the sun gear.
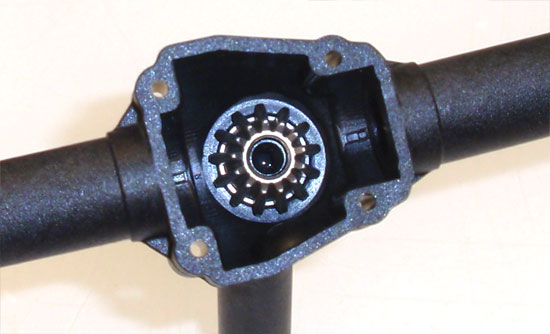
Vaterra Ascender K5 Build Step 37
Take your solid, one-piece spool assembly and slide a shim and washer on both ends. Your instructions might not show this washer but it is supposed to be used in this step.
Vaterra Ascender K5 Build Step 38
Place the spool into the axle housing and apply some black grease to the gear and rotate it around.
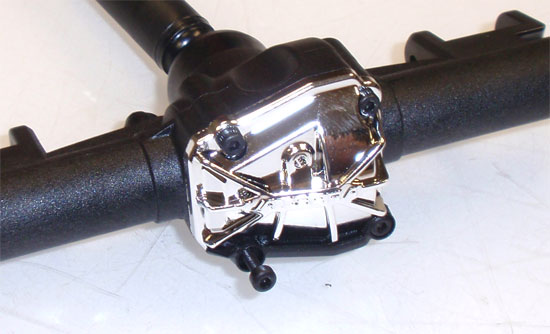
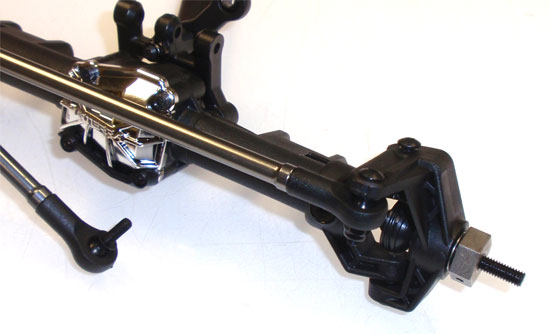
Vaterra Ascender K5 Build Step 40
Slide the chrome pumpkin cover (and cover protector) onto the axle and secure with the 4 screws. Note that there are two different lengths of screws used here; use the shorter ones up top.
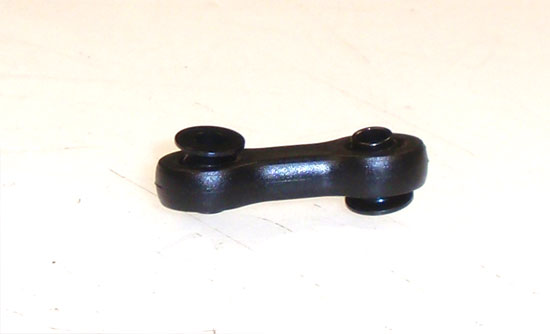
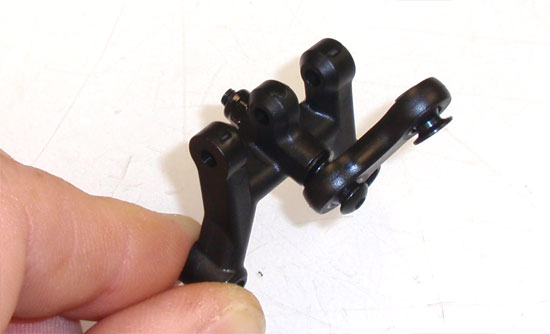
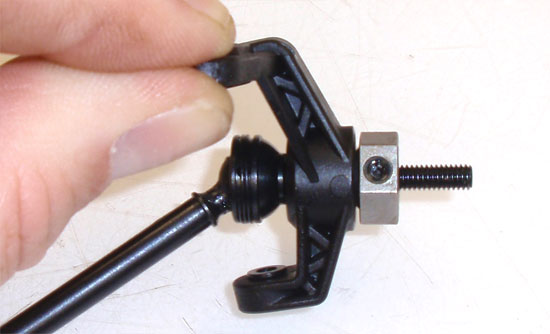
Vaterra Ascender K5 Build Step 41
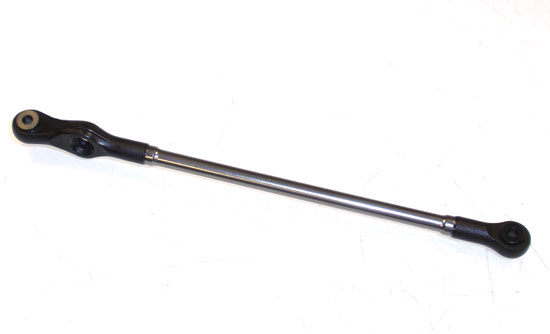
Assemble the short link. This link is used to attach the front axle to the floating battery tray. Note the direction of the two balls.
Vaterra Ascender K5 Build Step 42
Attach the link to the link brace.
Vaterra Ascender K5 Build Step 43
Now attach the link brace to the front axle.
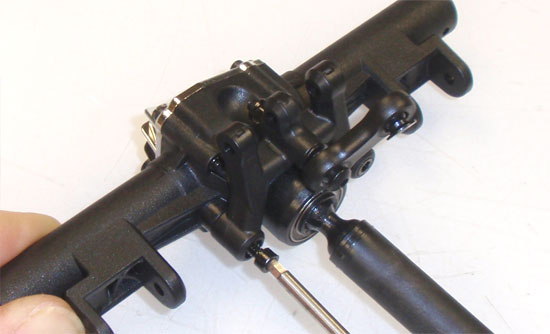
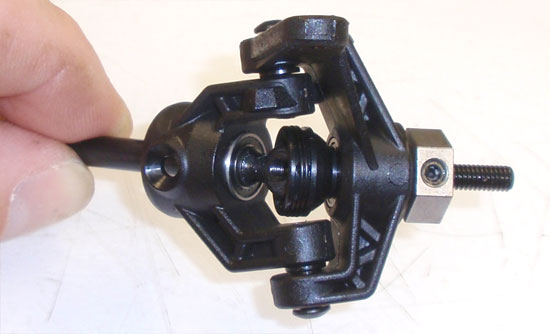
Vaterra Ascender K5 Build Step 44
Build the axle as shown.
Vaterra Ascender K5 Build Step 45
Using your fingernail, rotate the spiral retainer into place. We did this in Part 1 so you should be a pro at it by now. Build 2 of these.
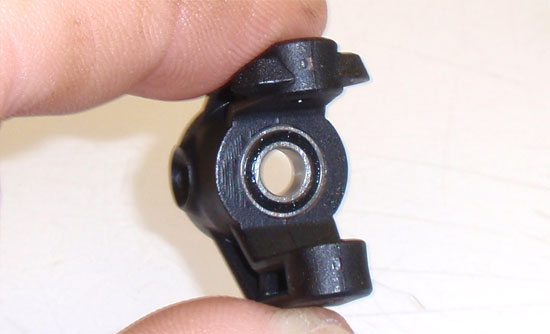
Vaterra Ascender K5 Build Step 46
Assemble the left spindle by pressing a bearing into each side (don’t forget the crush tube between them). Take 2 of the hat washers and slide them into the upper and lower holes in the spindle as shown.
Vaterra Ascender K5 Build Step 47
Rest the spindle on it’s side and carefully push an assembled axle through it. Slide the wheel hex into place and, while lining up the hole in the hex and the hole in the axle, secure with the long setscrew. The reason you want to put the hat washers in prior to this assembly is that they can be a bit difficult to insert after if you have sausage fingers. The fit it tight enough to keep them in place; just make sure you assemble with the spindle laying sideways.
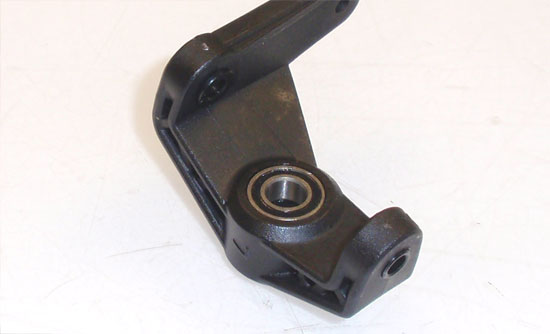
Vaterra Ascender K5 Build Step 48
This outer bearing was a pain to work with, but I found if you pressed it into the axle carrier first it was much more manageable. Just press it flush with the piece as shown. Note the orientation of the carrier; the ‘steer-stops’ will be at the top.
Vaterra Ascender K5 Build Step 49
Slide the assembled axle carrier onto the axle and into place with the steering spindle. Secure with the 2 M3x12mm screws. Don’t overtighten! Snug them down and then rotate the spindle. If it is tight, back the screws off slightly and try again. You want the spindle to move as freely as possible.
Vaterra Ascender K5 Build Step 50
Build the right side spindle like we did in in the steps above. As you can see here, we press the outer bearing flush into the right side axle carrier (note the panhard rod mounting tab). You can then assemble the steering as we did in Step 49.
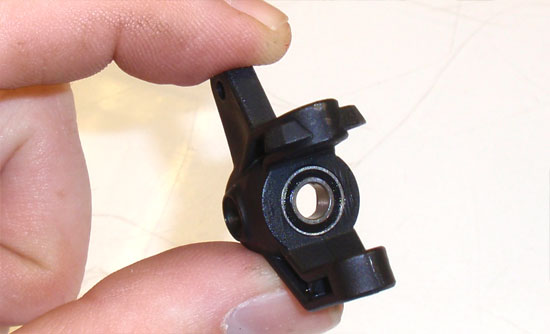
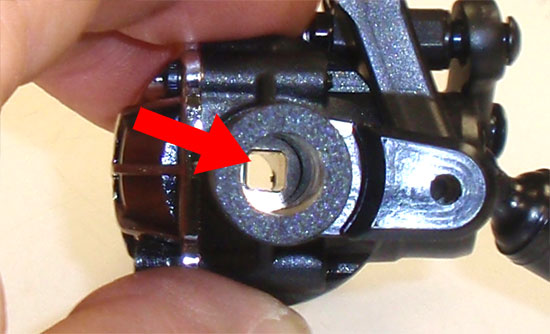
Vaterra Ascender K5 Build Step 51
I found an easy way to key the axle to the spool. This picture shows the square opening in the spool you’re trying to mate the axle to.
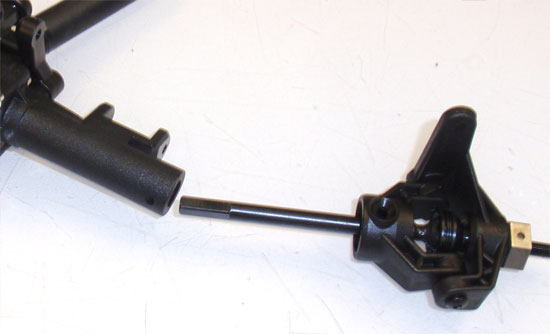
Vaterra Ascender K5 Build Step 52
Take your axle assembly and slide it into the axle housing as far as it will go.
Vaterra Ascender K5 Build Step 53
Using one hand to apply a small amount of pressure, press the axle assembly against the axle housing. Now slowly twist the slider shaft until the axle ‘slips’ into the spool. Do this with both sides, making sure you get the right on the right and the left on the left.
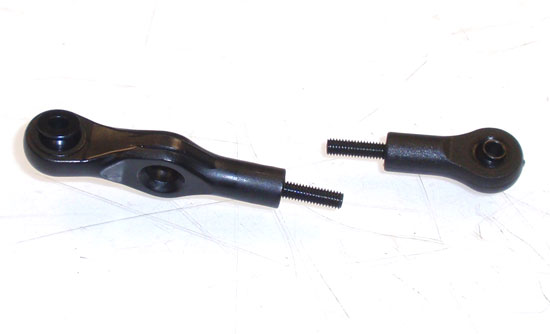
Vaterra Ascender K5 Build Step 54
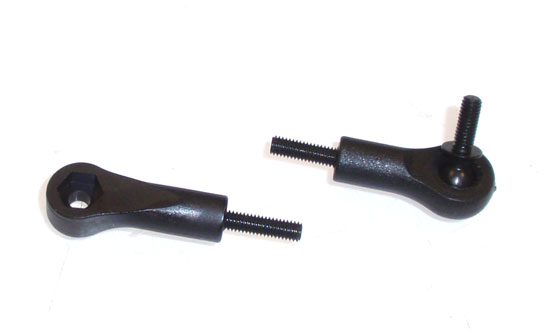
Build two rod ends as shown. This is for the lower steering link (the link that goes from one steering knuckle to the other).
Vaterra Ascender K5 Build Step 55
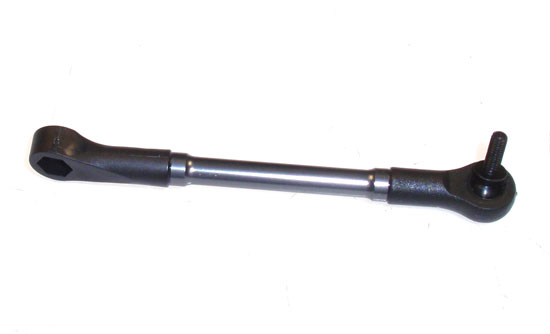
Assemble, making sure you use a dab of threadlocker on the setscrews.
Vaterra Ascender K5 Build Step 56
Build two more rod ends. These are for the upper steering link (the link that goes from the servo to the steering assembly).
Vaterra Ascender K5 Build Step 57
Assemble, making sure you use a dab of threadlocker on the setscrews. Also note the orientation of the two ends.
Vaterra Ascender K5 Build Step 58
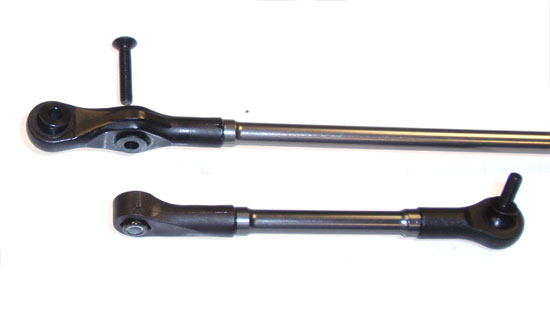
Press a black locknut into the upper steering link and attach to the lower steering link.
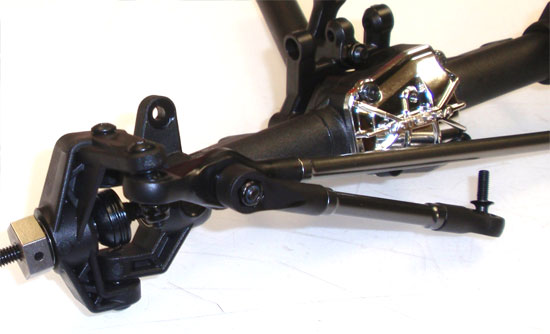
Vaterra Ascender K5 Build Step 59
Attach the steering link assembly to the right-side steering knuckle.
Vaterra Ascender K5 Build Step 60
Finally, attach the steering link to the left-side steering knuckle. Rotate the steering back and forth a few times to make sure it moves smoothly.
 RC Driver The Best In RC Car & Truck News, Reviews & Video