 RC Driver The Best In RC Car & Truck News, Reviews & Video


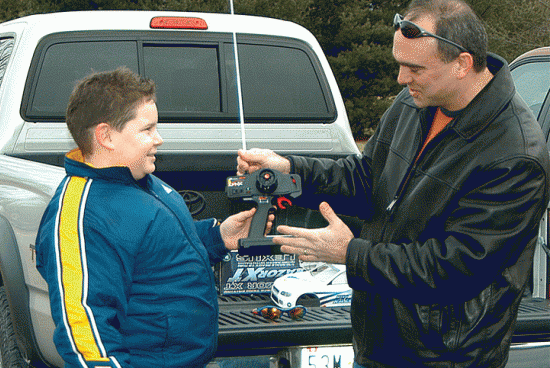
Second Nature…a term used to describe a task that you perform so often that you can do it without any conscious effort. For instance, operating a computer mouse is something most of us do without even thinking about it. But, put the mouse in the hands of someone who’s never used one and you’ll immediately discover the entertainment value of inexperience. Now let’s talk about driving a RC car. For me, it’s become second nature. Things like knowing which way to turn the wheel and whether the car is coming toward me or going away from me have become instinctive. So, when I see someone driving for the first time, I don’t always realize how difficult driving in a straight line might seem to a newcomer. I guess it’s time for me to revisit the basics of RC driving; time for RC Driving 101!! To do this right, I needed a willing participant… somebody who has shown an interest in radio control cars but has yet to try it. Meet Curtis…an 11-year old neighbor who’s witnessed me ripping up the asphalt with my RC cars on countless occasions. To say Curt was excited to participate would be an understatement.
THE LEARNING CURVE
Ready-To-Run kits are available in electric versions, which run on batteries, and nitro versions, which run on a fuel that is made specifically for RC car engines. Since Curt’s first RC experience will be with a nitro car, he will have broader learning curve to overcome due to the fact that nitro cars require more prep time and maintenance. Whether you choose electric or nitro, you need to be willing to wrench on them yourself. Even though Curt’s car is an on-road nitro vehicle, much of what you learn here will apply to electric and/or off-road vehicles as well.
THE VERY BASICS INSTRUCTIONS
Growing up, I followed my dad’s example–when all else fails, read the instructions. Don’t go by that! Your RC car will come with an instruction manual. Read it first! Don’t just look at the pictures. If it’s nitro-powered it will include instructions for breaking-in the engine. Follow them!
RADIO SYSTEM
Some radios are available with more bells and whistles than most would know what to do with, and others, are equipped only with the essential functions. The basic operation, however, remains the same. Since most RTR kits include a pistol type transmitter, like the one we’ll be using, that’s the type I’ll focus on. Most of these transmitters are set up for right-handed drivers, which means you will hold it in your left hand and use your right hand to steer. With the forefinger on the trigger you can operate the throttle and brake functions. Pull the trigger to make the car go forward and push the trigger to operate the brakes.
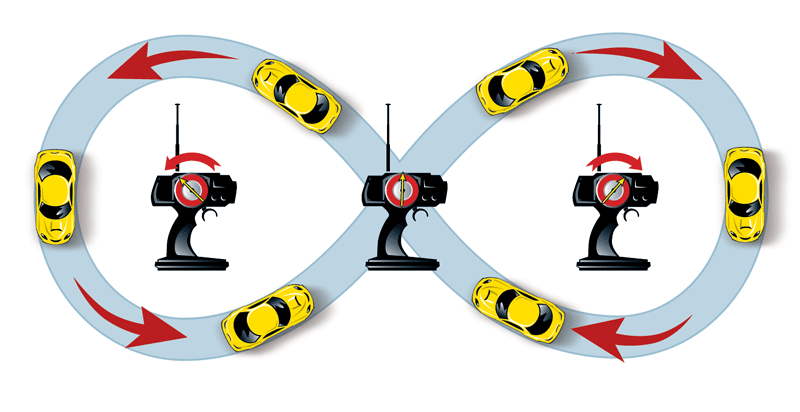
The transmitter’s steering wheel operates just as you would expect–turn the wheel right (clockwise), the car turns right–turn the wheel left (counterclockwise), the car turns left. The tricky part comes in when you have the car coming toward you. The steering may seem opposite when the car turns to your right as you turn the wheel left and turns to your left as you steer right. (The easiest way to get used to this is to drive in a figure eight. More on that later.)
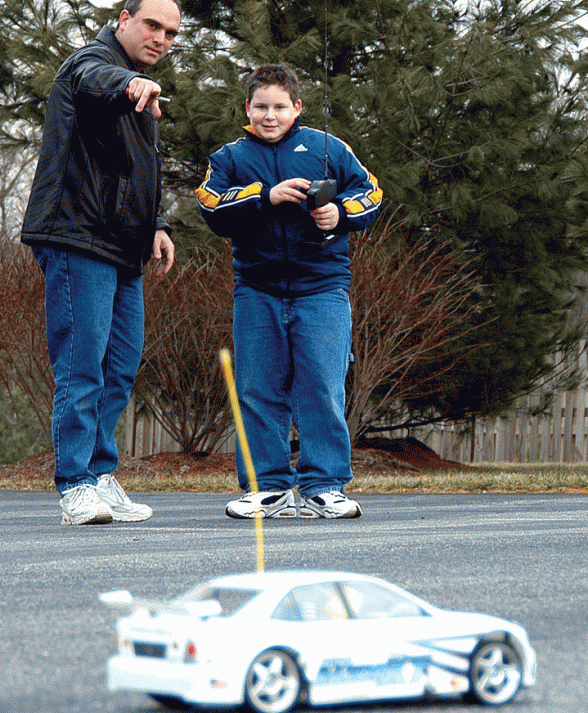
LET’S KICK UP SOME ASPHALT
Always start with fresh batteries in both the transmitter and in the car for the receiver. Extend the transmitter’s antenna, turn the transmitter on and then turn on the car’s receiver switch. Before starting the car, operate the transmitter controls to confirm proper operation. Do the wheels turn right when the steering wheel is turned right? Does the throttle open when the trigger is pulled? Does the throttle close and the brakes engage when the trigger is pushed? Once you’ve determined all is well, it’s time to start the car. Keep in mind that this is not a lawn mower–short quick pulls of the starter cord work best. Pulling too hard or too far could have you sidelined until you figure out how to get the string back in the starter. Trust me… you don’t want to go there just yet. Assuming you’ve followed the instruction manual’s directions to a “T” for breaking-in your new engine (just as we did), you’re ready to go for a spin around the parking lot. Some important info to keep in mind, which is usually overlooked by first-timers, is that the transmitter controls are proportional. That means you don’t need to pull the trigger all the way. The further you squeeze the trigger, the faster your car will go. If you don’t want to go too fast simply squeeze the trigger slowly until you reach the desired speed. When you’re ready to slow down, gently push the trigger. If you get into trouble, such as heading for the storm drain, then you’ll want to push the trigger quickly to engage the brake. Start off slowly by driving in a big oval until you get the feel for the throttle control. Vary your speed to become comfortable with how the brakes function. Here is where the figure eight comes in to play. As you are coming out of the top of the turn and the car is headed toward you, slowly turn the steering wheel the other direction to create the bottom of the “8”. You should quickly get the hang of this as you start to “feel” which way to turn the wheel instead of just thinking about it. Vary your speeds throughout this exercise as well. For a more challenging exercise, try setting up cones to lay out a road course.
HMMM…THAT WASN’T SO BAD
There you have it. The basics of driving a RC car. Pretty… well, basic… don’t you think? As long as you take your time, read and understand the instruction manual and practice often, your driving skills will soon become second nature to you.
After a few laps around the parking lot you should be able to avoid hitting your instructor in the ankle with your car.
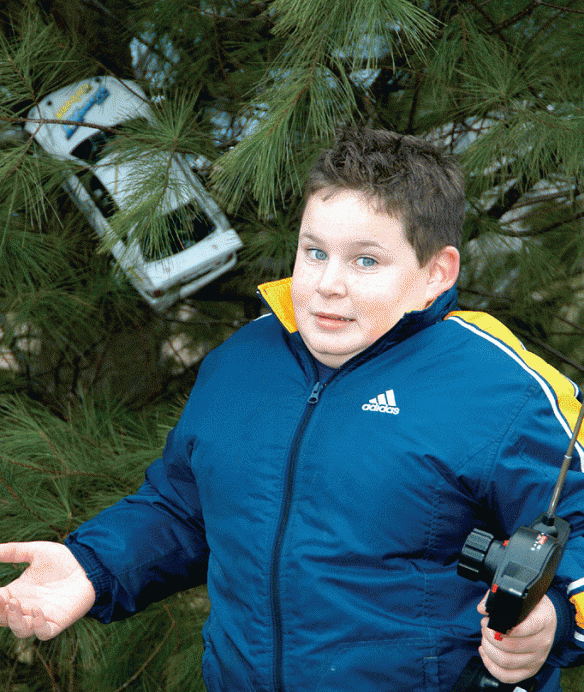
Always pay attention when you’re driving! Sometimes even the smallest rock can turn your low-riding street racer into an uncontrollable 40 mph projectile.
NEED MORE DRIVING TIPS? WATCH OUR DRIVING BASICS VIDEO


Awesome a lot of good info