 RC Driver The Best In RC Car & Truck News, Reviews & Video


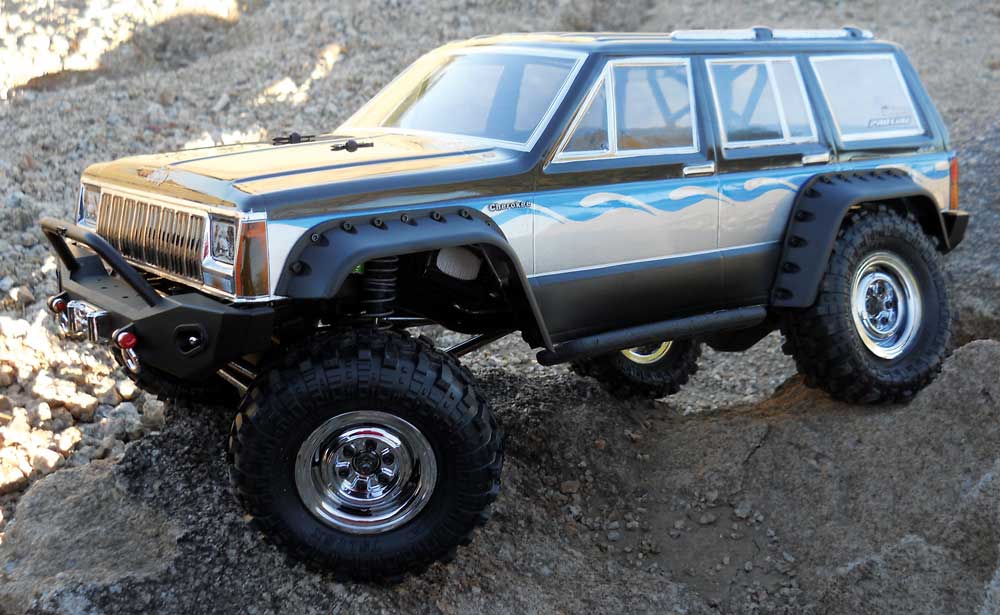
Everything is a compromise in the world of scale crawlers. It starts with scale vs. performance. Some build their vehicles to be scale to the point where it’s hard to distinguish them from full size vehicles, but the performance is similar to its full scale counterpart. Some are happy with scale enough from ten feet away, as long as it performs well, though some would argue the performance of these vehicles is less than scale. But many of us are trying to fi nd some kind of balance in between. This is where I’m at. I considered running the long wheelbase setup, but after some discussion with friends and observations on the trail, it seems there are advantages to both long and short wheelbases. I’ve come to the realization that every time I try to gain performance in one area of my setup, I compromise another aspect of performance. When Pro-Line released the Super Swamper tires in an XL version, I was going to be all over that, but before I placed my order, my friend happened to call and convince me that since the short wheelbase is less stable, I would probably be bett er off with the smaller original Super Swampers, to keep my center of gravity low. The only problem is that I had been running tall tires and the smaller tires would look funky under my current body. Since I needed a body that would fit the short wheelbase chassis, I went with Pro-Line’s ‘92 Jeep Cherokee body. I’ve always had a fondness for Cherokees, so this was a fun project.
ITEMS USED
Pro-Line
• ‘92 Jeep Cherokee Body 3321-00
• Ridgeline Wide Bumper Set 6089-00
• 1.9” Super Swamper Tires 1163-14
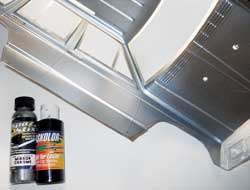
Parma
• FasMask #40281
• FasKrome #40300
• FasBlack #40001
• Faspearl Silver #40050
• Faspearl Charcoal #40054
• Faspearl Blue #40055
Spaz Stix
• Ultimate Mirror Chrome #10000
1
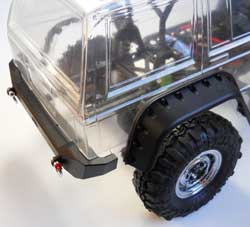
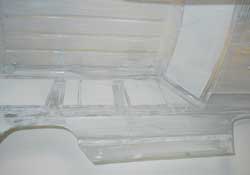
Before I marked my mounting holes, I wanted to make a couple of changes. In the catalog picture, the body is shown with the Ridgeline bumpers mounted over the stock bumper molded in the body. The inside line of the bumper fits the body perfectly, but I have a slight problem with having two bumpers. So I cut the bumpers off and tucked the Ridgeline bumpers into the body. This will also improve my approach angle. The bumper now seemed a bit wide for the body, so to widen it up and make clearance for the Super Swamper tires, I cut out the wheel wells and installed a set of fender flares from an Axial Dingo body. Then I got my body mounts set to the right height. I had to use the long body mounts that came with my kit in the rear. Once everything was lined up, I made my mounting holes.
2
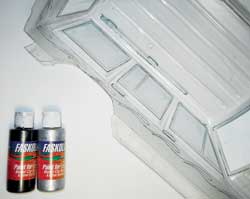
To get the best bond and to make sure the paint lies correctly, it is critical to remove any residual oils left on the body. You should scrub the body out with dish soap and warm water and that should do the trick, but I will even go so far as to give it a light scuffing with a scouring pad. Just be careful not to scuff the windows. After drying with a paper towel to avoid water spots, I applied the window decals, being particularly careful to make sure they are centered, since I will be cutting the trim around them. Then I applied two good coats of the Fasmask liquid mask with a foam brush. I gave it a couple hours between coats to dry and let it dry over night before I cut my graphics.
3
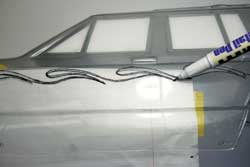
For a scaler I generally like to keep the theme simple, but you know I have to do something custom. My idea for this one was to not deviate too far from the stock two tone theme but to add a trim line of flame licks. To lay out my flame licks, I drew two licks on a piece of paper to map out my spacing and then I traced them on the body just under the body line with the ultrafine end of my Parma detail pen.
4
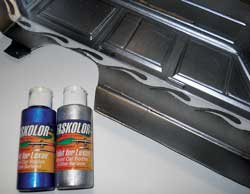
Before I started cutting the mask, I marked the grill, window trim, roof rack and door handles, because the indent is on the outside which will guide the tip of your pen and make it easier keep your lines straight when cutting on the inside. I cut the division between colors where the body indents right before the door handles, and then I cut out the trim pieces before removing the mask. You would think the flames would be the difficult part but for me all these straight lines are a nightmare. You want to use a quick smooth motion. Watch that your line doesn’t drift off, and when it does, stop immediately, lift the blade, and fix the angle. I then laid a couple coats of Faspearl Charcoal and then backed it with FasKrome to make it opaque and give it sparkle.
5
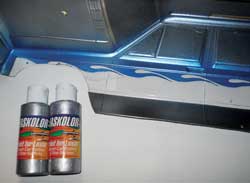
Next I carefully cut the flames. I like to start my lines from the center of the curve and then pull them out to the tips, to keep the tips nice and sharp. After removing the mask from the flames, I filled them in with a couple coats of Faspearl Blue, and gave them a light backing of FasKrome. Since my next color will be Silver, only a light coat is necessary.
6
The cutting is now mostly done and it gets easy from here. I removed the mask below the flames and filled it in with a couple of good coats of Faspearl Silver. Then I backed it with FasKrome after allowing fifteen to twenty minutes for the heavier coats to dry.
7
Before I removed the mask from the trim pieces, I cut out the blocks on the roof rails. If you want really realistic chrome trim on your scaler, Spaz Stix Mirror Chrome is the way to go. I laid several heavy coats. This paint lays really thin and dries quickly but it will be delicate and will need a waterbased protective coat, so I backed it with Parma’s FasBlack. I removed the blocks on the roof rails before doing so. I also decided at the last minute that I wanted the quarter panels to be textured, so I cut away the over spray film on the outside and laid the FasBlack there as well.
8
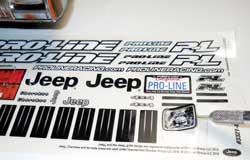
With the painting finished, all that is left is to apply the included decals. I like to cut them out with my hobby knife for a crisp precise edge. Normally on something like a logo, I would leave a gap around the edge, but with detail pieces I like to cut as close to the line as possible, as I feel it looks better.
WRAP UP
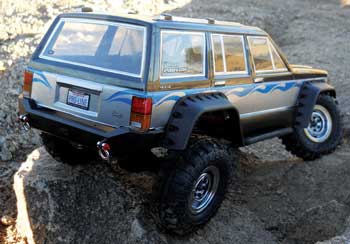
The Jeep Cherokee is a time-tested classic. Pro-Line’s version, like its full scale counterpart, is becoming a classic as well. The scale details on this body are top notch, and I really wanted to do it justice. I like how the chrome accents to grill lines, but I may have gotten carried away with the window trim being chrome, as I haven’t seen any Cherokees with chrome window trim, but I wanted the trim to stand out against the charcoal. The important aspect for me is by running the Ridgeline plastic bumpers instead of steel, and a body without a plastic roll cage, I shaved over six ounces of unsprung weight. Combined with the shorter tires, I should see a significant improvement in side hilling and vertical climbing, while still looking scale!
LINK
Parma parmapse.com<a, 440-237-8650


