What used to be an out of reach, industry rarity in years past, FPV (First- Person View) systems have found their way into countless RC vehicles over the past few months. Sure, there is mini quad rotor racing with goggles strapped on or planes giving fixed wing “rides” to anyone who wants to catch a glimpse of the view from the cockpit, but what about the car guys? We can do FPV too, right? Of course we can and in the following words, I’ll explain just how I went about it. Driving an RC car FPV has been something lurking in the back of my mind since I got my first taste of the hobby back in the early, 80s, but with the technology available today, it can be a reality for any of us. No need to take notes, because this project is quick and painless.
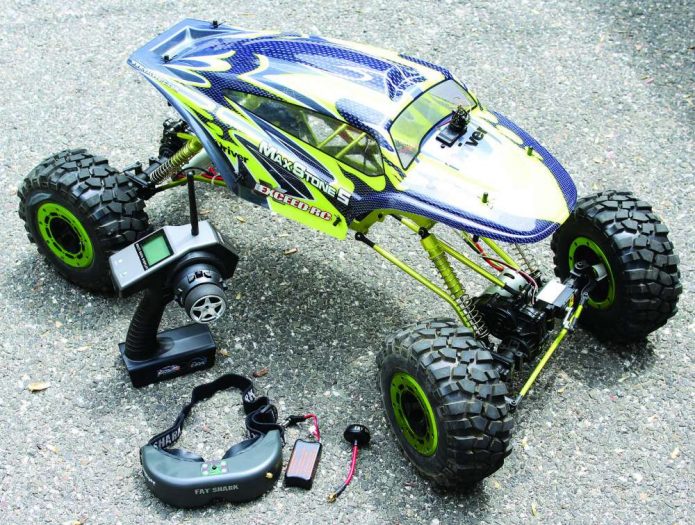
The first thing I had to do was figure out which type of vehicle to equip with the camera. Touring cars would just be too fast … for my reflexes anyway. Off-road buggies or trucks would surely have me reaching for some anti-nausea medication. Large scale rigs would pose too much of a liability. Crawlers and scalers seemed to be the only logical solution to fit the bill for my needs. Luckily I had recently reviewed the MaxStone 5 from Exceed RC in addition to a Blade Nano QX FPV with the Fatshark Teleporter V4
headset from Horizon Hobby. I had what I needed minus a bit of imagination and some spare parts.
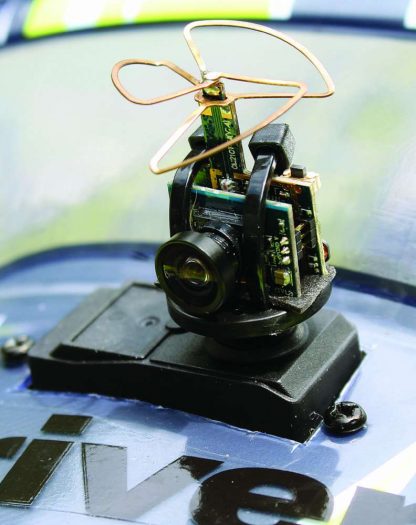
My first concern with this project was how easily I’d be able to remove a camera system from a donor vehicle. My fears were unfounded as the mini FPV camera/antenna in the Nano QX FPV easily unplugs from the main wiring harness to be used with one of their 1S micro batteries as a stand- alone unit. Once that was settled, I figured I could just tape the camera and battery to one of the axles of the massive crawler. That wouldn’t hold true to our “all or nothing” M.O. here at RC Driver though, so I took it a step further.
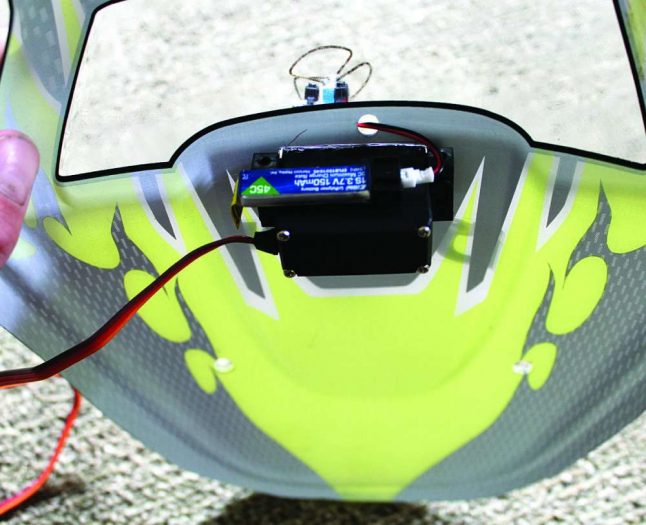
My thought was that to get the full FPV experience I had been dreaming of for 30 something years, the camera had to be in the driver’s seat … or fairly close to it anyway. I purloined a spare standard servo with a small wheel for a horn from my parts bins and within five minutes, I have the little Blade camera mounted up with a piece of double sided tape and a few zip ties. This prevented me from getting to the servo horn screw, but it was a snug press-fit and I’d rather have the camera pop off in a hard crash anyhow.
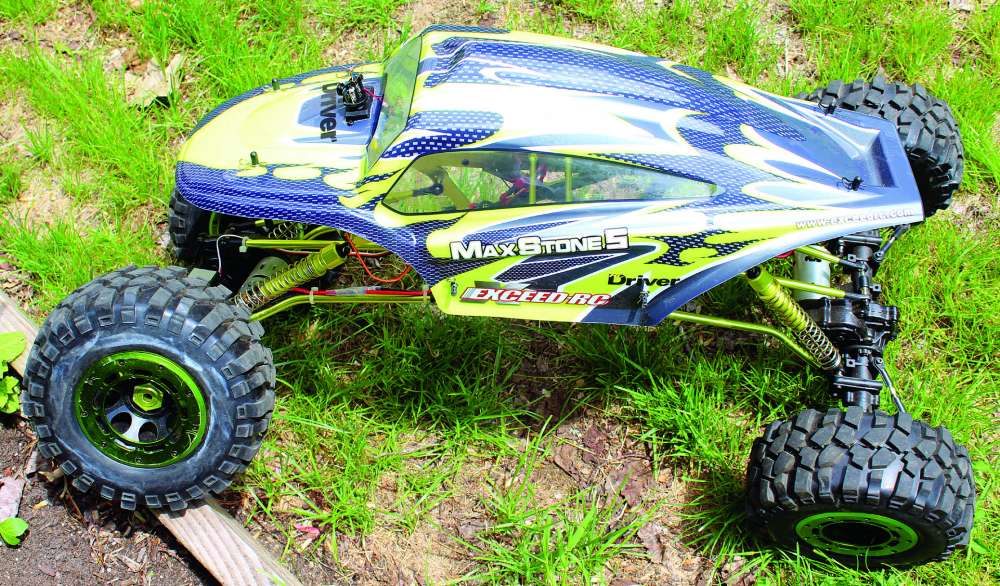
Next, I traced an outline of the servo case on the inside of the MaxStone shell, just forward of the windshield. Once that hole was cut, I reamed two holes to run screws through to the servo mounting blocks on the underside of the servo mounting tabs. After the servo had been mounted, I then reamed a small hole behind it to route the FPV system’s battery lead inside the body. A few small pieces of hook and loop tape had the little E-flite 150mAh 1S LiPo
stuck securely to the back of the servo case.
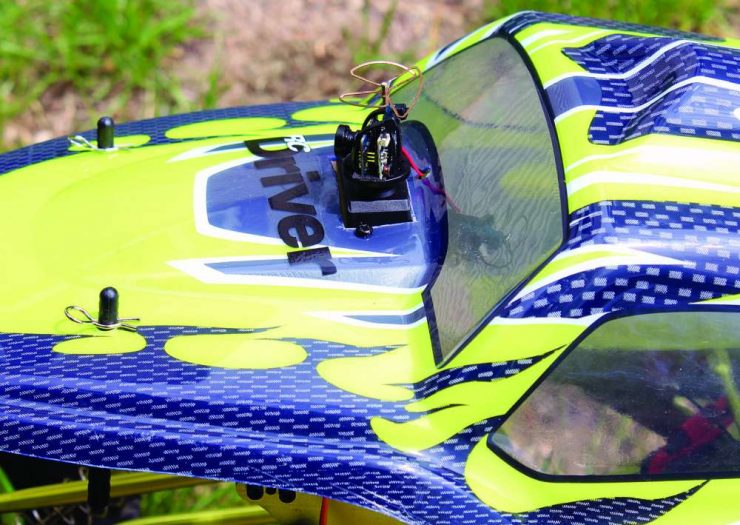
Now that I had a functioning camera rigged up, I needed a radio system with third channel capabilities to rotate (pan) the camera. The stock transmitter for the MaxStone is only a two-channel unit, so once again I was off to the parts bins. An RTR radio system from Dragon RC (as used with the Serpent Spyder line of RTR vehicles) fit the bill perfectly. I yanked the Exceed receiver out, swapped the plugs, added the camera servo lead, crossed my fingers and flipped the switch. Much to my amazement, everything worked flawlessly without any need for programming. I was able to use the AUX channel on the transmitter to rotate the camera 90 degrees in a single direction. Not quite “Hollywood Tech”, but a radio with a proportional third channel would make for some nice smooth camera action.
Driving the MaxStone in FPV is definitely a sweet ride. Things can get a little bumpy if you’re throttle happy like me, but even then it was a great ride and tons of fun. I set up an impromptu race course with some logs and barrels for myself and the other guys at the track and we most assuredly needed more batteries as we were fighting for the fastest lap. We’d also all but forgotten about the servo mounted under the camera as the Teleporter Headset has a Head Tracking feature. This allows whoever is wearing the goggles to turn their head in either direction or look up/down and the view through the camera will follow (to a certain degree) without the camera actually moving.
The parts list is short and sweet, especially if you’re not going to mount your camera to a servo. You could go much simpler and just tape the camera down in a fixed position. You could also get much more complex and add provisions to allow the camera to pan and tilt. Though we are talking about surface vehicles, the sky is the limit with this one. A few tips to follow when conquering your own FPV conversion. Do not choose too fast of a vehicle. FPV racing requires lightning fast reflexes so start slow to ensure you’ll enjoy it. Secondly, try sitting in a chair the first time or two you strap the goggles on and touch your chin to your chest. This will curb any motion sickness you might feel if the vehicle is a little too fast. Lastly, have fun with it and enjoy your ride in the driver’s seat!
 RC Driver The Best In RC Car & Truck News, Reviews & Video


