 RC Driver The Best In RC Car & Truck News, Reviews & Video


The Build – Part 3
In this step we’ll be installing the diffs into the gearboxes and the gearboxes to the chassis.
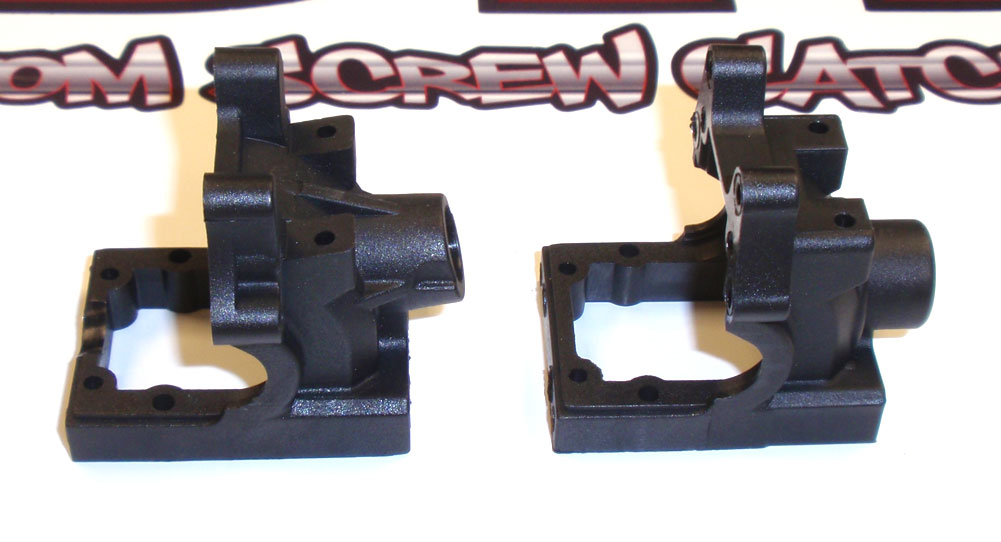
You can see that the two gearboxes look a little different at the output shaft area. The box on the left is for the front. The angle is there to compensate for the kickup bent into the chassis.
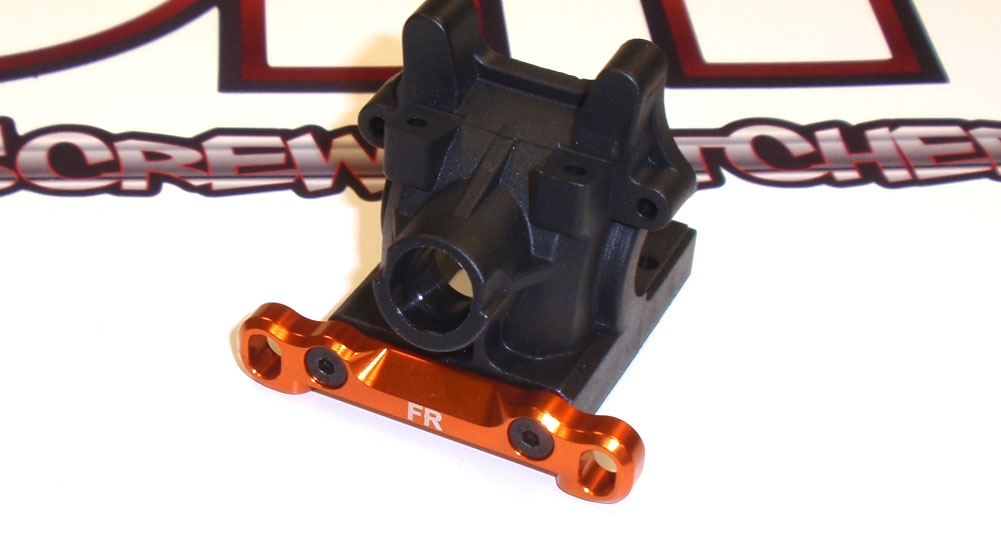
Starting with the front gearbox (the one with the angled output shaft), install the FR arm mount.
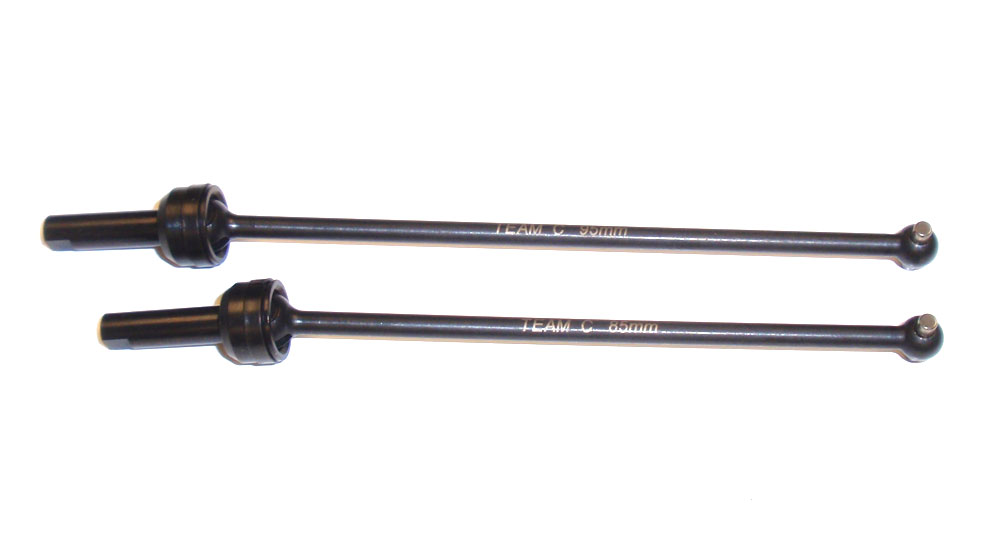
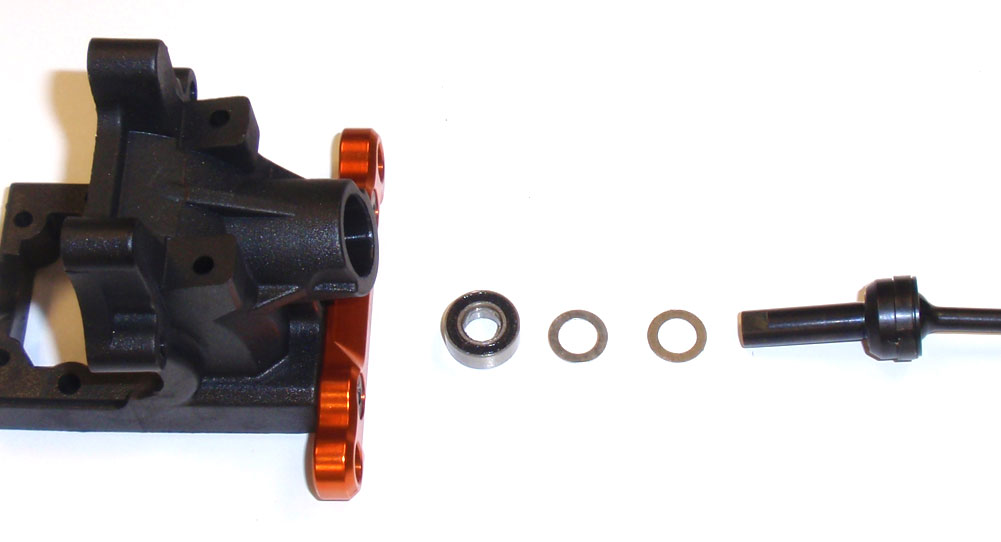
Team C has graciously included pre-built center CVDs with the TM4. There are 2 lengths; an 85mm for the front and a 95mm for the rear. They lengths are etched into the bone for easy identification.
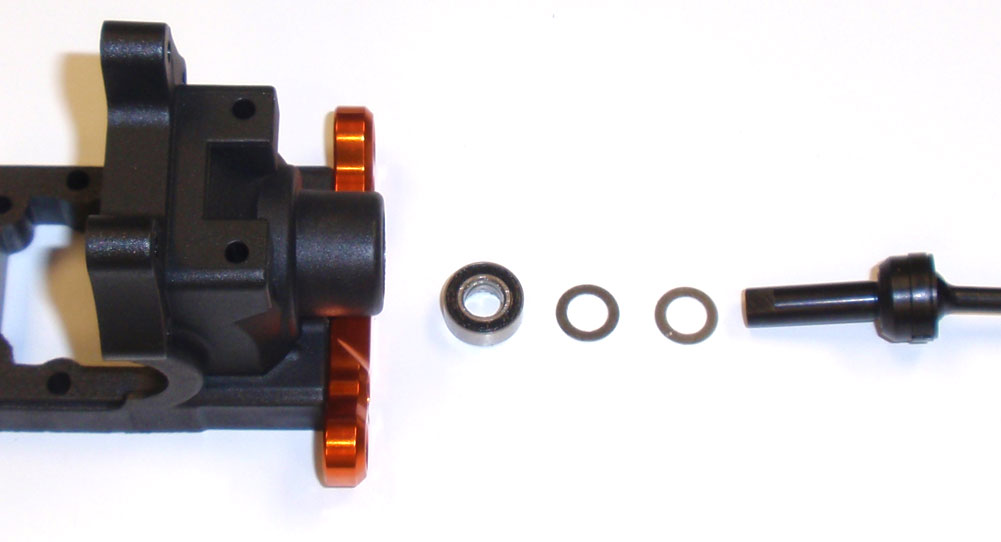
Take the 85mm CVD and slide a pair of 5×8 shims followed by a 5×10 bearing. Insert this assembly into the front gearbox.
Flip the box over and install another 5×10 bearing. Slide the sun gear onto the shaft and use the M3x8 screw to keep it in place. Use a dab of threadlocker to make sure the screw doesn’t come loose.
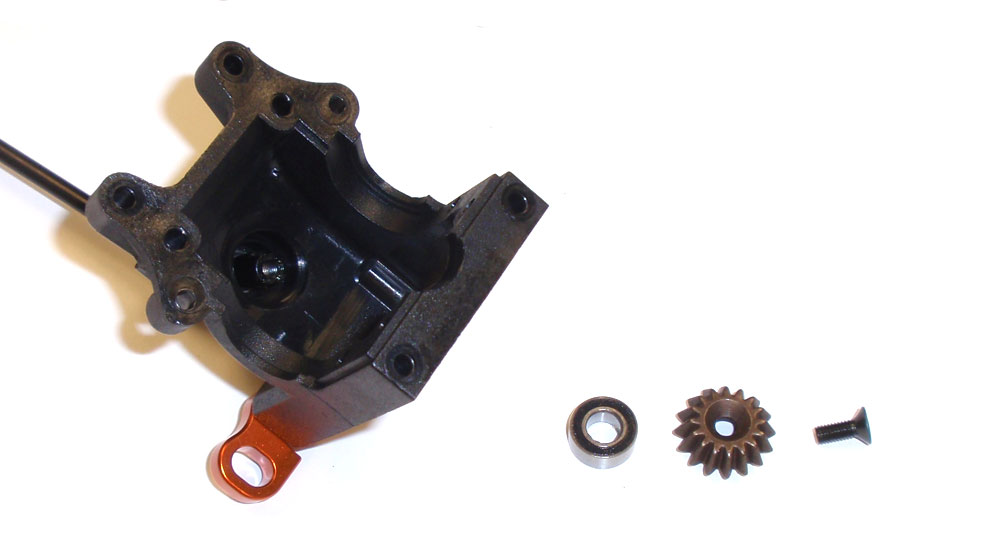
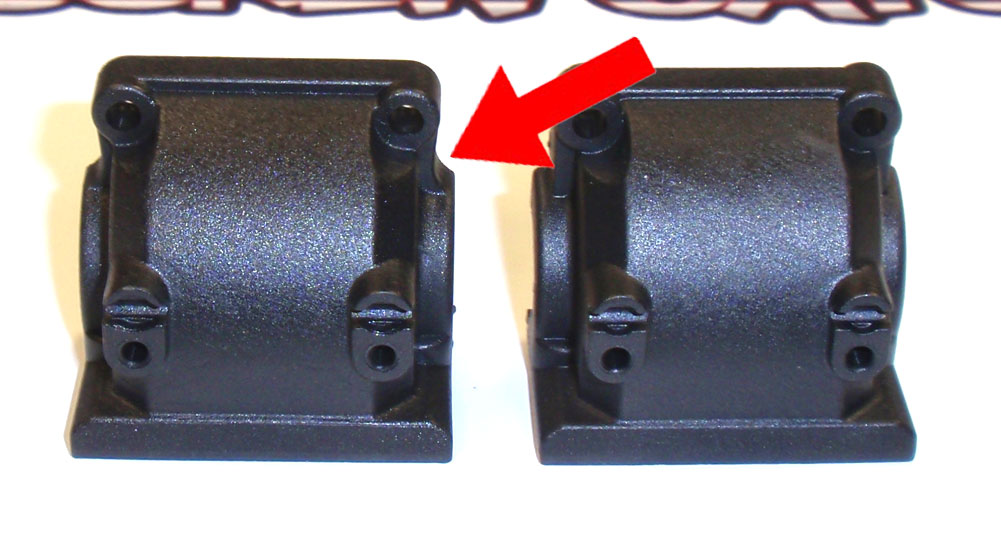
Like the gearboxes, the front and rear covers are slightly different. The one on the left (with the arrowed cutout) is for the front gearbox.
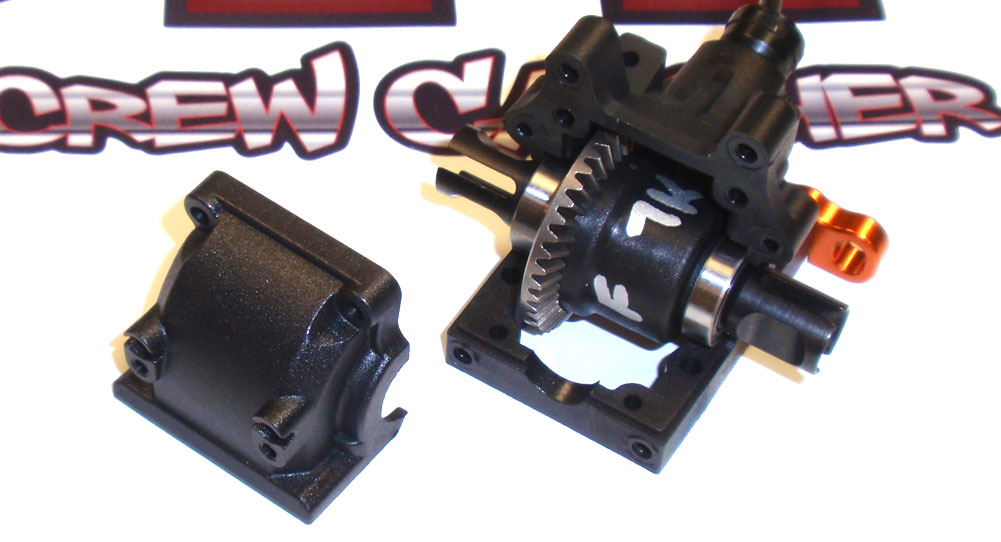
Insert the front differential, making sure the bearings on the diff seat completely. Now install the front cover.
Attach the gearbox assembly to the chassis. This is a bit tricky, but this picture shows you how the FR arm mount needs to be positioned.
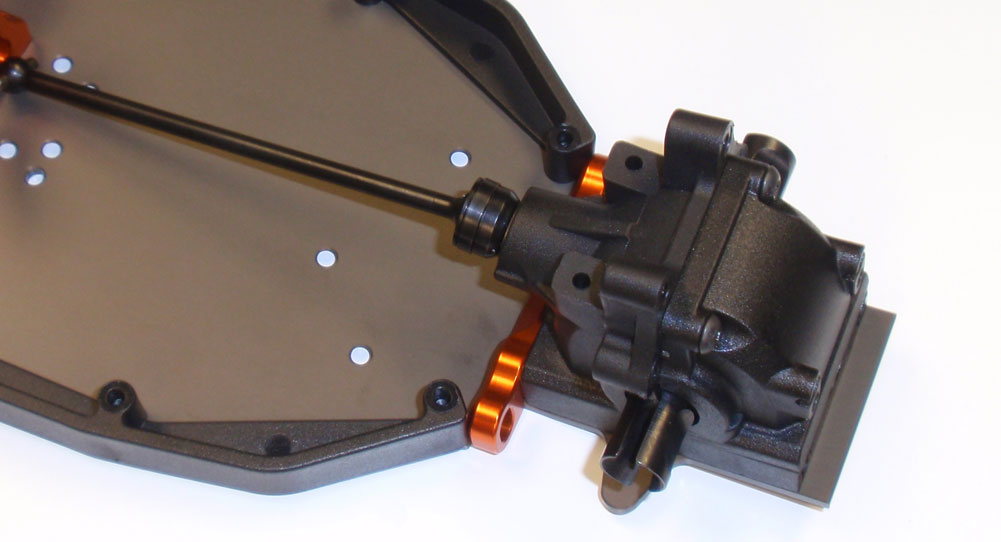
The front gearbox installed.
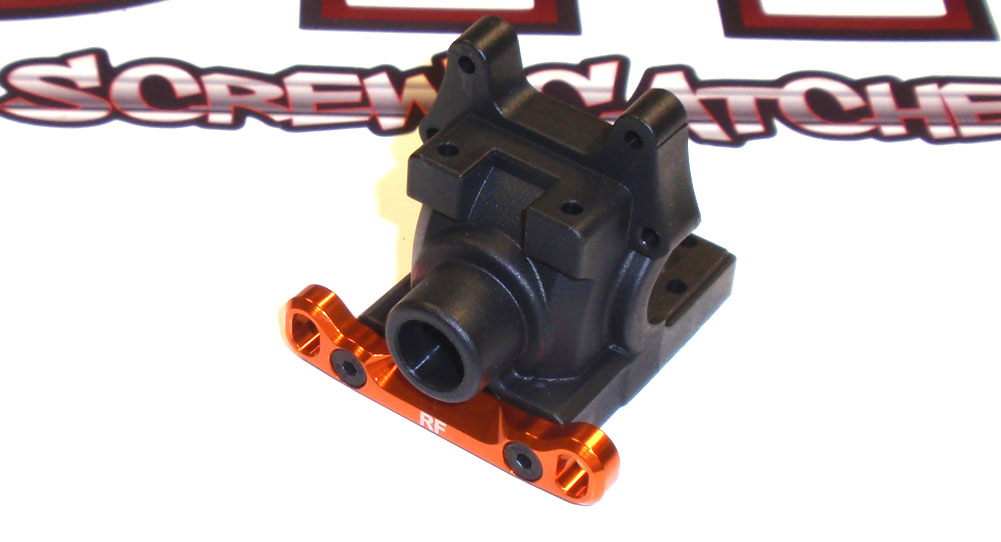
Attach the RF arm mount to the rear gearbox.
Slide a pair of 5×8 shims and a 5×10 bearing onto the 95mm CVD. Insert that assembly into the rear gearbox.

Insert another 5×10 bearing onto the CVD followed by the sun gear and M3x8 screws. Use a dab of threadlocker here.

Position the rear diff into the gearbox and install the rear cover.
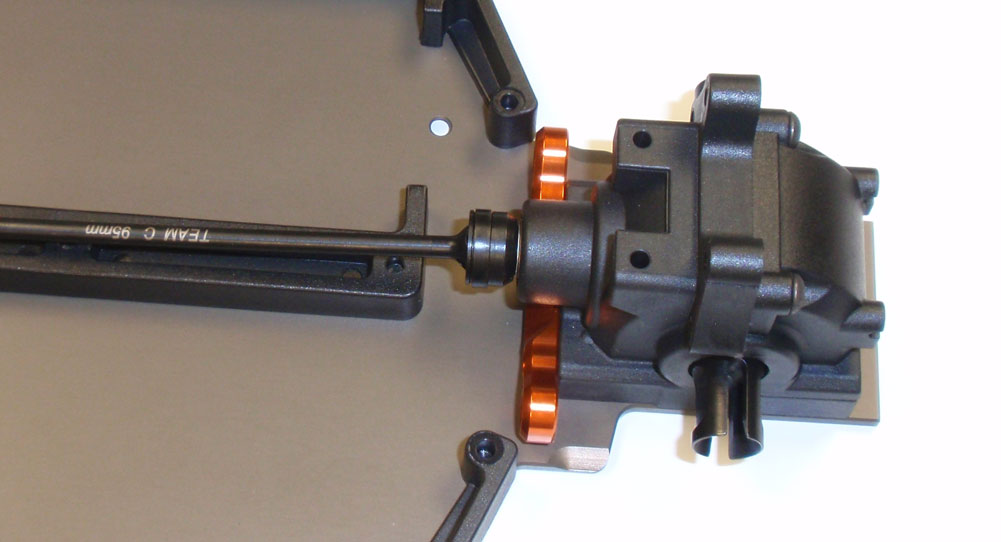
Attach the rear gearbox to the chassis.
Give the CVDs a spin to make sure everything rotates smoothly. Next up is the center slipper clutch.


