


When Associated re-released the original RC10, it brought back many fond memories for a lot of people. My memories are more bittersweet. When I was a kid, I had several friends who owned RC10s and I really wanted one. Whenever I brought it up with my dad and tried to show him my catalogs, he would have nothing to do with it. He apparently had built a very early RC kit and had problems, so every time I asked I would end up with another toy-store RC. Years later when I was in my early twenties, my dad became terminally ill and building an RC was something that I regretted never getting to do with my father. So I ordered more catalogs this time my Dad was very interested and helped me pick my first kit, a Stampede. Unfortunately, I was an hour into the build when I got the call. From that point on I’ve always felt this was something we’re doing together and that is the root of my RC addiction. Fast-forward to last week. I’m hanging out at my friend Rob’s shop, checking out his impressive collection, when I see he never finished the RC10. I asked him if he needed me to paint it, because I really just wanted to get my hands on it. He just wanted the paint job on the box, but he wanted the stripes to be painted on instead of using the included decals. It would be too easy if I just used striping tape to tape it off , but after some discussion, we decided that the orange color scheme was not really his thing, so we would do a color shift to blue. After some thought I decided liquid mask would actually be a quicker way to go for this Easy Paint-Job. That’s because of how I was going to lay the colors. Just watch, you’ll see what I mean.

Parma
• FasMask #40281
• FasWhite #40000
• FasBlue #40004
• Fasfluorescent Blue #40106
• FasBlack #40001
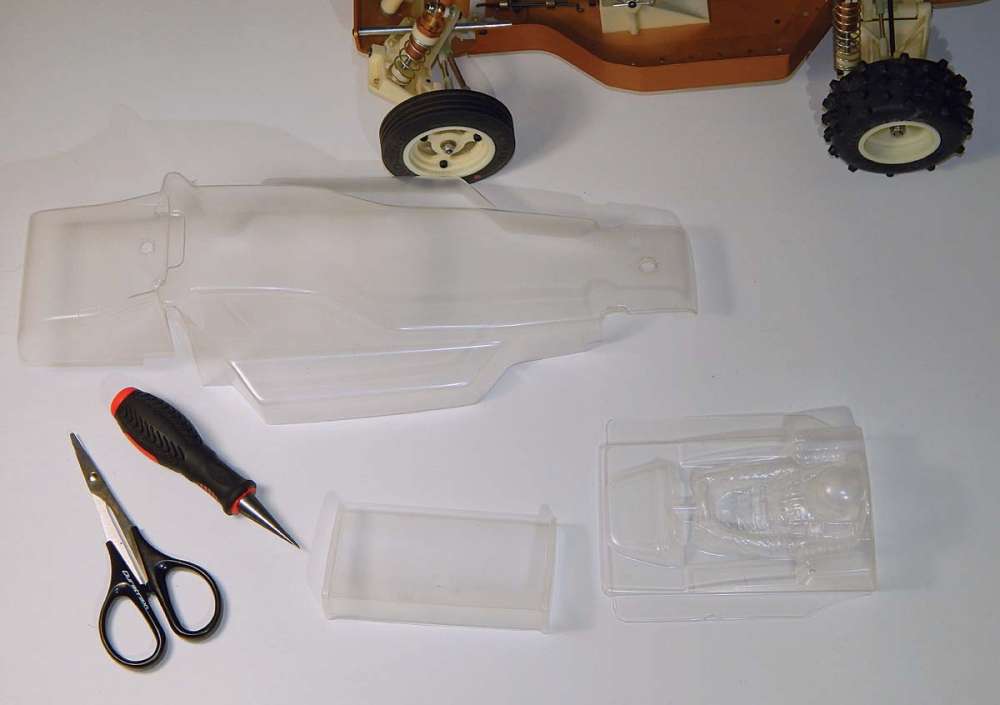 1. A lot has changed in this hobby since 1983 and you’ll see the basis of many of the RCs we drive today in the old RC10. It really was roughed together compared to the CAD technology we see today. So, the bottom trim line is not marked on this body and if you’ve never mount- ed one of these before, you’re going to go through a lot of trial error at first. I ended up taking out most of the front end and then I had to notch it to clear the steering bell cranks at full lock. I cut a slot up the side to clear the rear shock tower. Next I had to notch out more of the back end to clear the upper links at full compression. When I finally had it in place, I marked the tops of the body mounts. This is a problem I always have with angled body mounts because I forget that since the body mount is angled back you need to make your hole just for- ward of the top of the body mount.
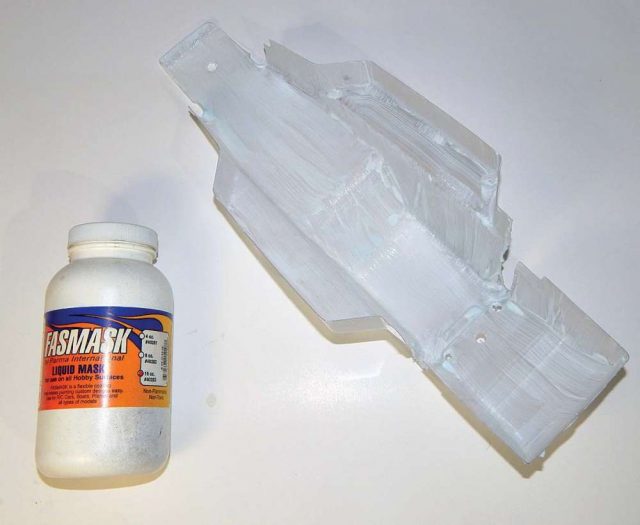 2. Once I had the body in place, it was time to get prepped for paint by scrubbing it out with warm water and dish soap. I dried out the body with a paper towel to prevent water spots and then I applied the FasMask liquid mask by dumping a couple of little globs into the body and spreading it with a 1-inch foam brush. Better to lay it too thick than two thin. I apply two or three coats, allowing a couple hours to dry between coats and overnight after the last coat.
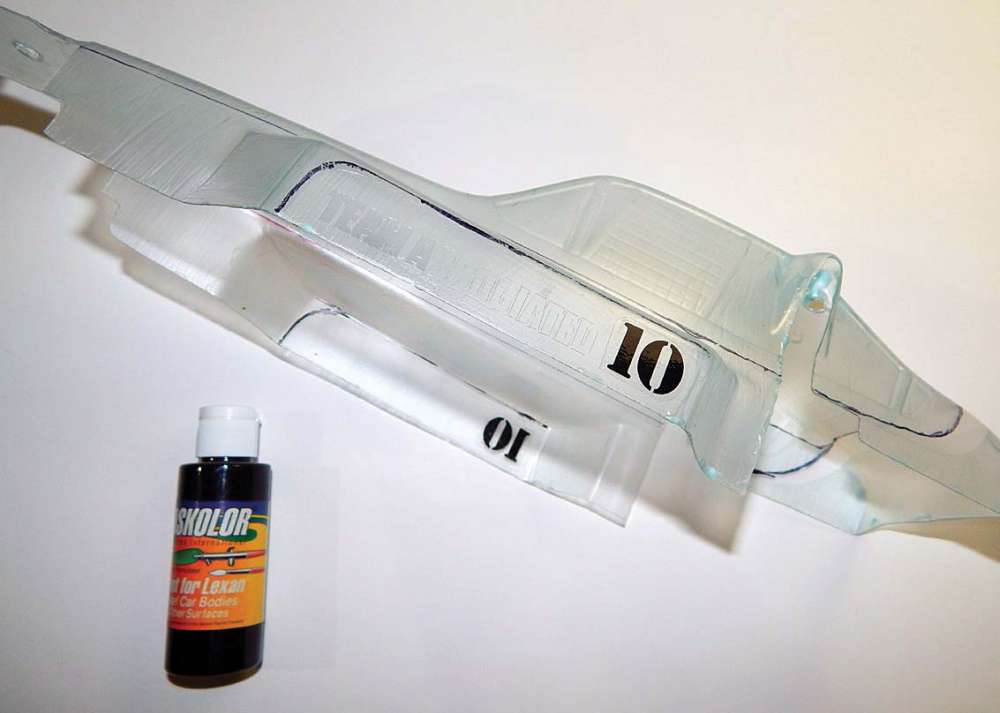 3. I laid out the graphics by just drawing the top line of the stripe. Since it is such a thin line I was able to just eyeball my second line off that. I cut and removed the top lines and then I took the numbers off the decal sheet and put them on the outside of the body. I cut the numbers on the inside of the body and removed the mask from that area. Then I filled the areas with FasBlack, laying a light mist coat, before going back with two slightly heavier coats. You lay the first coat very light so the paint doesn’t try to spread unevenly.
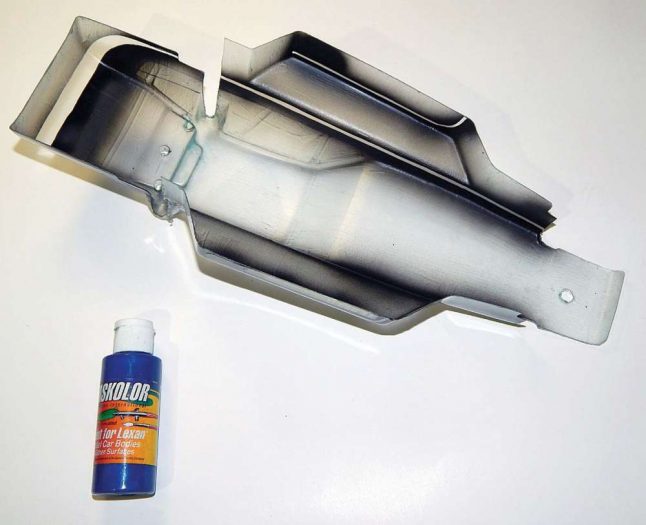 4. After giving the black a lit- the time to dry, I cut my next stripe by eyeballing the line off my previous line as I had done before. I filled the areas with FasBlue which is a fairly opaque color on its own, but I typically like to back it with Faswhite to keep it bright and prevent other colors from bleeding through. That is not going to be necessary in this case, since I will be using a lighter blue in my next step.
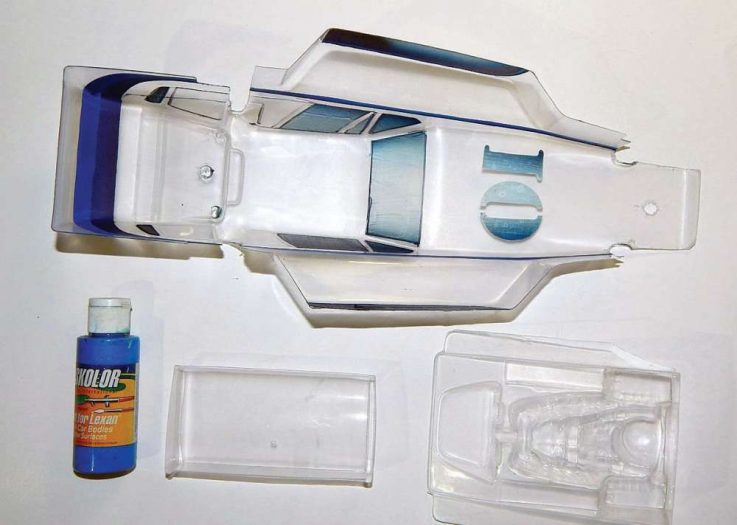 5. Before removing a big chunk of the mask for the background color, I pulled the large number off the decal sheet and applied that to the outside of the body, then cut it out on the inside. I also cut my windows out by tracing them on the outside so I had a good line to follow when I cut them on the inside. I cut just outside of the line so there would be no extra color showing after I’m done. Then I remove a big chunk of the mask to fill the area with FasFluorescent Blue. This color is very thin and can be difficult to use in large areas. I laid it in very thin coats but used five coats in total to build up the color the way I wanted. I also painted the wing and just the helmet inside the interior. The wing has some hard-to-reach areas and you’ll be best off to paint it from the inside and outside
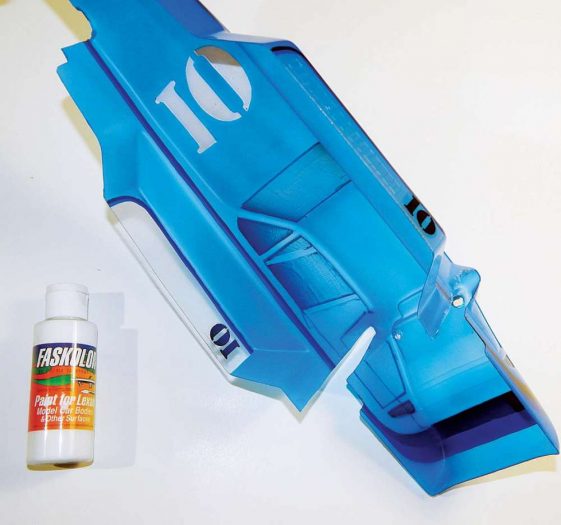 6. I would typically back the FasFluorescent colors with FasWhite to really make them opaque. I’m going to do it this time and that is my next step, but first I remove the mask from the number on the top and the rest of the mask from the sides. Then I lay a coat in the open areas before going back and spraying the whole body in three coats of white to make it nice and opaque.
 7. Rob wanted the windows cut out like it is shown on the box, but I was afraid that would make it delicate, so I decided I would at least detail the roll cage and then if he wanted to cut the windows out later that would be up to him. The box shows the cage in a flat black, so I decided to spray it from the outside, by cutting and removing the overspray film from that area. I also cut a couple of squares on the front side of the body to simulate vents, rather than use the included decals. I left the overspray film just on the helmet of the interior. Then I sprayed those areas with FasBlack from a slight distance to make the finish a little rough. I did this now and rather than the first step I used the FasBlack, so I wouldn’t get overspray on it.
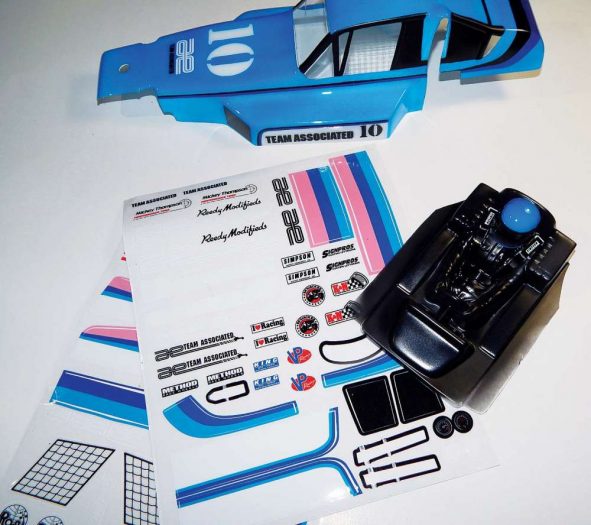 8. After giving it a good amount of time to dry, I removed the mask from the windows and also removed the overspray film. I then applied the decals to detail the interior before attaching to the inside of the body with a couple strips of servo tape. I didn’t use my good Parma Pro tape for this, I saved that for more important things and just used the tape included with the kit.
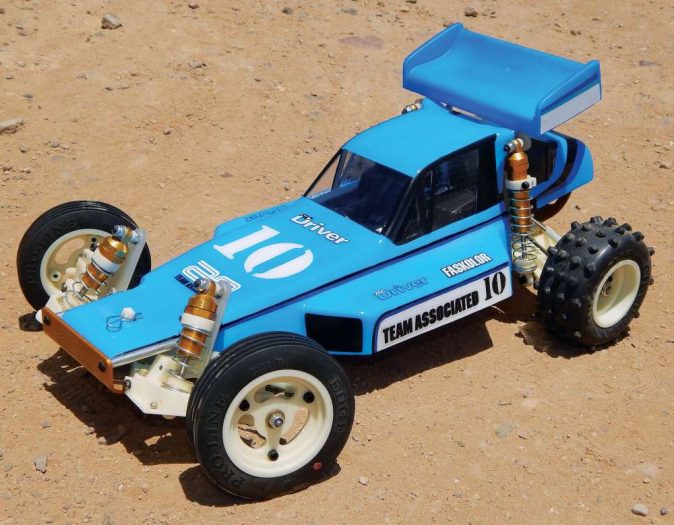 WRAP UP
I can see how some would wonder why I did not mask off such a simple scheme with tape, but if you discount the drying time I think it took me about the same amount of time to cut it in the mask and then because I was able to lay my color in the opposite order to what I would have with tape. I was able to go from dark to light and never use backing colors before the next step, which saved me a huge amount of time in the long run. I tend to use a lot of backing colors to pull off a lot of the schemes I do, but if you think like this, you can save yourself some paint time!
By David Harrington
LINKS
Parma parmapse.com, (440) 237-8650


