 RC Driver The Best In RC Car & Truck News, Reviews & Video


I think most of us remember the old chopper building show with the father/son team. Their two different approaches to the creative process really helps make my point here. Senior wanted to draw everything up in advance on a computer to show the customer what they would be getting. Often the builders became frustrated with impractical aspects of the designs. I also personally felt the designs became stale and uninspired. Junior, on the other hand, liked to build things on the fly, and came up with some of his best ideas along the way. This is the way I prefer to do things. It seems when you run into a snag and have to start problem solving, that’s when you come up with the most creative ideas that you wouldn’t have before. Necessity is the mother of invention, they say. So this focus is less on the paint job, and more on the creative process of how this car came together.
By David Harrington
It all started with an old comp crawler body from 2009. The crawler class evolved so fast that these kind of bodies have long been obsolete, but Parma put a cool scale rock buggy look to theirs and I had one around that I figured I would use for something someday. It occurred to me the Arrma cars have skinny chassis, so it might fit on my Granite monster truck which isn’t as much a monster since I lowered it down and put stadium truck tires on it. It seemed like the plan might work, but I had no idea how it would turn out or if the results would be worthwhile. So let’s see how I ended up at this point.
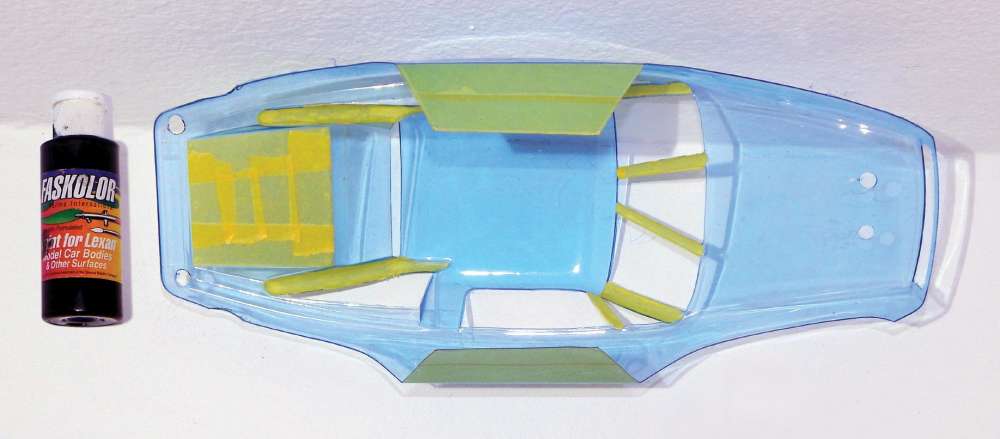
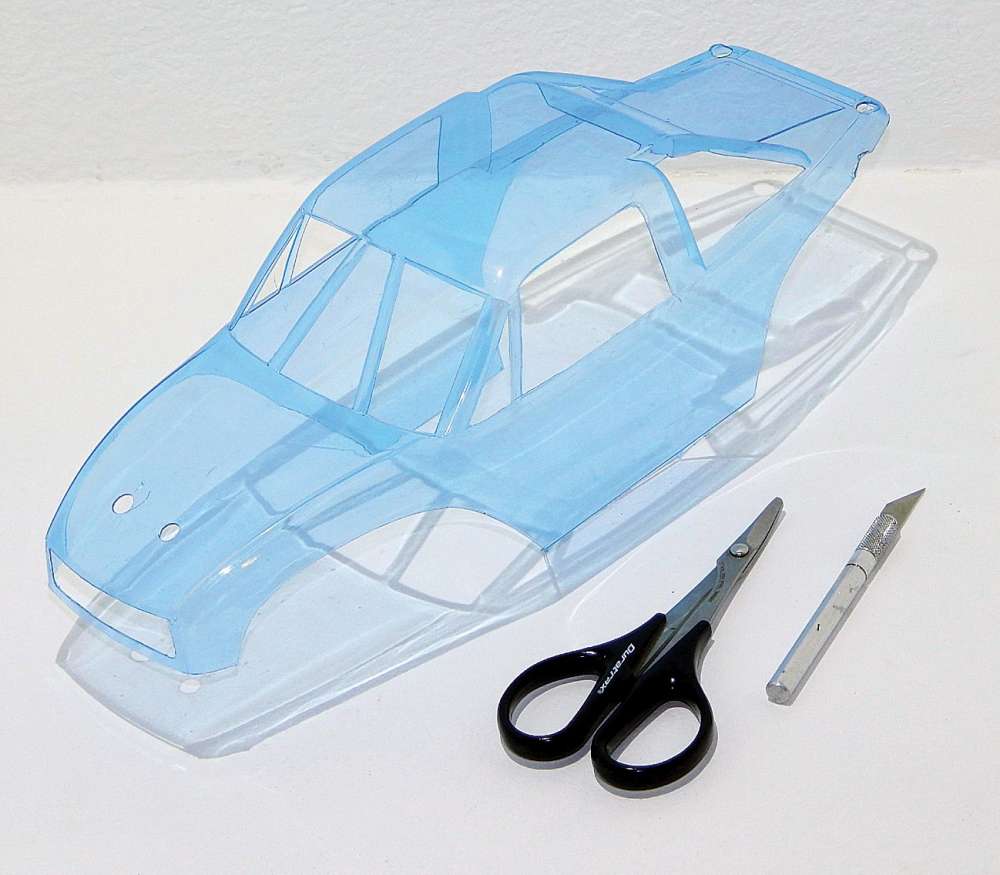 1 The first thing I had to do was trim the body out with my Lexan scissors to see if it would fit. At first it looked like a no go and I was ready to pack it in, but this is where I decided I was going to make it work. I had to cut off the rear portion behind the wheel wells to allow the body to sit on top of the rear shock tower. The window mask and the headlight and grill decals that came with this body have been lost. I could have easily masked the windows off and painted a grill, but I was looking at the molded in roll bars and I got an idea. I decided to cut out the windows and I also cut out a grill area that I will fill with screen later for a more scale look. To cut them out, I scored them with my hobby knife and then bent them until they cracked out.
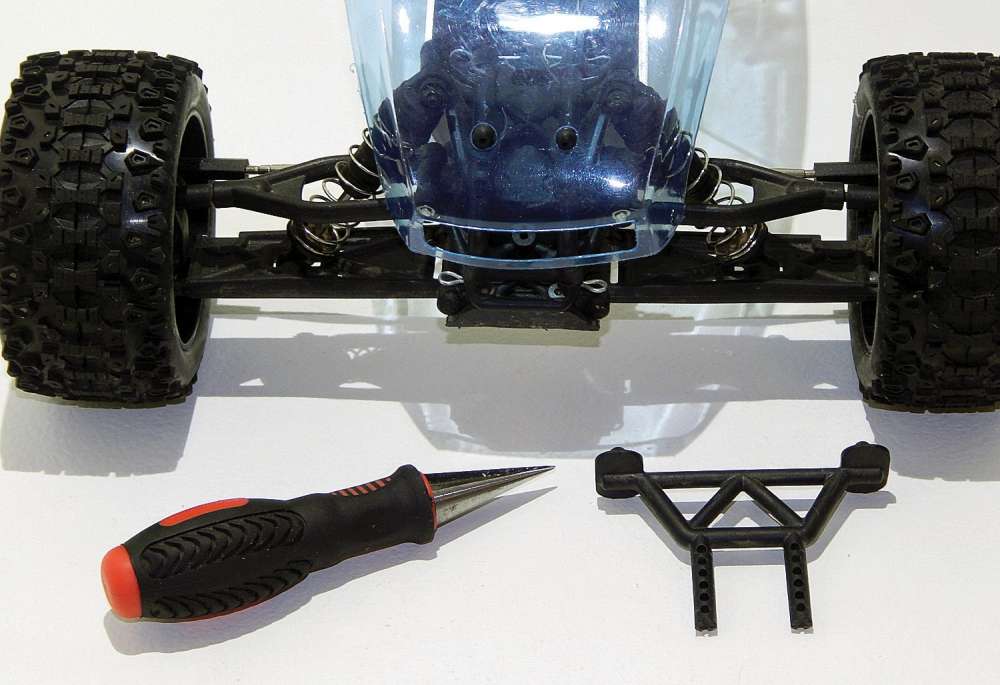 2 The front body mount presented the next problem. The body was sitting about an inch and half too high, and the body mount was bottomed out. Again I was ready to give in, but I had gone too far to turn back. I looked at the points where the body mount adjusts. They were much more narrow than the actual mount, which is good for this body. So I found a couple of body posts left over from an Axial kit and dropped them in at the adjust- ment point. I had to open up the hole for a body clip to accept the pin. Now the front drops right down to the chassis, and the more narrow mounting point allowed me to move the body back, which saved my behind later.
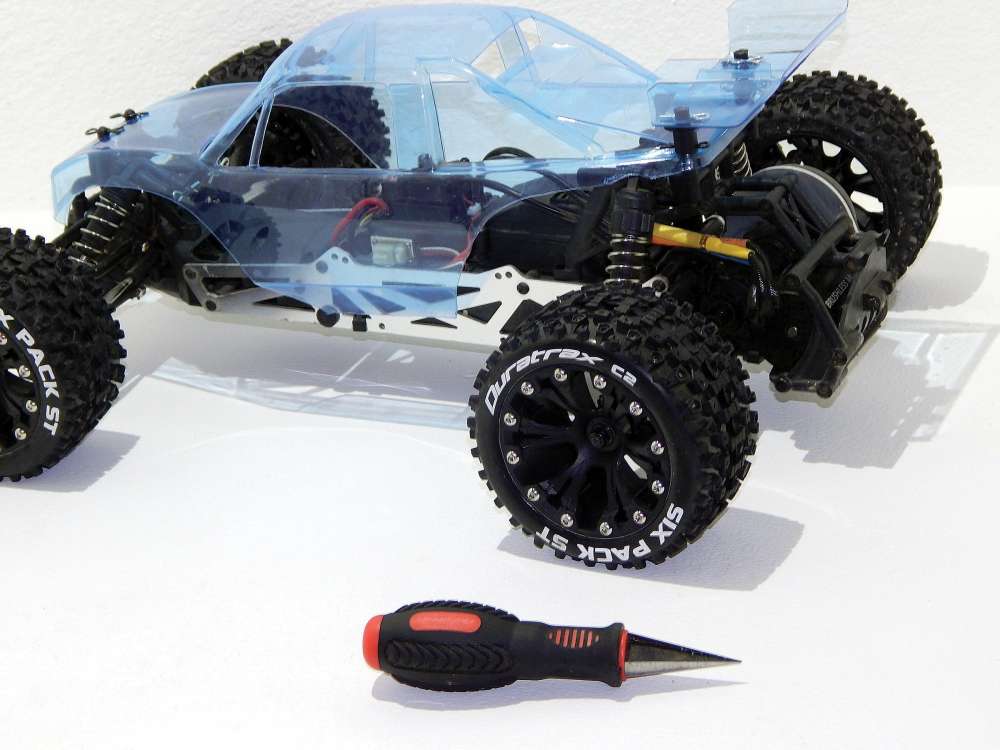 3 I didn’t necessarily have to get inventive with the rear body mount. I could have just removed the adjustment collar and it would have sat right down on the rear shock tower, but I did not want to have to trim the body mount in case this didn’t work out. I also didn’t want the body mount sticking out. So I got the idea to put the adjustment collars on top of the body, to hold the body down and also create a wing mount. I initially pictured a larger 1/10-scale wing, but I came across this little 1/18-scale wing that matched the width of the rear of the body and thought would give it a more scale look, especially if i made some side dams out of scrap Lexan.
 4 In my head I pic- ture this body being just flat black, but this is a painting article so I decided to do something. One trend I’ve been seeing in the full scale auto- motive world is flat on gloss black paint schemes, that’s what I tried to create here by painting on the inside and outside. So I just masked off the rear deck, roll bars, and bottom floor pans with masking tape, using my hobby knife to trim them. Then I sprayed the entire inside with Faspearl Charcoal. I used the char- coal rather black so the effect would be a little more pronouced for pictures.
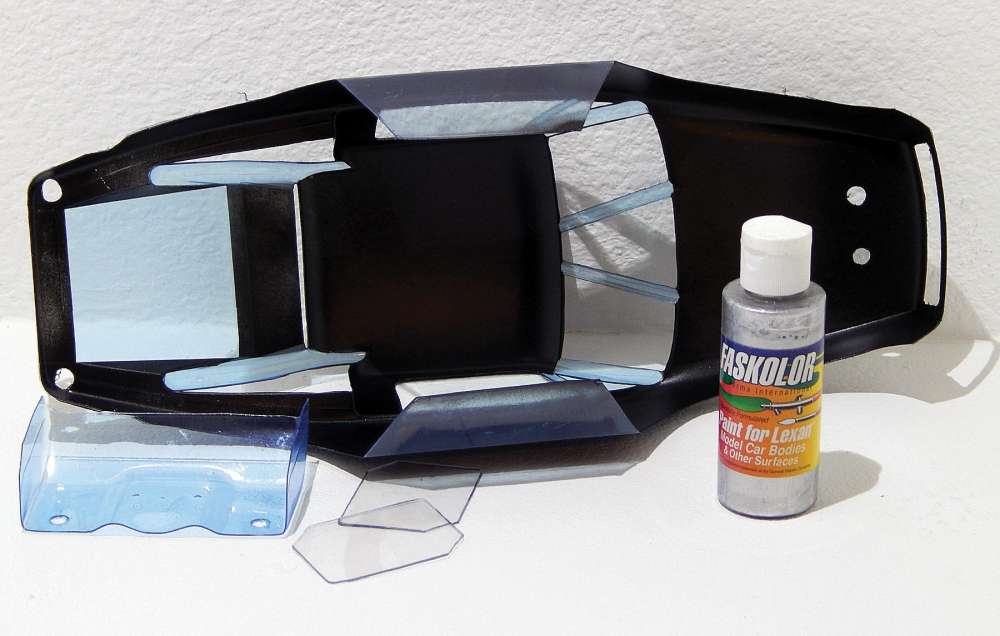 5 The pearl color will need to be backed with FasKrome, which is also the same color I planned to paint the areas I masked off. So I first removed the masking tape and then laid several coats of FasKrome. At this point I also painted the wing and side dams. These will not be getting a backing color, so I laid few coats, let it dry, and then laid a couple more heavy coats.
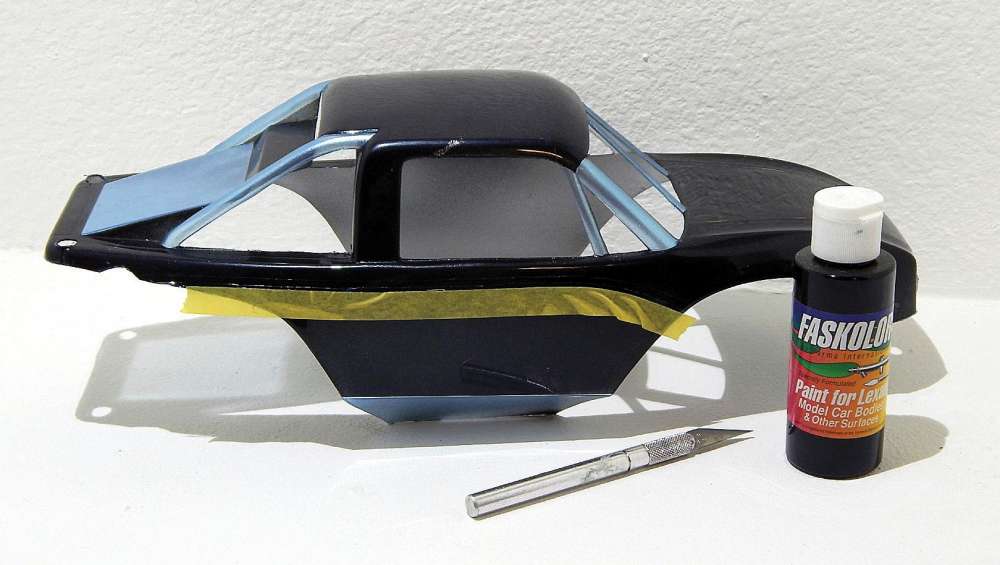 6 Now it is time to start cutting the graphics in the overspray film on the outside of the body. I used a piece of masking tape to make my lines and give my knife an edge to help guide it. Be very careful not to remove the overspray film with the tape. Whenever possible I put the tape on the section that was to be removed. I then sprayed the inside of the body with FasBlack, to make the FasKrome opaque, and for a uniform look. Then I sprayed in the graphics on the outside.
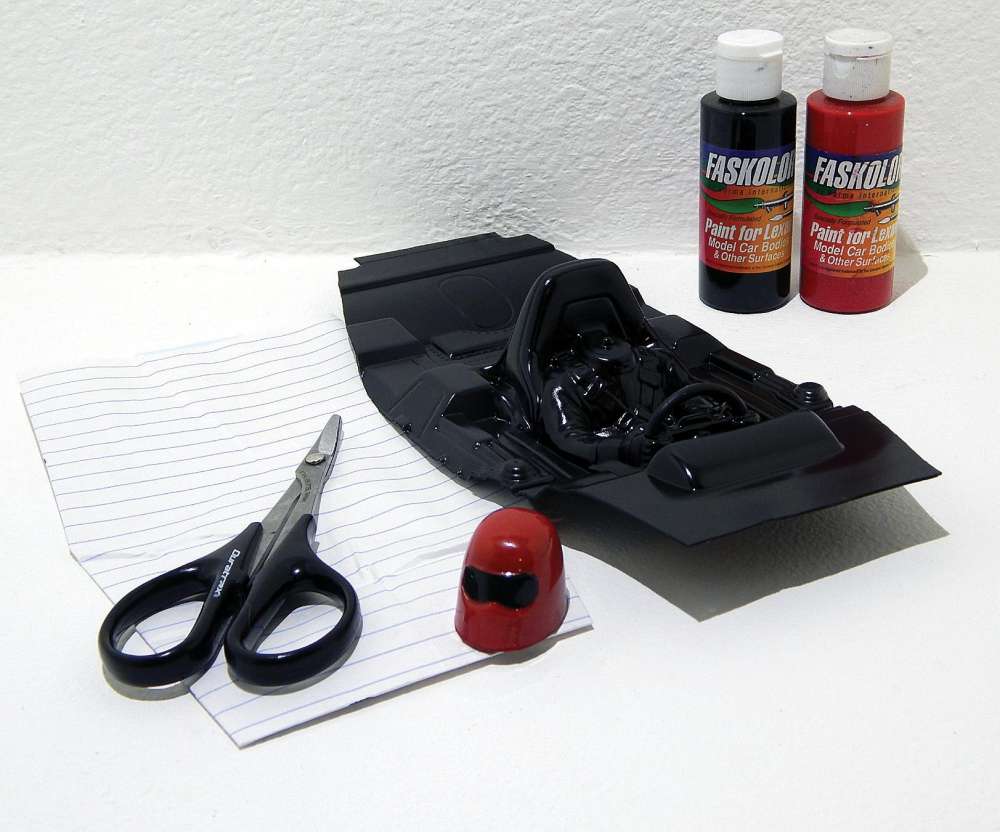 7 I did a full tutorial on mounting and detailing Parma’s interior in the Jan ‘16 issue. For this one I folded up a piece of paper to find the inside dimensions of the body. I then roughed out the shape from the interior, test fitted, and trimmed as necessary. I masked off the visor inside the helmet, and filled the rest with FasRed. Then I removed the mask, and filled in the visor with FasBlack. I didn’t want to detail anything, I wasn’t planning a full-on scaler, so I just sprayed it with the black from the outside. The steering wheel was made with 14 gauge wire.
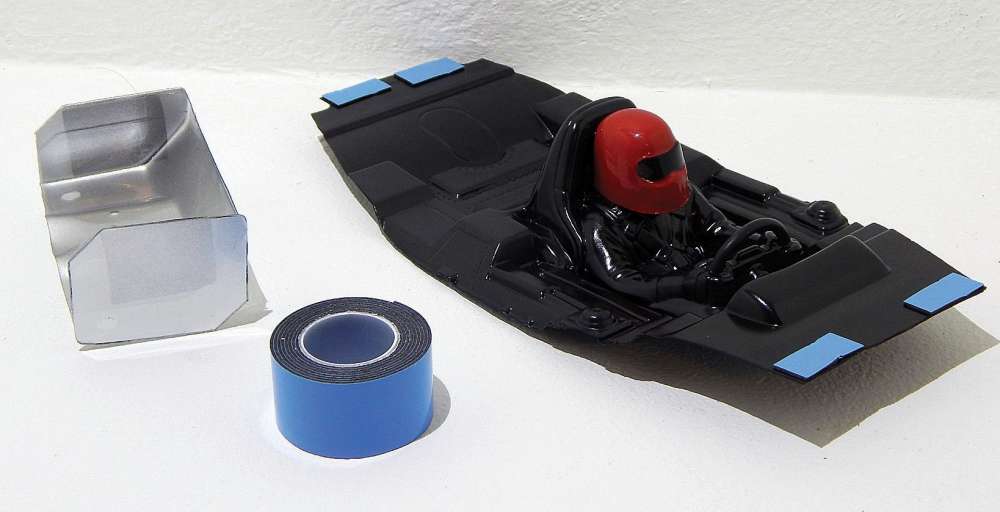 8 Almost done! Now I just need to put it all together. I used servo tape to attach the side dams to the wing, and on the back of the hel- met to attach it to the interior. The interior came with Velcro to attach it, but I don’t plan on removing the interior so I just used servo tape to attach that to the body too. I got the screen for the grill from a strainer I picked up at the dollar store, for a buck. I cut it to size and then glued it on the edges with Shoe Goo.
WRAP UP
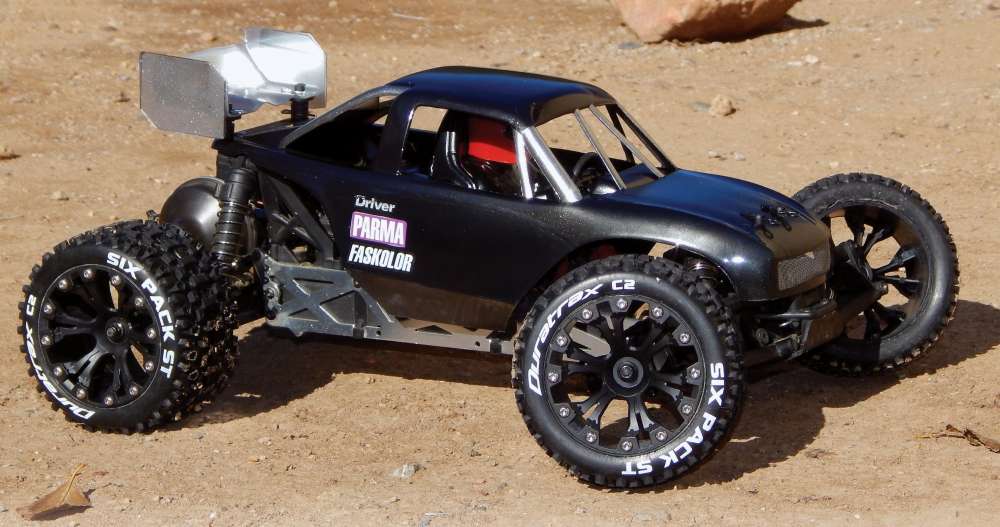
When I started this project, I thought it might come out like some goofy fantasy vehicle, but I liked the idea of the challenge to make it work. As it came together I started to realize it actually has a semi scale thing going on, and ended up being a lot more convinc- ing than I ever expected. I’ve been meaning to change the stock body on the Granite, and there is a plethora of 1/10-scale truck bodies out there that would have dropped right on, but I like this better, because I haven’t seen anyone else with one, and I think it looks cool. Best of all, I know the effort and thought that went into making it all work, and that is something to be proud of!
LINK
Parma parmapse.com, (440) 237-8650.


