Words and Photos by David Harrington
From RC Driver Issue: 133
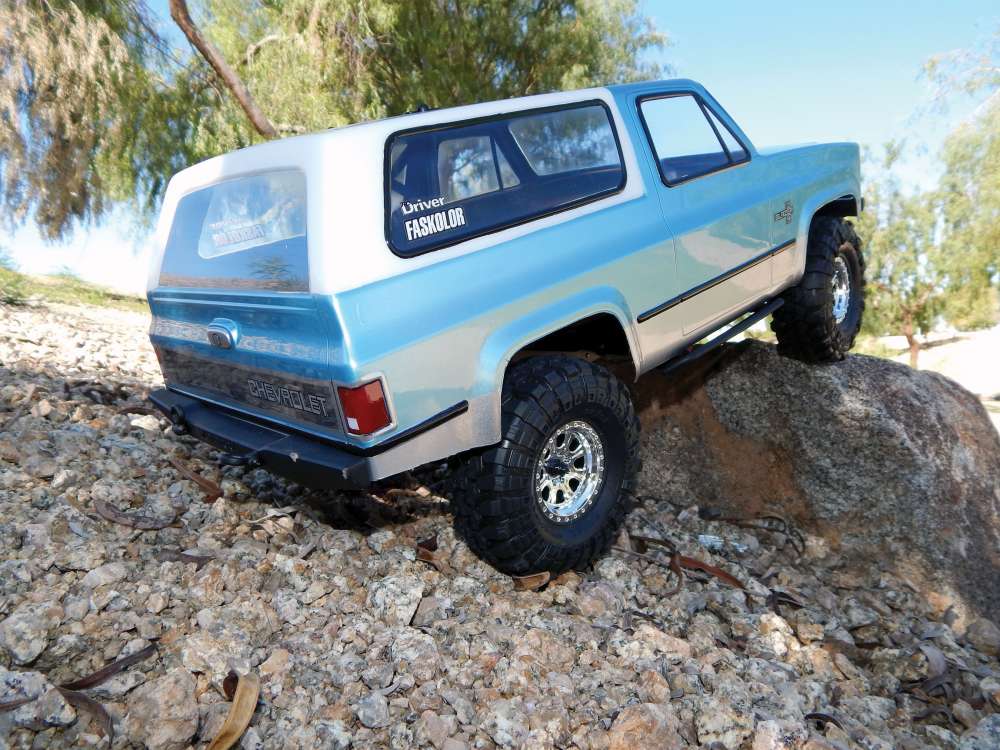
By the time you’re done building a chassis, painting the body can be a chore but this is no time to be in a hurry. For me it is the best part of seeing an RC vehicle come together. When I saw the Vaterra Ascender release I just saw an awesome ‘86 K-5 Chevy Blazer body with a cool molded plastic chrome grill. Yeah, there is a cool new innovative chassis underneath but I love my Chevys and had to have it. It’s funny how life works. When I started painting Lexan bodies they didn’t usually come with trim decals and I had to learn to paint everything. Now most bodies come with trim and detail decals and the Ascender is no exception. I especially like how the window decals are tinted. But decals get torn off on the trail and I’ve got to the point where I like to do my own details. So I saw this as a good opportunity to share some detailing tips on how I tried to kick this body up a notch. I spent all week building this truck so let’s get to painting!
Step 1
You should be able to just trim the body on the lines make the holes in the pre-marked spots and drop it on the chassis. If life was only that easy for me! I seem to always have to do something different. I wasn’t a fan of how the sliders wrapped around the door so I left the spacers out to narrow them up then I shaved gap between the body and the sliders. To lower the body I had to cut where it meets the bumpers. I started at the wheel wells and cut up at an angle. That took about an eighth of an inch off the front and back. To get the other eighth off, I notched the body slightly. I not only like the way that lines up the bumpers but I also like how it tucks the wheels into the wheel wells more. Step 2
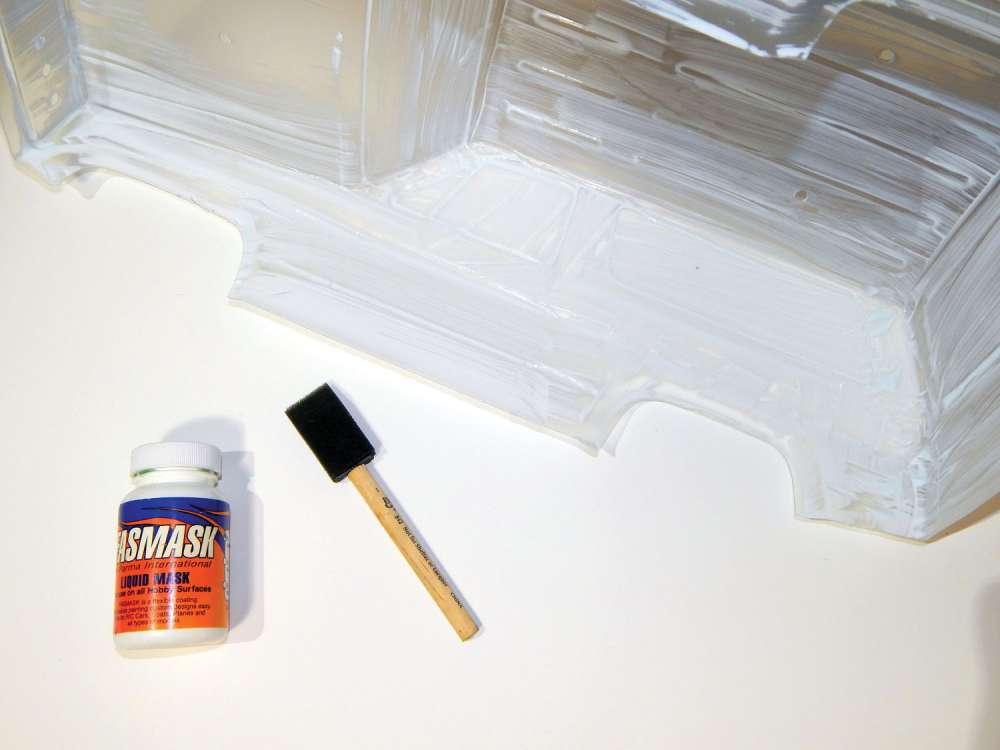
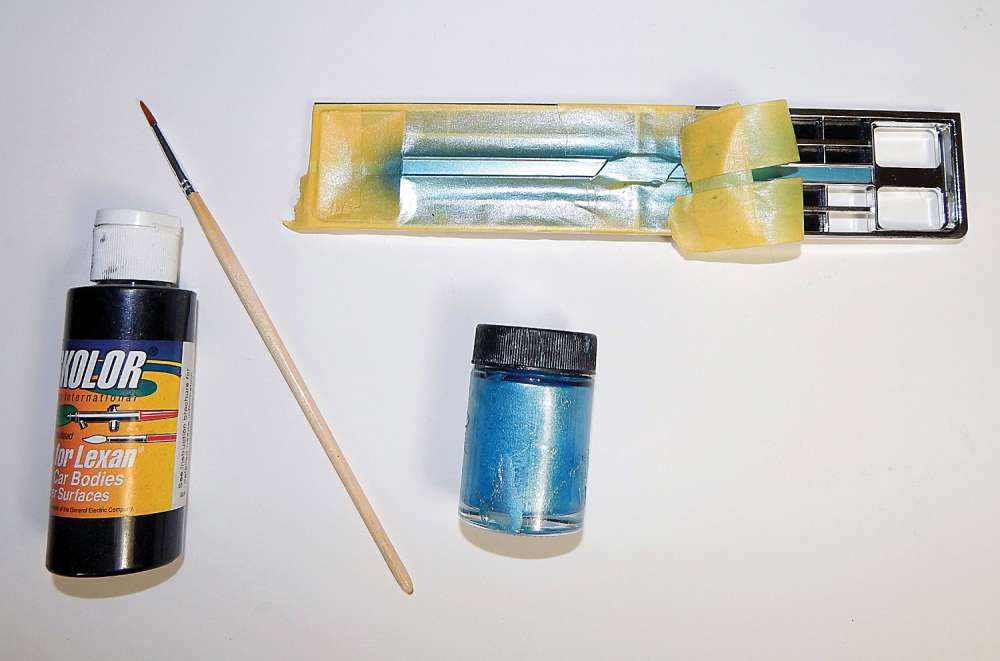
I always debate with myself over the masking technique and I usually end up using liquid mask. While this is a simple scheme that would be easy to tape off and tape would save me from cut- ting some straight lines, ultimately I would still do some cutting. Liquid mask is easier to cut and minimizes frustrations that paint bleeds can cause. I laid two good thick coats of Fasmask with a foam brush, allowing a couple of hours to dry between coats and overnight after the last coat.
Step 3
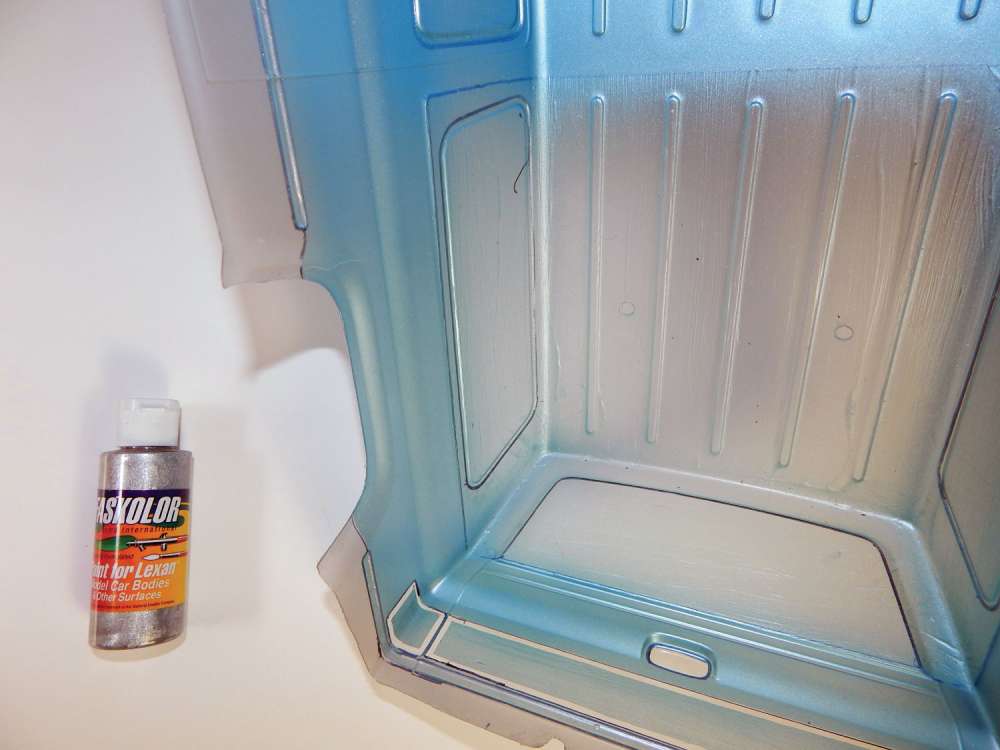
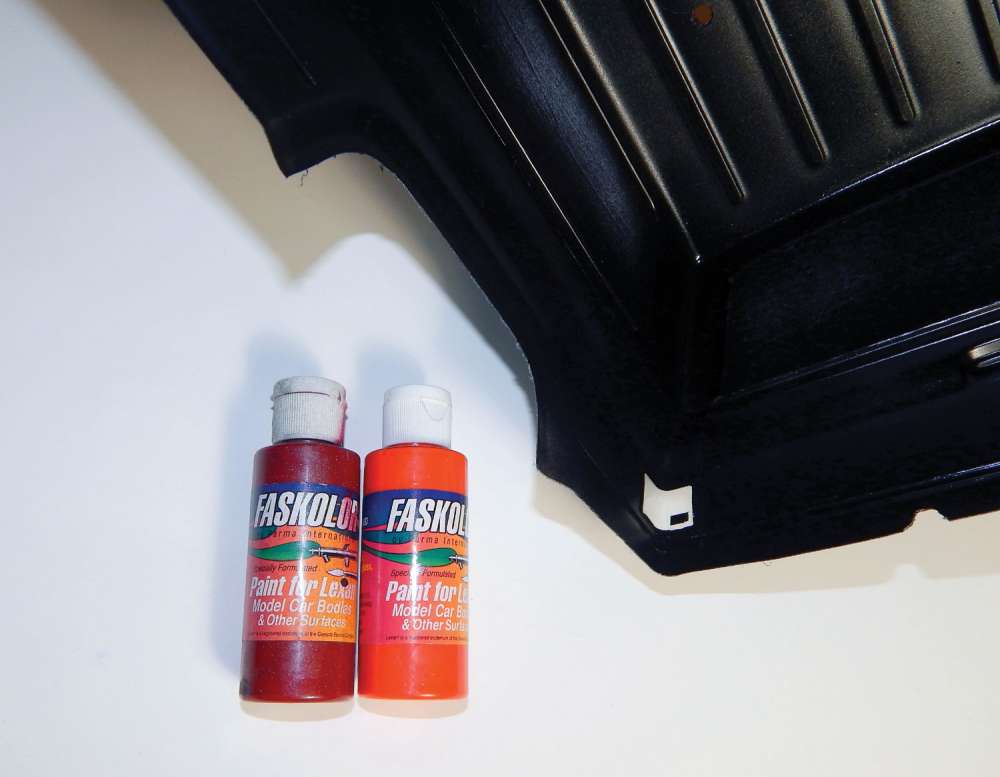
Most of the cutting will be done in this first step. I traced the details on the outside with a perma- nent marker and then carefully cut them on the inside. To start, I cut the rear roof area out, the outside of the front and side windows, rear gate latch, the trim piec- es, the turn indicators, the line that splits the two- tone around the trim of the rear taillights and the panel between. Make sure you leave the headlight area masked. I found a brochure for ‘86 Blazers online and checked out my color options. I settled on a light blue and silver theme but I had to mix my own blue. I wanted to get a shade close to the factory color so I added a little bit of Faspearl Blue to the Faspearl Silver. The blue will overpower the silver quickly so it doesn’t take much. It will look darker in the bottle and I feel I could have gone a shade darker. After getting a color I liked I laid three coats, starting with two lighter coats before laying a heavier coat.
Step 4
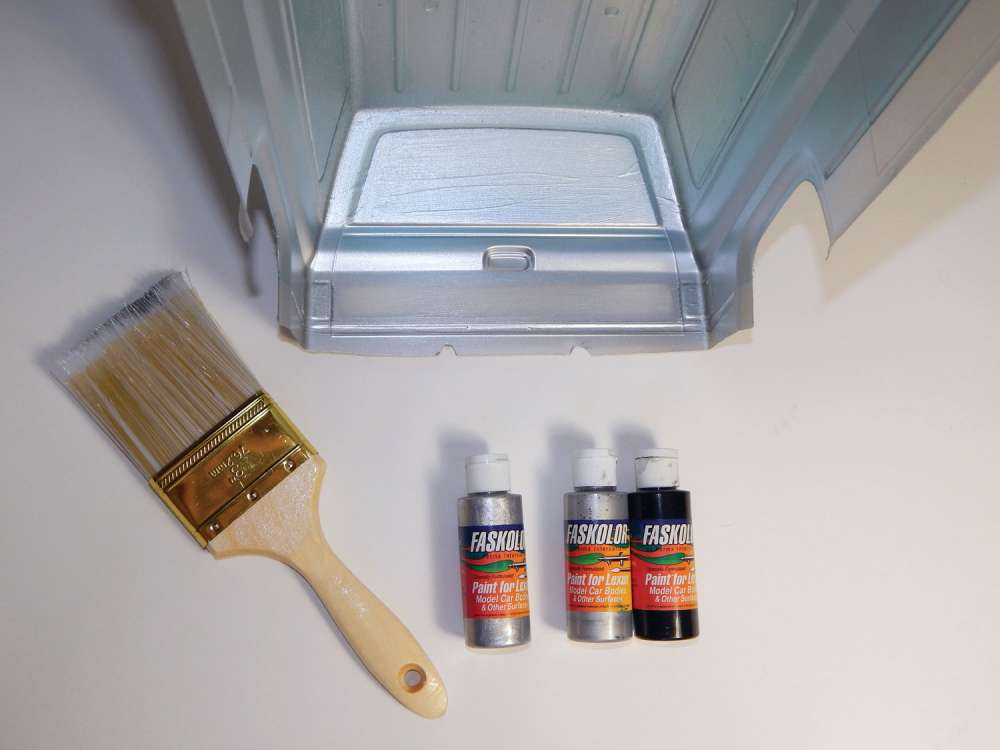
After that last big step the bulk of the hard stuff is done. It’s all downhill from here. I already cut the line for the two-tone scheme so I just had to remove the mask from the bottom area and lay my FasPearl Silver in the same manner as I did the blue.
Step 5
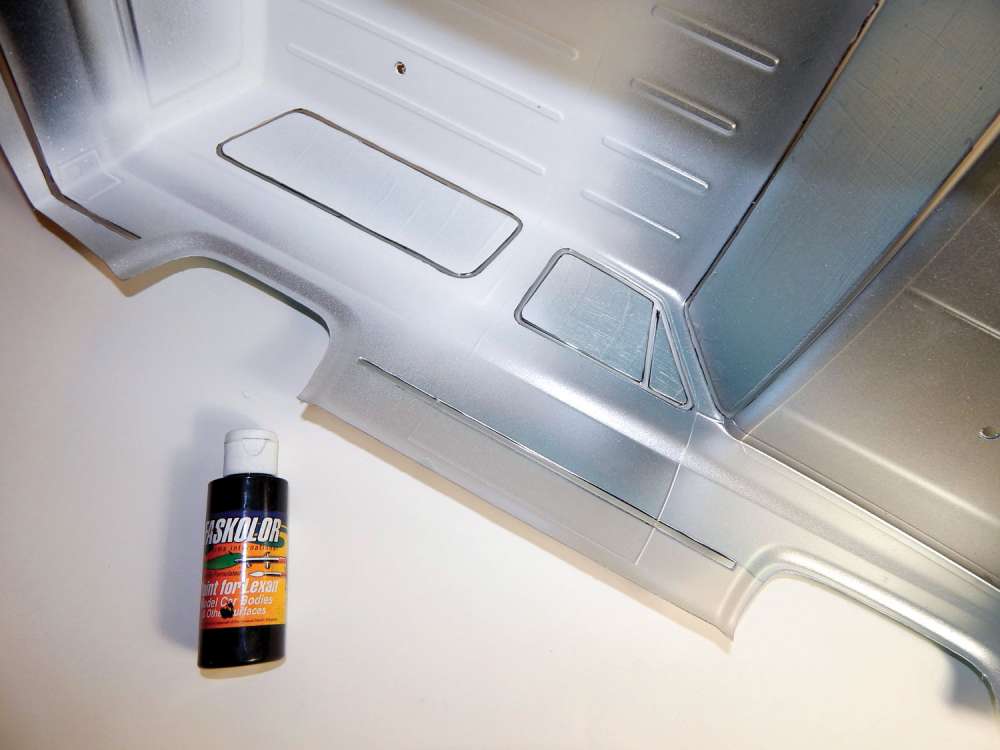
Normally I would have backed the last two Faspearl colors with FasKrome to make them opaque but since I was using the silver behind the blue I saved some time and skipped to this step. Next I cut out the centers of the turn indicators and rear taillights, just removing the outside trim. The rear center panel I did similar to the rear trim panel. Then I removed the mask from the rear latch before spraying the FasKrome in those areas and then backing the whole body.
Step 6
For the rear panel I wanted to try something different. I have demonstrated a brushed aluminum technique in the past and this was the perfect practical application for that. I laid a thick coat of FasKrome and then before it dried I took a large soft bristle brush and dragged it through, trying to keep my lines as straight as possible. I then backed it with FasSilver and then FasBlack. I got in a hurry and didn’t lay the silver thick enough. You want a good coat of it so the black doesn’t show through too much.
Step 7
Back in ‘86 the roof would have been black, white or color option one which would be the blue. I decided to go with a white roof to compliment the scheme but first I had to cut the trim around the rear window before removing the mask from the roof. I also cut out two small squares in the rear taillights. Then I laid three good coats of the FasWhite. I wanted to make sure it was opaque so the other colors wouldn’t show through.
Step 8
Now I cut out all the windows and removed the trim around them. Most ‘86 Blazers had brushed aluminum trim but black vinyl was an option which I thought would complement my bumpers so I also removed the trim pieces before filling these areas with Fasblack. I also backed the whole body in black for a clean, finished look.
Step 9
I finished up the painting by removing the mask from the turn indicators and rear tail- lights. I filled the indicators in with Faslucent Orange and the taillights with Faslucent Red. I did not back these semitransparent colors because I will be adding lights later.
Step 10
The molded chrome grill looks great on its own but I had to give it some love too. I
filled the in-betweens on the grill with FasBlack using a No.1 Round brush. I kept paper towels nearby to wipe off any mistakes. Another factory option was to have the center trim of the grill painted the body color so I taped off that section and sprayed a couple of coats of the color that I mixed up.
WRAP UP
I just wanted the body I saw on the box. The Vaterra body looks great on its own. I could have just sprayed some blue and been done with it but I think the extra time I took really made a difference. When I took it out for pictures I thought it looked just like the real thing! Now I get to finally drive it and that is the best part!
 RC Driver The Best In RC Car & Truck News, Reviews & Video


 Step 2