 RC Driver The Best In RC Car & Truck News, Reviews & Video


Nissan Titan Goes Medieval
This article was originally published in RC Driver’s May 2015 issue.
Words And Photos By David Harrington
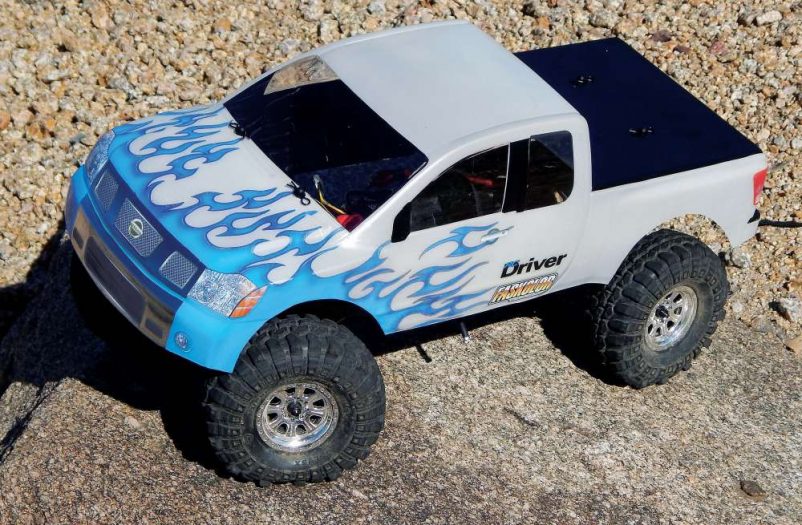
What is frustrating for me is when you look at a clear Lexan body, it is a blank canvas that could become anything, and I just never know what that will be. Part of that is because of my backwards creative process. Most people will have a particular RC that needs a new body and will order a body specific to that car. I on the other hand will see a body I like and ask myself, “How can I use that on one of my RCs?” In this case Parma’s Nissan Titan body for 1/10-scale monsters caught my eye. It was probably intended for a monster such as the Revo, but I don’t have one of those, so I tried fitting it on a 2WD 1/10-scale monster, which was a little too small for this body. I tried it on my Savage XL and it was a tad small for the larger monster, but real close to the stock body, so I was going to go with it. I had a whole Spider Man influenced web theme planned, and then out of nowhere, it occurred to me, The Vaterra Ascender has a fully adjustable wheel- base. I’d be sure to get a perfect fit there. When I sat the body on the chassis, the stock long wheelbase fit perfectly. I did not have to change a thing! Now that it was no longer a monster, at first I thought of toning down the web theme, but then I started to see it as more of a tall custom truck, and did a 180 turnabout on my idea. Now I’m seeing Pearl White and flames. I had some Parma Medieval precut flames that I was saving for the right project, and they fit this body perfectly. So the whole project kind of came together on its own. Sometimes I feel I don’t have any say-so, the project tells me what to do!
ITEMS USED
Parma
Nissan Titan Body #10127
Medieval Flames Mask #10833
Masking tape #40257
FasWhite #40000
Faspearl White #40051
Faslucent Blue #40306
Fasfluorescent Blue #40106
FasKrome #40300
FasBlack #40001
Spaz Stix
Mirror Chrome #10000
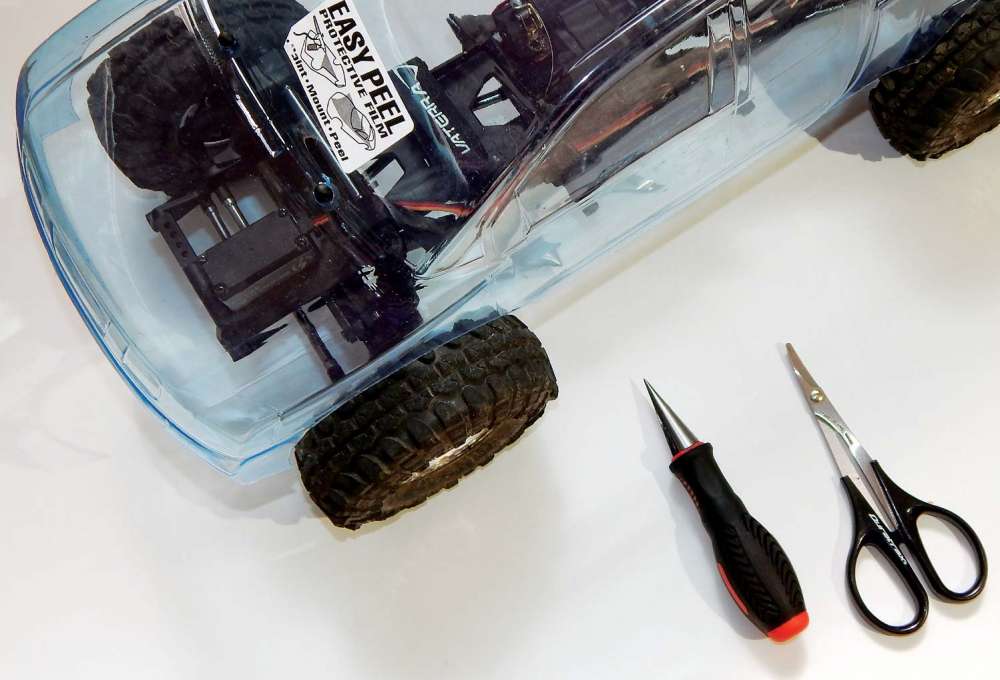 1 After trimming out the body with my Lexan scissors, I took the bumpers and sliders off the chassis to line up the body. The Ascender uses spacers to adjust how far the bumpers stick out. If I took one spacer off the rear and put it in the front, the bumpers would line up perfectly, but I wanted to keep the body’s stock bumpers for now. I know a lot of the scaler guys like to tuck the tires inside the body, but in reality a 4.5-inch 1/10-scale tire would be 45 inches in full scale. I believe a Titan with 45-inch tires would look about like this. Once I had everything lined up I marked the tops of the body posts with my marker, and then made my holes with my body reamer. The front post almost went into the windshield but it just fit!

2 Now the body is trimmed and mounted but it needs to be cleaned before I start masking. I scrub it with some dish soap and warm water to remove any residual oils. Then I dry it with a lint -free towel. I start masking by applying the included precut window masks. I apply them by tacking one corner in place with my thumbnail, then pulling it across and lining it up on a straight edge. I press it down along the edge, the remove the initial corner and reposition it. Then I start working my way back and forth until the whole mask is sealed down. Don’t worry about bubbles under the mask, just make sure you seal the edges with the back of your fingernail.

3 Next I need to apply the flame mask. I start by weeding all the excess material off the sheet so just the flames themselves and the outlines remain. I cut the transfer tape in half. I place one piece at an angle across the tips, and then the other half next to it to support the remaining mask. As you remove the mask from the sheet, it sometimes may not want to pull off, so take your time, and if a piece doesn’t lift, I press the lift-off tape back down and kind of bend and fold the paper to get the mask loose. I’m not going to lie; transferring the mask to the body can be very tricky and sometimes frustrating. You only have one chance to line it up. I hold it underneath the body, looking down through the body. Then I start pressing the tips of the flames down and work my way to the thicker parts. I had to do a little trimming to the graphics where the hood met the side. I also masked off the remaining area inside the flames with some masking tape.
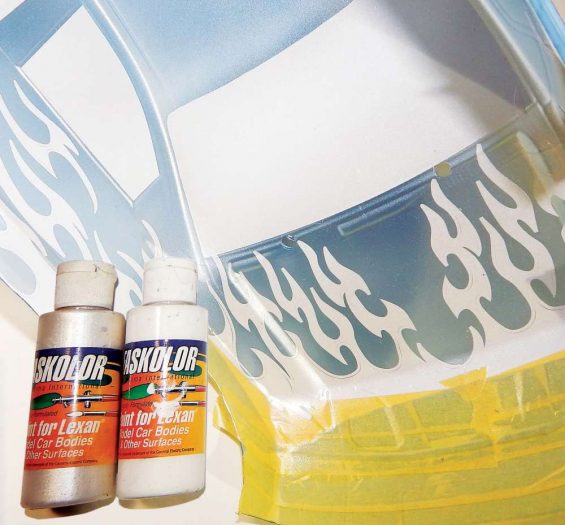 4 Before I start laying the paint, I warm up the vinyl mask with a blow dryer. This will soften it so I can work it into corners. I do this right before I paint. I start spraying with some Faspearl White. I went with this, because it really just screams “cus- tom”. I just need a couple quick coats to add some sparkle. Typically I back pearl colors with FasKrome for more sparkle but the white is particularly trans- lucent so I back it with FasWhite to make it nice and bright. I lay a couple light coats, then a thicker coat, to make it opaque to block the dark colors.
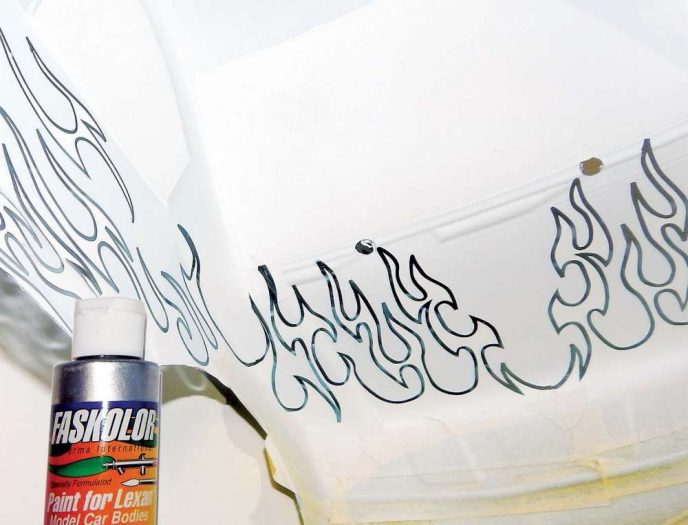 5 While applying the vinyl mask can be tedious, once you get it on it’s all downhill because it is easy to remove. I start removing the outline by using the tip of my hobby knife to get the mask started and then I just peel it off. After the entire outlining mask is removed I fill it in with FasKrome. I used the FasKrome here because it is fairly neutral, but a dark color like black would have worked as well.
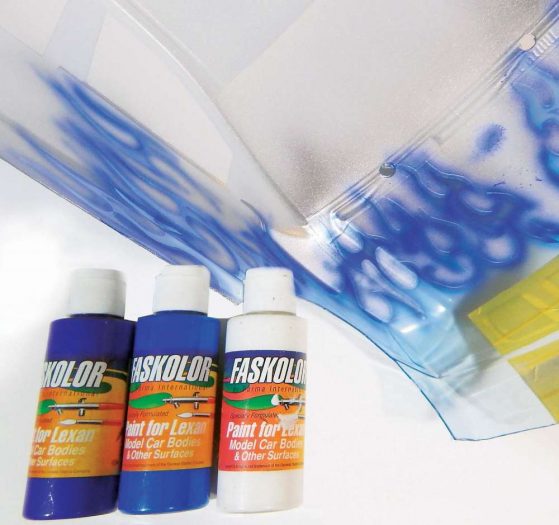
6 After removing the entire mask from the flame area, I re-masked the grill. Then I shaded around the edges of the flames with Faslucent Blue. I like to use the Faslucent colors for shading because they are generally thinner and work real- ly well for shading. I fill the rest the area with FasFluorescent Blue. The Fluorescent color will need to be backed with white to make it opaque.
 7 One of the stand-out features of the Titan is the chrome grill. I want- ed to really accent that. So after removing the mask form the grill area I fill it with Spaz Stix Mirror Chrome. This paint is a different formulation, but on its own is very delicate and needs a water based backer, which the Parma paints are great for.
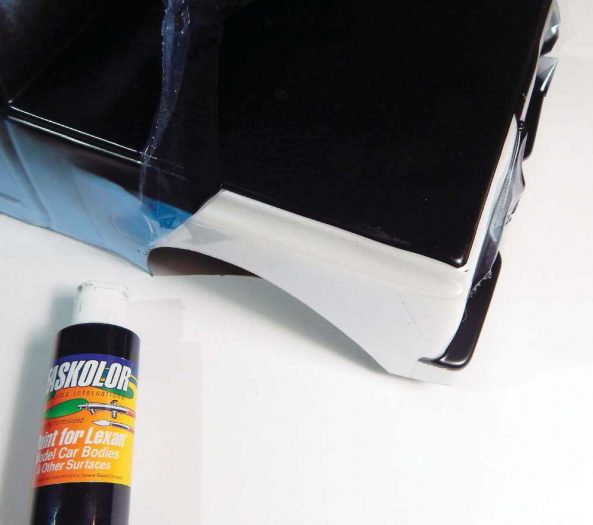
8 I like to do the trim details from the outside for a flatter look. So I cut out the pillars around the side windows, the step on the bumper, and the bed cover. Then I back the chrome grill and the entire inside of the body with FasBlack, before spraying it on the outside.
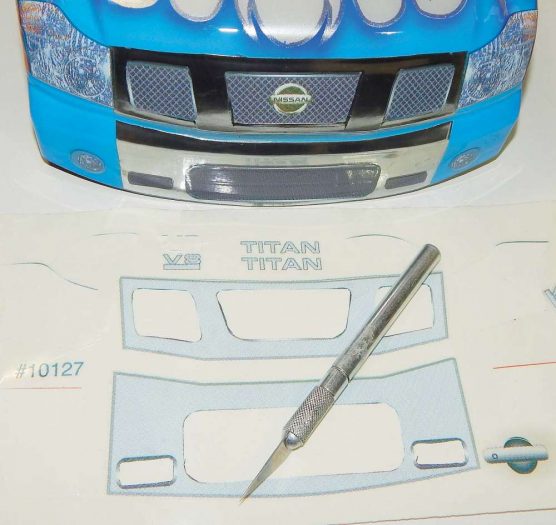
9 After the paint has had some time to dry, you remove the window mask and the over- spray film. Then all that is left to do is apply the decals. The decals are precut, so you just have to peel and stick, but since I painted my grill, I cut out the centers and applied them.
with a subscription to RC Driver
So now that it is done, I can’t help but wonder, how did I get here? I had one idea in my head for weeks and when I sat down to do it, something else came out, but I love it and it’s got me thinking of more ideas. I would like to find some slid- ers and fender flares that I can modify to fit it. I think I’d like to keep the stock bumpers on the body, so I was considering making a bumper that attaches to the chassis, and braces the bumpers on the body, so they are more solid. Regardless of where this ends up, I think seeing things come together and not knowing how it will come out is part of the fun!
LINKS
Parma parmapse.com, 440-237-8650


