This article was originally published in RC Driver’s August 2015 issue.
ITEMS USED
Parma
- FasWhite #40000
- FasBlack #40001
- FasRed #40003
Pro-Line
Painting black on black flames
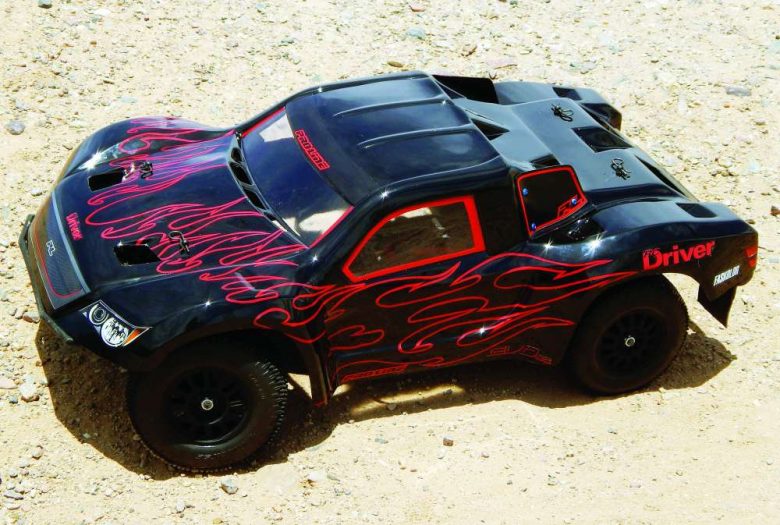
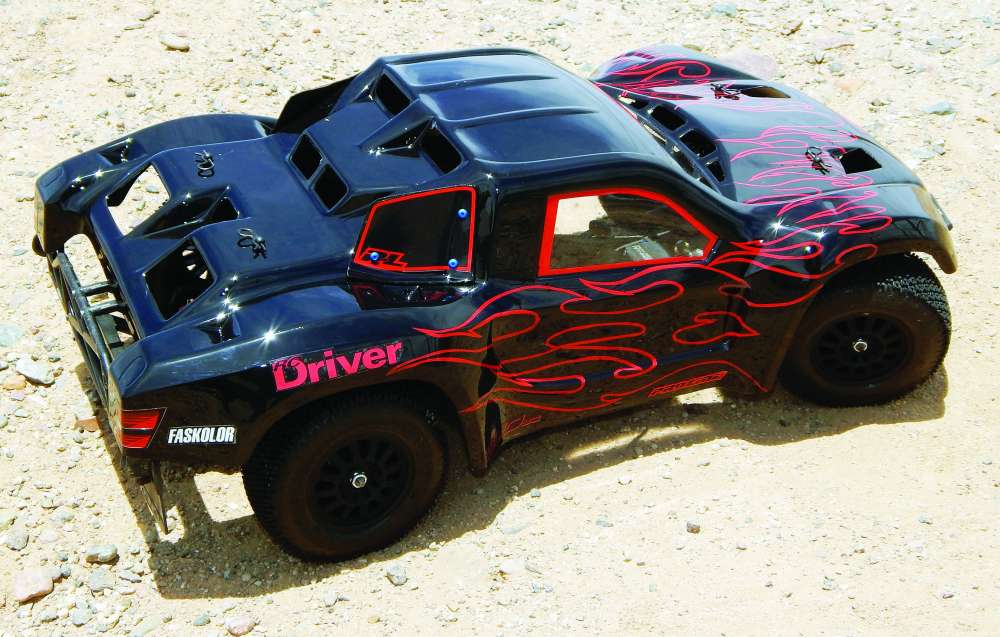
When I picked up this Pro-Line Evo SC body I had no particular inspiration. I just needed a body for my Associated SC10.2. I figured I would just do my usual flames, probably blue and silver; those are my colors, sometimes I like a blue and lime green. When I pulled the body out of the bag and I looked at the decals, I suddenly got a different idea. I noticed the decals seemed to have a black with red trim theme going on and I liked how this gave it a modern, techy look. It suddenly occurred to me how it would look if I carried the theme through the body and did just a red outline of the flames. To do this I will just paint it as I normally would, but the difference here is the color selection. I thought this would be an excellent example of how your color choice can have a dramatic effect on the overall look. So I present to you my Black on Black Evo SC.
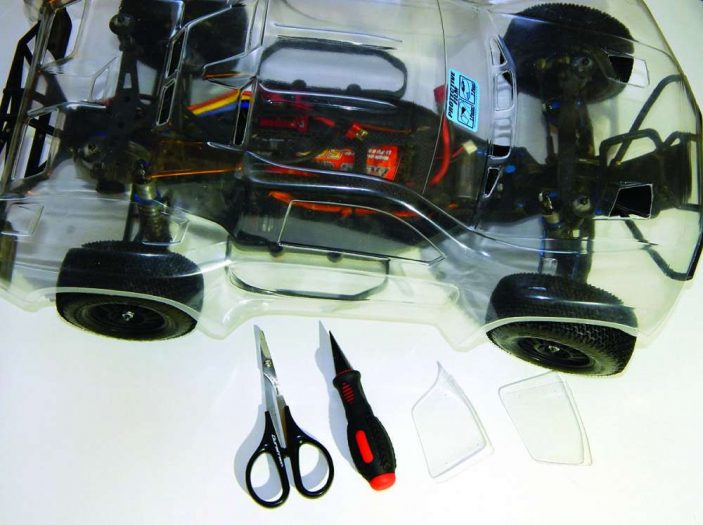
1 This body has several pre-marked spots to make the holes for the body mounts. There is a guide in the wheel wells to tell which holes to use for your chassis. So before I trimmed the body I marked the holes for the SC10 with a marker so I would not forget which holes to use after I threw the scraps away. After trimming the body with my body scissors, I set it on the chassis to confirm that the marks lined up, which they did. I left the front mounts at the lowest position but I had to put the rear in the highest position. This body has many vent holes to cut. I find the cleanest way to do this is to take my body reamer and make a hole in each corner of the hole and then use my hobby knife to score a line from hole to hole. Next I push back and forth on the piece until it pops out.

2 Now the body is trimmed and mounted but it needs to be cleaned before I start masking. I scrub it with some dish soap and warm water to remove any residual oils. Then I dry it with a lint free towel. I start masking by applying the included precut window mask. I apply them by tacking one corner in place with my thumbnail, then pulling it across and lining it up on a straight edge. I press it down along the edge and then remove the initial corner and reposition it. Then I apply the liquid mask with a one-inch foam brush in three coats, allowing a couple of hours in between, and overnight for the final coat to dry. With liquid mask, thicker is better, making it easier to remove.
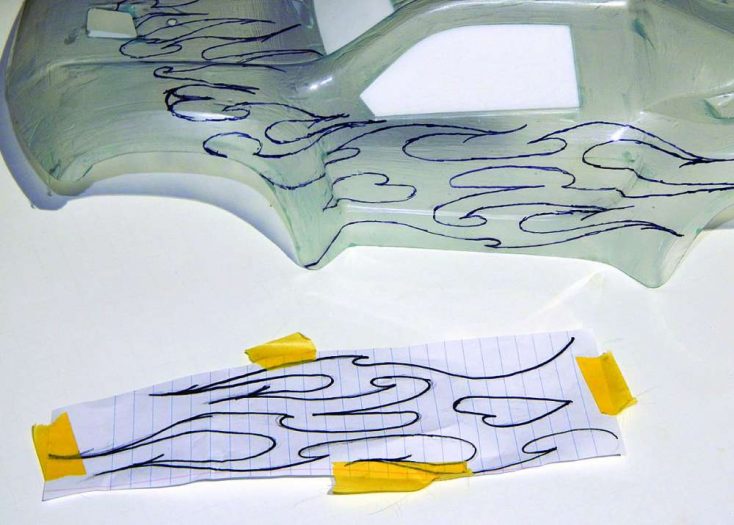
3 I like to sketch my graphics on a piece of paper. If you’re not confident with you artistic abilities, you can always download clip art from the internet and print it out. I trace it with a permanent marker, so I have a reverse image on the backside. Then I tape it inside the body with some low tack masking tape and trace the design on the outside of the body.
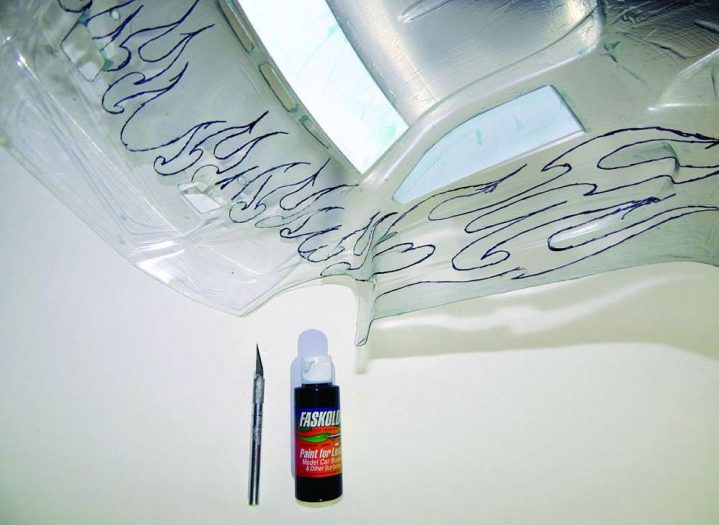
4 I cut out the graphics with my hobby knife. I use very gentle pressure as I do not want to score the body and create cracking points. Make sure you have a fresh blade in your knife as it will help with contours. This requires patience, so take your time. When the design was all cut out I carefully removed the mask from the flame area, and then filled with a couple of coats of FasBlack. I lay the first coat very light and then go in heavier with the second coat.
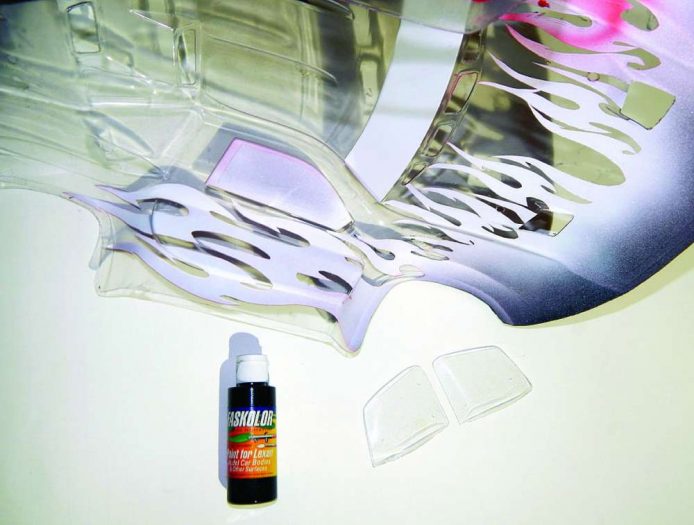
5 You might wonder why I didn’t just cut the outline all at once. That is because I have found it is extremely difficult to see your previous line. By removing a layer of mask, there is now depth where you can see a shadow when close to a light. Since only the out- line is showing it is very important to keep the line as even as possible. After cutting and removing the outline, I also cut the trim around the windows before I fill those areas with two coats of FasRed. The FasRed is an opaque color, but I back it with some FasWhite to keep the darker black from coming through.
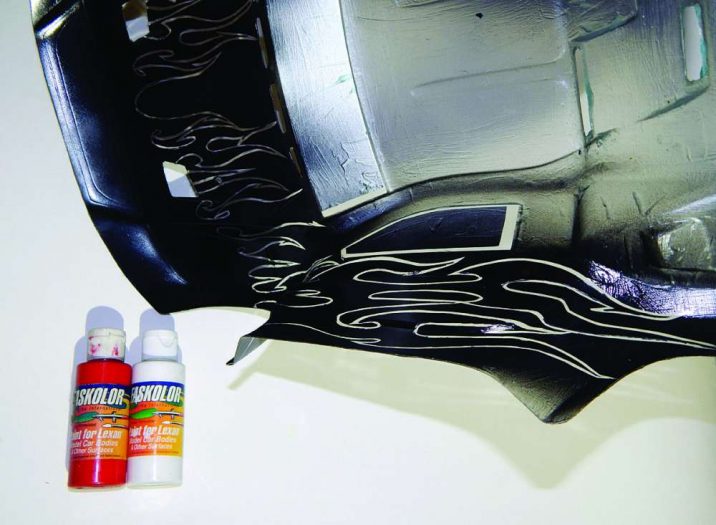
6 Now that all the difficult cutting is out of the way, this is where it gets fun. I remove the remainder of the liquid mask from the background, being careful not to pull any of the paint off with it since the paint is getting thicker by this point. Then I fill it with three coats of FasBlack, starting light, and getting heavier with each coat. I also hit the number plates at this point.
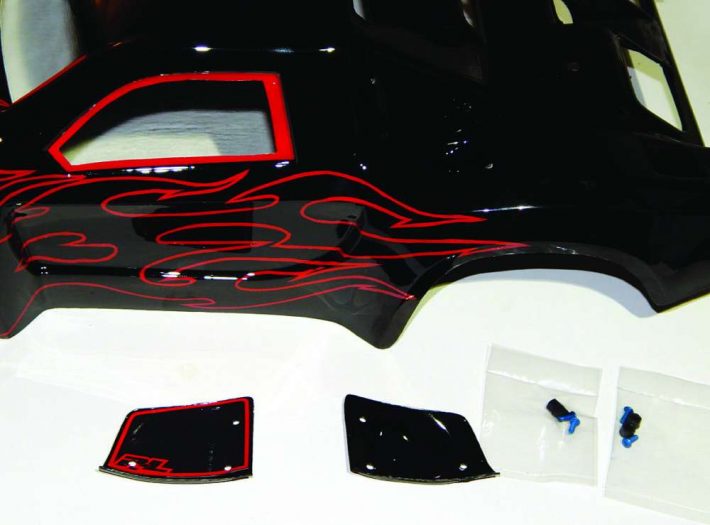
7 Not quite done! After the paint has all dried I remove the window mask and overspray film. The holes on the number plates are premarked, but not on the body, so I make the holes in the plates and then hold them up to the body to mark my holes. Then I cover the plate with the decal and make the holes in the decal with my hobby knife. The included mounting screws are standard size, so you will need a 1/16-inch hex, and 1/4-inch socket drivers.
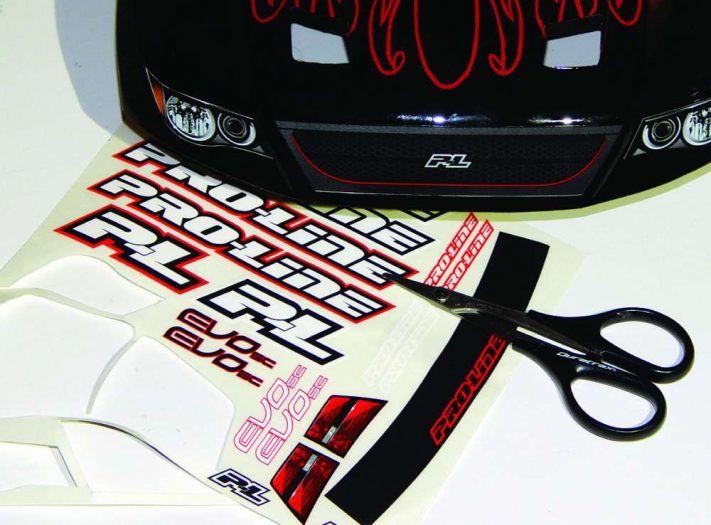
8 All that is left to do is finish applying the decals. You will have to cut out the decals. I think you get cleaner results with a hobby knife and for smaller, more detailed, decals I would go that way, but for larger simple stuff, it is faster to just use a sharp pair of body scissors. I have to tell you, once the decals were in place the whole theme really started to come together.
WRAP UP
I purposely did the paint in the order I did because I like when flames have an over-exaggerated effect, but if you wanted less exaggerated flames you would just have to reverse the order and do the background first. This would make you cut the out- line on the inside of the flames. Now that it is finished, I have to take a step back and give myself some self-criticism. In this case I was surprised how much it reminded me of the original Batmobile, but that is fine, I love the Batmobile. This would be Batman’s SC10 if he raced RCs on his day off! I also realized this was supposed to be a race body, and this may not be the easiest body to see when we race at night, but at least it will definitely stand out from the pack. I like it!
Links
Parma parmapse.com (440) 237-8650
 RC Driver The Best In RC Car & Truck News, Reviews & Video


