


You’ve seen the pictures of the top pro driver’s vehicles, with fantastic installs and that perfect placement. Clearly, rolls and rolls of solder and double-sided tape were used to achieve this level of perfection. Many of the top racers build up new vehicles on a regular basis, or get lots of gear to test, so installs are a regular occurrence. Like anything, practice makes perfect. What about the rest of us? How are we going to make our gear “Look Pro” without all this practice? Following are some basic steps to help you make your electronics look “Pro on the first Go.”
LAY OF THE LAND
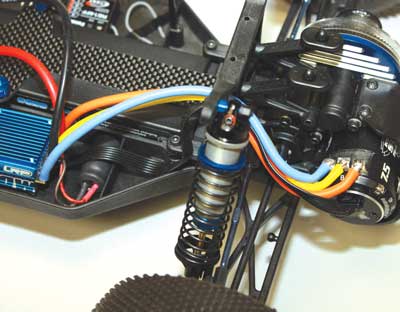
Time, patience and a little bit of common sense go a long way, especially when you start your electronics layout planning. Loosely lay out your gear on your vehicles’ chassis to get an idea of what directions all the various wires need to route. Try a few ESC positions and pay close attention to how the motor wires, battery wires, and receiver wires will be routed to their destination. Typically servo wires and ESC wires to the receiver are way too long. Short tight bundles covered in shrink tubing make a great stealth shortening and you won’t have any lame zip-ties. Also pay attention to the position of the solder tabs on the motor. Often you can rotate the motor by using optional screw holes on the face to help you point the tabs towards the ESC and shorten the wires. Or, in off-road setups where the motor is exposed, get the tabs out of the danger zone. Ever get your buggy/truck tomahawk landed on from the back? Motor tabs can be damaged easily when this happens. Your ESC solder tabs or posts right next to carbon chassis parts or aluminum parts is probably not a great idea either. Always take into consideration what any given item is sitting next to. Minor movements may jolt a wire over into your drivetrain or debris getting into tight spaces can, of course, lead to failures.
STICK IT
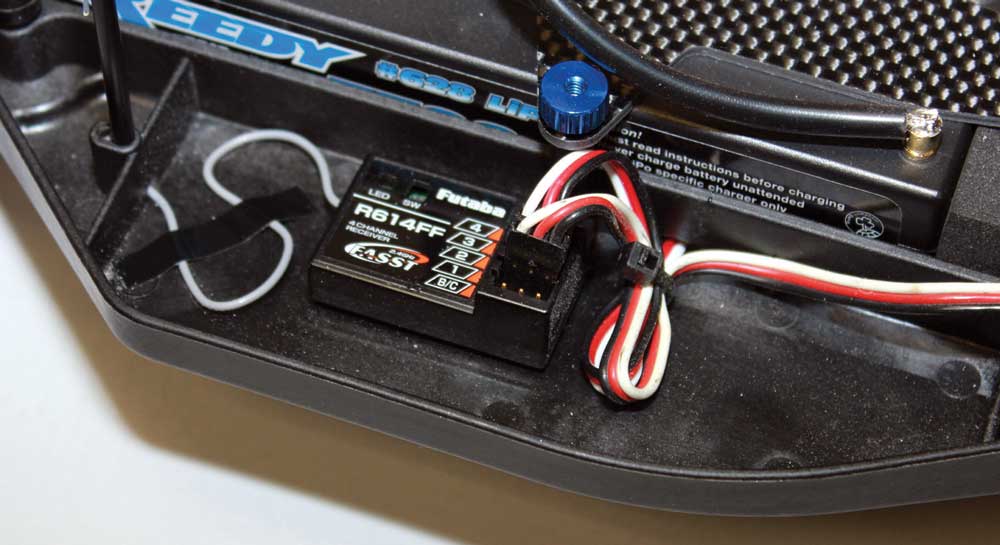
After you get your seating arrangement determined, secure the items that don’t need to be soldered on; transponder, receiver, ESC and any extra capacitors for the receiver. Clean the surfaces of the items, and their mounting location. Do not use the household-brand grey tape. This stuff is simply “bad” for your gear. There is virtually no vibration damping at all with this tape and is usually affiliated with oddball failures. Most hobby shops carry good “mounting” tape specific to RC cars. Use it.
GET WIRED
Next up is the ESC wires. Measure 10 times, cut once. That’s been a motto to live by in RC ESC installs for years. It’s not a bad idea to leave about a half to a quarter-inch of “extra” the first time you cut the wires. Then you can fine-tune the final lengths.
We should take a moment to discuss the curse of the backwards battery. Many racers own battery packs that use bullet plugs and not all the battery pack brands use the same location for the positive in regards to the left or right of the battery pack. So racers are forced to leave ESCs with wires long enough to reach both configurations. This is an invitation to cross connections. In a rush, or if a friend is connecting the battery, often times things are plugged in dead backwards. To avoid this, simply leave a pig tail in the battery pack at ALL times. This will achieve two things. One, you’ll be significantly less likely to plug in the polarized plug of your choice backwards. Two, your battery pack bullets will not get worn out by constant in and out plugging. The bullet plugs used all wear over time. The bullet in the battery is not replaceable. Countless problems from “loose bullets” can be found at tracks all over. Leaving the short pig tail always in the battery pack prevents wear, and reduces the “whoops” factor. Some manufactures even offer race-ready pig tails for battery packs. This however, does not look pro at all. But for the racer that has to fit the bill for “whoops” themselves, it’s a wise decision. No pro gets to be pro by missing races due to a whoops.
Once you have wire lengths decided, time for final wire strip and tin. Use wire strippers for this. Countless installers have used scissors or a sharp knife, only to cut the stands of wire. As this is installed, these small loose strands often short to adjacent tabs. Pro installs do no good if followed immediately by a smoke show. Soldering has become a lost art in the RC world, so take some time and practice on your spare wires. Properly tinned surfaces and wires are crucial to your solder joints being able to take the loads and withstand the abuse of a RC car in motion.
NEAT AND TIDY
Finally, route and plug in all the various receiver wires. In many cars, the receiver wires are asked to go under battery packs, or next to drive trains. As pro as this looks, again, it’s inviting problems. In most 2WD off-road vehicles, the wire channels that go under the battery packs generally still allow the battery pack to hammer on the wire. This is done so chassis strength is not sacrificed. Route through the back into tower around the back side of the battery and then over to the receiver. If wires are way too long, the tight bundle in shrink tubing will do wonders to stealth the wires. Do NOT bundle all the receiver wires together. This is only asking for problems. If anything needs to be serviced in a rush, you’ll find it near impossible to trace wires in the “next.” It’s best to try to route each items’ wires separately so if anything does happen to them, it’s easy to find, and won’t affect the other gear installed. Pesky wires can be double-side-taped to the chassis using thin strips. Do NOT use CA glue to fasten wires to the chassis.
WRAP UP
With a little bit of time and patience, anyone can do pro installs. The key is all in the basics, and making sure you don’t create problems just for the sake of looking cool.


