 RC Driver The Best In RC Car & Truck News, Reviews & Video


Give your SC Truck Some Muscle
This article was originally published in RC Driver’s June 2015 issue.
By David Harrington
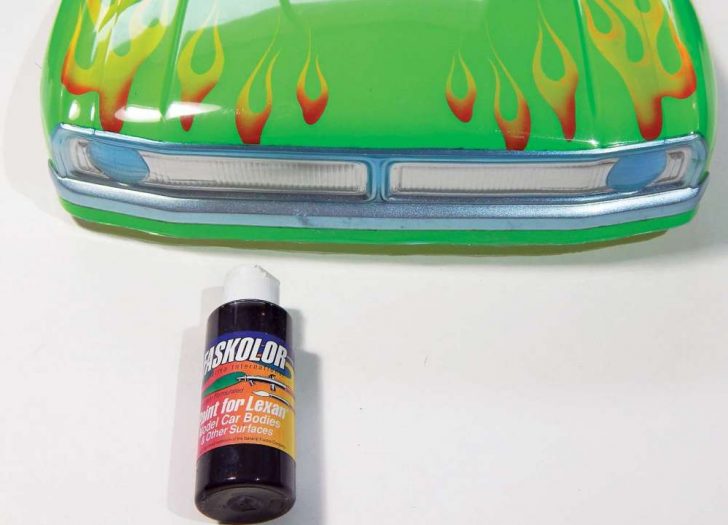
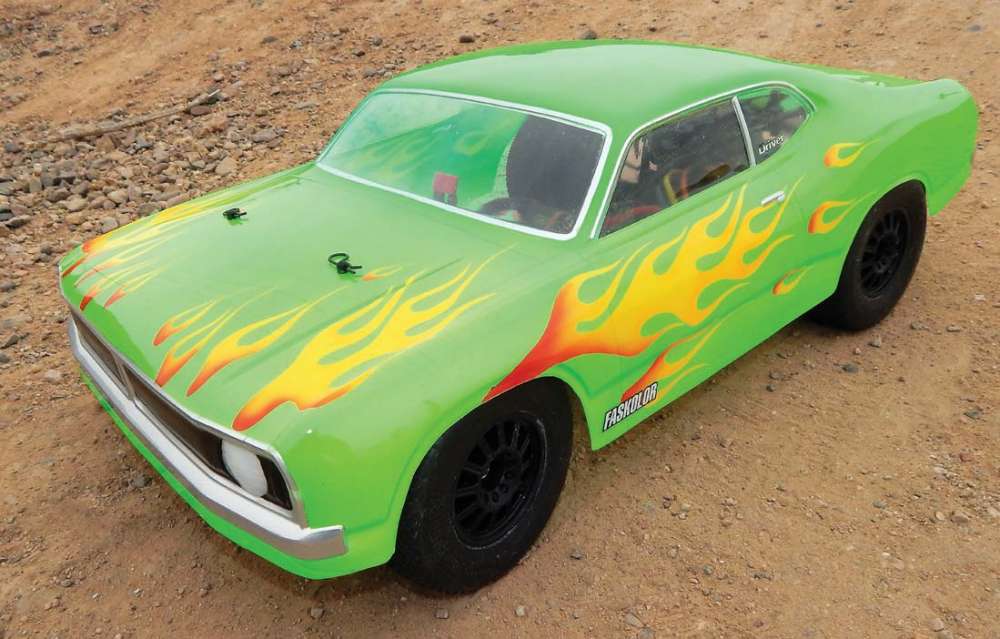
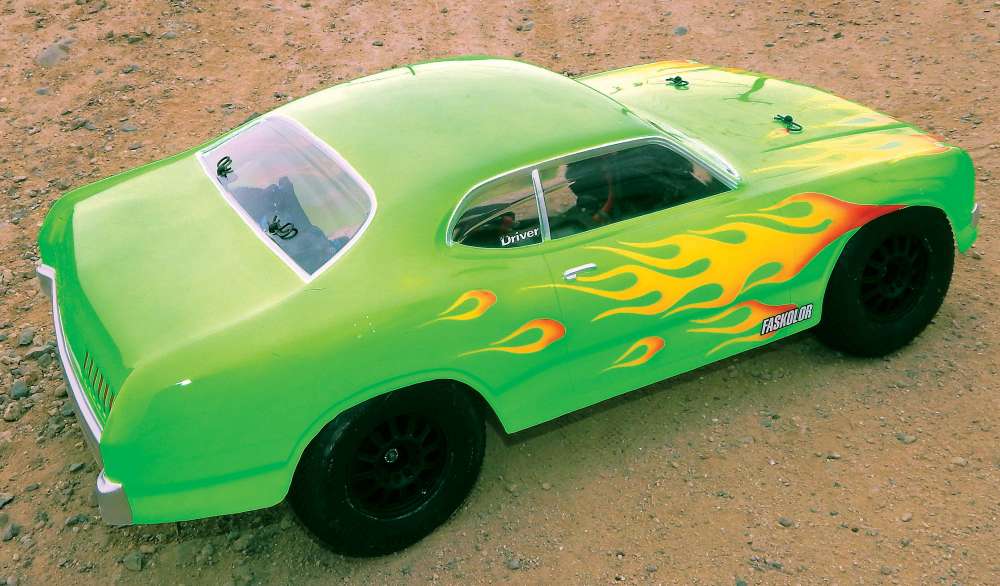 I have noted in this column that Parma’s ever growing lineup of car bodies for short course truck chassis gives you the creative freedom to turn your short course into just about anything you want. Their recent lineup of muscle car bodies have been a hit with the guys at my track. So much so that it didn’t take much talking for me to convince them that we needed to convert our track back to way it used to be, with an oval track around the outside and the off-road track on the infield. So when I was ge ing ready to paint this 71 Muscle body, I just assumed I would give it a stock car theme, but when I got to looking at this body, I started to see the Dodge Dart/Plymouth Duster influence. I started thinking about the Demon 340, and the bright, wild colors Dodge offered at that time. I was looking at a bo le of FasKolor Fasfluorescent Green and it started making sense, but I didn’t just want it to be bright green, I wanted to incorporate the hot rod influence with some flames. You better put your shades on, it’s about to get bright in here!
Parma
•71 Muscle SC body #1245
•Flames Paint mask #10786
•Masking tape #40257
•FasWhite #40000
•FasKrome #40300
•FasBlack #40001
•FasFluorescent Green #40107
•FasFluorescent Flaming Orange #40304
•FasRed #40003
•FasYellow #40002
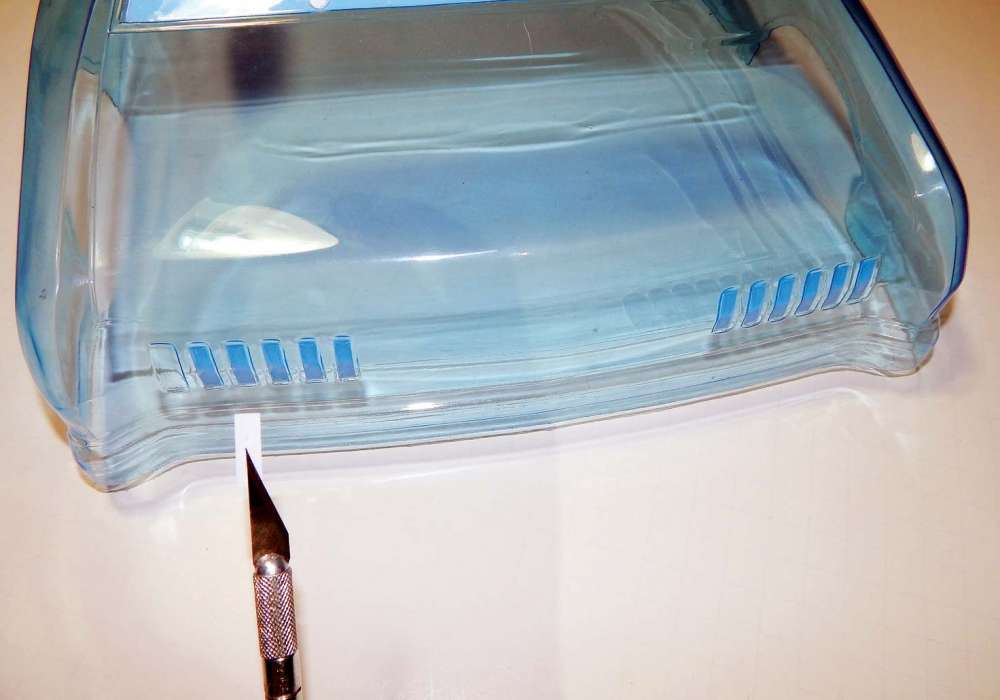
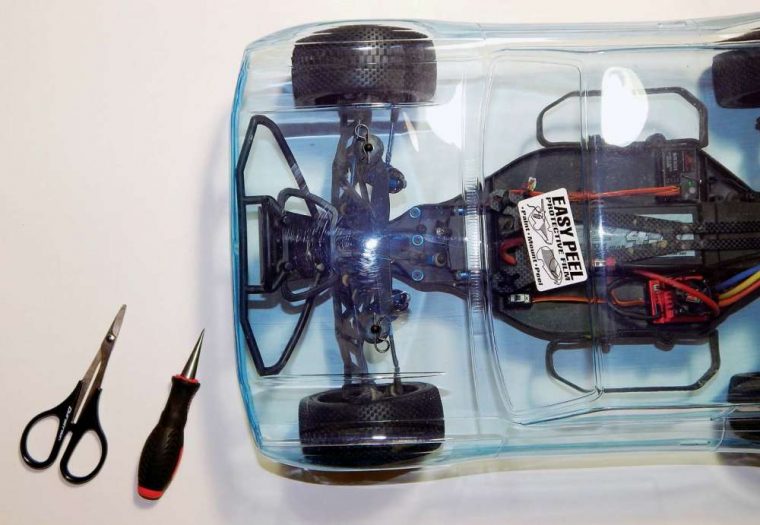 I began by trimming out the body with a pair of Lexan scissors. These bodies are designed to be a general purpose fit for most short course trucks. Therefore, you will need to set it on the chas- sis to find the position where you will make holes for the body posts. Since the position of the front wheel will change as the sus- pension compresses and the wheel turns, I line the body up so the rear wheels are centered in the wheel wells. Then I mark the tops of the posts with a permanent marker on the outside of the body. Then I make the holes with a body reamer. I had an interesting problem with this body. I usually trim the bumper on the body to make way for the bumper on the car. On this one it was clear of the bumper, but hitting the grill. After some thought I just warmed up the bumper on the car and pushed it back a tad to allow the body to drop right on without any additional trimming.
Before masking the body I give it good scrubbing with some warm water and dish soap. I start masking my body by applying the included window and light mask. To position the window mask, I first line up a bottom corner and then I stretch it across to line up with the other side. I may have to lift and reposition the first corner. Once the bottom edge is lined up I work my way back to the top. When applying smaller mask and decals, I find it helpful to stick them on the tip of my hobby knife to get them into position.
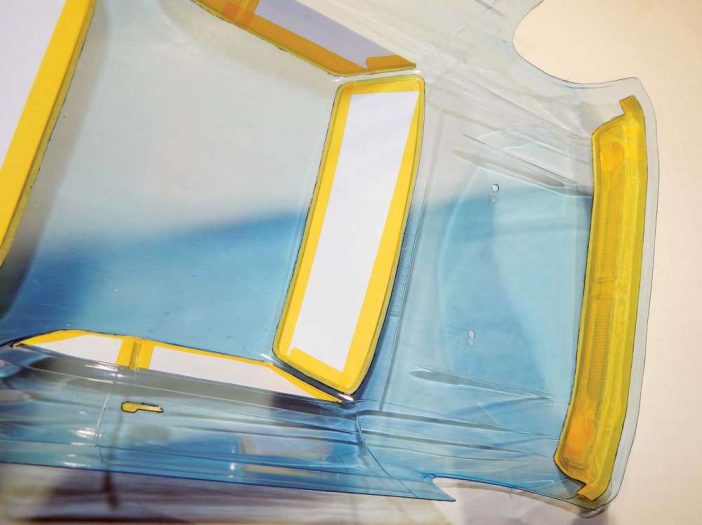
Next I start masking all my chrome trim around the windows, the bumpers, the grill,and door handles with masking tape. I like Parma’s tape because it is thin, slightly flexible, and has just enough stick. I cover the areas with tape. Then on the outside side of the body, I trace the outline with a permanent marker to give me a guideline where I will cut the tape on the inside before removing the excess.
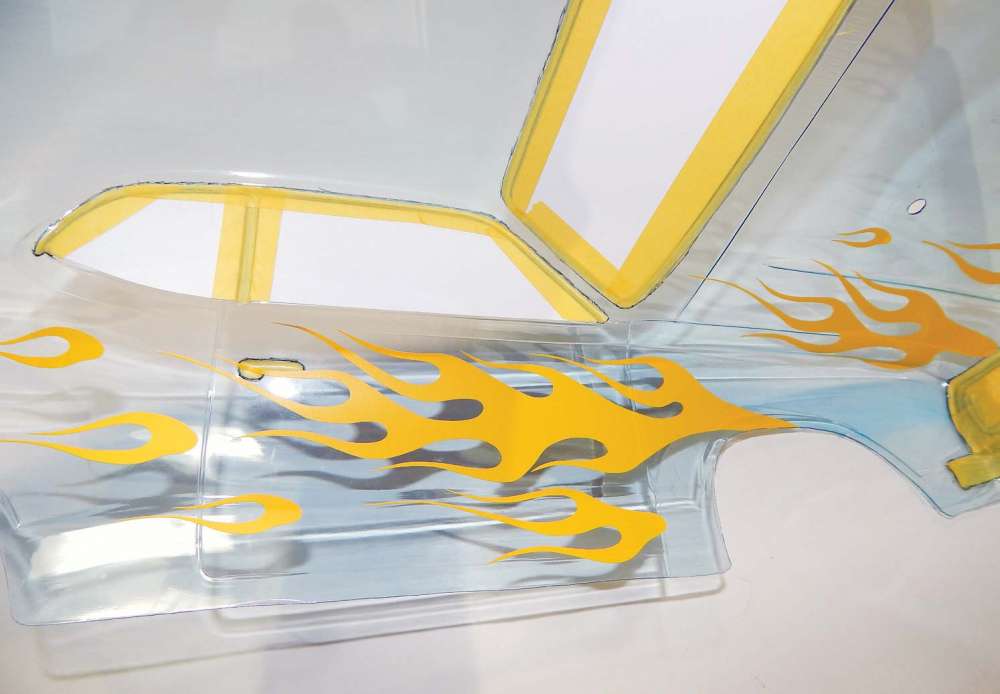 To apply the Parma precut graphics, I first weed away all the excess material from the masking sheet. To remove the mask from the masking sheet I use the included lift off tape. I lay it over the segment I want to lift up and then I rub it down with the back of my fingernail to get a good grip on the particular segment I want. You may have to bend at the backing paper to get the mask to come off. Once I have the mask lifted I transfer it to the body similarly to how I applied the window mask.

With everything all masked off I am ready to lay paint, but first I warm the vinyl mask up with a blow dryer so I can work it into door lines and crevices. I start by spraying the Fasfluorescent Green. To avoid bleeds when using tape, you need to lay light coats. Heavy coats can get under the tape. This is especially true of the fluorescent colors which are a little thinner. To make the fluorescent color more opaque and bright I back it with several coats of FasWhite.
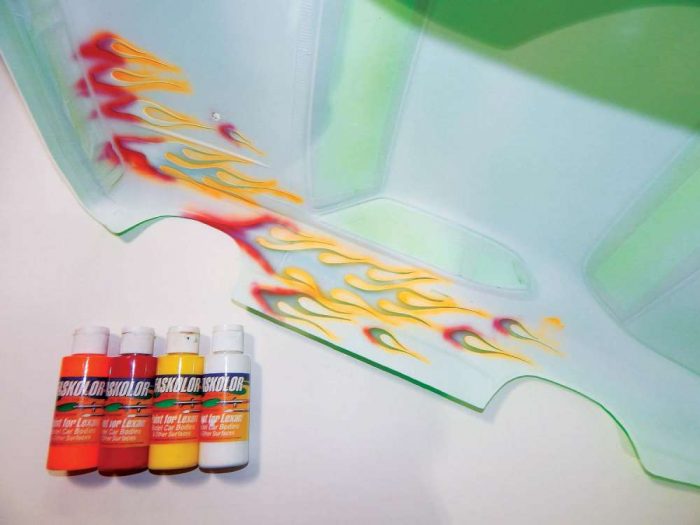
After giving the paint some time to dry, I remove the flame mask. To get the mask started, I get the end up with the tip of my hobby knife and then carefully peel it away, being careful not to take the paint with it. I shade Fasfluorescent Flaming Orange around the edges and then some FasRed at the base before filling in the rest of the area with FasYellow and backing everything with FasWhite.
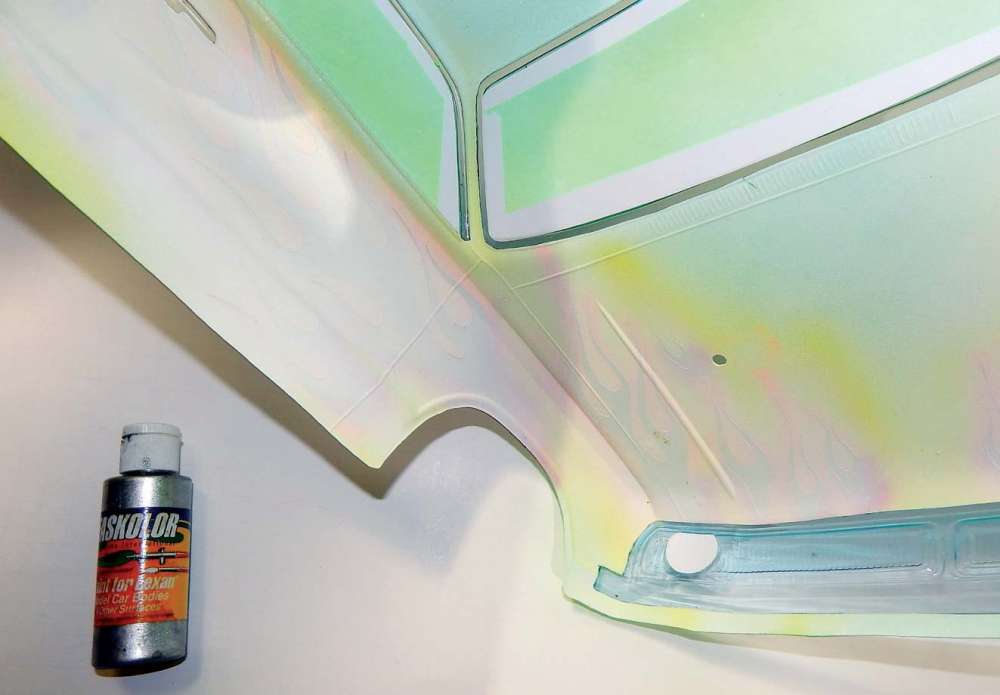 It is time to start filling in the details. I remove all the masking tape from the trim areas. I fill all those areas with several coats of
the FasKrome. I meant to mask off the turn indicators in the grill area at this point, but I honestly just forgot.
Next I remove the headlight mask and shade just a little FasKrome in the corner. I remove all the taillight masks, and fill that area in with FasRed. I then fill in the headlights with FasWhite, while also backing the taillights, and all the FasKrome.
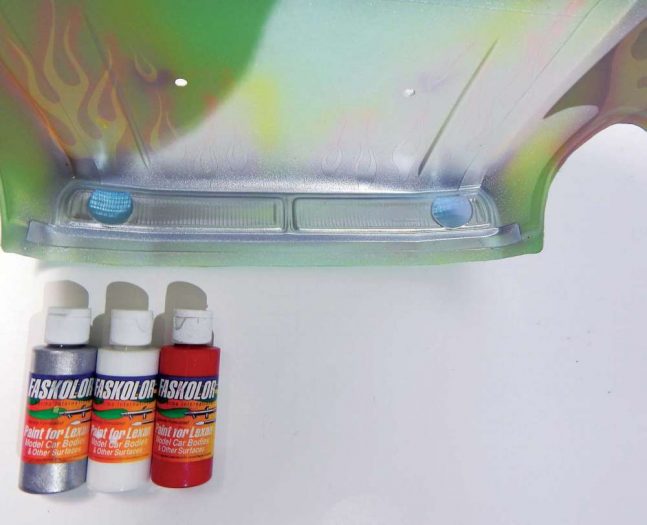
 To do the black in the grill, I cut away the overspray film on the out- side of the body and fill the grill area with a couple coats of FasBlack. Now all that is left to do is remove the window mask and overspray film. I like to detail the headlights by outlining and drawing in some of the lines with the ultra-fine tip of my detail pen.
 WRAP UP
Alright, so after you lay the paint and back it with white it comes out a bit brighter than what I saw in the bottle. If I wanted to come closer to the Dodge color I might have been better off to mix a custom color that used a little of the Fasfluorescent Green, but this is sure to get people’s attention, and will definitely be visible on the track. The 71 Muscle body looks great, and I’m still seeing the stock theme in the back of my head, so I may have to revisit this body later. Meanwhile I still have one more body from the muscle body to show off, so keep an eye out in the months to come for some more muscle car action!
Links
Parma parmapse.com, 440-237-8650


